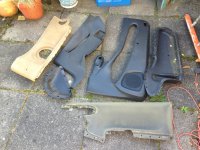
So I've done the whole leather interior swap and I've quite enjoyed it for the last 10 months or whatever! But I've still see room for improvement and I've got an itch I need to scratch...
I'm not sure where I should start, it's basically in two parts - full sound install and interior retrim. I want a sub and a couple of amps in the boot and have a speaker and tweeter up front either side, in the back passenger area there is space for an additional speaker rather side. I would be very liberal with my sound proofing as well and no doubt change the wiring.
But what I'm also wanting to do is retrim the interior panels including the roof and pillar trims. I want to keep the leather parts of course but I want a dark material on the crappy plastic parts to compliment the leather, I want to cover ALL the plastic in dark cloth - even the door bins it's an idea I got off my friends new Mk6 GTi which has full dark cloth interior and nice white led light details in door pockets etc. Tbh it's the only thing I like inside the Golf, the rest is bland German.
I'm quite handy at dismantling/ building things and am quite creative at that sort of stuff so I plan on doing all of this myself (prepare yourselves for another guide ;P).
First thing I plan to do is perhaps source the speakers and tweeters I want to use, I've already found the head unit I want:
http://www.caraudiodirect.co.uk/pio-avicf950bt-pioneer-avic-f950bt-navigation.html
Looks like an awesome little all round entertainment Skynet type thing I'll need a custom made facia for it (which I look forward to).
So speakers and HU sorted I'll get the wiring sorted and maybe pre install amp and sub wiring to reduce future hassle? I may get the amp at the same time as the speakers and HU then later on get the sub and make a nice mdf-clad boot build
I need to sell my two CN+s to fund some of this as well so if you're interested pm me or look in classifieds soon I think I'm going to start with the roof and pillar trim first and try and retrim that and so how it looks against the cream leather, I might try and source another set of interior lights from another car make that are black to go with it all.
It's a full re-revamp I'm struggling with where to start, I'm going to start getting fibreglassing kits and material samples next week after this weeks hefty shift pattern ends.
Anyone with any advice/ guidance on this please advice me on this!
Mark
I'm not sure where I should start, it's basically in two parts - full sound install and interior retrim. I want a sub and a couple of amps in the boot and have a speaker and tweeter up front either side, in the back passenger area there is space for an additional speaker rather side. I would be very liberal with my sound proofing as well and no doubt change the wiring.
But what I'm also wanting to do is retrim the interior panels including the roof and pillar trims. I want to keep the leather parts of course but I want a dark material on the crappy plastic parts to compliment the leather, I want to cover ALL the plastic in dark cloth - even the door bins
I'm quite handy at dismantling/ building things and am quite creative at that sort of stuff so I plan on doing all of this myself (prepare yourselves for another guide ;P).
First thing I plan to do is perhaps source the speakers and tweeters I want to use, I've already found the head unit I want:
http://www.caraudiodirect.co.uk/pio-avicf950bt-pioneer-avic-f950bt-navigation.html
Looks like an awesome little all round entertainment Skynet type thing
So speakers and HU sorted I'll get the wiring sorted and maybe pre install amp and sub wiring to reduce future hassle? I may get the amp at the same time as the speakers and HU then later on get the sub and make a nice mdf-clad boot build
I need to sell my two CN+s to fund some of this as well so if you're interested pm me or look in classifieds soon
It's a full re-revamp
Anyone with any advice/ guidance on this please advice me on this!
Mark


