

500X Martin
New member
- Joined
- May 25, 2021
- Messages
- 1
- Points
- 1
I’ve had my 66 plate 500X for around 8 months now and like many of you I’ve found the reversing light to be complete pants for actually seeing what’s behind you. I’ve seen some of the threads about bulb swaps but none of them seem to really solve the problem, so I’ve had a go at adding an auxiliary reversing lamp instead. It cost about £25, so it’s more than an LED bulb swap but I think it’s worth it.
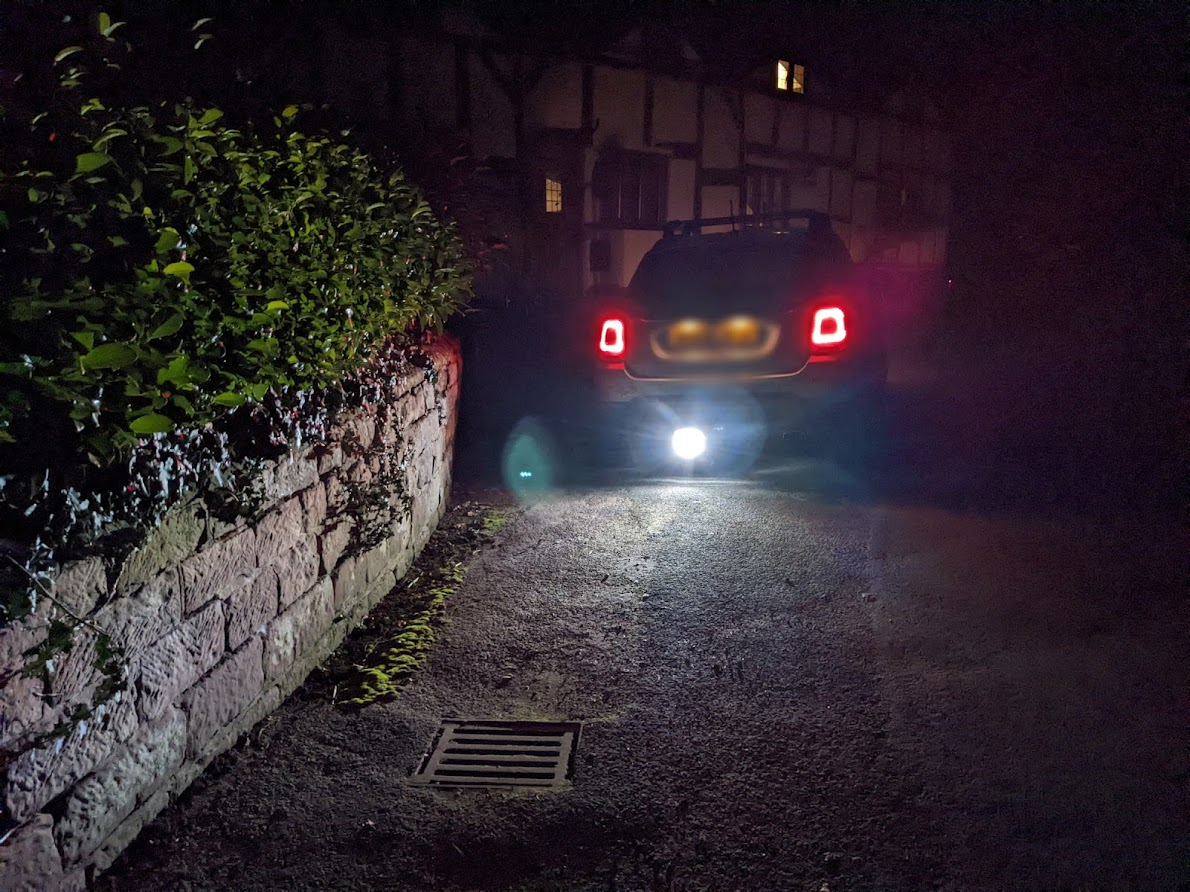
Here’s the result, which hopefully you’ll agree is much better than the pathetic attempt that Fiat seem to think is appropriate.
I’ve used an E marked 11W LED reverse lamp and a bulb adapter, mounted using an existing fixing below the bumper. This means that there are no changes to the wiring loom and the whole thing is easily and completely reversible if I want.
I thought I’d do a little how to guide in case anybody is interested:
First off, I’m not an auto-electrician and although I’m happy that all of this is safe and legal don’t blame me if you try this and something goes wrong!
Things you’ll need:
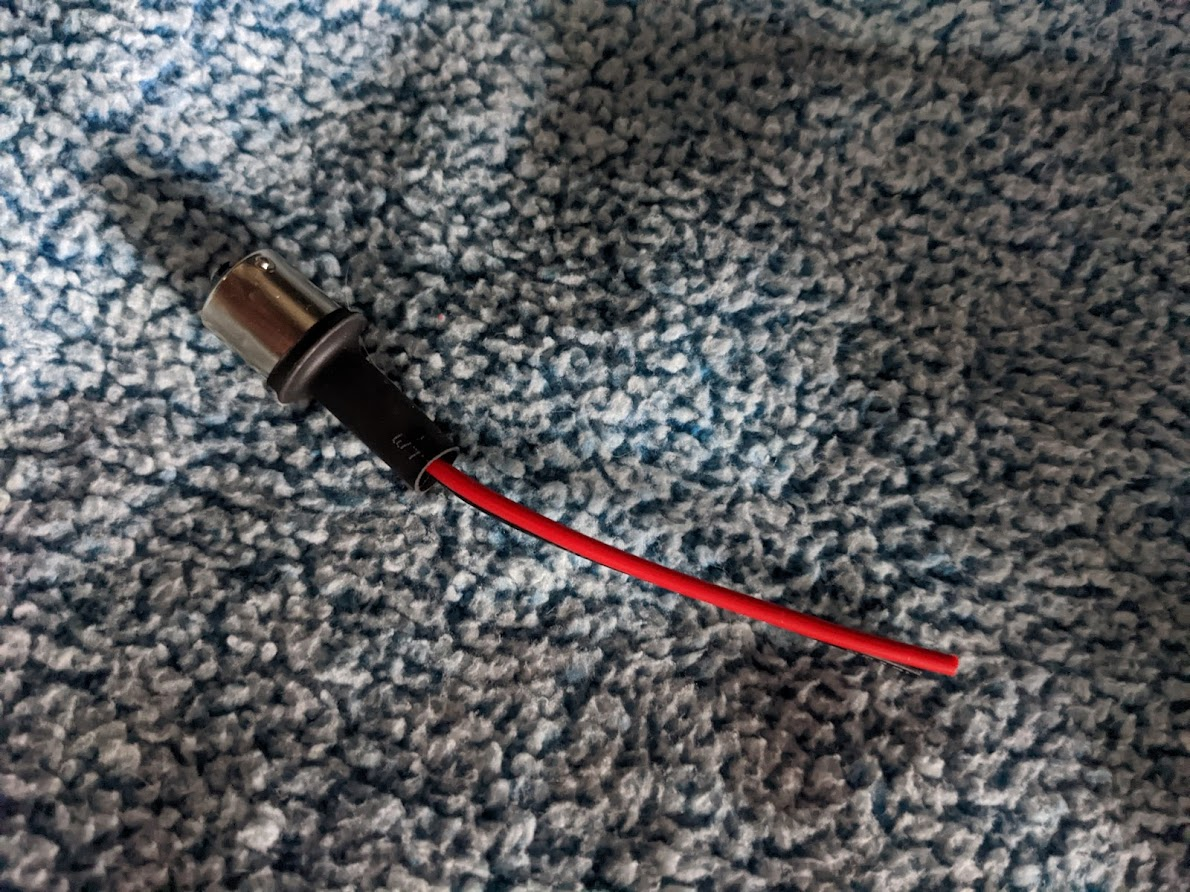
Bulb Adapter
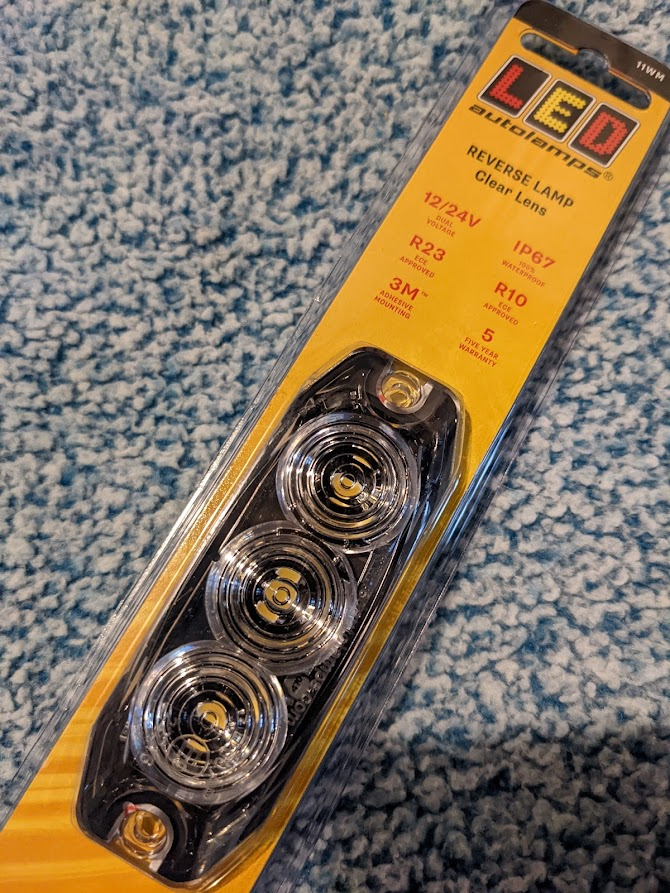
LED reverse light E marked 11w 12-24v
Step 1 Remove the left rear light cluster
Open the boot for access, remove 2 x T30 screws and then pull the light unit backwards. I had to use a trim pry tool to help move it as it’s quite tight but it should just pull back, there are two prongs that need to be disengaged, then undo the electrical connector so you can free the unit.
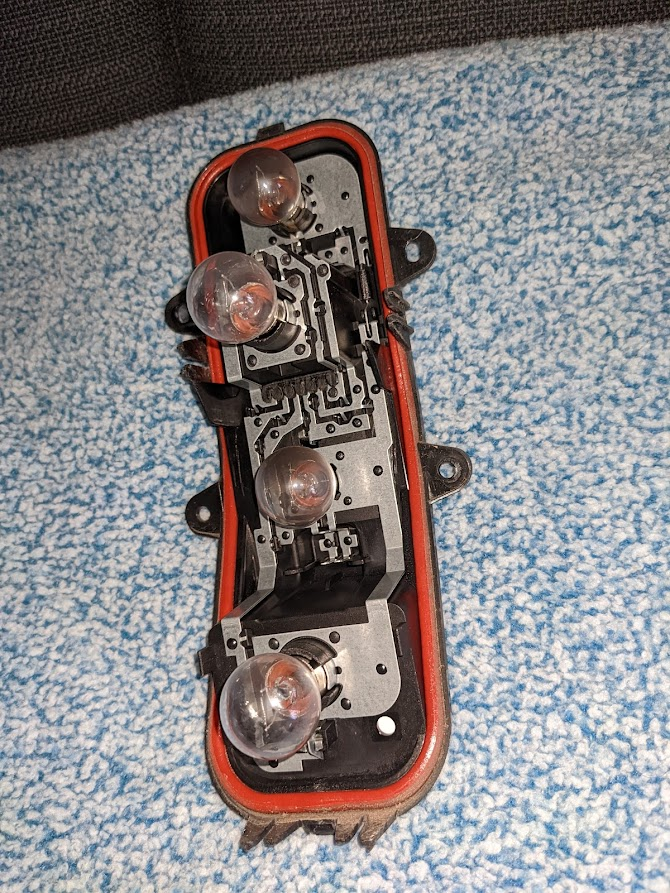
Step 2 Remove the bulb holder from the light unit
Undo two screws and release the clip at the top, the whole bulb unit should then lift out. The reversing bulb is the bottom one in this photo - take it out.
Step 3 Sort your wiring
There are different ways of doing this depending upon what connectors you have/like, how good your soldering skills are and how easy you want it to be to dis-assemble. I can’t solder for toffee so I used a mix of terminal block, an automotive connector where the wires are crimped in place and some little tubes that are heat-shrink and solder all in one (can’t remember what they’re called). Essentially, you need to get a long enough stretch of wiring (+ve and -ve) to exit from the bulb holder, down behind the bumper and along to near the centre where the light will be.
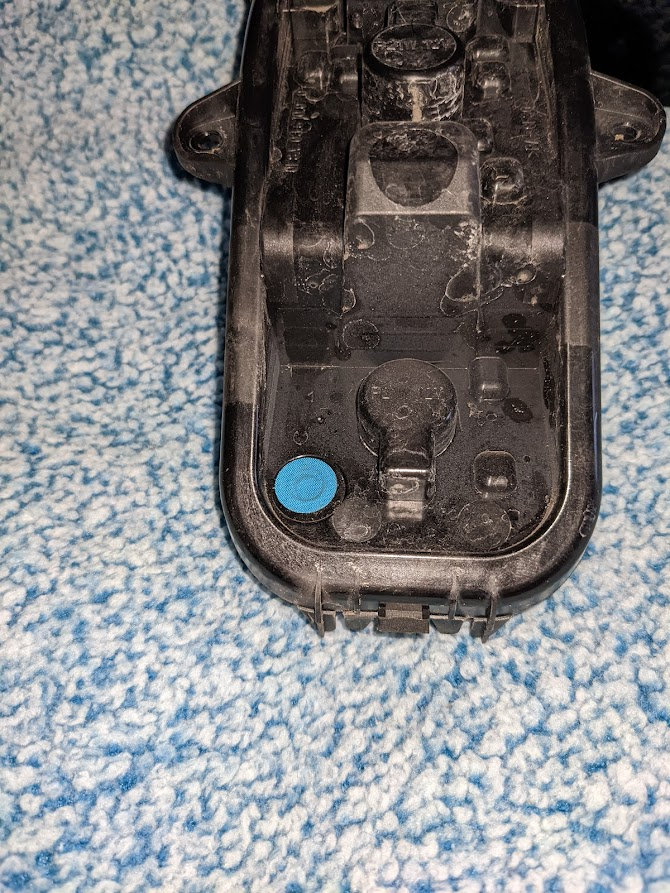
By using the bulb adapter you don’t need to tap into the wiring, just plug it in instead of the bulb. Handily there is already a hole in the bulb holder, covered by a little sticker, where you can then pass the wires back through the bulb holder to the outside world. The hole is the white circle in the photo in step 2 and the blue circle in the photo below.
You need to extend the wires from the bulb adapter to where you mount the light. You could do this with an uninterrupted run or build in a way of separating the reversing light from the light cluster to make it easier whenever you need to change a bulb. I used a terminal block to extend the wires from the bulb adapter by about 8” (good soldered connections would be nicer), passed these through the hole in the holder and added a blob of silicon sealer round the hole to keep things watertight. I then used a connector to let me split the wiring between the light cluster and the reverse light so that it’s easy to remove the cluster in the future. This connector needs to be far enough away from the bulb holder to allow it to sit below the cluster when it’s all put back together otherwise you may not be able to refit the light cluster properly.

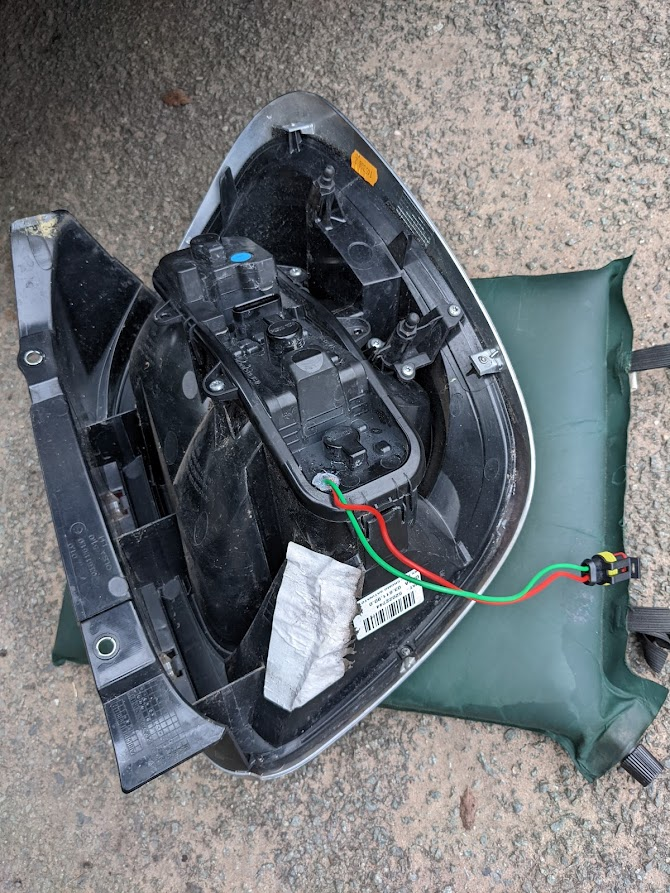
You can then refit the bulb holder to the light cluster and you should have something like this:
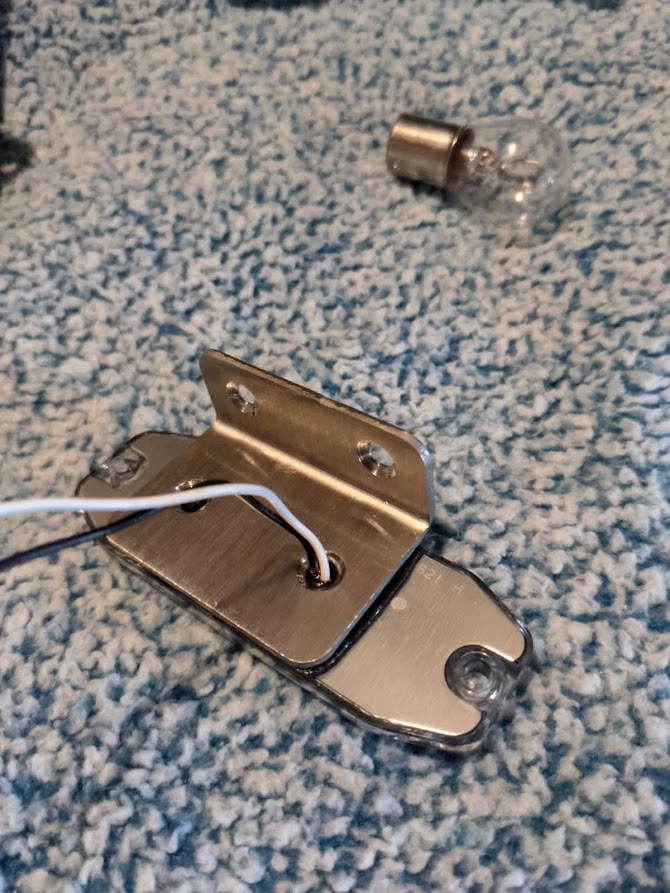
Step 4 Mount the lamp
I used a stainless steel 90 degree bracket that already had holes in it to allow the wiring through and to be screwed to the bumper, but there’s plenty of things that you could use instead. The lamp came with a 3M sticky pad that I used to attach it to the bracket, The lamp comes with about 6” of wire but you'll have to add another 3 or 4 feet to this. Make sure you pass the wires through the bracket before you add any connector to the end and then you can stick it to the bracket.
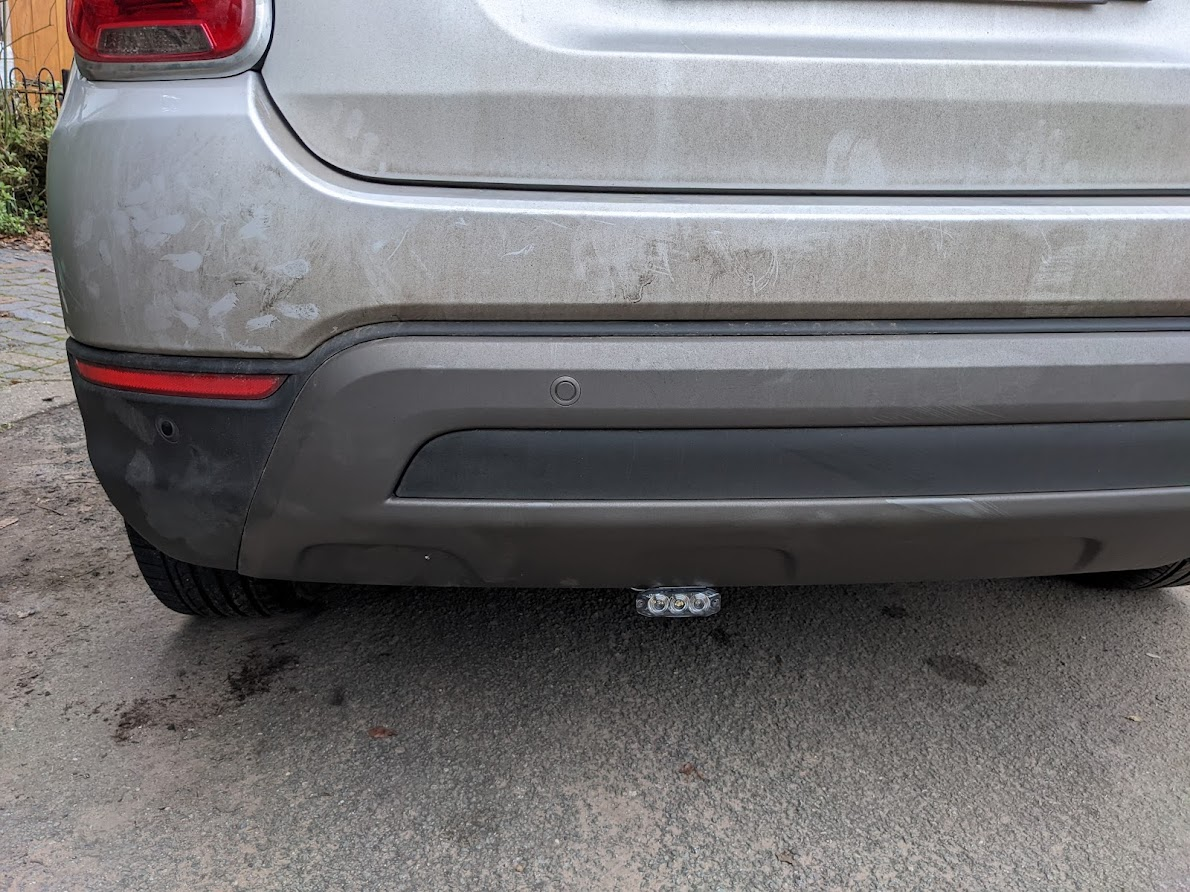
If you look under the bottom lip of the bumper you’ll see a number of fixings that can be used to mount the lamp. The lamp is very light so it doesn’t need much to hold it in place. I secured the bracket to the underside of the bumper using the T25 screw on the right of this picture.

Simply remove the screw and then clamp the bracket in place by replacing the screw. You should end up with something looking like this (yes, I know it needs a wash).
Step 5 Thread the wire
At the left hand side of the bumper where the bottom of the lamp cluster would sit there is a gap big enough to pass the wire from the lamp (including a connector). I used a pull rod inserted from the top, down behind the bumper to then pull the wire up through the gap. There’s loads of space when you look from underneath. It would probably be easier to thread the wire down from the top, but then you’d need to do some of your wiring in situ rather than in the house. Use a zip tie or two to secure the wiring behind the bumper and away from the exhaust.
Sorry didn’t get a picture of where the wire goes / comes out
Step 6 Connect it up
Now all you need to do is connect everything together, test it, then put the cluster back. Connect your reverse lamp wires to the tail of your bulb adapter, put the Fiat connector back on the cluster for all the bulbs and just check it all works before replacing the cluster. Be careful that your new wiring and any connector don’t foul the back of the light cluster. There should be a big enough gap at the top of the bumper, below the bottom of the cluster, to hide any connector. Then replace the two T30 screws to secure the cluster.
With a bit of luck you’ll have this:
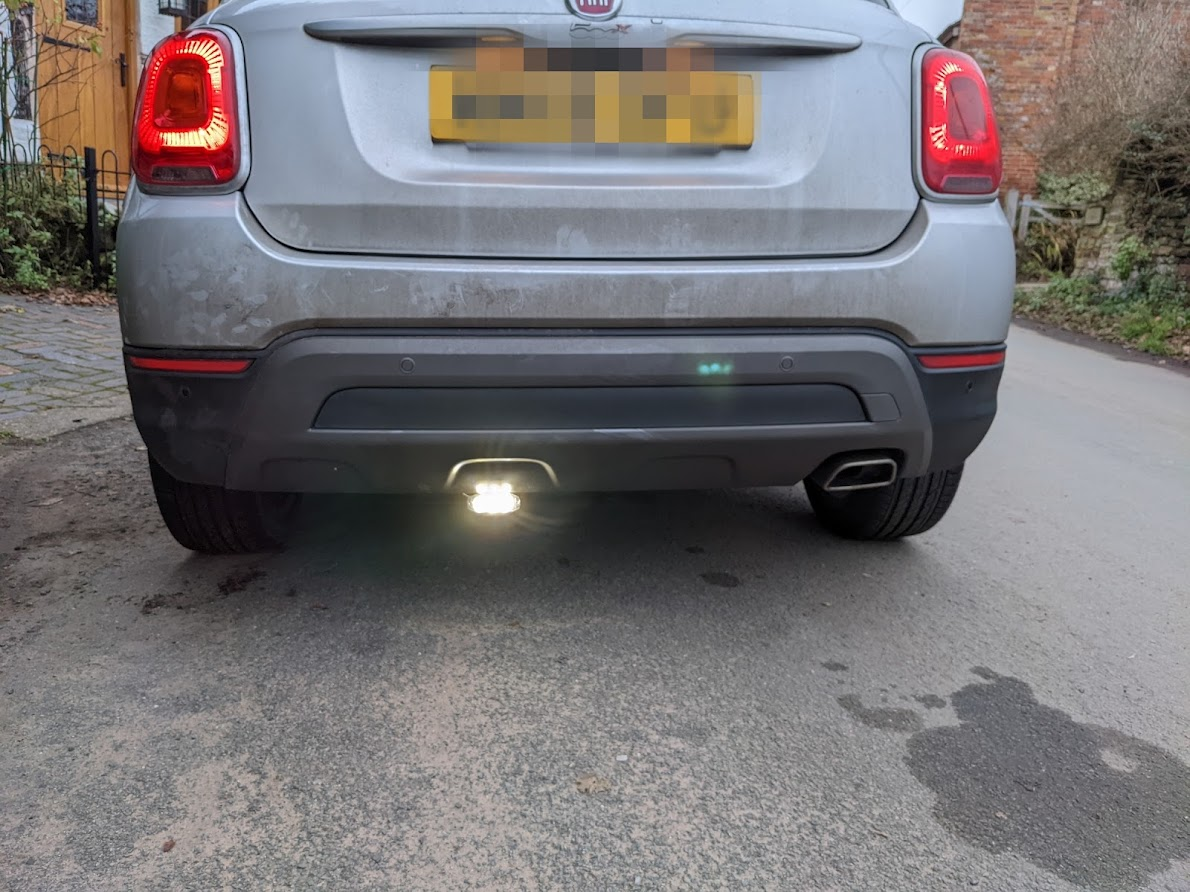
The green dots are the LEDs reflecting off the back of my phone back onto the car
I had bought 2 lamps, one for each side but I think that one will be enough on its own. There are no warning lights on the dash and the light goes out as expected when coming out of reverse (some bulbs swaps have reported an afterglow). The light is E approved and pointing directly backwards so shouldn’t cause any glare problems etc.
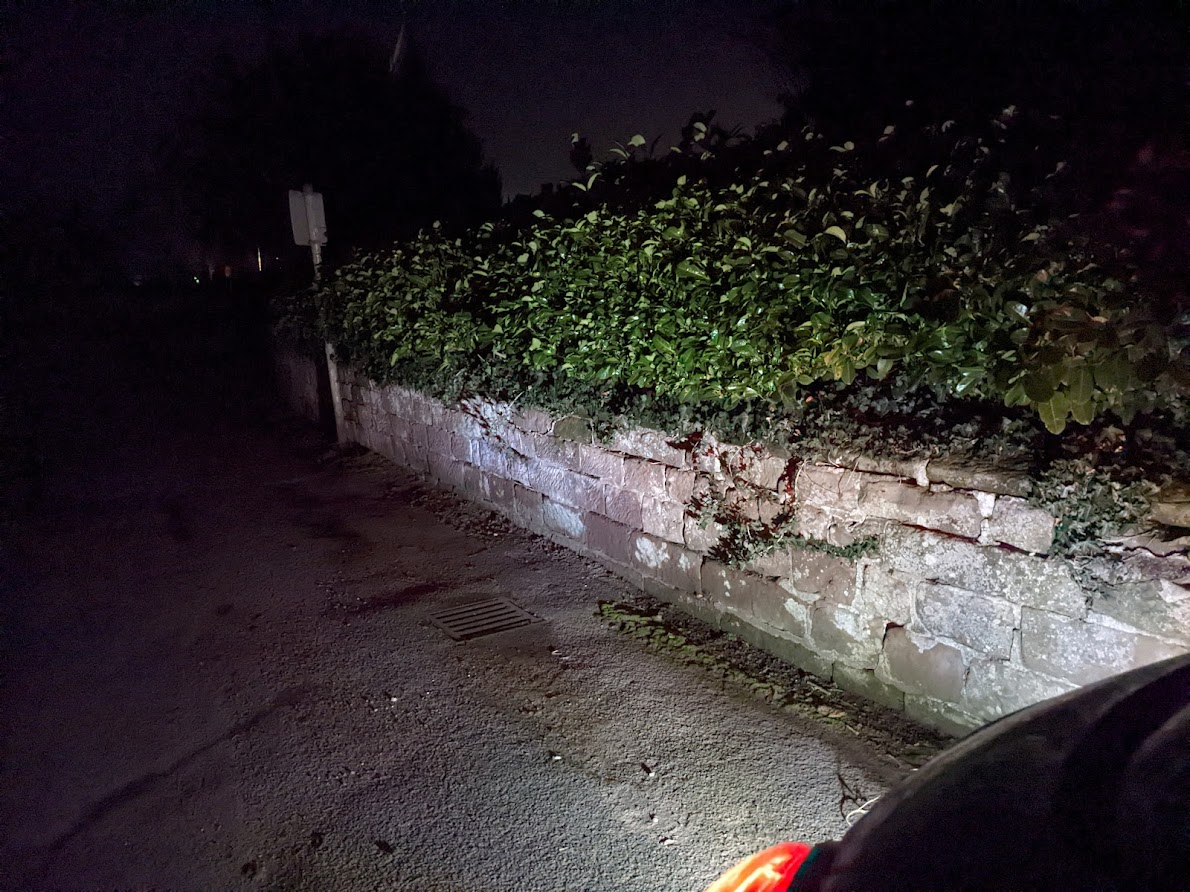
Doing this means you don’t have a reversing light in the cluster anymore but It’s quite discreet when not lit up, clearly visible during the day and actually lets me see behind me at night.
Here’s the result, which hopefully you’ll agree is much better than the pathetic attempt that Fiat seem to think is appropriate.
I’ve used an E marked 11W LED reverse lamp and a bulb adapter, mounted using an existing fixing below the bumper. This means that there are no changes to the wiring loom and the whole thing is easily and completely reversible if I want.
I thought I’d do a little how to guide in case anybody is interested:
First off, I’m not an auto-electrician and although I’m happy that all of this is safe and legal don’t blame me if you try this and something goes wrong!
Things you’ll need:
- 207 Bulb adapter base (got mine from ebay)
- Autolamps LED reverse lamp clear lens 11w (ebay or various other places)
- Suitable bracket, I used a stainless steel, 90 degree, pre-drilled one
- Some wire, connectors of your choice (or solder the connections), 2 x zip ties, T30 & T25 star drivers, cross head screw driver, a blob of silicon sealant
Bulb Adapter
LED reverse light E marked 11w 12-24v
Step 1 Remove the left rear light cluster
Open the boot for access, remove 2 x T30 screws and then pull the light unit backwards. I had to use a trim pry tool to help move it as it’s quite tight but it should just pull back, there are two prongs that need to be disengaged, then undo the electrical connector so you can free the unit.
Step 2 Remove the bulb holder from the light unit
Undo two screws and release the clip at the top, the whole bulb unit should then lift out. The reversing bulb is the bottom one in this photo - take it out.
Step 3 Sort your wiring
There are different ways of doing this depending upon what connectors you have/like, how good your soldering skills are and how easy you want it to be to dis-assemble. I can’t solder for toffee so I used a mix of terminal block, an automotive connector where the wires are crimped in place and some little tubes that are heat-shrink and solder all in one (can’t remember what they’re called). Essentially, you need to get a long enough stretch of wiring (+ve and -ve) to exit from the bulb holder, down behind the bumper and along to near the centre where the light will be.
By using the bulb adapter you don’t need to tap into the wiring, just plug it in instead of the bulb. Handily there is already a hole in the bulb holder, covered by a little sticker, where you can then pass the wires back through the bulb holder to the outside world. The hole is the white circle in the photo in step 2 and the blue circle in the photo below.
You need to extend the wires from the bulb adapter to where you mount the light. You could do this with an uninterrupted run or build in a way of separating the reversing light from the light cluster to make it easier whenever you need to change a bulb. I used a terminal block to extend the wires from the bulb adapter by about 8” (good soldered connections would be nicer), passed these through the hole in the holder and added a blob of silicon sealer round the hole to keep things watertight. I then used a connector to let me split the wiring between the light cluster and the reverse light so that it’s easy to remove the cluster in the future. This connector needs to be far enough away from the bulb holder to allow it to sit below the cluster when it’s all put back together otherwise you may not be able to refit the light cluster properly.
You can then refit the bulb holder to the light cluster and you should have something like this:
Step 4 Mount the lamp
I used a stainless steel 90 degree bracket that already had holes in it to allow the wiring through and to be screwed to the bumper, but there’s plenty of things that you could use instead. The lamp came with a 3M sticky pad that I used to attach it to the bracket, The lamp comes with about 6” of wire but you'll have to add another 3 or 4 feet to this. Make sure you pass the wires through the bracket before you add any connector to the end and then you can stick it to the bracket.
If you look under the bottom lip of the bumper you’ll see a number of fixings that can be used to mount the lamp. The lamp is very light so it doesn’t need much to hold it in place. I secured the bracket to the underside of the bumper using the T25 screw on the right of this picture.
Simply remove the screw and then clamp the bracket in place by replacing the screw. You should end up with something looking like this (yes, I know it needs a wash).
Step 5 Thread the wire
At the left hand side of the bumper where the bottom of the lamp cluster would sit there is a gap big enough to pass the wire from the lamp (including a connector). I used a pull rod inserted from the top, down behind the bumper to then pull the wire up through the gap. There’s loads of space when you look from underneath. It would probably be easier to thread the wire down from the top, but then you’d need to do some of your wiring in situ rather than in the house. Use a zip tie or two to secure the wiring behind the bumper and away from the exhaust.
Sorry didn’t get a picture of where the wire goes / comes out
Step 6 Connect it up
Now all you need to do is connect everything together, test it, then put the cluster back. Connect your reverse lamp wires to the tail of your bulb adapter, put the Fiat connector back on the cluster for all the bulbs and just check it all works before replacing the cluster. Be careful that your new wiring and any connector don’t foul the back of the light cluster. There should be a big enough gap at the top of the bumper, below the bottom of the cluster, to hide any connector. Then replace the two T30 screws to secure the cluster.
With a bit of luck you’ll have this:
The green dots are the LEDs reflecting off the back of my phone back onto the car
I had bought 2 lamps, one for each side but I think that one will be enough on its own. There are no warning lights on the dash and the light goes out as expected when coming out of reverse (some bulbs swaps have reported an afterglow). The light is E approved and pointing directly backwards so shouldn’t cause any glare problems etc.
Doing this means you don’t have a reversing light in the cluster anymore but It’s quite discreet when not lit up, clearly visible during the day and actually lets me see behind me at night.
") I didn't even know there was such a thing as a bulb adaptor.. but that looks very useful...
I didn't even know there was such a thing as a bulb adaptor.. but that looks very useful...