DF909C7C-D97D-4652-BAA5-3C1ABF6319AC.jpeg

500 Pics of the wife’s 500 twinair 2011(modified in progress still)

Introduction

Hi peeps,

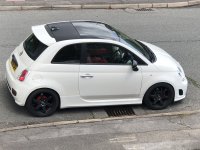
Well this is my wife’s twinair 85bhp 2011 Fiat 500. She bought it just in the new year as unfortunately we have had to down grade due to my ill health and having to give work up.

Anyhow it’s a low mileage one with an s/a box as she can only drive auto. Pain I know as I would go manual anyway.

Well this is a bit of a project fun car as I have permission to modify it . So I have started and will be a ongoing thing. Things I want to do that I haven’t done already are as follows really.
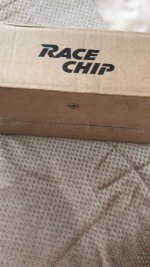
-remap
-full exhaust right through
-upgrades front discs and pad and braided lines(brakes I don’t thing are good at all)
-disc conversion on the back
-sports bumpers and side skirts
-all polybushed bushes
-tft dash display change
-headunit control change
-suede with red stitch all plastics inside(dash,door cards etc)
-red leather armrest
-parking sensors all round
-all dressing bolts , carbon etc in the engine bay

I’m sure there is a lot more still. Haha.

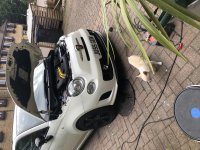
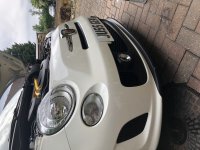
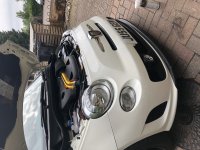
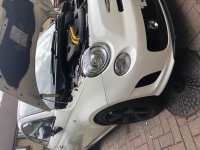
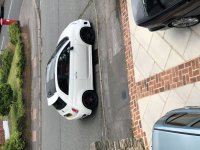
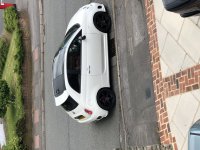
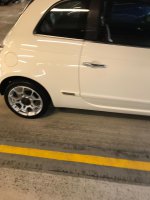
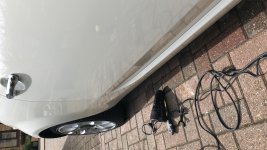
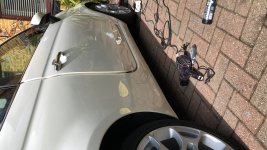
Anyhow I love detailing cars as I am a bit ocd with paint correction so I have spent 5 days doing this as a 2 step correction process and treating with gtech cystal serum and exo v4 .

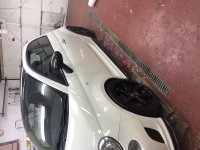
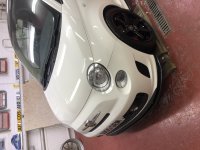
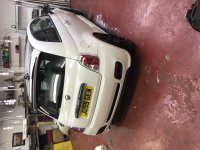
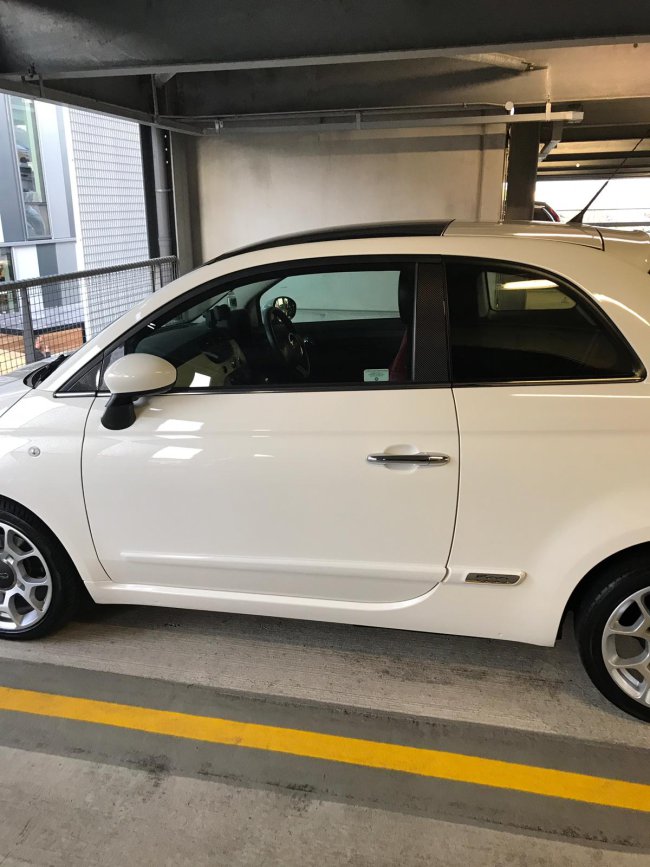
These pics give an idea on how clean it is
  • Like
Reactions: robtt
Another weekly update;

Picked up an Abarth front bumper complete and in excellent condition and also Abarth side skirts.

Spent along time da ing the bumper as a lot of light scratches but it now shines lovely. It’s now on the car.

Taking the bumper off I noticed that the air on rad at the bottom is going. Two rows of the rad have fallen out. Is this a common thing??? Looks like I will be buying another aircon rad. O well.

I have connected up the fog lights with the connector that’s already there. Does anybody know the best way to get these to work as I assume that part of the loom isn’t connected to the switch as it’s not working. Be good to get it to work and I will also change the switch to the front and back fog light switch .

Also got the side skirts on this evening. I have just Mastersealed them on. And loads of it. They are not moving one bit. Need to now da them as there are some marks on them but should get 99% out then touch in a few stone chips and the Masterseal so it all blends.

Window tint turned up in the week so will be fitting at some point . It’s only a 35% for the main rear screen and the two rears sides. Should make a nice bit of difference. Not usually a tint fan but I think for this it will look good with all the carbon wrap and real carbon pieces that I have and many more to come.

I have a few pics of the front bumper on the car.
 

Attachments

  • F0EA0AF8-428E-4C12-A3A6-FE494868C18D.jpeg
    F0EA0AF8-428E-4C12-A3A6-FE494868C18D.jpeg
    4.6 MB · Views: 160
  • C4190890-ED23-495F-9319-D58BBD843987.jpeg
    C4190890-ED23-495F-9319-D58BBD843987.jpeg
    3.1 MB · Views: 108
  • EFF89AA7-B296-463E-915D-B93FF2CCE313.jpeg
    EFF89AA7-B296-463E-915D-B93FF2CCE313.jpeg
    3.1 MB · Views: 101
  • 3AB3B9BC-A58E-4AAA-8BBC-DE9B0971CCB7.jpeg
    3AB3B9BC-A58E-4AAA-8BBC-DE9B0971CCB7.jpeg
    2.9 MB · Views: 137
The bottom row of fins fell off the condenser on my twinair when I had the bumper off. It doesn't effect much especially in cooler climate as long as the rest of the fins are all good, ie not corroded and flake off when touched lightly. Nothing to worry about.
 
That’s good to know. It would be a pain to change as it would need all charging up again. Might do it at some point as I like to know it’s all as it should be. But can wait a bit now . Thankyou .
 
Here’s a few pics of a very dirty car. But side skirts on as you can see. Still haven’t finished tidying up the blending of them because of the master seal but will soon as going on hols . Once back will sort it and take some close ups.

Also I put new new plugs in which were the same that was in there but the dealer never tightened them up enough. Car runs soooooo much better now I have done it. Smoother, a lot more responsive. It’s like a different car. Something so simple can make such a difference.
 

Attachments

  • 61C524B1-5E04-48CB-9407-707A44A88659.jpeg
    61C524B1-5E04-48CB-9407-707A44A88659.jpeg
    3.5 MB · Views: 128
  • B83325D3-2803-412D-A59B-B9A514244529.jpeg
    B83325D3-2803-412D-A59B-B9A514244529.jpeg
    3.3 MB · Views: 132
  • 26A9B894-7A91-4B61-A69E-ED22496F4385.jpeg
    26A9B894-7A91-4B61-A69E-ED22496F4385.jpeg
    2.5 MB · Views: 218
My daughter took this parcel in today for us.

Excited to get home now. Haha.
 

Attachments

  • B10655A3-099C-4F63-A75B-B719D9587F61.jpeg
    B10655A3-099C-4F63-A75B-B719D9587F61.jpeg
    201.3 KB · Views: 94
And, as a matter of course, when you eventually finish you will remember to notify your Insurer of any modifications ? I would hate to think of you doing all this work and being unable to claim if someone hits the car !
 
Hi guys and girls,

Been a while since I have been on. Just a little update really. Mods that’s have been done since,

Braided brake lines
M-tec drilled and grooved discs
Ebc green stuff pads
Complete rear drum and shoe kit
Oil filter and oil change
Brake fluid change to Castrol
Race chip gts module
Tmc power pedal module
Abarth speedo leather cover
Abarth steering wheel
Diamond custom mats and boot liner
Rear window tinted 35%
Maxton carbon effect lower front spoiler
Maxton carbon effect side skirt extensions
Maxton carbon effect rear spoiler extension
Genuine abarth door sill plates
Abarth rear badge


Think that’s it. Haha.
 
Few pics
 

Attachments

  • 361942DA-879C-4A92-9637-2A526997FD7F.jpeg
    361942DA-879C-4A92-9637-2A526997FD7F.jpeg
    2.5 MB · Views: 121
  • F5C714D6-A5F2-4593-9E3F-FACA1A799451.jpeg
    F5C714D6-A5F2-4593-9E3F-FACA1A799451.jpeg
    2.7 MB · Views: 124
  • DE5109A3-D319-40DA-ACE7-77118DB87E3E.jpeg
    DE5109A3-D319-40DA-ACE7-77118DB87E3E.jpeg
    3 MB · Views: 160
Back
Top