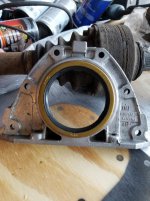
While I'd agree with g8rpi re using nothing coarser than metal polish on a sealing surface, in reality, it's not unusual to find a build up of dirt/corrosion on the machined surface just outboard of the seal. This, of course, needs to be removed and I suggested emery tape or fine abrasive paper in order to remove it quickly. However you do it, it's important to have as smooth a surface as possible for the lip to seal against without becoming worn or damaged in use.
The traditional way in garages is to use a strip of emery tape in a see-sawing motion to clean up the shaft, a bit like how you might polish your shoe toe-caps (I'm showing my age here,does anyone polish their shoes anymore?).If the crank is removed, this is easier.
If in a machine shop, the crank journal and sealing surfaces can be polished while on the crank-grinder using a strip of emery looped over the surfaces as the crank is rotating. Sometimes (for safety) a special holding tool for the emery tape is used. There also a technique called 'stringing' the journals where string is soaked in metal polish and see-sawed around the journals.
If there is wear groove worn into the sealing surface, it's best to slightly reposition the seal so that the seal lip is running on a flat surface of the correct diameter. In cases of bad wear, a seal sleeve e.g. "Speedi-Sleeve" can often be fitted, these are available in a wide range of sizes and may allow a standard size seal to be used.
As g8rpi says, the seal is installed with the lip facing the higher pressure side, so that the pressure forces the lip against the surface to be sealed. There is also,often a spring, called a 'garter spring', fitted inside the seal to hold the sealing lip against the surface to be sealed. If the seal is driven into position, it's a good idea to check that this spring hasn't become dislodged by the impacts. It's always better to press the seal into position, even if it means using a bench vice and a couple of blocks of wood or a bolt/screw and washers or large sockets if fitting a seal in-situ on an engine, hub, axle etc. It's important that the seal is fitted squarely into the housing and is not distorted during fitting.
If a seal or a casing containing a lip type seal is being fitted over a shaft which has a keyway or splines, it's important to protect the seal lip from possible damage. In a home workshop, this can often be done by using electrical (pvc) tape over any sharp edges plus a coating of oil on the tape.
Whenever a seal fails, try to figure out why? On engines, check that there isn't excessive blow-by past the piston rings due to bore wear and that any crankcase ventilation/breather system is functioning correctly (i.e. not blocked!). On gearboxes/transmissions/axle casings, check that any breather fitted (you might have to search for it!) isn't blocked. On hubs, don't overfill with grease, more might not be better!
As regards seal sizes - the size is often marked (need good eyesight or magnification...) in small print on the seal outer rubber surface., or inside when the seal outside surface isn't rubber covered. (e.g. 70x90x10 indicates a seal whose bore is 70mm, outside diameter is 90mm and width is 10mm). If the size isn't visible it can be measured. If a seal isn't available from your usual garage/motor factors, don't forget that many engineering suppliers who stock bearings also stock seals. So if you have the size and type needed e.g. single lip, double lip (outer lip is a dirt seal), they can often supply a suitable seal. If going this route, remember many seal have a 'direction of rotation' indicated by an arrow, so choose carefully.
I hope this extra info is useful to you guys and helps you avoid problems after fitting a new seal.
AL.


