This part of the guide will show you how I fitted my Amp into the drivers side footwell, and Pt2 will show you how to connect it up to the door speakers. Please excuse some of my explanations of parts of the interior, I don't know the names of some of the parts, but have tried to describe them as best I can 
First off, you will need:
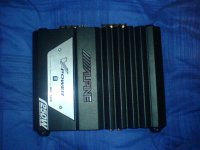
One amplifier
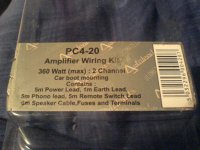
One amplifier wiring kit
A Haynes maunal
Set of Allen Keys
Screwdrivers (Various)
Spanners (Various)
A Bolt
A Hacksaw
A Stanley Knife
A crimping tool
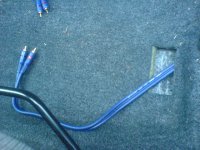
So the first thing I did was run the Phono cable from the Head Unit down to the footwell. Unfortunatly there aren't many pictures for this bit, because I forgot to take them But if you take the HU out completely and look towards the back-right of the space it goes in you will see a gap that goes behind the dash. You need to feed the phono cable down this gap and it should pop by the pedals. You then grab this end and pull it through. Next you need to take off the rubbing strips along the bottom of the doorway, as you need to reach under the carpet, and you should be left with this:
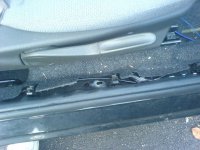
Once you have done this, feed the phono cable down the back of the carpet and pull the carpet up by the door. Reach under the carpet and find the end of the cable. Pull it through and route it through the rectangular hole in the carpet (I'm assuming this is there for a feature that my car doesn't have, such as side airbags or heated seats). You can see this hole in the picture above.
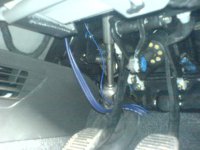
Next, you need to do exactly the same with the remote lead, although this can be slightly trickier to route down the back of the dash as it's pretty flimsy and gets caught easily. Here are a couple of pictures to show what it should look like when finished:
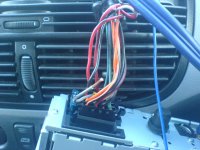
When that is done you need to connect the remote wire to the HU. Now it appears Fiat have decided to go against industry standard and make their remote wire grey (I'm pretty sure most others are blue). This caused me no end of trouble finding it until I looked at my HU manual (Doh!). Anyway, here is a picture of the ISO block and it shows the remote lead already cut away from the standard wiring:
If you can't see which wire it is from that picture, here is one where I've circled the remote wire
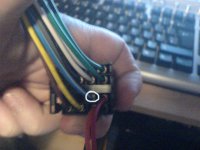
Now all you need to do is crimp the remote lead to this grey wire and that should be that finished Next up, finding an earth point.
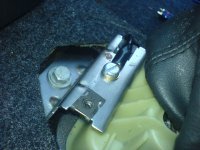
Now for the earth that I used, you need to take the centre piece of trim out around the gear stick and handbrake. There is a guide on how to do it here, but I'm sure it's in the Haynes manual aswell. Once all of that is off, you should see a piece of metal around by the gear stick with three holes in it. Now this is what connects that bit of trim you have just removed to the car, and it connects to the body, so I have used it as my earth. You need to bolt your earth cable to the hole in the middle, like so:
Then you need to run the earth to the hole which we ran the phono cable and remote lead to, just run it under the carpet, reach under and pull it through like you did with the other two.
Now, if you try and fit the piece of trim back on, you will notice that the bolt now gets in the way of part of the plastic. So we will have to make a slight modification so it fits. Take a hacksaw, and cut the plastic so it looks like the picture below.
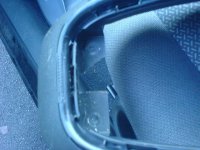
And now it should fit on, if you move the earth cable to the side slightly. It should now look like the picture below:
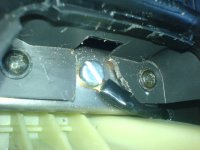
Don't attach it back yet, just check that it sits correctly, as we will need it back off when we run the power cable.
Now we have to run the power cable, so pop the bonnet and you should be faced with this:
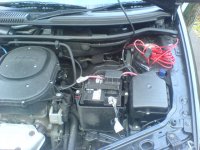
I took this after I had put the wire through the grommet, just to make it easier for you to see where to look for it. To get the wire through, you need to get a small screwdriver and pierce a hole in it. Then just poke the wire through and start feeding it in. Like the remote wire and phono cable, this is slightly push and hope, and it should pop out in the passengers footwell, although you may have to reach up and grab it. After it comes out, pull it through and feed it down the back of the carpet. You then need to take the passenger side rubbing strip off and reach under the carpet, pull the wire through and up around the gear stick surround, here:
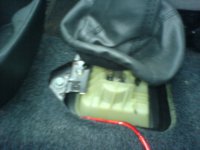
Now put it under that piece of metal we used for the earth and back under the carpet. Take a Stanley knife and cut a small hole in the carpet and reach under from the drivers side door. It's a bit fiddly but grab the power cable and push it through the hole, and it should end up like this:
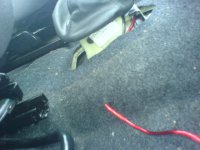
Now you need to connect the power cable to the battery. No pictures, but there should be a bolt you can unscrew and stick the terminal over.
And now all the wires you need to power the Amp should be sat in your footwell ready to be connected (I know that in my picture the wires are a bit messy, but when you do it, make sure none of the wires go near each other, especially the earth and power cable)
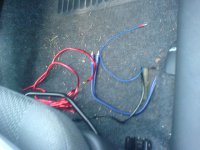
Now it's the moment of truth....
Connect all the wires to the Amp (Power cable on last) and then turn the HU on. If all goes well, the Amp should power up...
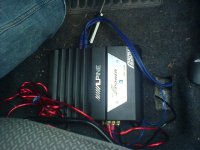
I think that the blue is the colour of success!
Thats it for this part of the guide, look out for Pt2 in the very near future, which will cover taking the doors off, drilling holes in them and running the speaker wire to them, and also ironing out any problems with interference etc.
Mark
First off, you will need:
One amplifier

One amplifier wiring kit

A Haynes maunal
Set of Allen Keys
Screwdrivers (Various)
Spanners (Various)
A Bolt
A Hacksaw
A Stanley Knife
A crimping tool
So the first thing I did was run the Phono cable from the Head Unit down to the footwell. Unfortunatly there aren't many pictures for this bit, because I forgot to take them

Once you have done this, feed the phono cable down the back of the carpet and pull the carpet up by the door. Reach under the carpet and find the end of the cable. Pull it through and route it through the rectangular hole in the carpet (I'm assuming this is there for a feature that my car doesn't have, such as side airbags or heated seats). You can see this hole in the picture above.
Next, you need to do exactly the same with the remote lead, although this can be slightly trickier to route down the back of the dash as it's pretty flimsy and gets caught easily. Here are a couple of pictures to show what it should look like when finished:


When that is done you need to connect the remote wire to the HU. Now it appears Fiat have decided to go against industry standard and make their remote wire grey (I'm pretty sure most others are blue). This caused me no end of trouble finding it until I looked at my HU manual (Doh!). Anyway, here is a picture of the ISO block and it shows the remote lead already cut away from the standard wiring:

If you can't see which wire it is from that picture, here is one where I've circled the remote wire

Now all you need to do is crimp the remote lead to this grey wire and that should be that finished
Now for the earth that I used, you need to take the centre piece of trim out around the gear stick and handbrake. There is a guide on how to do it here, but I'm sure it's in the Haynes manual aswell. Once all of that is off, you should see a piece of metal around by the gear stick with three holes in it. Now this is what connects that bit of trim you have just removed to the car, and it connects to the body, so I have used it as my earth. You need to bolt your earth cable to the hole in the middle, like so:

Then you need to run the earth to the hole which we ran the phono cable and remote lead to, just run it under the carpet, reach under and pull it through like you did with the other two.
Now, if you try and fit the piece of trim back on, you will notice that the bolt now gets in the way of part of the plastic. So we will have to make a slight modification so it fits.

And now it should fit on, if you move the earth cable to the side slightly. It should now look like the picture below:

Don't attach it back yet, just check that it sits correctly, as we will need it back off when we run the power cable.
Now we have to run the power cable, so pop the bonnet and you should be faced with this:

I took this after I had put the wire through the grommet, just to make it easier for you to see where to look for it. To get the wire through, you need to get a small screwdriver and pierce a hole in it. Then just poke the wire through and start feeding it in. Like the remote wire and phono cable, this is slightly push and hope, and it should pop out in the passengers footwell, although you may have to reach up and grab it. After it comes out, pull it through and feed it down the back of the carpet. You then need to take the passenger side rubbing strip off and reach under the carpet, pull the wire through and up around the gear stick surround, here:

Now put it under that piece of metal we used for the earth and back under the carpet. Take a Stanley knife and cut a small hole in the carpet and reach under from the drivers side door. It's a bit fiddly but grab the power cable and push it through the hole, and it should end up like this:

Now you need to connect the power cable to the battery. No pictures, but there should be a bolt you can unscrew and stick the terminal over.
And now all the wires you need to power the Amp should be sat in your footwell ready to be connected

Now it's the moment of truth....
Connect all the wires to the Amp (Power cable on last) and then turn the HU on. If all goes well, the Amp should power up...

I think that the blue is the colour of success!
Thats it for this part of the guide, look out for Pt2 in the very near future, which will cover taking the doors off, drilling holes in them and running the speaker wire to them, and also ironing out any problems with interference etc.
Mark


