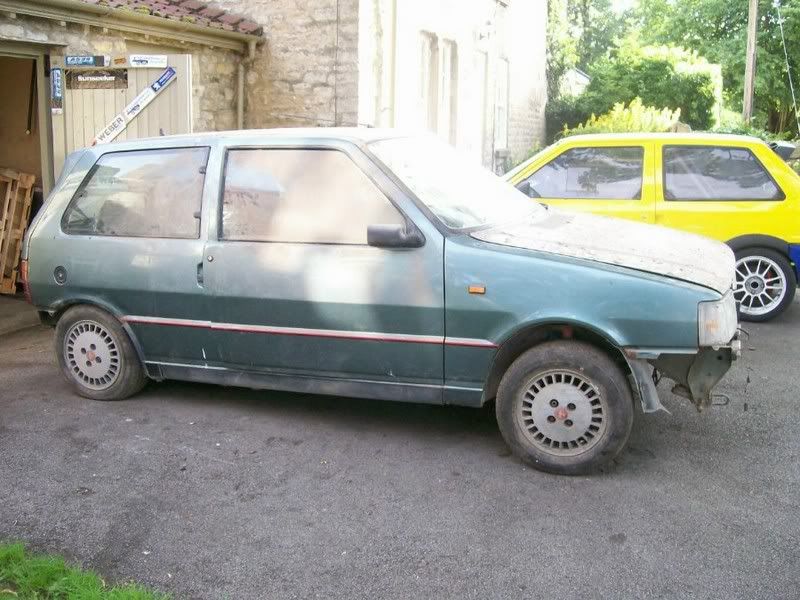
Well as some of you know I managed to get myself a MK 1 Uno Turbo. The car has been sat for sometime in a barn. Great just what i need! Another sodding car! ")
The engine isn’t sat in the car and little is known about why not. Still for just a small £25 I thought Id take the risk! So cash swopped hands and after sometime finding space and organising a trailer etc, I eventually got the car back to mine.
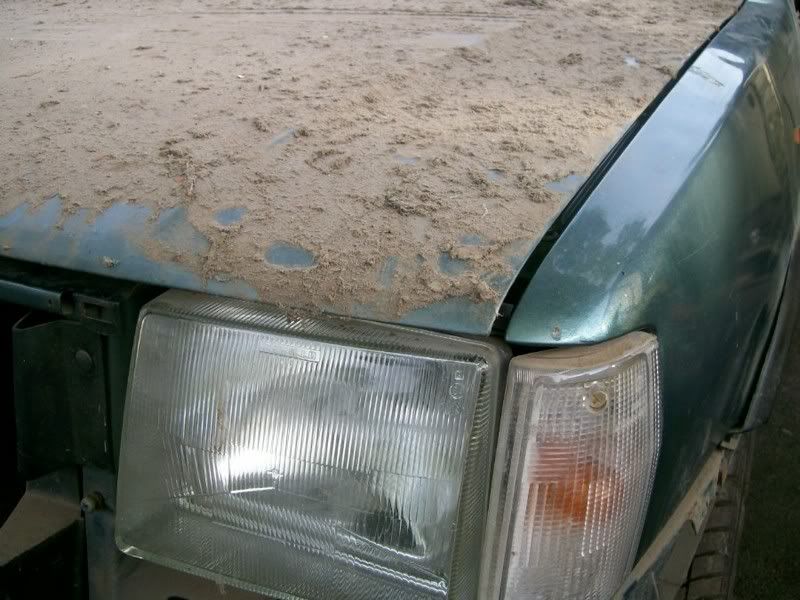
Some serious dust!
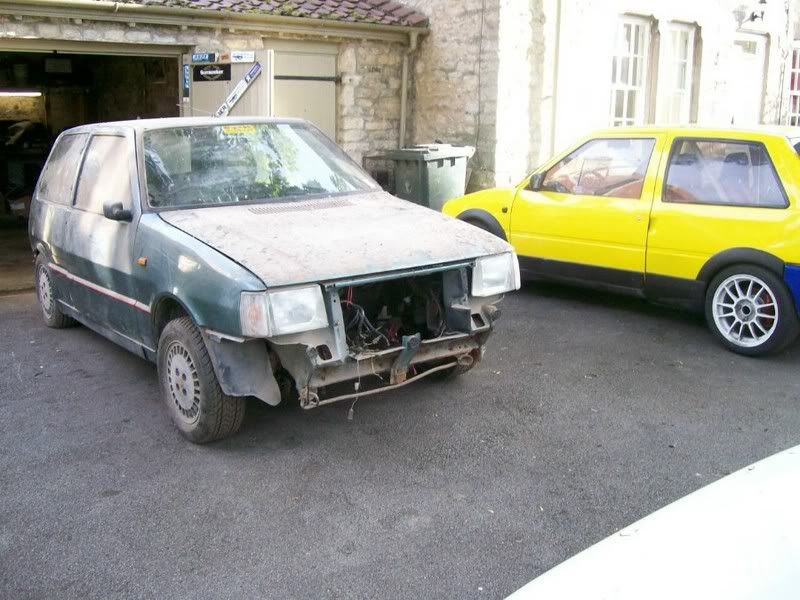

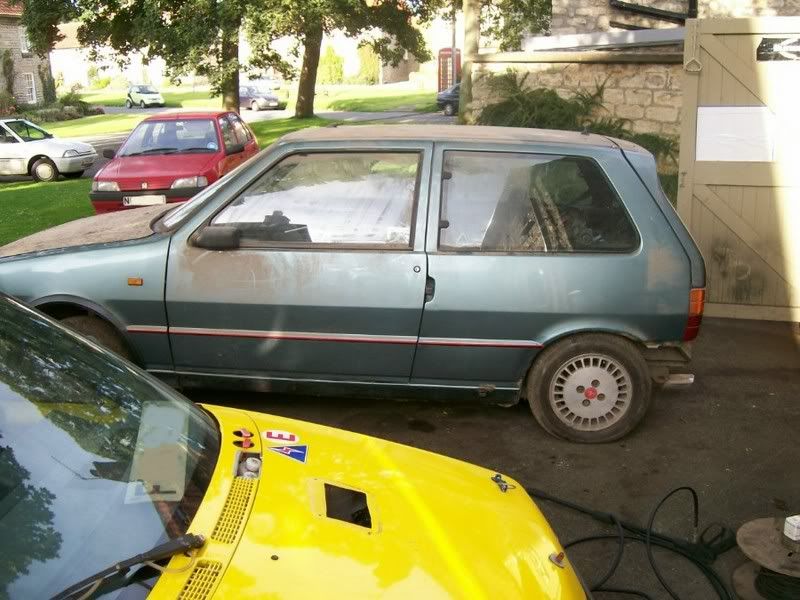
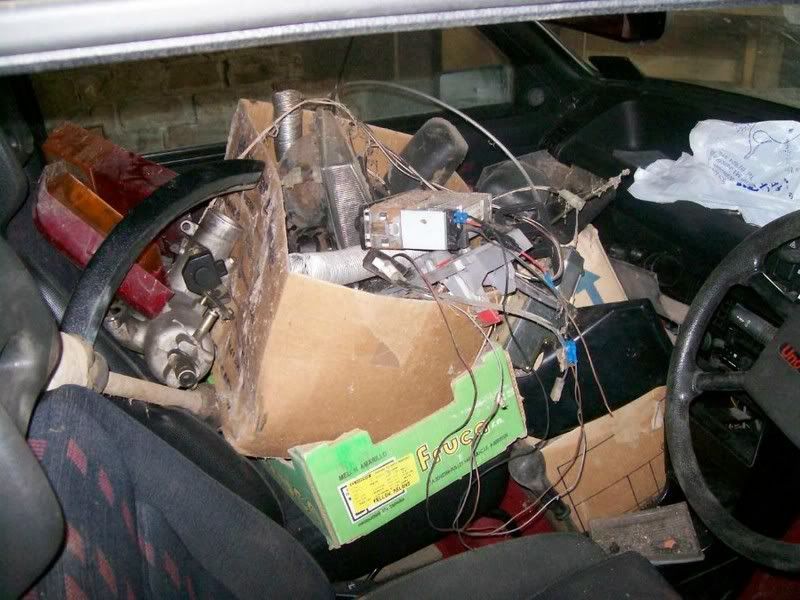
But with the car pushed back into my garage I then had the dubious pleasure of going through box after box of parts trying to guess what stuff was and what was missing. At first glance things looked hopeful… most stuff seemed to be there. Having said that the bumpers and bodykit were beyond repair, the interior was filthy. Rust is present on the car and can be seen creeping up the rear arches, some spots on the roof, around the windscreen and on the sills… but more of that later.
So What Have I actually got.
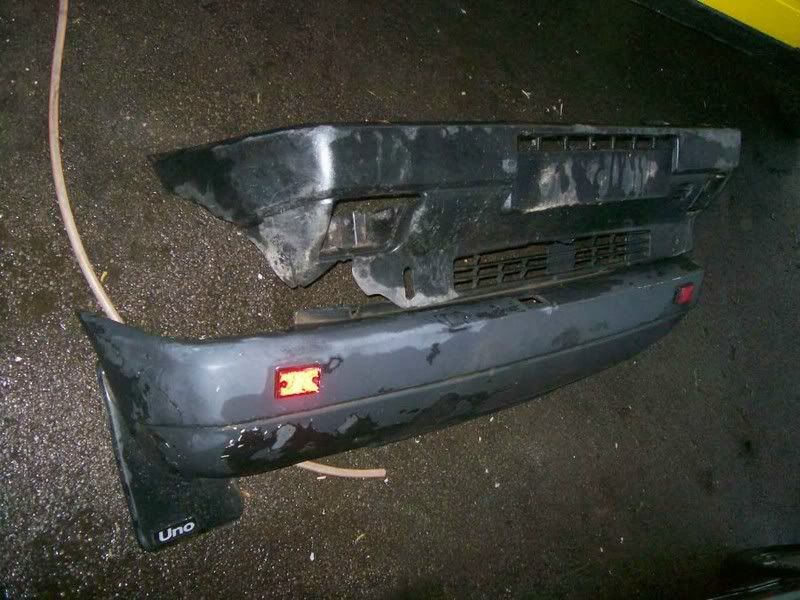
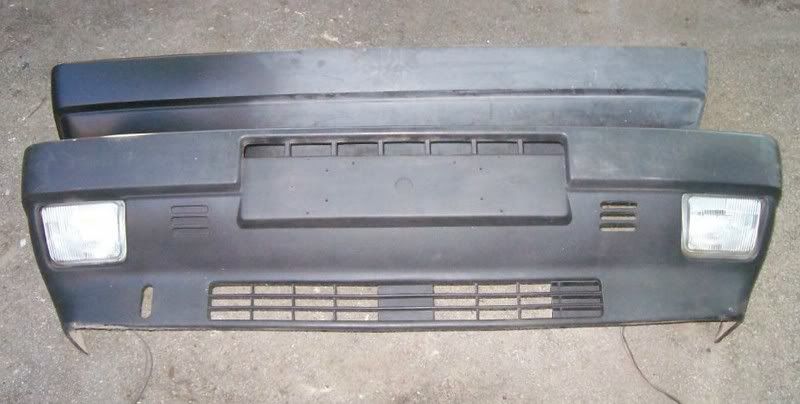
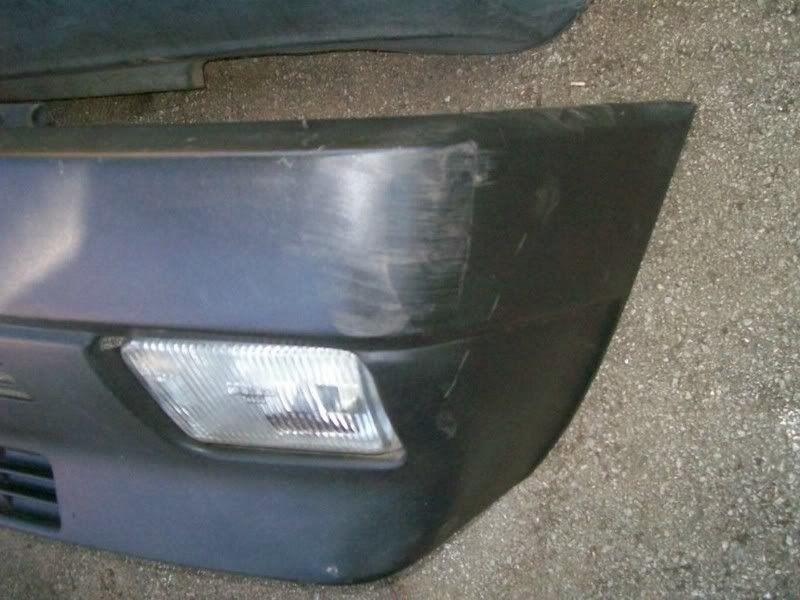
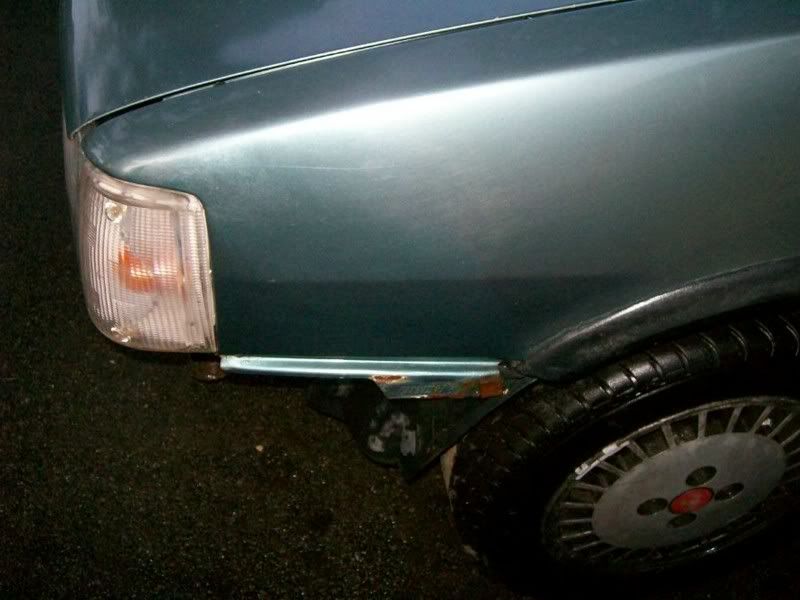
Trying to see exactly what’s missing and what’s broken from as early on as possible – giving me chance to plan etc. Bumpers and trim were damaged… the front bumper missing a fair chunk and the rear bumper having been painted at some point with god awful reflectors stuck on. So they both hit the bin and a replacement set and arches bought locally from UnoRacer. Unfortunately wasn’t until I got them home discovered they had a big scuff on the front bumper and one of the arches is missing the lower section… eh well, they were local and at £110 I got a replacement passenger seat and a set of lowering springs and dampers so Im far from complaining.
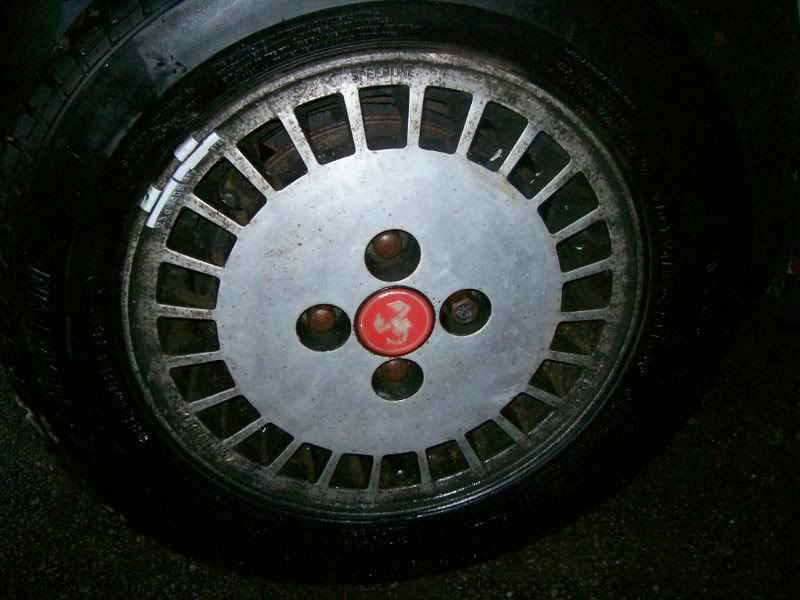
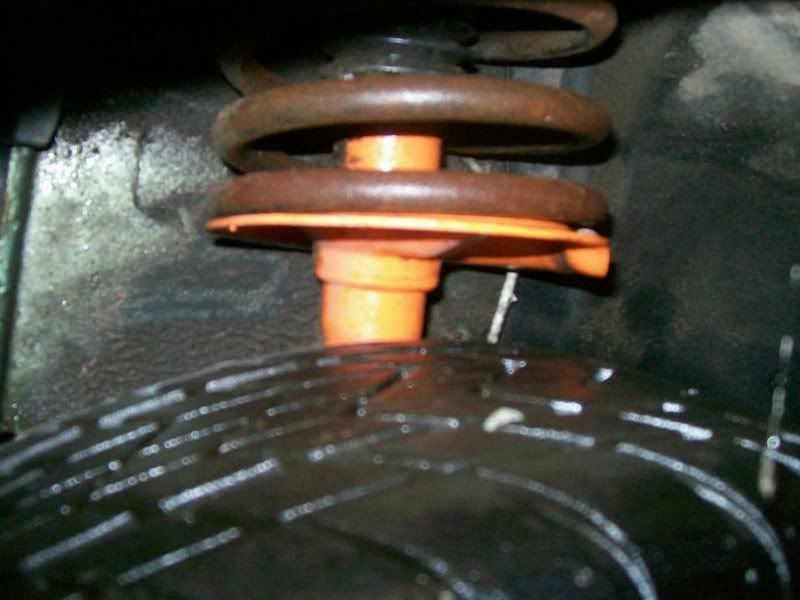
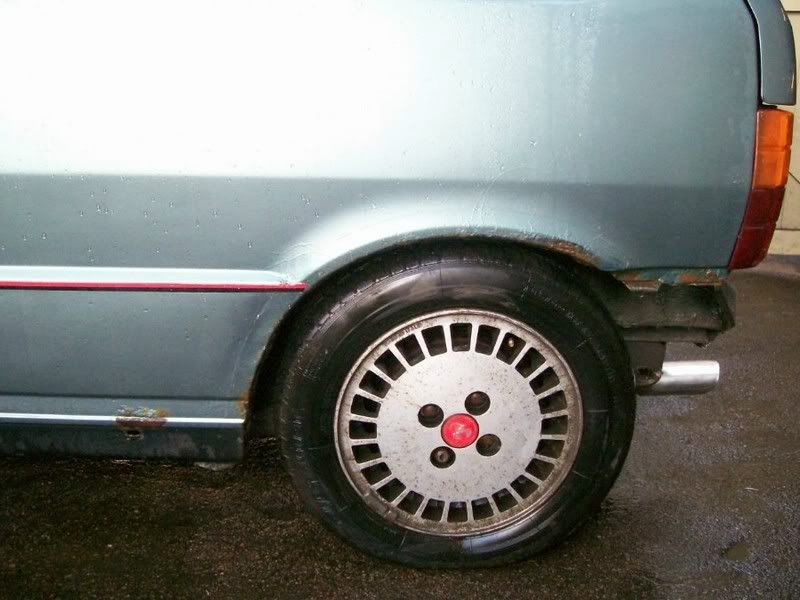
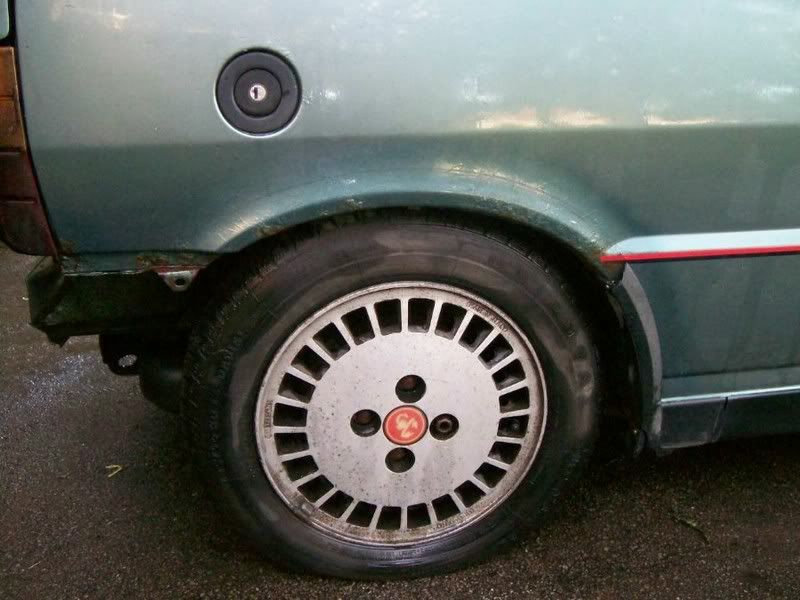
The alloys are corroded as you’d expect but dampers and springs look remarkably new…. Possibly even lowering springs? Ill let the experts decide on that!
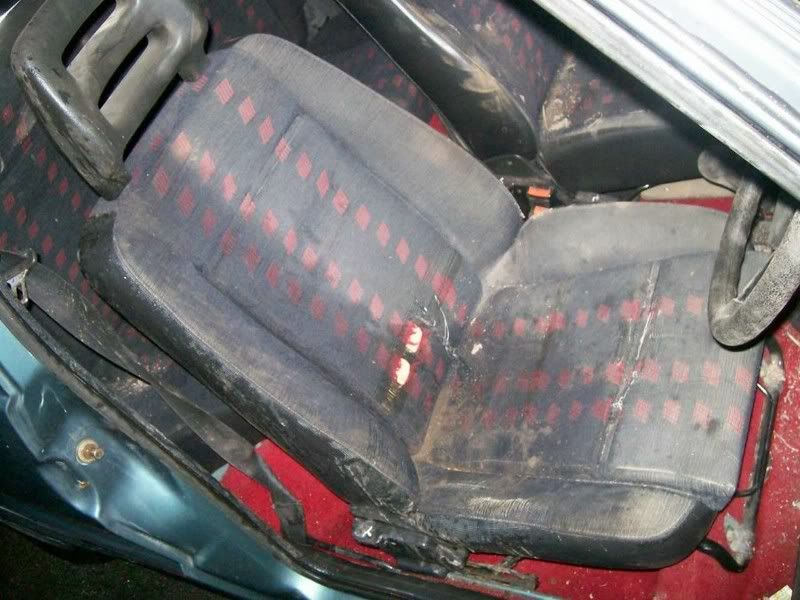
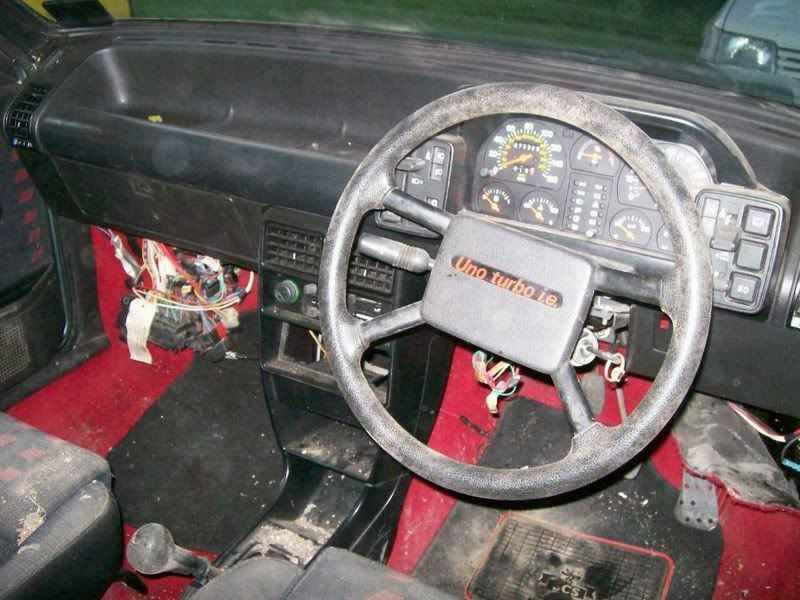
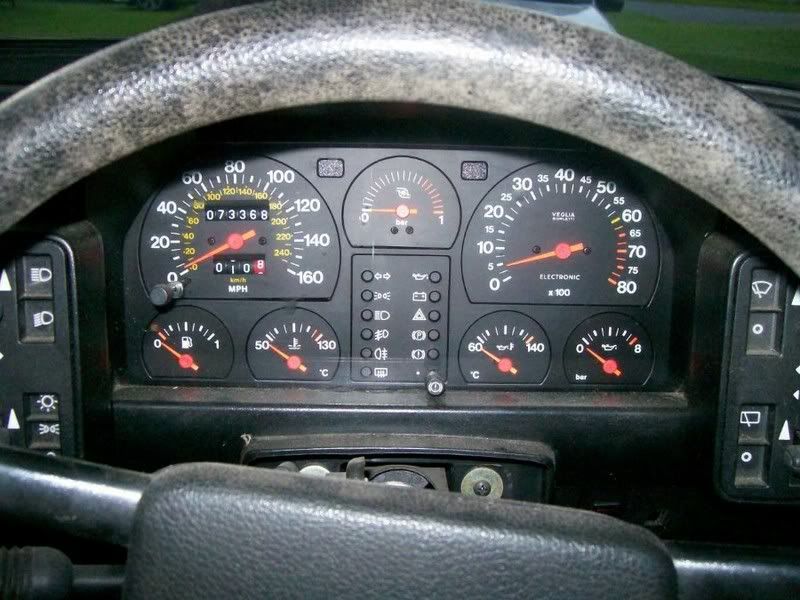
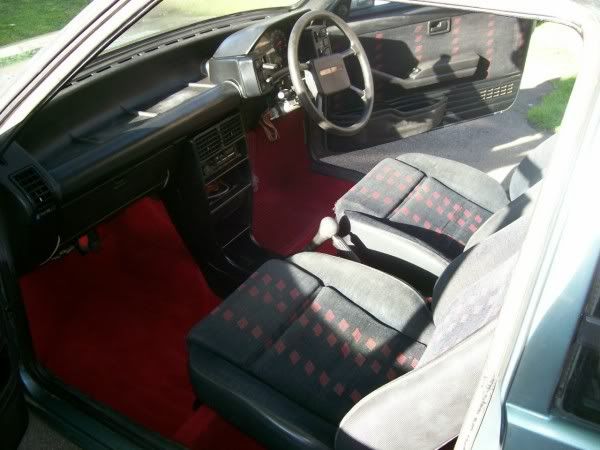
The interior as mentioned already was filthy and the driver’s seat was worn out in the only way a Fiat seat can. Having said that though in my opinion the MK1 UT dash layout is one of the best ever on a production car. How oldskool retro is that! Absolutely loverely!
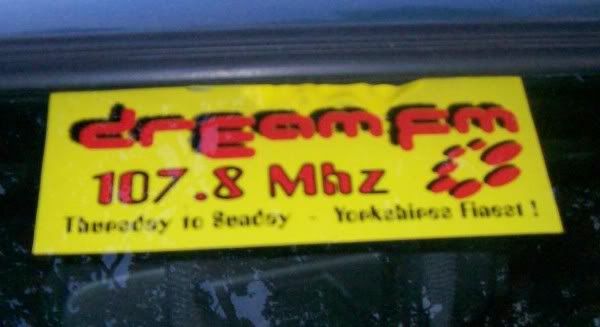
Found this window sticker – you know im pretty certain this radio station doesn’t actually exist anymore!
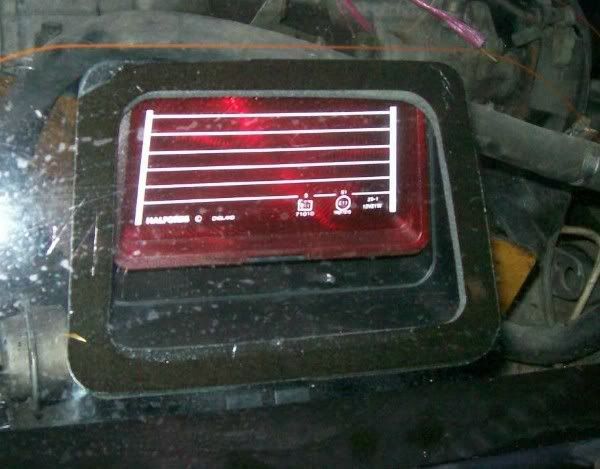
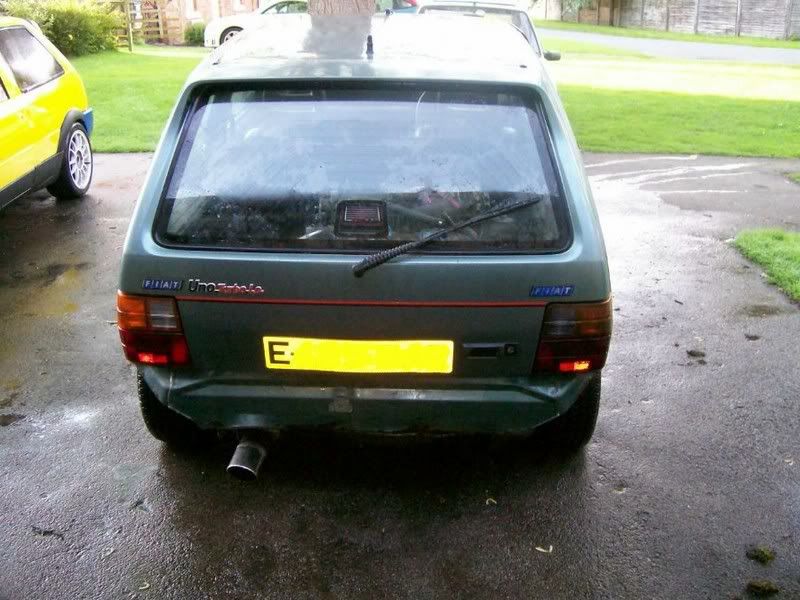
And a very nice 3rd level brake light courtesy of Halfords… nice.
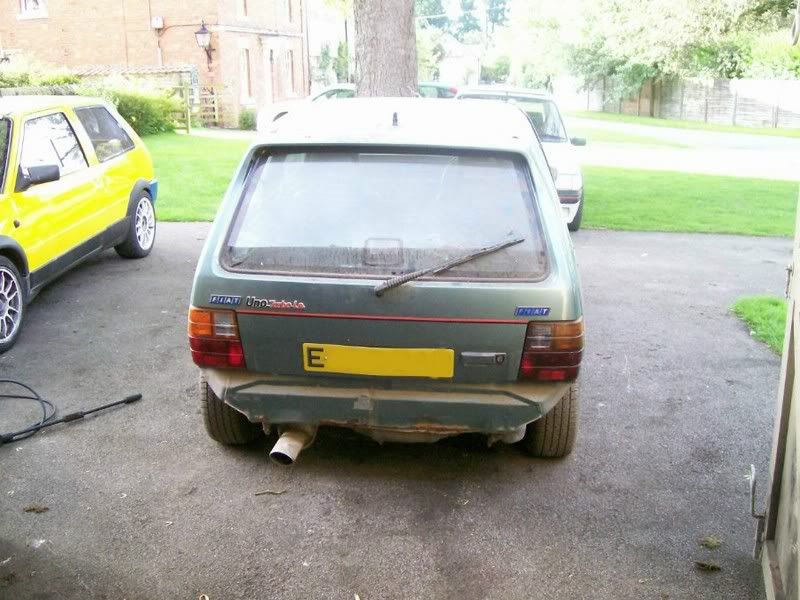
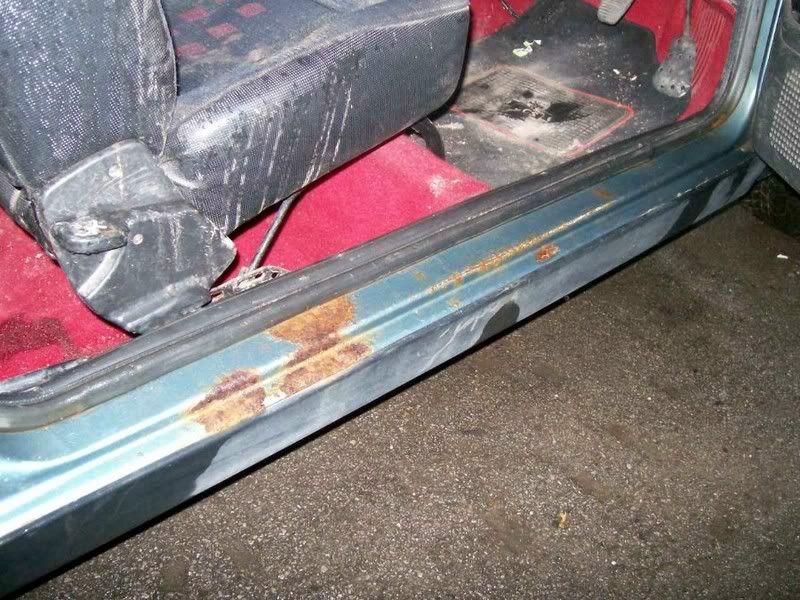
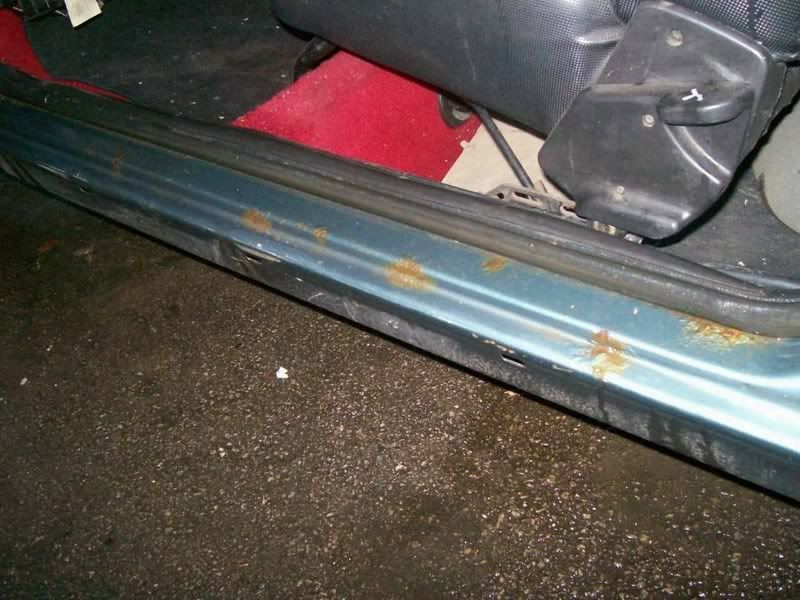
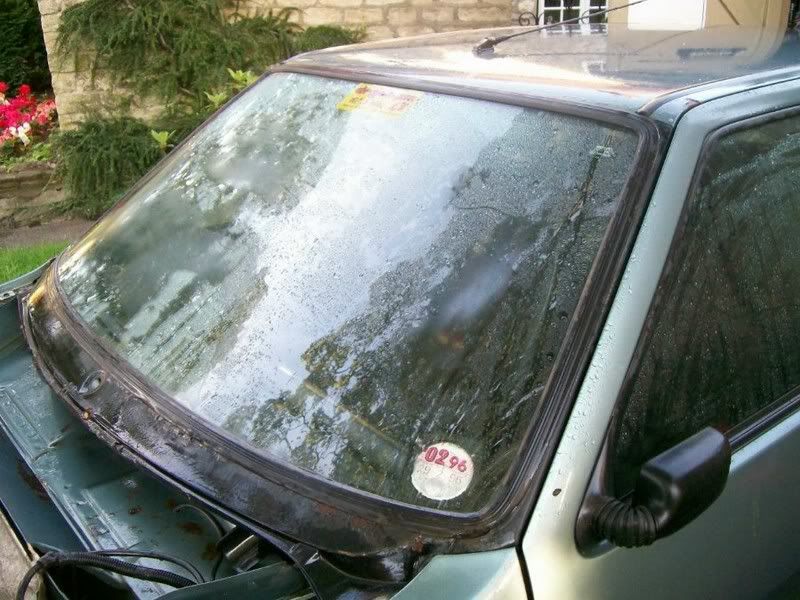
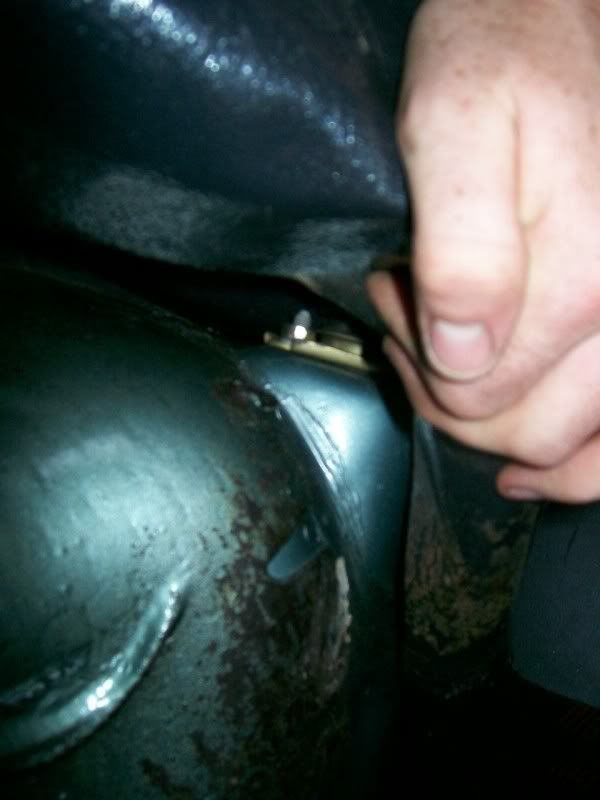
Some more rust on the sills – probably the worst bit on the whole car – so looks like im going to have to do a sills replacement in the future then! But that can wait till the engines back in and see if it works! Around the windscreen is also pretty bad.
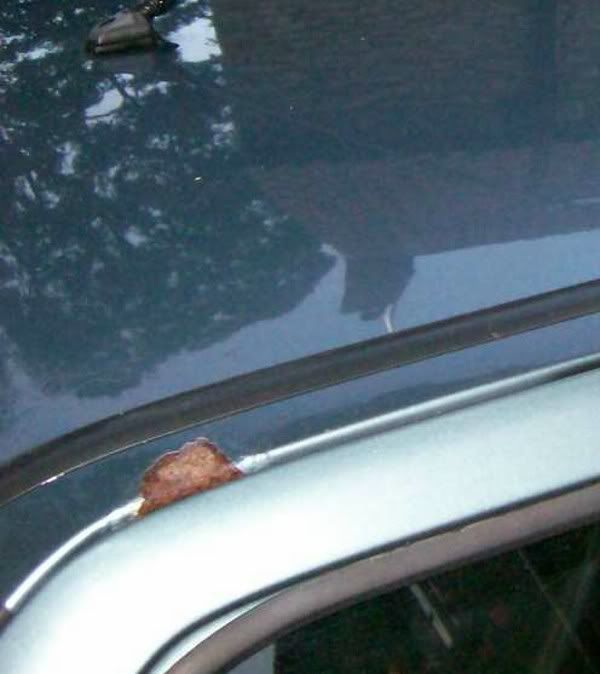
Also the scab on the roof and the NSF wing seems to have overspray on… possibly had a car park bump? But the damage on the original front bumper was OS, so doesn’t tally :?
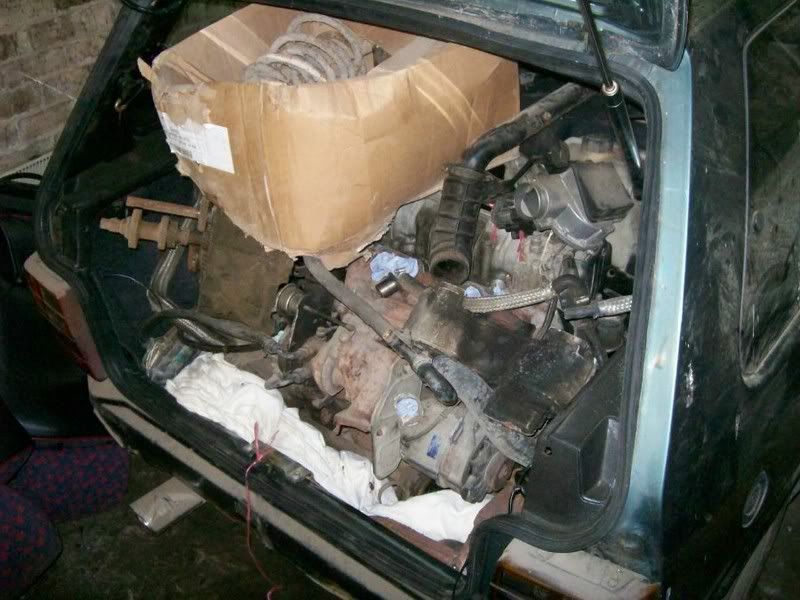
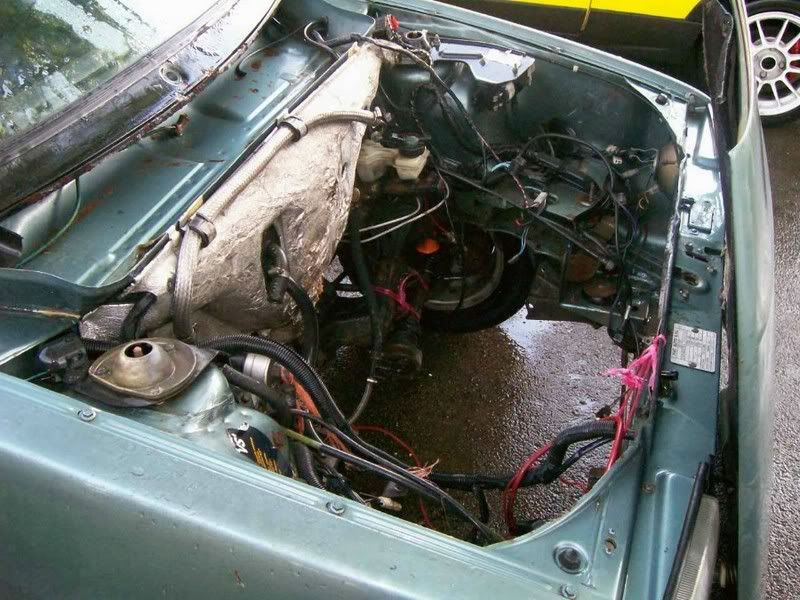
- at the moment though the major priority before I start throwing money at it is get the engine in and try to get it started before I start worrying about the body. So after putting my back out getting the engine and box in the boot for the trailer ride home – (when there was 2 of us) I really FUBAR’d it when I lifted it out again by myself.
Still it all appears to be there the waste gate isn’t seized and the turbo has no play and spins freely.

There is also a gearbox in pieces – is this the original box hence why the engines out etc? But then why was it not put back in? I also found 3 ECUs sat loose in the car and none on the bulkhead… hmm possibly an electric problem then? Talking of which I also found a large number of completely melted rotor arms. All will be revealed soon enough I suppose.
Spring Clean
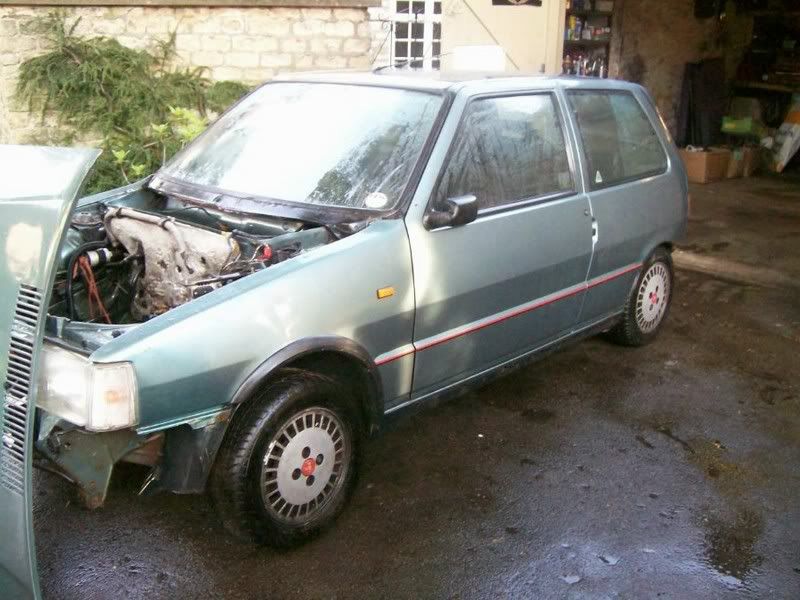
First things first. After removing what must have been a tonne of boxes from the car ever hopeful I thought I would give it a quick power wash off, and see if it would T cut up into a nice gloss shine and sure enough… it didn’t! Pft, you’ve got to try haven’t you! Lol! In all seriousness I was still trying to see the damage at this point, and whilst the car isn’t going to be a show stopper and does have some rust to be dealed with its actually 95% solid and does seem to be complete.
More pics.

Rust in rear arches and around screen
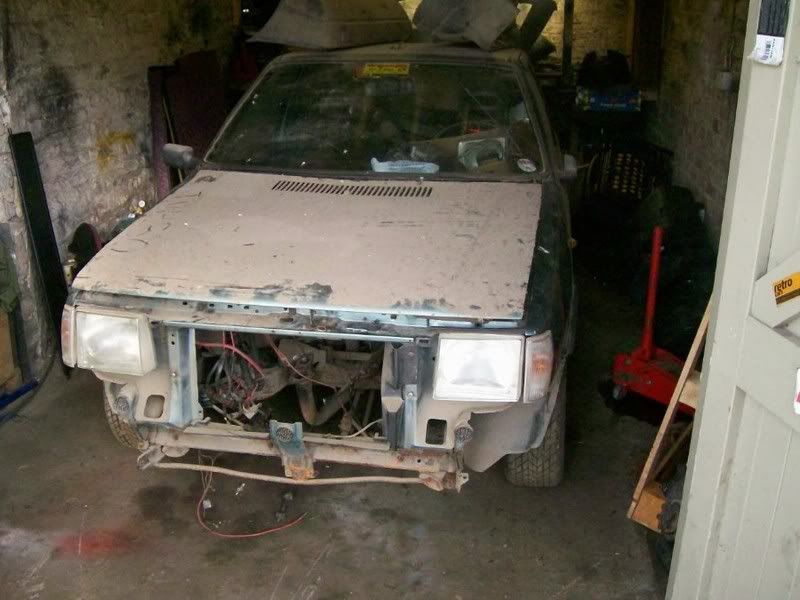
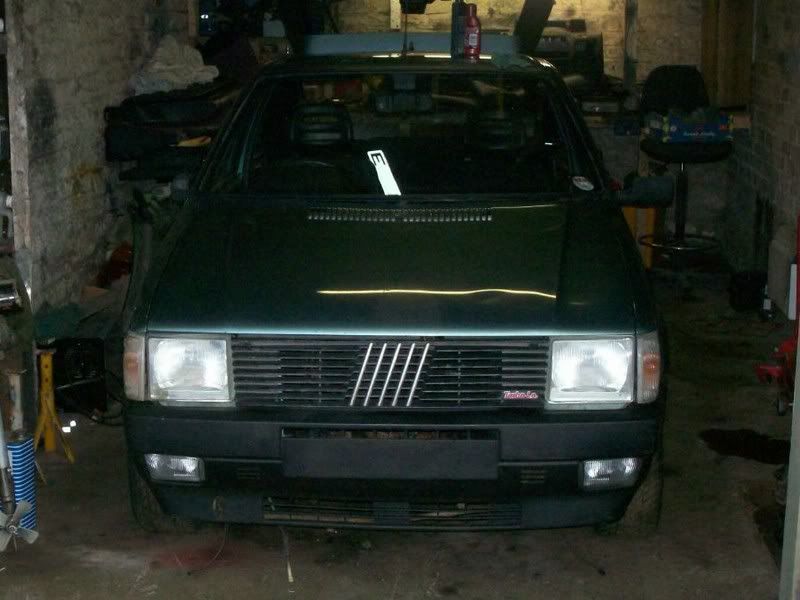
I also threw on the front bumper to see what it looked like
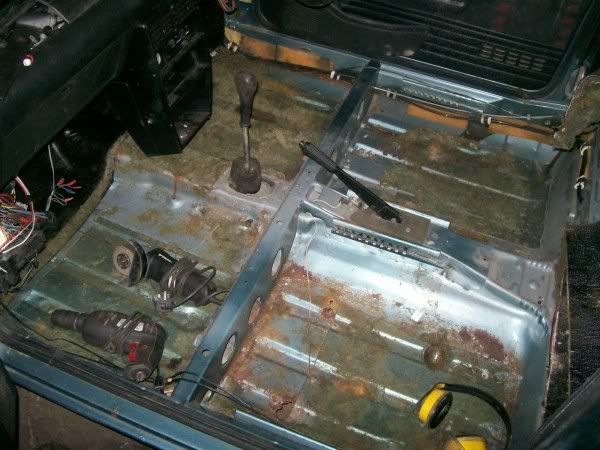
Interior strip
Having done a few light restorations before now, but not pretending to be any expert in the matter, the way I tend to look at the car is in 5 main areas. Rear subframe / front subframe / external / internal / engine. Then just work my way through them. I generally start with the internals as its generally easily sorted and clean to work on. It also helps drum up some enthusiasm as you get to see a section of the car take shape quite quickly. (It also means I would have somewhere to put all the boxes of engine etc again rather than across my garage.)
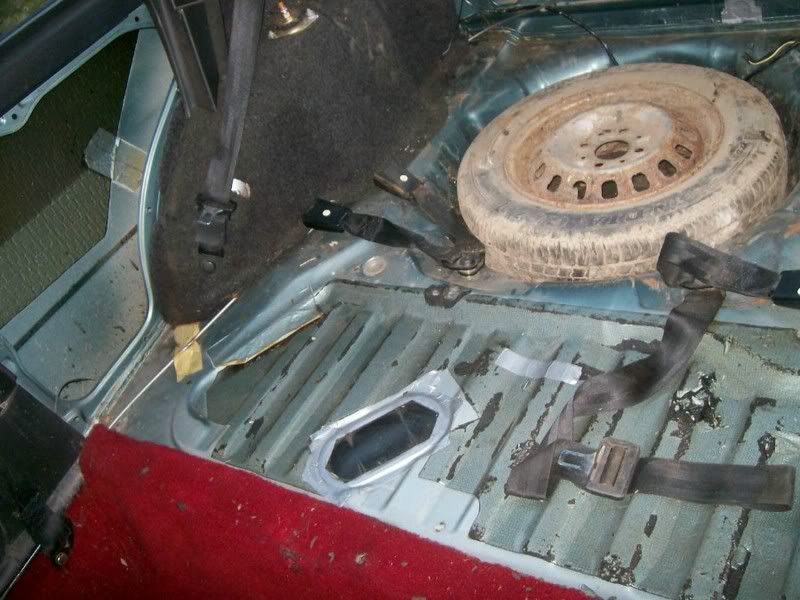
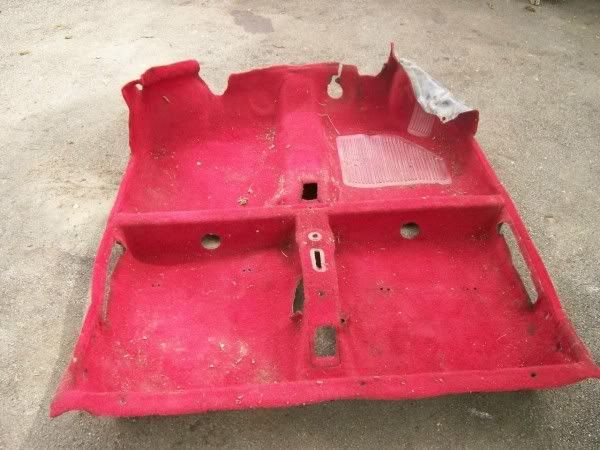
So out comes the seats/carpet/soundproofing/trim.
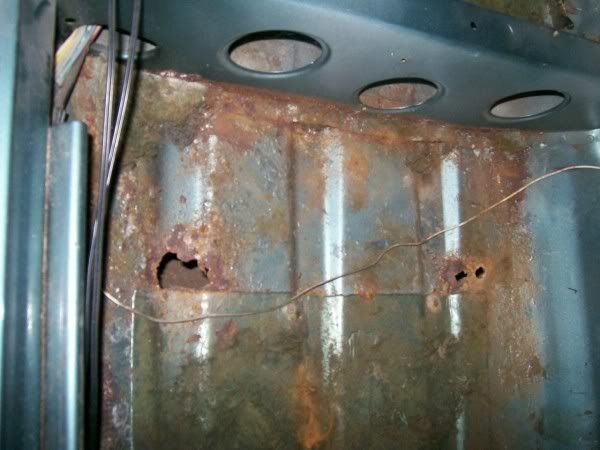
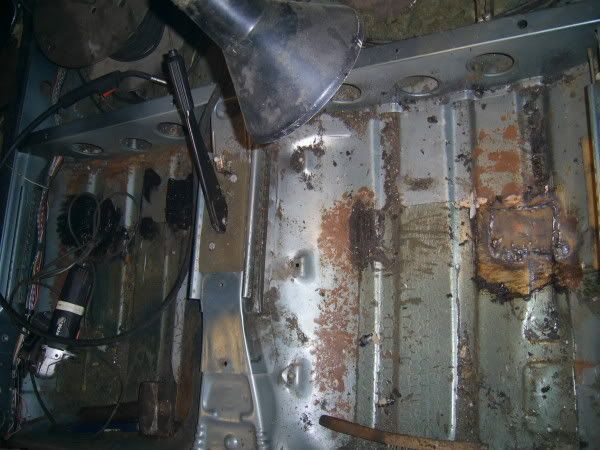
One nice thing about this is you get to see the condition of the floor from the other side. In this case the Uno is really solid, but the foot wells and seat wells have a little surface rust from water sitting off damp feet I guess. But strut tops and rear seat areas are all A1.

Having said that theres evidence of someone having had bucket seats in the car and the drilled holes have rusted out. Beautiful example of the necessity to paint drilled holes!
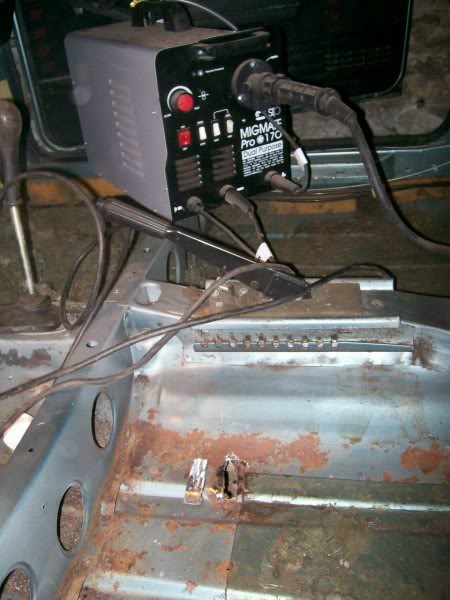
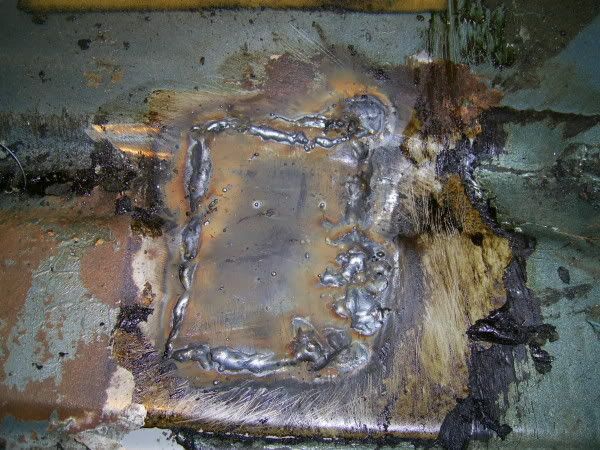
So out came the welder… now I haven’t done that much welding in the past but what I have done has never been so difficult as welding in new plates on this Uno. The old metal was so thin and crap quality that blowing holes was definetly the name of the game – so I had to resort to going further back to better metal. The old rusty holes were completely cut out – so its not just a patch. The finished plate received a sealant and then the whole floor was thoroughly cleaned back and sprayed in a good thick layer of underseal. Its not pretty but it does the job and should protect it for a few more years yet.
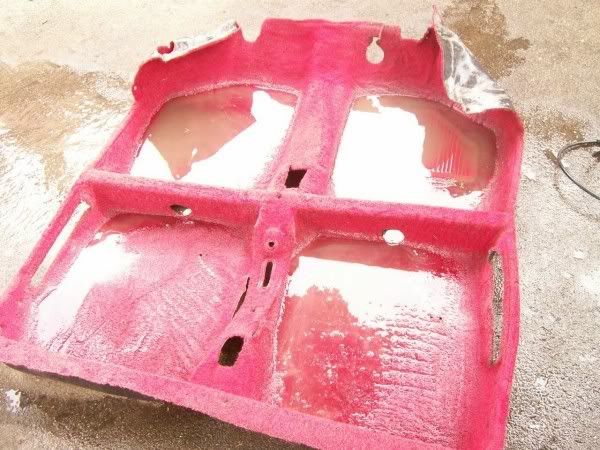
Next on the list was the carpet – with this out I attacked it with the jet spray and loosened the many kilos of dirt and grime out of it.
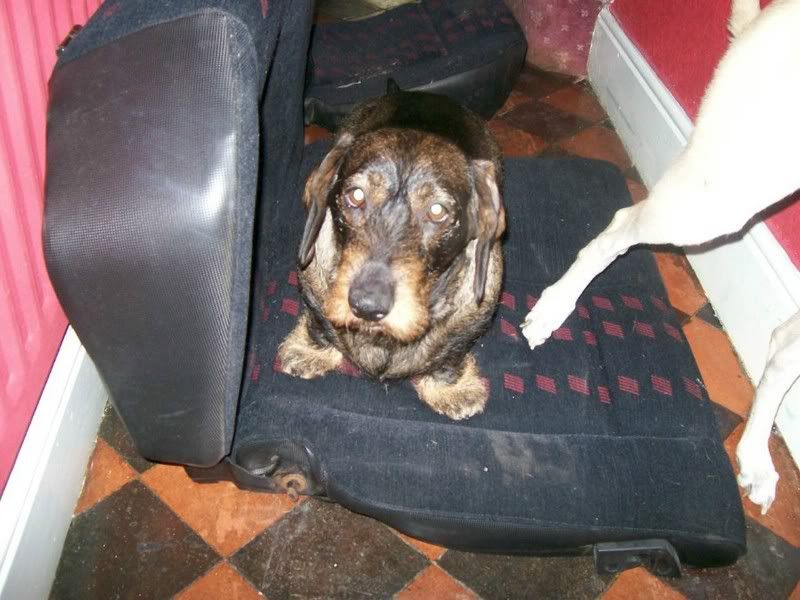
Next on the list was to clean the rear seats while they were out – but my dog informed me that the were fine just the way they were thank you very much
Front Seat Refurb
As per usual the drivers seat was worn out. So I picked up an OK ish passenger seat as mentioned earlier and set about swopping the covers. I thought Id do a write up detailing this as I would imagine that this maybe of some use to other members.
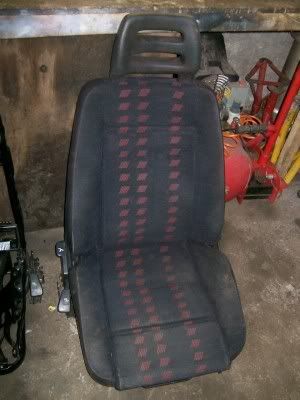
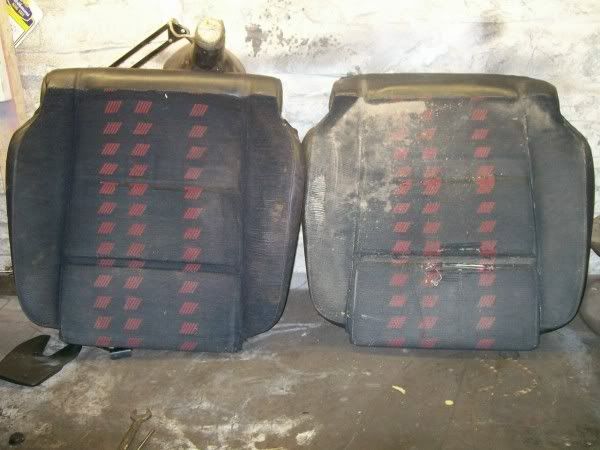
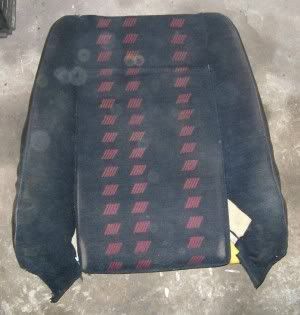
1./ The new passenger seat.
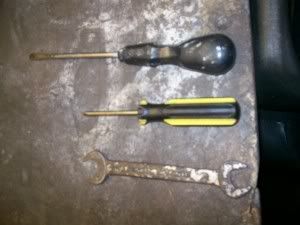
2./ Tools for the job. 17mm spanner / Flat blade screwdriver / Philips screwdriver
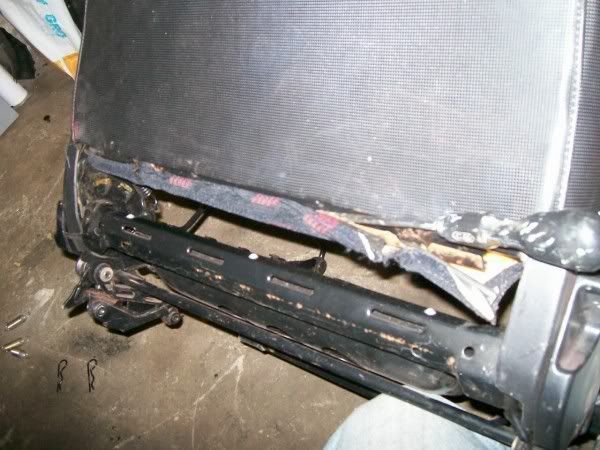
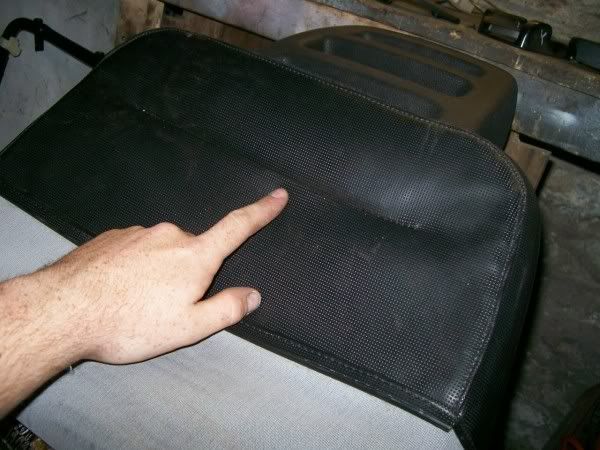
3./ Start with your old knackered seat as if you rip something it doesn’t matter. Spin it upside down and unclip the 4 base cushion plastic strips.

4./ Just prise them back with the FBS.

5./ With all 4 prised back peel the fabric back an inch or so and the cushion should now fall off the frame.
6./ New cushion sat next to the old one.
7./ Now starting from the back cushion – same as before unclip the plastic clip at the bottom of the back rest.
8./ Remove the plastic covers and lift handles.
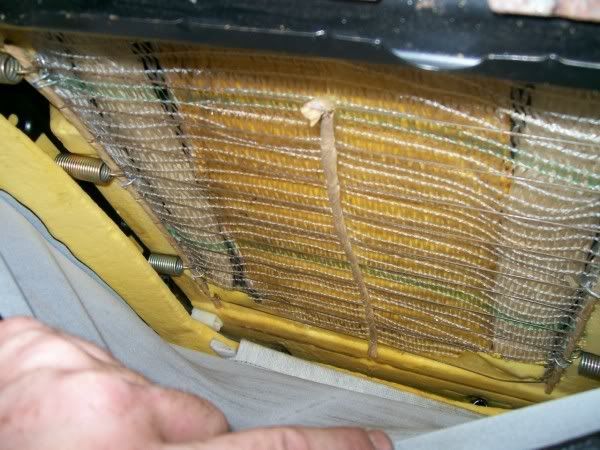
9./ Peel back the back rest fabric about 7”… you’ll find it gets hard to go further with it as its got wire restraints half way up.
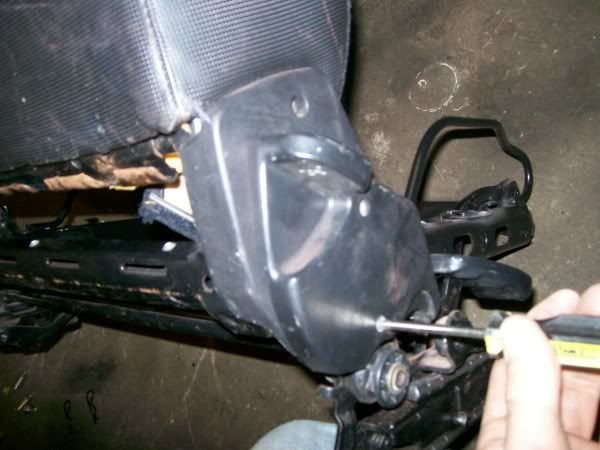
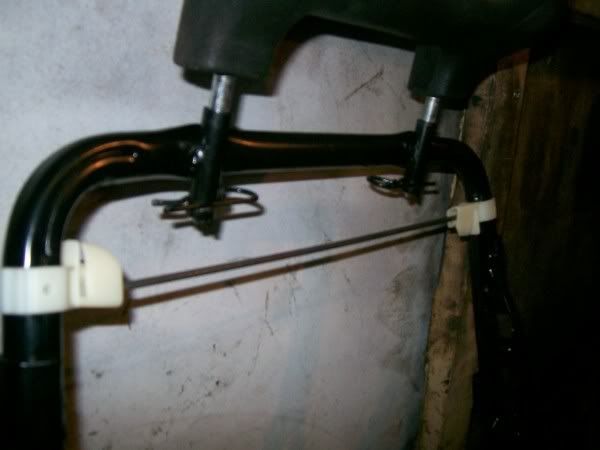
10./ Next we must remove the wire restraint sat at the top of the back rest fabric. Now looking at the pic of the old frame you can just see its held in place with two plastic clips – so simply hold the tab back and pop the wire out…. In practise you have to do this blind though.
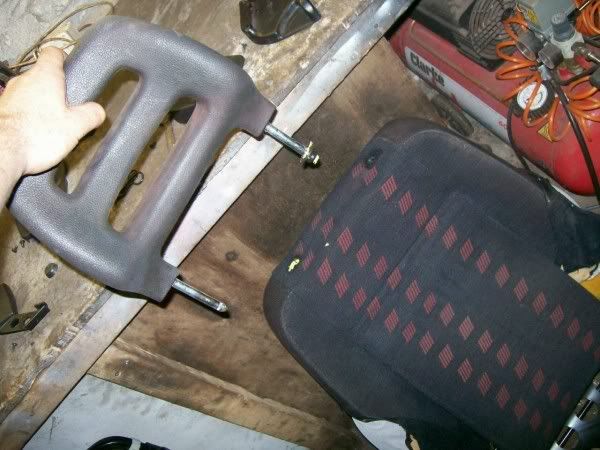
11./ Whilst we are here I then removed the head rest which is held in place by two P clips – just pull them off.
12./ Slide the headrest off.
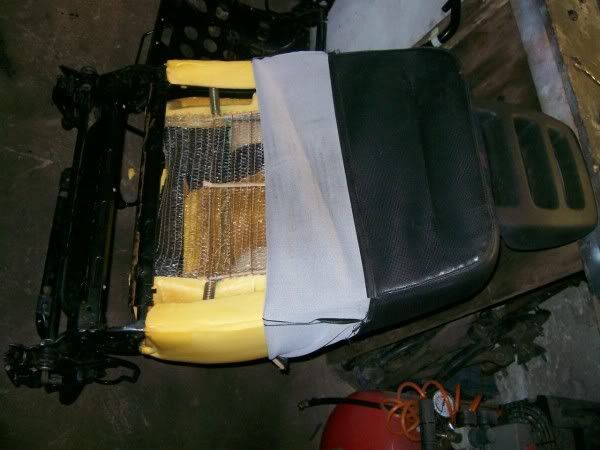
13./ Next is to un clip the 6 springs holding the central webbing in. I used the FBS again to assist with this. Also note on rebuild these springs are in size order.
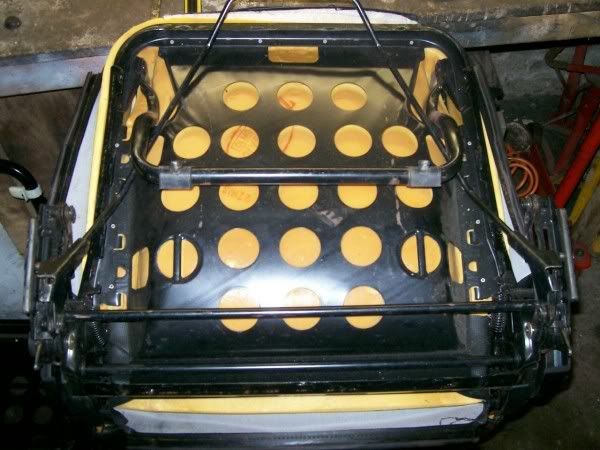
14./ And that’s it! Just slide the complete back rest off.
15./ Rebuild was just a reverse.
Well with the interior section just about finished off and looking very nice its time to move onto a new section. The front subframe seemed the obvious place as with this cleaned up the engine could then be fitted.

…more to follow in the coming weeks… please feel free to post comments ideas and opinions.
The engine isn’t sat in the car and little is known about why not. Still for just a small £25 I thought Id take the risk! So cash swopped hands and after sometime finding space and organising a trailer etc, I eventually got the car back to mine.
Some serious dust!
But with the car pushed back into my garage I then had the dubious pleasure of going through box after box of parts trying to guess what stuff was and what was missing. At first glance things looked hopeful… most stuff seemed to be there. Having said that the bumpers and bodykit were beyond repair, the interior was filthy. Rust is present on the car and can be seen creeping up the rear arches, some spots on the roof, around the windscreen and on the sills… but more of that later.
So What Have I actually got.
Trying to see exactly what’s missing and what’s broken from as early on as possible – giving me chance to plan etc. Bumpers and trim were damaged… the front bumper missing a fair chunk and the rear bumper having been painted at some point with god awful reflectors stuck on. So they both hit the bin and a replacement set and arches bought locally from UnoRacer. Unfortunately wasn’t until I got them home discovered they had a big scuff on the front bumper and one of the arches is missing the lower section… eh well, they were local and at £110 I got a replacement passenger seat and a set of lowering springs and dampers so Im far from complaining.
The alloys are corroded as you’d expect but dampers and springs look remarkably new…. Possibly even lowering springs? Ill let the experts decide on that!
The interior as mentioned already was filthy and the driver’s seat was worn out in the only way a Fiat seat can. Having said that though in my opinion the MK1 UT dash layout is one of the best ever on a production car. How oldskool retro is that! Absolutely loverely!
Found this window sticker – you know im pretty certain this radio station doesn’t actually exist anymore!
And a very nice 3rd level brake light courtesy of Halfords… nice.
Some more rust on the sills – probably the worst bit on the whole car – so looks like im going to have to do a sills replacement in the future then! But that can wait till the engines back in and see if it works! Around the windscreen is also pretty bad.
Also the scab on the roof and the NSF wing seems to have overspray on… possibly had a car park bump? But the damage on the original front bumper was OS, so doesn’t tally :?
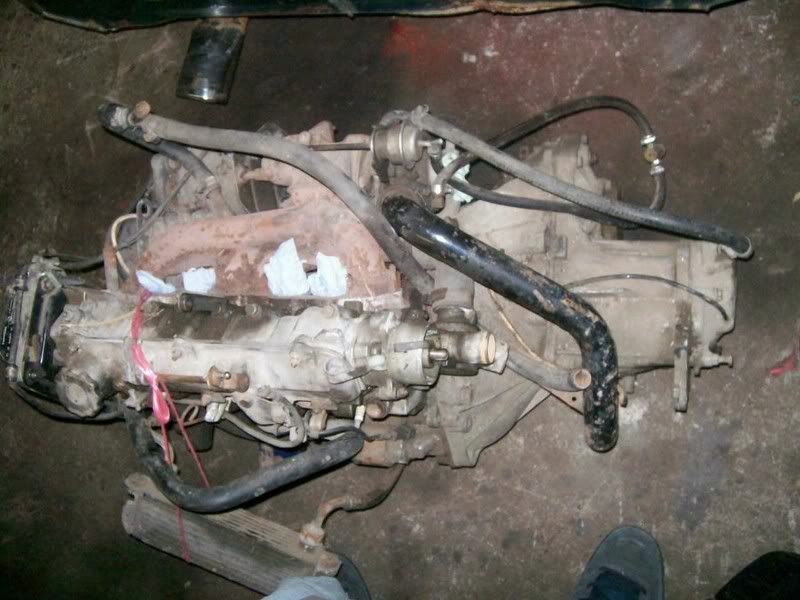
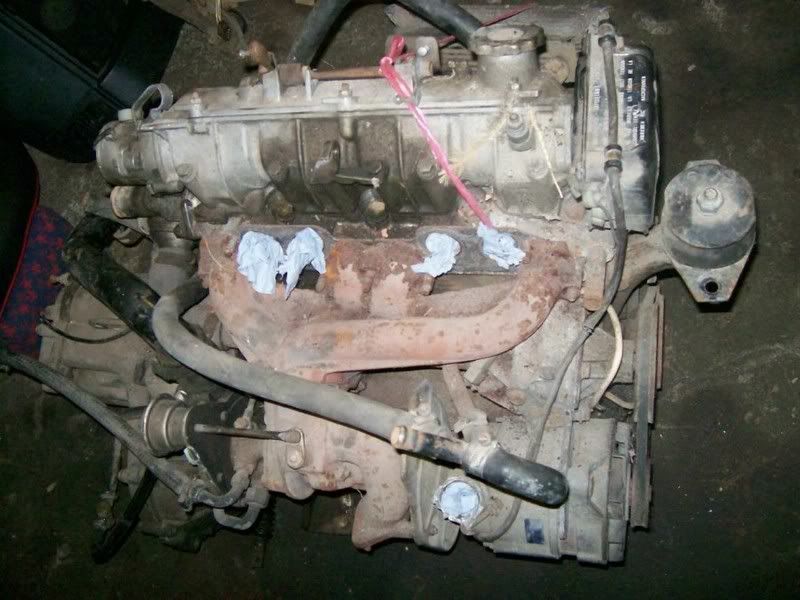
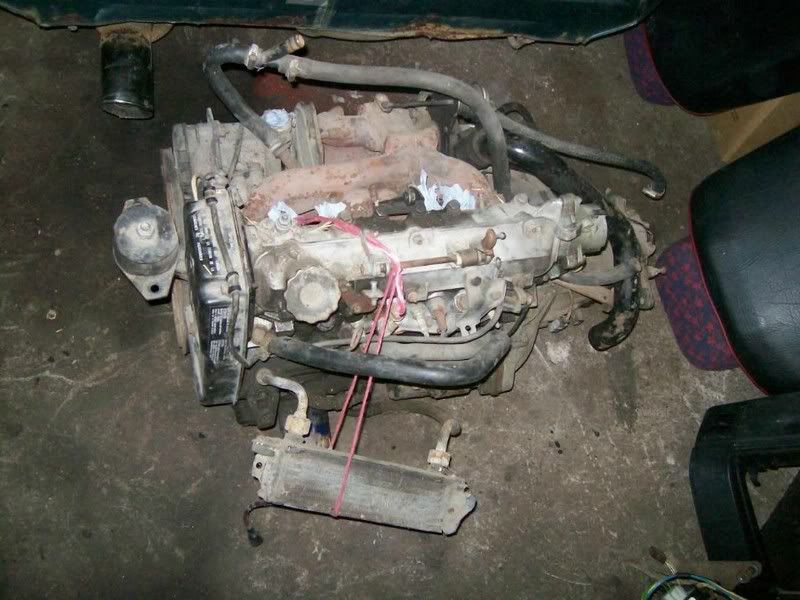
- at the moment though the major priority before I start throwing money at it is get the engine in and try to get it started before I start worrying about the body. So after putting my back out getting the engine and box in the boot for the trailer ride home – (when there was 2 of us) I really FUBAR’d it when I lifted it out again by myself.
Still it all appears to be there the waste gate isn’t seized and the turbo has no play and spins freely.
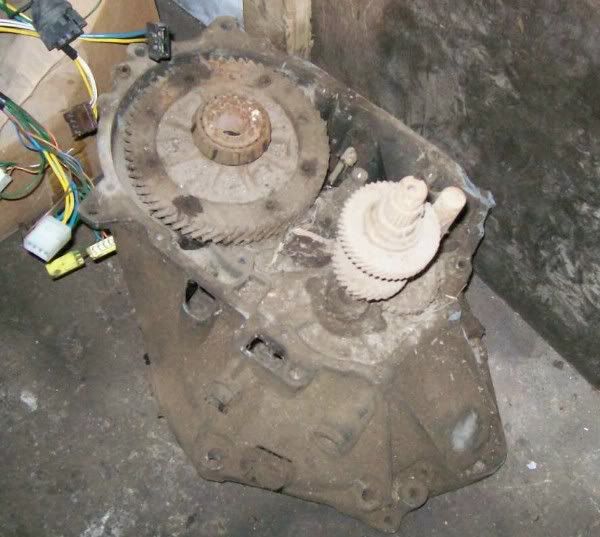
There is also a gearbox in pieces – is this the original box hence why the engines out etc? But then why was it not put back in? I also found 3 ECUs sat loose in the car and none on the bulkhead… hmm possibly an electric problem then? Talking of which I also found a large number of completely melted rotor arms. All will be revealed soon enough I suppose.
Spring Clean
First things first. After removing what must have been a tonne of boxes from the car ever hopeful I thought I would give it a quick power wash off, and see if it would T cut up into a nice gloss shine and sure enough… it didn’t! Pft, you’ve got to try haven’t you! Lol! In all seriousness I was still trying to see the damage at this point, and whilst the car isn’t going to be a show stopper and does have some rust to be dealed with its actually 95% solid and does seem to be complete.
More pics.
Rust in rear arches and around screen
I also threw on the front bumper to see what it looked like
Interior strip
Having done a few light restorations before now, but not pretending to be any expert in the matter, the way I tend to look at the car is in 5 main areas. Rear subframe / front subframe / external / internal / engine. Then just work my way through them. I generally start with the internals as its generally easily sorted and clean to work on. It also helps drum up some enthusiasm as you get to see a section of the car take shape quite quickly. (It also means I would have somewhere to put all the boxes of engine etc again rather than across my garage.
)So out comes the seats/carpet/soundproofing/trim.
One nice thing about this is you get to see the condition of the floor from the other side. In this case the Uno is really solid, but the foot wells and seat wells have a little surface rust from water sitting off damp feet I guess. But strut tops and rear seat areas are all A1.
Having said that theres evidence of someone having had bucket seats in the car and the drilled holes have rusted out. Beautiful example of the necessity to paint drilled holes!
So out came the welder… now I haven’t done that much welding in the past but what I have done has never been so difficult as welding in new plates on this Uno. The old metal was so thin and crap quality that blowing holes was definetly the name of the game – so I had to resort to going further back to better metal. The old rusty holes were completely cut out – so its not just a patch. The finished plate received a sealant and then the whole floor was thoroughly cleaned back and sprayed in a good thick layer of underseal. Its not pretty but it does the job and should protect it for a few more years yet.
Next on the list was the carpet – with this out I attacked it with the jet spray and loosened the many kilos of dirt and grime out of it.
Next on the list was to clean the rear seats while they were out – but my dog informed me that the were fine just the way they were thank you very much
Front Seat Refurb
As per usual the drivers seat was worn out. So I picked up an OK ish passenger seat as mentioned earlier and set about swopping the covers. I thought Id do a write up detailing this as I would imagine that this maybe of some use to other members.
1./ The new passenger seat.
2./ Tools for the job. 17mm spanner / Flat blade screwdriver / Philips screwdriver
3./ Start with your old knackered seat as if you rip something it doesn’t matter. Spin it upside down and unclip the 4 base cushion plastic strips.
4./ Just prise them back with the FBS.
5./ With all 4 prised back peel the fabric back an inch or so and the cushion should now fall off the frame.
6./ New cushion sat next to the old one.
7./ Now starting from the back cushion – same as before unclip the plastic clip at the bottom of the back rest.
8./ Remove the plastic covers and lift handles.
9./ Peel back the back rest fabric about 7”… you’ll find it gets hard to go further with it as its got wire restraints half way up.
10./ Next we must remove the wire restraint sat at the top of the back rest fabric. Now looking at the pic of the old frame you can just see its held in place with two plastic clips – so simply hold the tab back and pop the wire out…. In practise you have to do this blind though.
11./ Whilst we are here I then removed the head rest which is held in place by two P clips – just pull them off.
12./ Slide the headrest off.
13./ Next is to un clip the 6 springs holding the central webbing in. I used the FBS again to assist with this. Also note on rebuild these springs are in size order.
14./ And that’s it! Just slide the complete back rest off.
15./ Rebuild was just a reverse.
Well with the interior section just about finished off and looking very nice its time to move onto a new section. The front subframe seemed the obvious place as with this cleaned up the engine could then be fitted.
…more to follow in the coming weeks… please feel free to post comments ideas and opinions.