IMG_0864.jpeg

500 (Classic) Long time coming!

Introduction

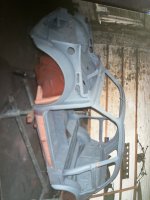
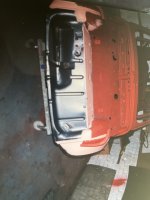
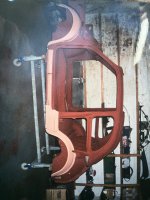
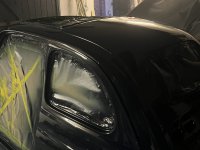
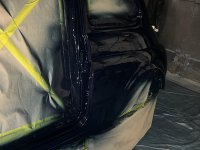
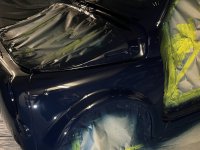
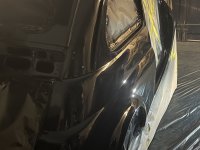
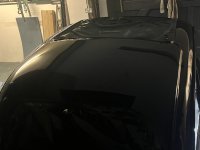
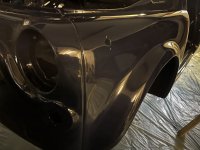
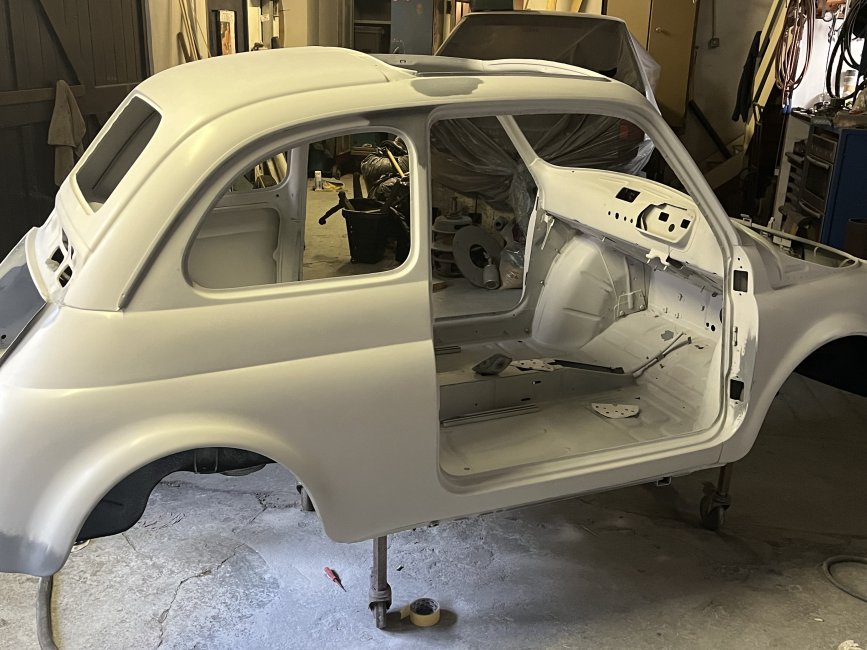
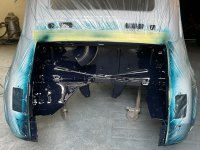
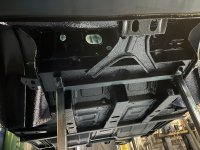
Having dug out my 500 recently after a very long time dormant (20 years since I did the panel work) I’m feeling motivated. I’ve painted the bolt on panels and today started applying some to the shell so am starting to get some thoughts towards building it up. There’s a couple of problems on this front, firstly the huge gap since I took it apart and the unfortunate fact that a lot of the parts were lost in a fire where they were stored some years ago. I’ve sourced some of the more crucial parts over the years and have spent a fair wedge recently on new stuff. I think I’m dialled in on what needs bought but its tricky knowing every small bit I'm might or might not be missing, I have tried sourcing a parts book but as yet had no luck, out of stock seems to be the theme. Does anyone know where I might buy one? or maybe an online link? I’d much prefer a paper copy.

IMG_0864.jpeg
IMG_0873.jpeg
IMG_0877.jpeg
Looking at your photos, you have done a superb job on the body-work. I have copies of both the FACTORY parts book---the "Carrozzeria" and the "Ricambio". To be honest, I don't like lending these books out as they are just about irreplaceable, BUT Cumbria isn't that far from North Wales (I live just inside the Welsh border outside Chester) and if you would like to come down to me, spend sometime looking through my copies, and as I have a "copy machine", we could copy out any pages that you need the parts for---both mechanical AND body-wise
 
I am in a similar boat but it’s 30 years since I bought the car (in boxes, so who knows what is missing). It isn’t that hard to assemble, but I have been messaging a friend with questions like “what goes here” and “what is this” to solve problems. I am now about to place my second “final order of parts” from Alex Gerstl and I fear there is a third order looming. Good luck
 
Looking at your photos, you have done a superb job on the body-work. I have copies of both the FACTORY parts book---the "Carrozzeria" and the "Ricambio". To be honest, I don't like lending these books out as they are just about irreplaceable, BUT Cumbria isn't that far from North Wales (I live just inside the Welsh border outside Chester) and if you would like to come down to me, spend sometime looking through my copies, and as I have a "copy machine", we could copy out any pages that you need the parts for---both mechanical AND body-wise
Thanks Tom, it’ll come out ok I think. The door fit is tolerable but not really as good as I’d like, pattern parts are a bit like that though. Looking at the receipt I see I paid £120 each for the doors so maybe you get what you pay for. I remember at the time I could panel the whole car for not much money which at the time I went for. It really was a good shell to start with, maybe I’d fix it as it stood these days. I’ll take a photo of a photo later to show it in works.
It’s a very kind offer of yours, I may take you up on that at some stage. I’ll see what comes out of the boxes when I’m done painting. There’ll no doubt be some head scratching.
 
I am in a similar boat but it’s 30 years since I bought the car (in boxes, so who knows what is missing). It isn’t that hard to assemble, but I have been messaging a friend with questions like “what goes here” and “what is this” to solve problems. I am now about to place my second “final order of parts” from Alex Gerstl and I fear there is a third order looming. Good luck

30 years Mike! I thought I was a bit behind schedule!

I’m hearing you on the parts orders, I’m just about to make a second bulk purchase and won’t be done even then. Nice that mostly everything can be bought though that doesn’t solve my need for a rhd wiper mechanism as they don’t exist it seems.
 
Tonight’s instalment, try as I did there’s still some bits that resisted coverage. Might need to get a nice brush for touching in. There’s a bit of muck in it which I’ll flat out whilst dealing with the big saggy curtain I have in one bit 🥹
IMG_0888.jpeg
IMG_0891.jpeg
 
30 years Mike! I thought I was a bit behind schedule!

I’m hearing you on the parts orders, I’m just about to make a second bulk purchase and won’t be done even then. Nice that mostly everything can be bought though that doesn’t solve my need for a rhd wiper mechanism as they don’t exist it seems.
A friend of mine managed to obtain a RHD wiper linkage set-up for me from "Riambi Auto Classiche". If you contact me direct ( [email protected] ) I will pass on all the information that is on the box to you---I have a mobile number, a land-line/fax number and a (possibly, still valid) e-mail address. I believe that the company is in Switzerland. It may be of help to you
 
Looking good. Always such a transformation when the paint goes on. 🙂
I must give my fingers (and brain!) a good talking too----the supplier of my wiper linkage was "RiCambi Auto Classiche". Contact me direct and I will pass on all the contact info that I have for them
 
I must give my fingers (and brain!) a good talking too----the supplier of my wiper linkage was "RiCambi Auto Classiche". Contact me direct and I will pass on all the contact info that I have for them
Hi Tom,

I’ve sent you an email, I use an AOL email account which often ends up in new contacts spam folders if you don’t see it in your regular inbox. Many thanks.
 
Inside done after much masking to protect the outside and bits already painted, took ages and cost me £7 for a roll of masking tape that proclaimed to be quality sticking but able to be removed without the dreaded damage to paint/primer. The anxiety was high when unwrapping as I’d had dismay on the last stage when I stripped the masking but thankfully the expensive tape was well worth its money. In honesty I’m not too thrilled with the inside, it’s a bit thin in places and loads of muck but it’ll have to do. The pictures make it look better than in the flesh, obviously I’ve picked the best ones 😂
IMG_0910.jpeg
IMG_0914.jpeg
IMG_0916.jpeg
 
He’s still to unwrap and there’s every chance that’ll be traumatic but at long last Malcolm wears a coat of shiny paint, it’s been a long time coming. There’s a fair bit of muck in it but I don’t mind as I poured it on good and proper so there’s plenty of meat to flat and polish, it should be pretty good once I’ve done that. I’m pleased on initial inspection regarding flatness. The roof had trauma when I had it blasted all those years ago, he was a bit enthusiastic and buckled the roof skin trying to get adhesive off the inside where the roof lining was. Even all these years later I remember how horrendous it was, I had to teach myself metal shrinking old school stylie. This involved applied gas torch to high areas which causes the metal to egg up (yes, like a half egg) and then quickly moving the metal towards it middle with relevant techniques, not easy and very scary but to my eye it’s worked a treat.
I’d like too blast off the reassembly but there’s a number of bits to purchase still and others to refurbish but at least I can make a start, once I get some polishing done.
Yippee 😃
 

Attachments

  • IMG_0930.jpeg
    IMG_0930.jpeg
    1.6 MB · Views: 59
  • IMG_0929.jpeg
    IMG_0929.jpeg
    1.9 MB · Views: 110
  • IMG_0927.jpeg
    IMG_0927.jpeg
    1.9 MB · Views: 65
  • IMG_0925.jpeg
    IMG_0925.jpeg
    1.8 MB · Views: 260
  • IMG_0924.jpeg
    IMG_0924.jpeg
    1.7 MB · Views: 71
  • IMG_0923.jpeg
    IMG_0923.jpeg
    1.6 MB · Views: 81
  • IMG_0919.jpeg
    IMG_0919.jpeg
    2.7 MB · Views: 184
Inside done after much masking to protect the outside and bits already painted, took ages and cost me £7 for a roll of masking tape that proclaimed to be quality sticking but able to be removed without the dreaded damage to paint/primer. The anxiety was high when unwrapping as I’d had dismay on the last stage when I stripped the masking but thankfully the expensive tape was well worth its money. In honesty I’m not too thrilled with the inside, it’s a bit thin in places and loads of muck but it’ll have to do. The pictures make it look better than in the flesh, obviously I’ve picked the best ones 😂View attachment 447961View attachment 447962View attachment 447963
Like my car - loads of effort going into bits that noone will ever see, but it makes you feel better!
 
He’s still to unwrap and there’s every chance that’ll be traumatic but at long last Malcolm wears a coat of shiny paint, it’s been a long time coming. There’s a fair bit of muck in it but I don’t mind as I poured it on good and proper so there’s plenty of meat to flat and polish, it should be pretty good once I’ve done that. I’m pleased on initial inspection regarding flatness. The roof had trauma when I had it blasted all those years ago, he was a bit enthusiastic and buckled the roof skin trying to get adhesive off the inside where the roof lining was. Even all these years later I remember how horrendous it was, I had to teach myself metal shrinking old school stylie. This involved applied gas torch to high areas which causes the metal to egg up (yes, like a half egg) and then quickly moving the metal towards it middle with relevant techniques, not easy and very scary but to my eye it’s worked a treat.
I’d like too blast off the reassembly but there’s a number of bits to purchase still and others to refurbish but at least I can make a start, once I get some polishing done.
Yippee 😃
It does look really good. It's must be so satisfying getting paint on the shell after all this time and being in a position where you can put it back together and actually enjoy it again!
 
So I did paint it again, I blame my compressor which isn’t very big and was running hard the first time and got too hot towards the end. I managed to borrow the use of next doors air source which is a much better setup with a dryer and this time it went better. Not perfect but good enough to work with. I’m 3/4 of the way through flatting and polishing but a few pictures to show the state of play. Couldn’t resist putting the badge of the front, the start or reassembly 🤟
I’ve had a load of bits in the electrolysis tank and am fairly close to having the bits to put it back on its wheels, stuff to paint and assemble before that day but it’s there on the horizon 😃
 
Back
Top