General Introducing a new toy

Currently reading:
General Introducing a new toy

This is about sorting out holes that a spot weld drill has caused but it just as easily sorts any manner of large holes where really you'd like metal

1.jpg

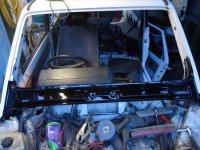
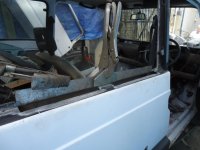
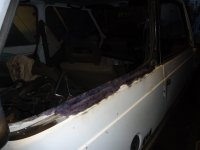
So what we are looking at is the windscreen frame, a hole and a piece of copper tube hammered flat, held in place with Molegrips.

You can't weld to copper. Or more exactly welding is joining two similar materials by melting them together and that don't happen with steel mig wire and copper.

So our flattened tube absorbs loads of heat and acts as a platform to build up an nice blob of weld without getting anything stuck to it.

Like magic, grind down the weld blob and.........
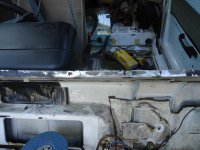
2.jpg

Fantastic. Better to have a thicker piece of copper but this will do.
It also works if you are wanting to butt weld very thin stuff. The copper acting as a heat sink.
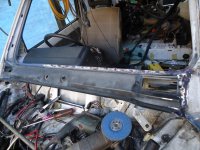
3.jpg

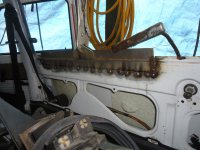
After a couple of hours of trimming fitting, trimming fitting etc etc, this is Ronnies panel welded in place. A wipe of filler to keep everything smooth and I can paint it tommorow night and hopefully refit the windscreen on Saturday.

And to think some people waste valuable garage time watching TV
 
Last edited by a moderator:
Kind of still on plan and managing to keep up the momentum although it will be dificult for the next week or so. However;

1.jpg

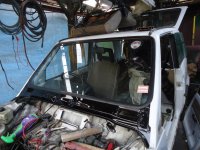
The screen has more chips than Macdonalds but it will do for now and keeps the weather out.

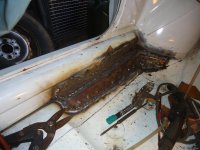
Welding the passenger side footwell next.
1st consider the options and form a cunning plan. Hmmn. In a perfect world I would remove the outer sill, do the repairs from inside that and then weld back the sill section.
Hmmn........... Nah. I just want to make it strong and the extra welds caused by cutting the outer sill wouldn't help.
I'm not going for concors and if people can see the repair then at least then there is nothing hidden.
So it's the (by now) familiar route of: make a cardboard template, transfer that to steel and.............

2.jpg

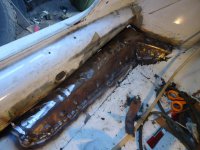
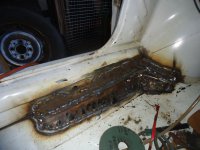
The cunning plan meant that this plate was going to be in 3 bits.
This, obviously, is the main one. I drilled loads of holes in it so that I could plug weld it to whatever good metal was left in the floor. And then I seam welded it as well.

3.jpg

Then it was an 'L' section piece, again drilled for plug welds, to conect the floor and inner sill.

4.jpg

Then much the same to close it onto the wheel well. Everything got seam welded to save me having to think about whether the repairs are within the proscibed viscinity of anything structural.
As far as I am concerned Panda's are so small that everything falls inside that catagory.
The other thing is that I might be sitting in it so it gets done strong or not at all.

It will need knocking back and a bit of paint (no not NATO green before Homie asks) but I'm already making a plate for this bit.

5.jpg

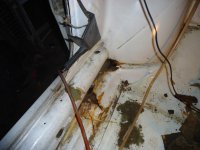
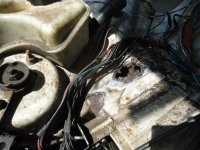
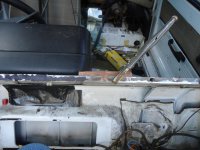
This is the battery mount which just happens to be directly below one of the places where the front scuttle had rusted through.

Once this is done then I will move onto the bit of floor directly below the battery mount where the water final exited the car:bang:
 
Last edited by a moderator:
Fantastic work as ever, and very relevant to me as I have to work on my inner sills / floor next.
How did you manage to seam weld so heavily without burning it through? Did you use your copper heatsink trick?
 
How did you manage to seam weld so heavily without burning it through? Did you use your copper heatsink trick?

You can do the copper trick for this but I didn't.

Most people's welding problems are not enough penertration (in fact ever since I was a teenager that has been one of my problems) usually caused by pussyfooting about and not using enoug heat/power.

When welding thin metal turn the power setting down and the wire speed up. Strangely this enables you to loose excess heat into the increased weld pool (more wire).

Also always weld thick to thin. Usually this is new metal to the original; cos the new stuff takes the heat better.

Weld in brief spurts. You get used to judging how far you can go before buring a hole. After a while you can 'hear' how a weld is going. This refers to the sizzling bacon sound when everything is going well.

It is also possible to fill holes without changing any settings by laying a circle of 'tacks' around the edge and then building a pool like a walnut whip.

Is any of this what you were asking about...?:)
 
Last edited:
Yes, very much so thanks. I am getting better! You are right about penetration (! )
I have realised that it is better to risk the odd hole that can be filled (this is very "Carry On" isn't it!) than having a whole weld that is too cold.
 
After 10 days the man cold is actually worse, so I'm trying the denial approach and keeping busy.

1.jpg

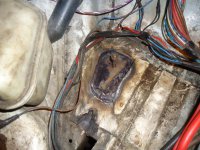
This is the battery clamp post and the liquid it is swimming in is rust converter. This was all pretty straight forward other that setting fire to some sound proofing inside the car.
Ah well these things happen:confused:
Haven't decided what to do with the little rusty patch in front of it yet

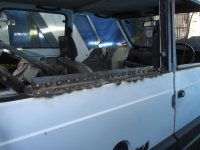
Attention turned to the O/S rear window frame which involved making a couple of new sections.
I decided to make one long piece for the inside while making two bits and keeping an original central piece on the outside to make sure the panel gap stayed correct.
2.jpg

3.jpg

For a simple little section I ended up making 3 of them.
The first one was fine; except I then noticed that the width of the bendline tapers front to back.
So I made another one; And got the taper running from back to front. Oops.
By the third one I was starting to get the hang of it.

4.jpg

Outer bits in place

5.jpg

Trimmed up and sloshed over with rust converter.
Next step is to knock the inside welds back, a smear of filler and a spot of paint. Then put the window back in. Rah(y)
 
Last edited by a moderator:
I've had a cold for so long that I'm thinking of getting it sponsored in support of charity.

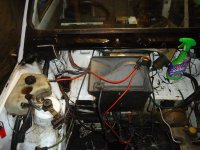
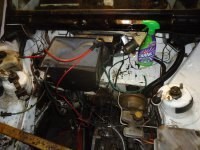
I felt better enough tonight to manage my 'Hour' and performed what I know will appeal to some of our more fastidious (and detail niggly picking sort of stuff) namely washed out the engine bay prior to replacing the heater box

1.jpg

2.jpg

It will need a further session but the old girl is gradually starting to scrub up all right(y)
 
Last edited by a moderator:
Here they come; I knew if I eventually cleaned something then instantly new friends would gather around me;)

Yes Barry was a big help (I am sad enough to have googled him in the past and he really is made up unlike Santa who is very real or no more Panda's for me) and when I finished all the change in my pocket was shiny halfway across the coin.
Same with my keys; they've never looked so good.

(Why do I know that this is only the start)
 
This one will be released back into the wild and hopefully become a value for money strong 4x4 for some unsuspecting forum member.
I'm going to have to stop working on it for a month or so in order to do some more to my old bedford. I have a couple of shows booked and it would be embarrassing to turn up with no obvious progress since last year.


Right then, I'm trying to be a good boy and use the proper photo imaging thingamybob so I don't know what might occurr or if I will ever find my pic library again..........

This is the drivers footwell; or more exactly this is a quite tricky plate I made to repair the drivers footwell. It is all one piece and has a 10mm flat fold in it so that I could really bang it tight into the inner cill.
The multitude of holes is so that the plate can grab (weld thru) onto any good bits of surviving Panda.


And after some time this is how it ended up.


This will be the next job then; I'm still working out how I will close it i.e. what shape plate or plates I will make.

While I do appreciate that this kind of plating is quite offensive to 'restorer types' the car doesn't have the value in it to make a neater/longer job.
At the end of the day a Panda has to have value (which may be intrinsic or emotional) next time the car gets repaired I'm sure it's 'worth' will be higher due to it survival as a result of these horrid welded plates.

What I'm trying to say here is that at least I have managed to resist just hammering it all flat and welding a square of 2mm over everything.:)

Laters(y)
 
Sorry to resurrect an old thread I am in the process of changing the scuttle panel myself, question is at the ends where it meets the a pillar is the scuttle panel brazed to the a pillar I have gotten the spot welds out but the bigger does not want to move
 
Unless the very ends have rotted out the leave them there, cut the new skuttle to fit and 'joddle' the ends to attach to the original bodywork.

Tell me if this doesn't make any sense.

As an update; I'm no nearer getting back to work on this one. Having moved house I am in the process of building a 'Panda Barn' and the 'white 4x4' :bang: is still resting 45 miles away.
 
As an update; I'm no nearer getting back to work on this one. Having moved house I am in the process of building a 'Panda Barn' and the 'white 4x4' :bang: is still resting 45 miles away.

Shame about the lack of progress, but Panda Barn sounds good!! Looking forward to having you back on the forum more often once it's finished and seeing some more of your great projects (y)
 
Back
Top