General Introducing a new toy

Currently reading:
General Introducing a new toy

Joined
Oct 26, 2012
Messages
1,233
Points
507
Location
Clacton on Sea essex
So of the more astute members might recognise this one.
Suffice to say that the last ower did lots of work which turned into a kind of 'Forth Bridge' scenario and ultimately lost heart.

1.jpg

It's an old rusty 4x4 that isn't quite ready to be turned into Coke cans just yet.

I must confess that my original intention was to build a 6x4 Panda but due to pressure of projects it will probably just get fixed. Oh yeah and my wife said I mustn't 6 wheel it. Ah another car and another time.

2.jpg

First obvious issue is the fact that there is no engine.
Not a problem. The late 'Purple Ronnie' happily donated a running injection example and fitted with an Ebay rescue carb'd head it will continue to provide service.

3.jpg
4.jpg

Yes it is a hideous colour but I had a big tin of Rustoleam left over from something else.

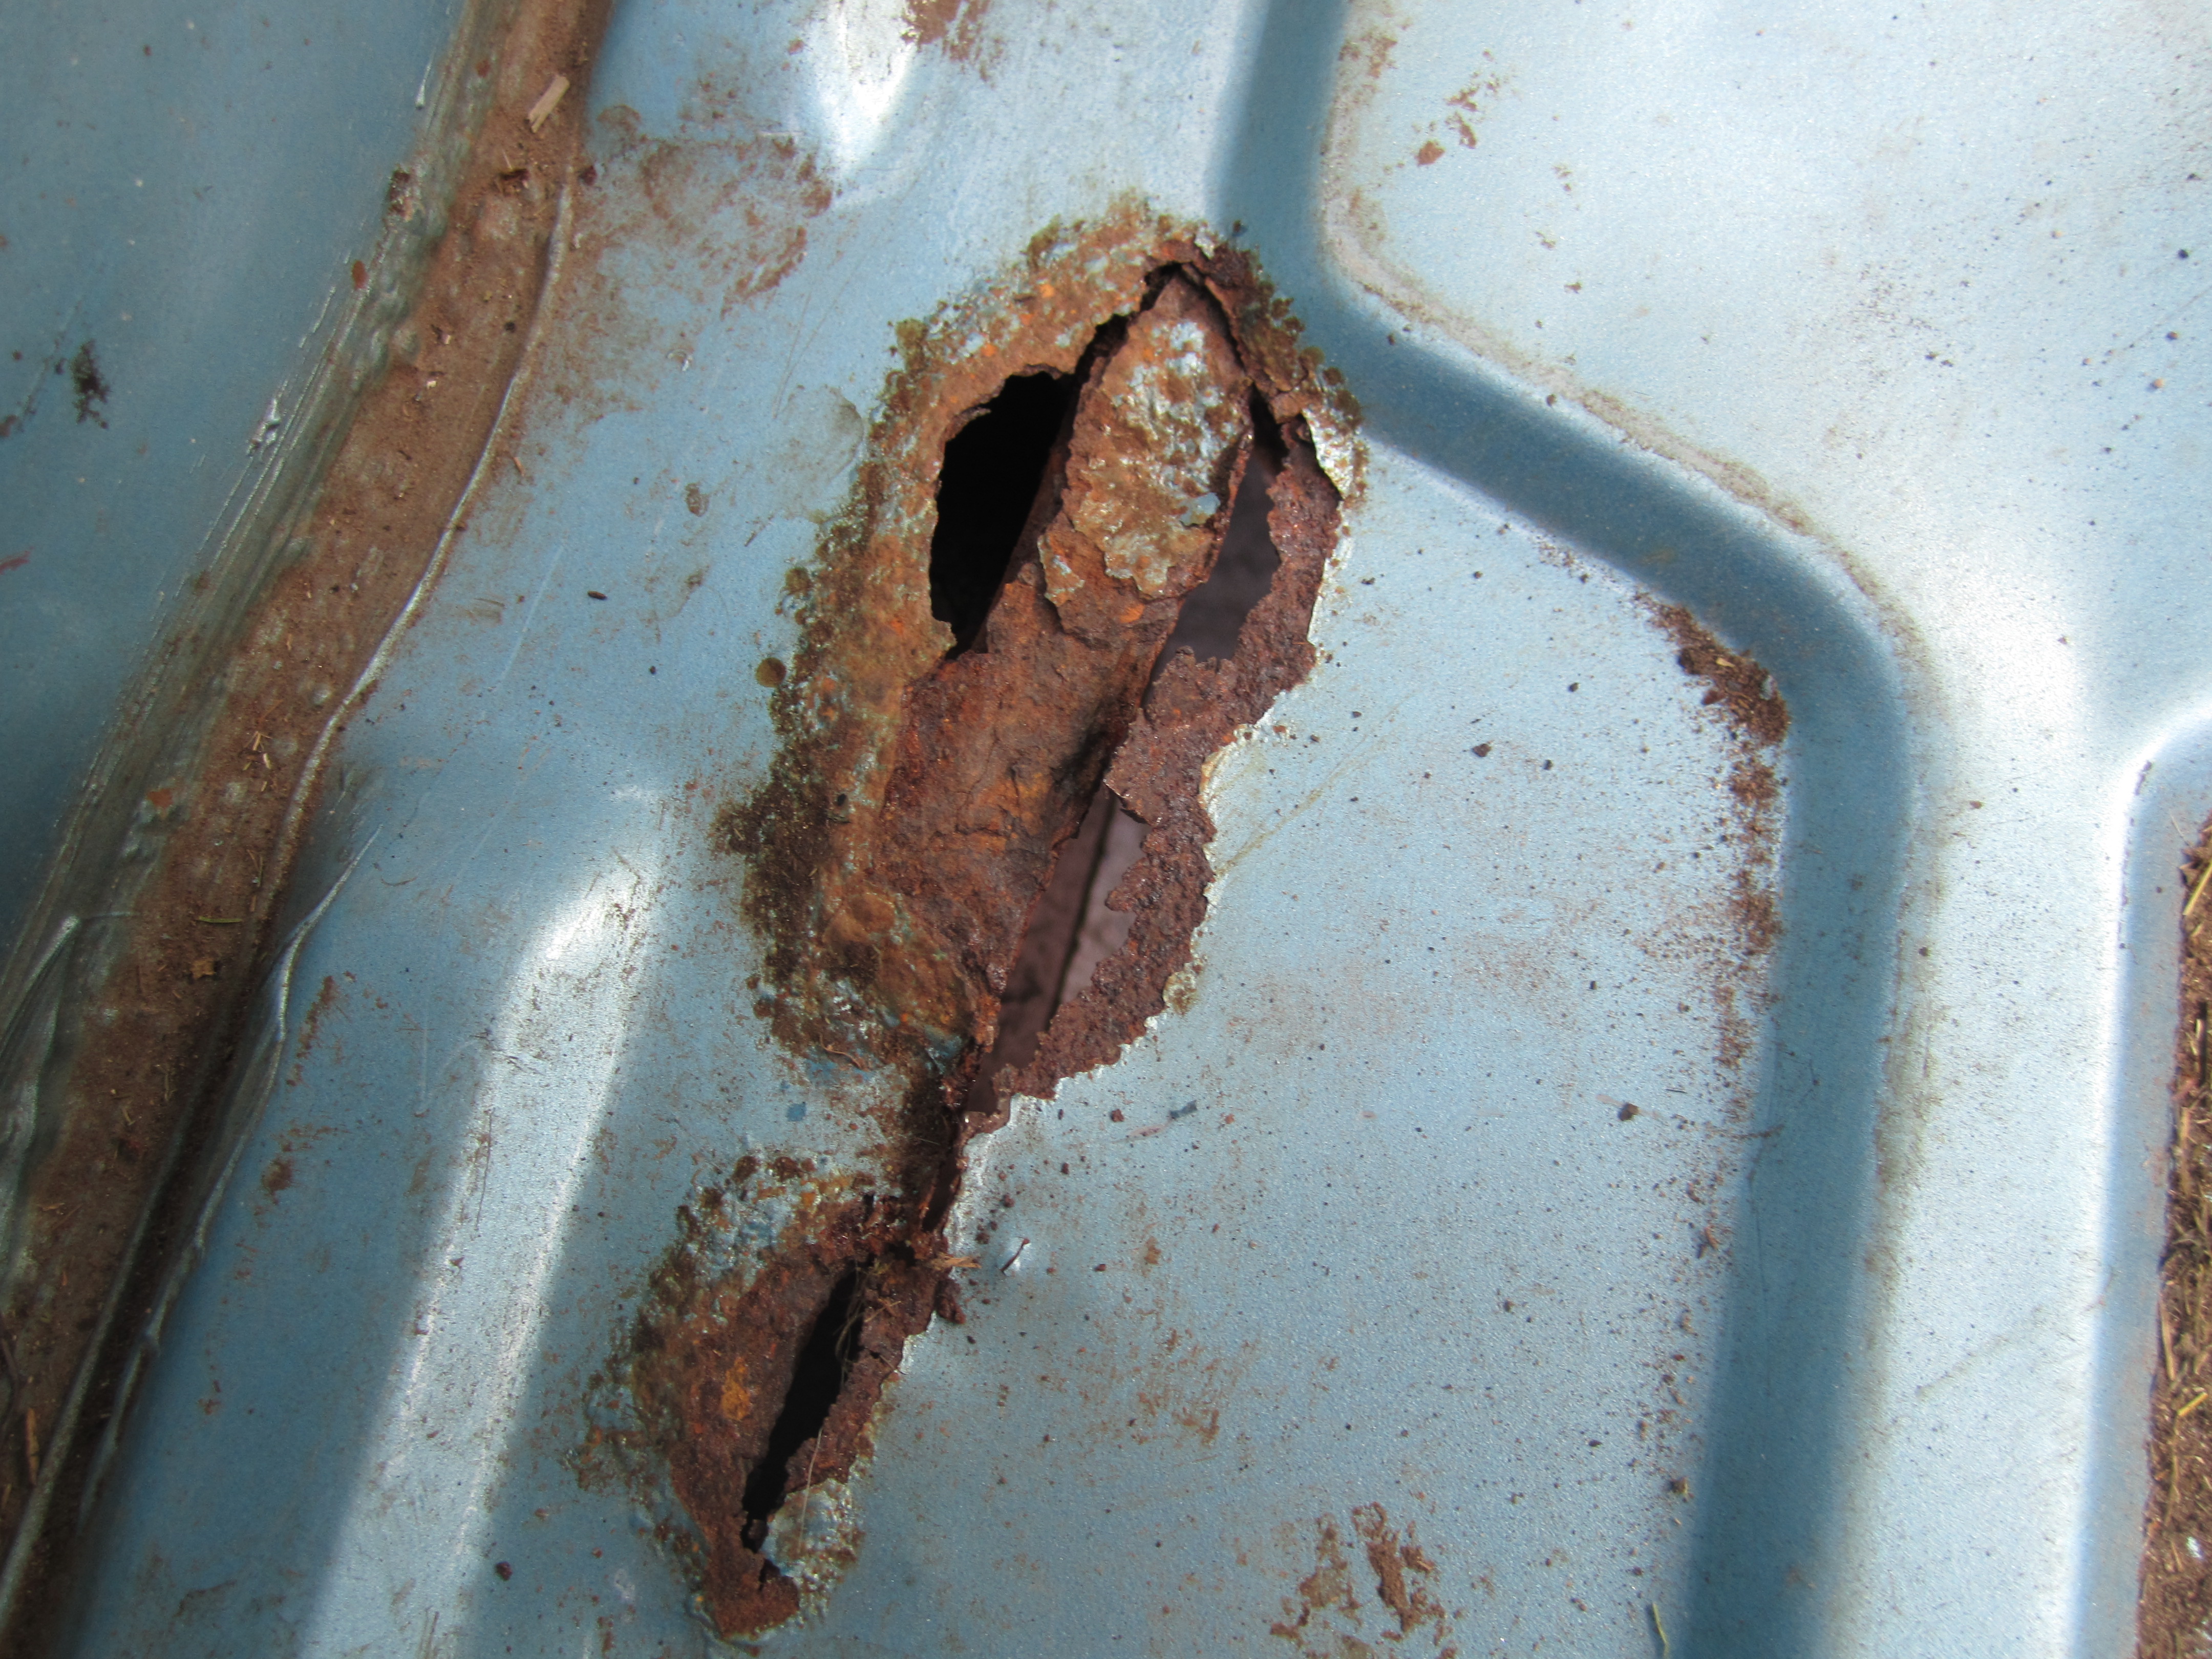
There are obvious rust issues
5.jpg
6.jpg

With yet another successfull screen removal I found this.

7.jpg
8.jpg

Fortunately 'Purple Ronnie' donated this
9.jpg

That will be a perfect condition scuttle panel then.
 
Last edited by a moderator:
Rub it in why don't you. ;)

I have a MkII Punto 1242 8V in a five door shell if you need complete fit and forget engine. :D

The engine's the best thing about the whole car.
 
Having had a little time to reflect about Peterborough. If I had the space to strip the car and tackle everything at once it'd be done. It was the doing a job and having to do another, and another, and another (mostly previous bodges) that just made if frustrating.

I still have the spare wheel holder and Vitara bull bar in my shed if anyone wants them. ;)
 
I've been prodding and probing, trying to dig out all the rust.

1.jpg

This bit didn't take a lot of looking for, once I had pulled the carpet and the soundproofing out

2.jpg

The drivers side floor was much harder to find. It was only when I cut out the original seam sealer that it was obvious.

This rear window seam was a bit of a surprise

3.jpg
4.jpg


A lot of the rust is quite hidden and at first glance looks fine. Hit it with a rotary wire brush and it all gets very different

I spent the afternoon and evening underneath scraping off underseal.

The car had a generous coating of underseal but a lot of it has got to the stage where it now traps moisture rather than holding it at bay.
However the corrosion isn't as bad as I had expected and most of it will be ok once cleaned off and treated/painted.

5.jpg

This panel looked OK at first but once the rubber seal came off there was a lot of tin worm under the seam.

You have to start somewhere so I fired up the grinder.


6.jpg

It was a very simple repair panel to make although it did have to be in two parts so that I could wiggle it into place..

7.jpg

And here it is freshly burned into place. I have explained the method before but is anyone is curious just ask.

8.jpg

This is an excess piece of the section I bent up. Just an angle at the top to match the existing body and then 'Joggled' at the bottom edge so that the new panel lays level with the original bodywork

It's plug welded into place. So the next stage is to 'Knock it back' i.e. grind it off and then smear some filler over the join so that the repair is only our little secret.
 
Last edited by a moderator:
All very familiar, but not all on the same Panda!

A friend of mine has a white 4x4 with rust at the bottom of a rear side window too. It seems to be caused by water being held by the rubber seal. In my friends case it's rusted where the ends of the seal join together, this more commonly happens in the door seals and starts to rust the top of the sills.
 
This is the back panel of the 'White one' with a smear of filler over the joint.

1.jpg

You will notice that there is a big difference between my 'Smear' of filler and one that is applied by a 'vehicle restorer' for whom a £5 tin of Bondo will last the rest of their life.

I subscribe to the 'bodyshop' school of thought which means you spread a thin layer of filler over a wide area and then you can quickly contol the whole panel. A restorer will **** about for hours and hours. At the end it will look the same and I may never know who is right or if anyone is.
 
Last edited by a moderator:
So no guesses for what I've been up to tonight.

1.jpg

While a 'local' repair, on either end of the windscreen frame, would have been much easier, the rust was starting down the inside (above the dash) as well and that would have a pig od a little repair.

And of course I had 'Purple Ronnies' panel which is perfect except for the corners I cut off removing it. Doh.

The rust was that extensive that while I was trimming the donor panel up prior to fitting, I left some 'extra' original bits on .

2.jpg

While it's not instantly obvious how much rust I had to cut out in this pic.....


3.jpg

It is quite apparent when 'Ronnies' panel is offered up


4.jpg

You can see that there is still lots of trimming to do but the section will sort all of the issues in one fell swoop.

5.jpg
 
Last edited by a moderator:
As a point of interest........... Someone might like to know how I got the original panel out.

1.jpg

This is the donor panel but the principal is the same.

Cars body sections are 'Spot Welded' this is where panel flanges are held together and then the spot welding machine clamps an electrode either side and passes a current through the joint for less than a second. The huge current 'fuses' the inner parts of the joint together permanently. Well usually permanently.
The 'Spots' are positioned a couple of inches apart.
Motor manufacturers like spot welding because it is very effective, very fast and very cheap.

2.jpg

A Spot weld drill is self centering (with a stubby tip) and removes one layer of the joint including the fused bit.

It is scary how easily a whole car could come apart.
The trick is seeing where the 'spots' are. They look like little dimples.
If they are not obvious then usually a rotary wire brush will highlight them.
The spot drill isn't infalable and often a small amount of jiggling and probing the joint is involved.

Once apart the remaining surface will need 'cleaning and dressing'. Which is to say; running over with a flexible disc on a grinder and tapping flat with a hammer and 'dolly' or a hammer and a heavy lump of metal, or two hammers etc etc.

Very often the spot drill will burst through both layers leaving a gaping 8mm hole. This isn't a crisis. All will be revealed.
 
Last edited by a moderator:
Back
Top