Technical 650 Engine Rebuild

Currently reading:
Technical 650 Engine Rebuild

Joined
Mar 7, 2005
Messages
6,240
Points
1,615
Location
Nairn
This might become another long saga.:)

As described elsewhere, I just bought this engine, quite cheaply, with not much idea of it's history or mileage. What I do know is that it was in an off-road runabout Fiat 500 for the previous owner's kids...so expect the worst.

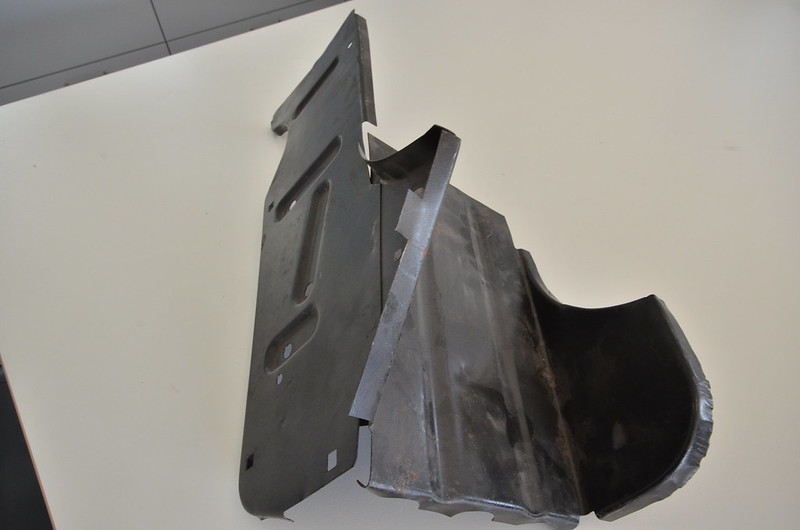
Its more or less in bits now, with no traumas or difficulties with that.
I've done some measuring and the results are a bit ambiguous, which is partly because I'm not used to this standard of measuring.
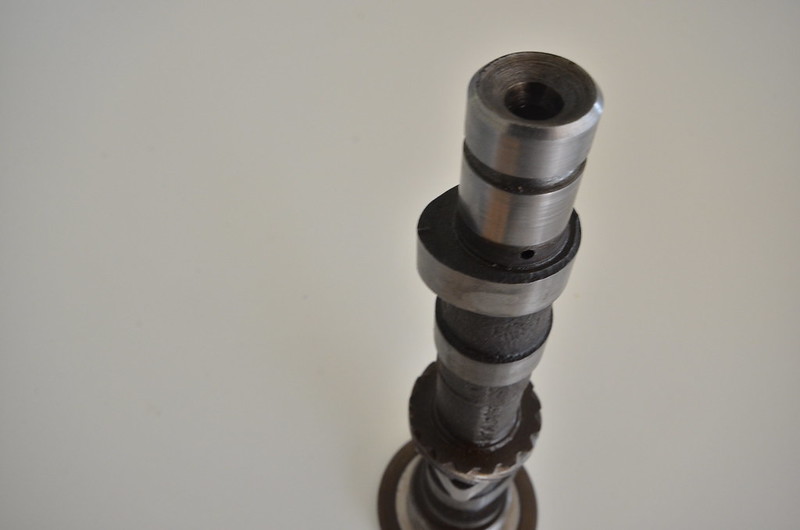
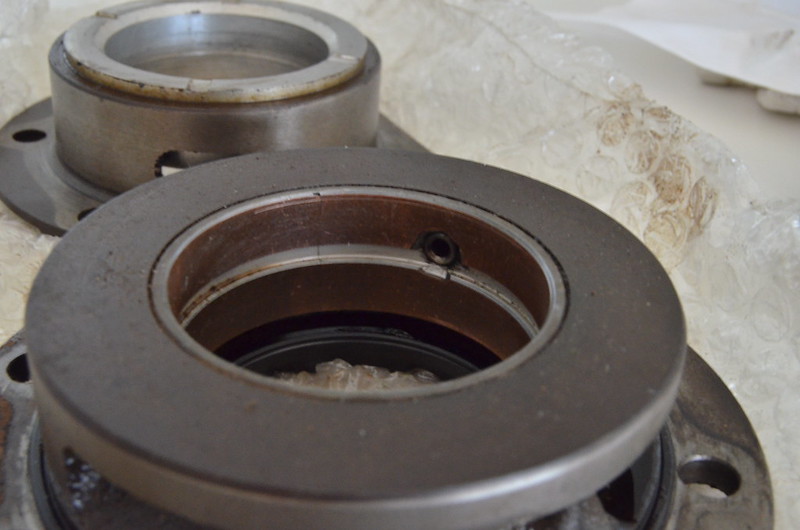
All the bearing journals appear to be within wear limits for standard size but the rear main bearing itself is worn to a copper backing.
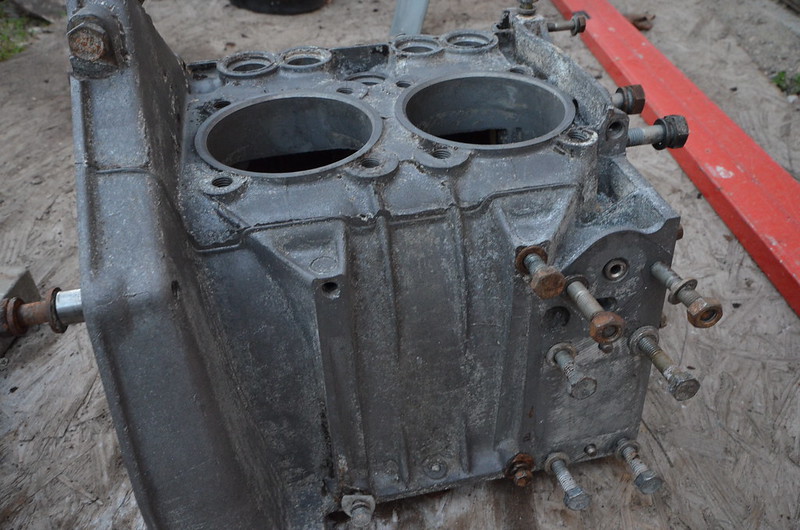
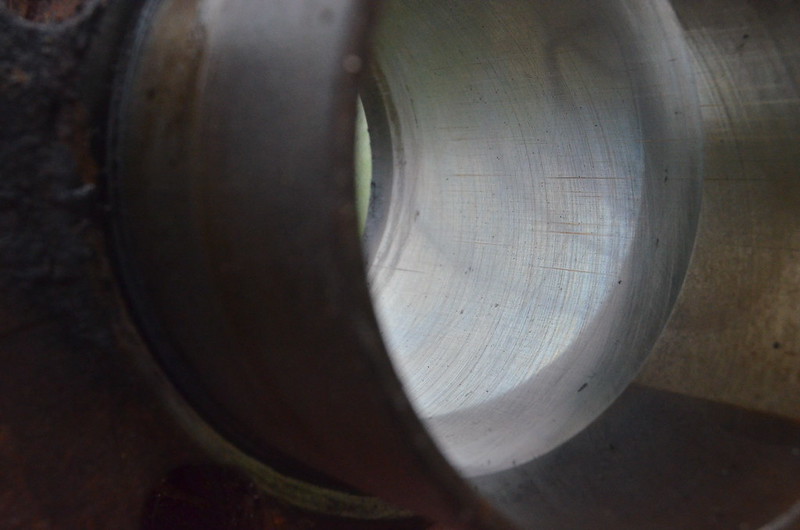
The bores have no wear lip and I can make out the swilrls of the original honing in places. Both the bores and the journals have very little in the way of grooving and what is there is very fine.
FOR_4139 by Peter Thompson, on Flickr
FOR_4129 by Peter Thompson, on Flickr
FOR_4132 by Peter Thompson, on Flickr
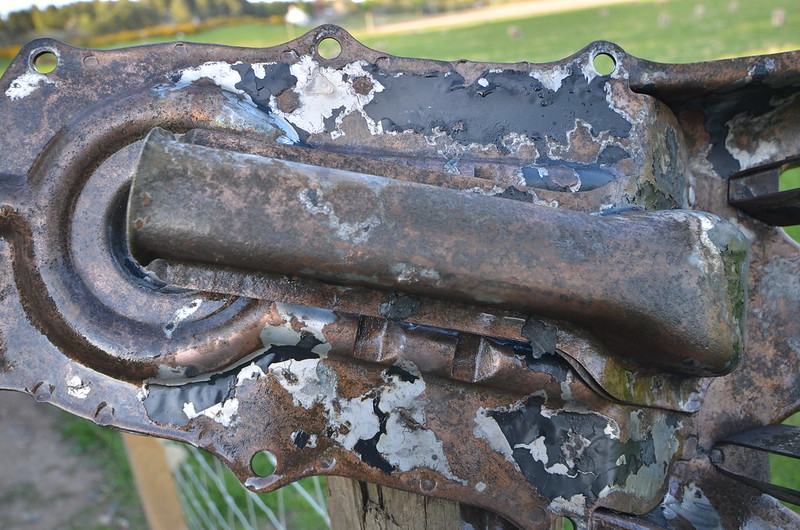
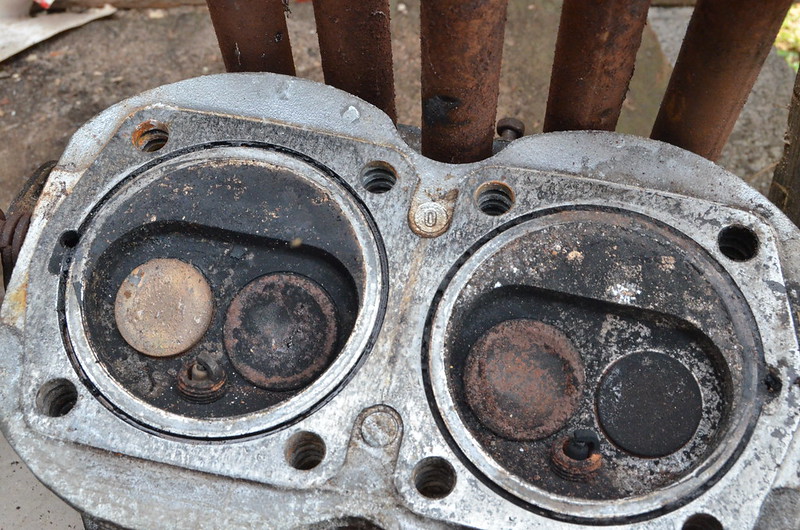
The head gasket was damaged close to one of the head blow-by holes and the circumferential groove was plugged with grunge. The engine appears to have been running on plugs which are too long. The valves look fine but one cylinder has been running a bit rich
FOR_4133 by Peter Thompson, on Flickr
My instincts are that with new bearings and piston rings , this engine could be a cheap and easy rebuild. I plan to let the professionals give me the verdict as we have an excellent precision engine machining shop in Inverness.
I suspect it's actually going to be recommended to be an expensive head skimming, crank regrind and cylinder boring.

In the meantime its down to the hard work of scrubbing it clean.:mad:
 
Peter,
Rear bearings all seem to be like that. I'm not sure if they are made differently to the front. I would just fit 2 new ones.
The bores look fairly ok, run some sandpaper down the bores to take any glaze off and renew the rings.
Head is the high compression type.
thumb.gif

Could be running rich due to poor plugs, tappet clearance, dizzy cap. Again, give it a good clean, reseat the valves and replace the valve seals.


Before you know it you will be motoring along a bit quicker than before with your new upgrade.
 
That's useful information about the bearings Sean.
I popped into the machine shop and it looks like around £250 + VAT to hone or rebore, polish or grind the crank and lightly skim the head. That is dependant on them having a narrow enough stone for the crank journals.
They were vey helpful and said they would measure and make recommendations first, doing the minimum metal removal necessary.
The replacement parts to include an exhaust system will come out at around £250, so with all the work added and the original £75 for the engine, whilst still cheap, it's becoming less of a game and more of a job.:mad:
My original 500 engine had a rebore, new pistons and con-rod bearings; I didn't even measure anything, and it runs like a dream.
maybe I will chance it after all.
 
Last edited:
Honing the bores is a different ball game to reboring. Honing just brakes the glaze to allow new piston rings to bed in, rebore and you will need an oversize piston set as well. For an effective diy honing tool you can cut a slot down a piece of dowel or metal rod, insert a half sheet of 150 grit wet or dry into the slot . Run this in the bores with a low speed electric drill and a little white spirit or similar for a bit of lube to get an even mat finish on the bores then you will get away with a £20 set of piston rings.
I have stripped a number of engines where the bearings look worn due to the copper look on the bearing surface but checking for wear by comparison with new bearings on the fit on the crankshaft they have been fine plus the original bearings may well be better quality than replacements.
So if you go diy I would replace the oil seals then as for the head you can use the two sheets of wet or dry on a sheet of glass or mdf to ensure it is flat and get a good gasket seal.
 
So if you go DIY
So I will be doing:)
I like the home-made honing tool.(y)
The guy at the engineering shop was my kind of engine-man; he wasn't intending to do more than needed. I reckon I could still trust him to measure and give me a verdict but as I have decided to wing it in any case, that wouldn't be fair.
Going to do my order soon.
Does anyone know what it means when suppliers specify "better quality" on main bearings....they're a lot more expensive.:eek:
 
Find out bearing number if you can. Look on t'internet and you can get SKF bearings for less
 
Find out bearing number if you can. Look on t'internet and you can get SKF bearings for less
Damian, do you mean ball or roller bearings? I've previously sourced those from general motot factors, as even some so-called "Italian" wheel bearings state that they are not made in Italy on the box.:eek:
I doubt there is as much choice with the shell bearings for the crankshaft.

I am hoping to make the 650 into a direct replacement for the 500. ie. no modifications to control cables or wiring so I have a few questions:

1. Can I use the thermostat housing off a 500 if I use the bellhousing, starter etc. off a 500? I have the correct spares already.
2. If the above is the case, then can I use a 500 exhaust?
3. What's going on with that ugly pipe from the airfilter? I see the fat thing described as a flame-trap but that item is in the smaller tube on the 500 engine. I would like to use the 500-style arrangement for air and breather pipes but is the diameter of the plastic carburettor elbow on the 28IMB a lot bigger?

I hope someone can advise. Thanks.
 
Peter, you cant use the 500 flywheel housing & starter. The back of the engine casing is different and the recess for the starter is on the side.
not sure why they went this route - maybe to resolve the issue of the housing cracking and starter flexing.
as a result the thermostat housing is different as the outlet tube has to clear the starter. And as a result of that the exhaust is a different shape.
You will be best to build a complete engine & box assembly to transfer.
Everything else will be the same ie cables.
Although I had to modify the shield that bolts to the inner wing by the exhaust & dizzy for clearance on the exhaust.
 
Although I had to modify the shield that bolts to the inner wing by the exhaust & dizzy for clearance on the exhaust.

Funnily enough, today I took delivery of the "shelf" which the removable shield bolts to, which also includes that re-inforcing stay and the lower engine side panel, for a 126. I'm going to modify to fit on Michio (re-named as I like the recent misquote of his name on my rebuild thread). So he will, be ready-made for a 126 engine.

Thanks to that info, it means my original parts order needs no correcting. But it would have been nice to have disguised the 650.
 
where did you find that? I am going to need one for my D when I get round to it.

That was just on UK Ebay; stated as unused old-stock. It will need a lot of modification but better than starting from a plain sheet of steel!
FOR_4708 by Peter Thompson, on Flickr
I spotted a problem with the camshaft, even before I measured it. One of the exhaust cams is flattened; it's over 2mm shorter than the other. So that will definitely need replacing.:eek:
I will need to work out what caused it and think about what related problems I might look for.
FOR_4709 by Peter Thompson, on Flickr
 
Last edited:
It is alarmingly common to have that wear on the camshaft. I would say that in all the engines I have pulled apart 1 in 3/4 camshafts have a badly worn lobe and are scrap and the later 126 engines seem to be the worst. So do not worry about looking for reasons as I think that it is just down to poor hardening when the camshafts were heat treated. I have got a good used one , a new one and a sport one here if you get stuck. As for crankshafts if your machine shop are unable to cope with that size journal I also have some already reground cranks here. I had a sad looking pile of worn ones in my garage so in a crazy moment I had them all reground. Still have two left I believe.
 
I would say that in all the engines I have pulled apart 1 in 3/4 camshafts have a badly worn lobe and are scrap and the later 126 engines seem to be the worst. So do not worry about looking for reasons as I think that it is just down to poor hardening when the camshafts were heat treated.
Thanks for that. It's really good to get information from someone with such a lot of experience.
I can see that they're commonly available new from several sources and I wondered how they differ from a 500? I see conflicting information implying there are differences whilst most supppliers state that the one they supply fits both engines. I ask because I could strip down my spare 500 engine which is visually, very sad.
I guess I should replace the cam followers if I buy new?
The internet says modern oils can cause problems due to low zinc levels; can't be the cause of this one as it must be at least 15 years since it ran.
 
Yes Peter, if you put a new (or nearly new) camshaft in you must renew the cam-followers. For what they cost, I would also put in a new oil-pump (don't forget to pack it with petroleum jelly prior to installing it). With even just a standard 126 engine installed, I think you will be surprised how much more performance there is (relatively speaking!). It is amazing how robust these little engines are--and they had to be as most Italians have only 2 throttle positions--fully ON and fully OFF. no mucking about with the bit in-between! In my 'yoof' when all I could afford was a 500, I thought nothing of driving up to Edinburgh from south London--4-1/2 round trips in 18 months. The last 1/2 was when we moved up to Edinburgh--lock stock and barrel in the 500, but we had only been married for 3 months.
thumb.gif
smile.gif
 
All of the 500 engines I have dismantled had the same camshaft which was also then used in the 594cc early 126 along with the 500R. The 652ccs engines had a different camshaft which then had a couple of revisions I believe as Fiat tweeked a little more power out of the engine.
As for cam followers nobody has ever given me a reasonable explanation as to why they should be replaced as a matter of course so if they are in good order I let them stay and have never had any problems.
 
The 652ccs engines had a different camshaft which then had a couple of revisions I believe as Fiat tweeked a little more power out of the engine.
.

This is the information which seems to be brushed over on the retailers' websites. There seems to be only one camshaft available for both engines on the limted range of sites I use; I'll keep looking.
I've started doing a bit of cleaning of components and derusting the cowling sections in my evil tank of acid.
The crankcase has been degreased and then I stuck it in the dishwasher.......it's getting there.
FOR_4985 by Peter Thompson, on Flickr
I guess most people paint the aluminium if they don't get a professional surface preparation treatment?
 
I had quite a bit of surface corrosion on my block which needed bead blasting to remove. I was unhappy with the different finishes between the blasted bits and the non so I used an American product called VHT High Temp to paint my aluminium parts. Blasting leaves a rough finish that is prone to corrosion, but is also a good key to paint!

One tip I learnt from hard won experience though... The VHT paint needs to be baked after application to properly cure. Make sure you get it out of the oven before Her Indoors comes home!

Chris
 
Between Peter and Chris you could make a whole new type of kitchen based program, The Great International Bake Off or maybe What Happens in the Kitchen Stays in the Kitchen.
Thinking about it I am also guilty having put many items in the washing machine, baking paint in the oven, washing off engines in the kitchen sink and using the kettle for a variety of uses.
One tip while I think about it. The original fuel hose can be very difficult to remove or fit but a quick dowse with a little hot water makes the job very easy.
What camshaft are you actually looking for as I may be able to save you some bucks. I also discovered this week that I have a pair of -0.2 main bearings I had forgotten about. Interesting thing about the crank grinding is that the main bearing undersizes are metric and the big ends imperial.
 
I will get hold of some of that silver engine paint...must do Tony Vitesse proud this time.:D

I am gradually soaking all the rust and some of the remaining paint off the cowling parts. It's amazing how complex that air intake is and I couldn't have stripped the rust as well as this without buying a sandblaster.
FOR_4999 by Peter Thompson, on Flickr
FOR_4996 by Peter Thompson, on Flickr
The remaining brown colour is a deposit of copper on the bare steel, which has transferred unintentionally through electrolysis from a copper blanking plug on the dipping-tank I'm using.
When the remaining paint has gone and after a final treatment with phosphoric it will be a coat of epoxy primer and I'm thinking about using the trade sprays of silver wheel paint as the finishing touch. I found it very easy to use and a fabulous finish when used on my tatty wheels.

Initially, I have ordered a set of standard bearings and piston rings and will try them for fit as the general appearance is of a good engine..... I would guess the typical 30 to 40,000 miles.
 
Back
Top