Styling 3D sticker for the FIAT logo on the boot

Currently reading:
Styling 3D sticker for the FIAT logo on the boot

Kistos

New member
Joined
Apr 14, 2014
Messages
24
Points
7
Location
Thessaloniki
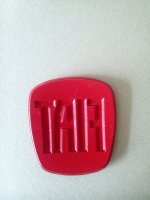
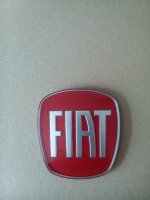
Hello there. I'd like to ask a question about the FIAT badge on the boot of my Bravo.

I have seen many threads about replacing it. Searching on Ebay i saw a 3D sticker (if you search for "ADESIVO 3D PVC STICKER STEMMA LOGO FIAT NUOVA BRAVO PER BAULE COFANO POSTERIORE" you'll see it) and wondered if someone bought it.

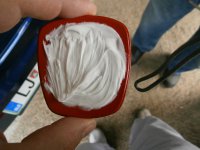
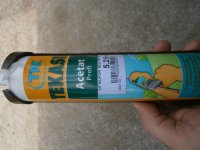
Does anyone have any experience with this solution for the fallen badge?

Thanks in advance! :)
 
As far as I can see by the pictures it is printed on Mimaki,Mutoh or Roland solvent or eco solvent device, afterwards it is laminated by a epoxy like substance to give it that "3D" look. There is no silver it is just grey so it is not like an original. I have seen such stickers and they can be good and most often IF they are done right, can resist UV and harsh elements and abuse. My original Fiat logo fell down on friday. I found it and will repaint it ant glue it back with silica glue like the one on my other Bravo.
 
PS: I will "refurbish" my sticker this week, so PM me or better send me an e-mail to remind me to update the thread:D
 
Hello again mate. Any news about your sticker?

Hi

I am sorry for my late replay. I did not have time and was constantly preoccupied with other stuff. I did it yesterday.
1. When the sticker falls off, you have to find it:D
2. I cleaned it with Ethanolium 70 per centum or with a mild nail lacquer remover but be careful with acetone. If you use ethanol up to 85% it is the best solution. You remove the parts of the old red color on the badge. Be careful with the silver FIAT letters inside, as they can get scratched. Clean it and remove the silver backing all around the transparent area except FIAT letters.
3. When you are done take the preferred red color or yellow etc. and paint a very thin layer over the whole badge just to cover badge. Let it dry. First layer fixes the FIAT letters, as I found out in my first project if you put too much color at once you can "melt" the silver color from FIAT letters. And at least I did not want that. So next layer applied after about two hours can be as thick as you want.
4. When it has cured over night, take some silicone gel kind off glue that you apply with a gun used for plumbing and bathroom and put some silicone on the logo and press it on the boot. Be careful not to put too much as the logo has to move with the button, tape with some duck tape and leave it over night. Next morning take off the tape and check if everything is fine.
5. I will put mine on the boot today and can take a photo of the glue and the amount of it.
 

Attachments

  • IMG_20140601_095552.jpg
    IMG_20140601_095552.jpg
    3.3 MB · Views: 125
  • IMG_20140601_095603.jpg
    IMG_20140601_095603.jpg
    3.4 MB · Views: 261
Last edited:
I like this red, it makes the whole thing at least from my point of view better, it is the same red as on JET on the letters. I was thinking at first using perhaps yellow or original red, but this one is Ferrari red...full of life and sporty
 
Thanks for the instructions Carloff.
I removed mine today and nearly all the red came away from the badge and was left stuck on the original double sided adhesive pad on the car. Easy job to clean the rest off with my finger nail.
Leaving it overnight as you suggest and will refit with silicone.
Good job for the price of some red spray paint.
 
Back
Top