Technical Tailgate leak - and how to fix the leaking foglights.

Currently reading:
Technical Tailgate leak - and how to fix the leaking foglights.

Joined
Jul 26, 2005
Messages
953
Points
157
Location
London
Opened the boot today.. to find half a litre of water flow out from the tailgate :eek:!

Gm.. out come the tools and off comes tailgate trim.. you won’t believe where water was collecting.. inside the fog light :( turned out it was all cracked up and one of the bolt supports snapped (from factory? Never had to take off me fog lights before).. was not a failed seal though.. all the plastic was split allowing an easy route for water to bypass the seal (may this explain occasional electrical shocks i get when touching bodywork? :rolleyes:)

lots of feat sump gasket, drilling and zip ties later all seems well (and you can’t tell the difference from outside.. beats £30 for a new part?) can take 'after' pics if any1’s interested (y)

As for why this is being posted? Am really bored @ the moment (can’t afford parts for next project that is:()
 
i have exactly the same problem, water gathers inside the skin of the tailgate then pours out of the plastic moulding in the corner when you open the boot!
seems to be a common problem on the grande punto but not heard of it before on the stilo, i'm guessing faulty seal on lights or rear wiper but cant see anything obvious. the pics would be very helpful if you could post 'em up or emither them to me!
 
it's all closed up now (was raining really hard tonight.. but all the insides are bone dry :) ) will take some outer pics (and write what you have to do - unless you can take a fog light out and take a snap of the tailgate without the light and the back of the light)
 
estimated time: 2 hours (includes 2 smoke and 1 coffee break)
difficulty rating: 1 spanner (easy)
requirements: water flowing out of tailgate and/or in the boot
tools: Screwdriver (Philips and flat head)
silicon sealant (fiat sump gasket is excellent for this),
#10 bit (and wrench)
1 hex screwdriver bit (can't remember size..) and screwdriver for it
degreaser, rugs and soapy water

1: remove internal tailgate trim - this is held on by about 9 plastic tree lugs and 2 large bolts (look inside hand depressions for bolts.. as if anyone would try closing the boot from inside?? maybe these are there to hide the bolts? once bolts undone - pull hard and trim comes off..)

2: have a nose about (there will be lots of grime and muck around water path.. or not if you've not had a problem for long or keep your car clean)

3: remove fog light bulbs (with socket and wiring) and unplug tailgate release button wiring (its easy - you need to press in a small catch and it pops right out.. and no.. you will not be able to see that catch.. feel for it as it is facing the tailgate)

4: undo 4 nuts securing tailgate release button (and trim for number plate lights)

5: applying small amounts of force remove tailgate release trim (it is on the outside.. it also helps if you push on the bolts a bit from the inside.. as it gets stuck.. no need to worry about push clips.. they are supposedly designed to pop in and out unassisted)

6: undo 2 nuts securing fog light cluster (x2 if you are doing both which is a good idea)

7: remove fog lights (they just pop right out ;-) if you push from the inside

8: have a close look at fog light plastic (it consists of outer body and reflector glued together.. my reflector was cracked and all the glue split.. hence water was flowing in at the top.. and flowing out at the bottom.. slowly)

9: you can try to fix the old one or buy a set of replacements (about £30 each.. and not in stock.. up to you)

10: if there is muck inside fogs - drown them in detergent and hot water and let em soak for an hour or so then wash out what you can (no need to thoroughly dry)

11: fog light gasket/seal would've remained on the tailgate - carefully prize it off and clean it (engine degreaser works a treat)

12: clean everything (there will be lots of muck.. this needs to come off if we are to get a good watertight seal) on the tailgate as well as all the bits you will be putting back in/on

13: slot fog light seal back into the fog light cluster.. let it sit there while you degrease the area around where your light will slot in then do the same to the seal and light itself

14: put a nice fat unbroken line of silicone gasket where the 2 parts of the fog light meet (and cracks open up.. the outer edge basically)

15: carefully lower fog light cluster into place (stop smudging silicon all over the tailgate..)

16: drive fog light securing nuts all the way in and then tighten (don't overdo this bit.. )
17: take your tube of liquid gasket and (pressing the nozzle tightly to the crack between fog light and tailgate) squeeze a nice thin line all around the light cluster

18: take a dry cloth and wipe off any excess silicone (achieving an even nice finish.. see pics.. yes its black silicone.. but normally there'd be muck in there .. which is also black... so no difference to looks really but it is now watertight)

19: do same to the other fog light cluster

20: degrease area around boot release button trim (and the trim itself) and put it back in

21: secure it with 4 nuts (drive these in all the way and then tighten a bit at a time .. again don't overdo it..)

22: there is a crack between tailgate and trim you've just fitted (this trim obscures a top part of the fog.. that’s where water comes in.. it flows through and around this trim and right into fog light cluster)

23: press your silicone tube nozzle tightly into this crack and starting from one fog trace a nice thin line of silicon all the way to the other fog (again achieving a nice even finish..see pic.. and again this crack is normally filled with muck.. so no worries about black silicone ;-) oh and if it isn’t perfect – wipe off excess with a dry cloth)

24: pop internal trim on (oh.. don’t forget to plug in all the bits.. like boot replace button.. fog light bulbs..)

25: you're done.. stop poking at the silicon (let it dry) but ensure that there is a nice unbroken seal around the fogs (so water can't get in) and that the section of trim above them is sealed at the top (so there will be no water leaking on to the fogs anyhow..)

ps: do not seal anything on the inside.. if your seals break..water will need to go somewhere.. and the default path through the tailgate and out of the car is really useful..
pps: why did i bother? this is too basic to need a guide :-( ?! boredom rulez
 
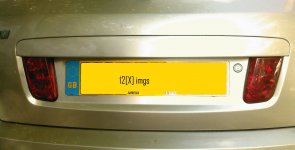
end result:
 

Attachments

  • SP_A0196.jpg
    SP_A0196.jpg
    167.4 KB · Views: 58
ive only just noticed that mine doesnt actually have them fog lights either side of the reg plate (observation not being one of my strong points!)..so it looks like its back to square one for me... rear wash/wipe or light clusters.
 
water will not get into upper boot or tailgate via light clusters.. rear wiper seal 4 u it is
 
Last edited:
I seem to have this problem as well, I think the problem might be the gasket between the tailgate release mechanism (which contains the number plate lights) and the hatch. This means that apart from water getting into the tailgate trim when it rains, water also gets into the number plate lights, which always, without exception, causes the number plate light bulb(s) to blow (which is so annoying that I haven't bothered to replace the bulbs the last 6 months :))

Anyone's got tips as to what I could replace this gasket with? I assume you can't buy this gasket as a separate part (couldn't find it on eper)?
 
Last edited:
ive only just noticed that mine doesnt actually have them fog lights either side of the reg plate (observation not being one of my strong points!)..so it looks like its back to square one for me... rear wash/wipe or light clusters.

Most likely the rubber grommet on the rear wiper spindle. Just put some sealant between it and the glass. It cured my leak immediately.
 
Great walkthrough. I just did my fogs, as one of them could have provided life for a goldfish. The glue between the two parts of the cluster was not actually glued anymore.

I noticed two other problems immediately after removing the tailgate opening lever bar. Two areas had paint problems. It seems like a combination of rubbing from the handle bar and poor paint job. Luckily the body is galvanized, so not too much rust inside. I made some pictures of the 1 hour paint job. Far from perfect, but more than good enough. :D I accidentally sprayed the T in FIAT a bit, but the car still works...

01DSC00672.jpg


02DSC00678.jpg


03DSC00680.jpg


04DSC00681.jpg


05DSC00685.jpg


06DSC00688.jpg
 
Last edited:
Where did you get the spray paint to match the color of the car?

I have absolutely no paint at all on the inside of the front wings, where the mud flaps should have been. Thought maybe I could buy some kind of paint to put.

Lucky for me as well that the body is galvanized, otherwise I would've been covered in nasty rust.
 
Where did you get the spray paint to match the color of the car?

Anyone that sells PPG paint. Just give them the information from the bonnet, or call your importer (FIAT) and ask for the paint code. They will make you a can while you wait. Mine was "base" so I had to buy a clear varnish aswell.

I have absolutely no paint at all on the inside of the front wings, where the mud flaps should have been.

I have also done some spraying here. The whole area under the door, 25 cm from the wing arch had lost the paint (and a bit up around). After I repainted it, I attached a mudflap. :)
 
How much did it cost? Clear varnish included.

Actually, I can't remember. I bought the cans 4 years ago, after a shopping mall parking hit and run. Propably 100-150 NOK each can. One primer, one Jet Blue, and one clear varnish. About £40 alltogether. You'll need two grades of sandpaper aswell.
 
Thank you. It's nice to also know that the paint can last that long. I already found a few places that may be able to help and will check them all out once it gets a little warmer. It's still 3 degrees here. Nasty.

It's nice that you can actually use primer first, you would do a pretty good paint job, I think. :)
 
Back
Top