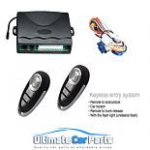
I've decided to write this guide as the wiring
in the MK2 Punto can be very confusing if
you're new to wiring when you're attempting
to upgrade the central locking to remote
central locking, and you're follow the
Haynes manual.
DO NOT follow the wiring diagram from the
Haynes book, as it delayed my installation by
a good hour or so! This is because the wiring
colours shown in the Haynes are different to
those in the car.
Now each RCL kit will most probably have
a slightly different loom to another, this may
be different size or different coloured wires.
These should be shown in the manual you get
with the kit, this is why I will ONLY be
showing the car wiring and what they are used
for, this will help speed up the process.
GREEN AND WHITE ------Lock
BLUE AND PURPLE ------- Unlock
PINK, PINK AND WHITE (Pins 3 and 13) ----- Indicators
The reason we decided to forget the Haynes
manual is due to the fact that in the wiring
diagram for central locking, Pins 3 and 13 for
the indicators will only flash the front left and
back right indicators (or something similar)
however if these two wires are connected to
the split cables that should be found on your
loom, this will set off all indicators when
locking/unlocking the car using the fob.
Earth wires on the loom MUST be connected,
this can be done through two ways. You can
either wrap the wires around bolts in the chassis
(best found withing the steering column behind
the underside wheel panel where the adjustment
lever is) or as I did, cut the BROWN (this is the
cars Earth wire) going to the steering wheel and
joining it to the Earths on the loom.
After connecting these you should be done!
Now in my experience the key fob did not
work for the first few minutes, but keep trying
and it should suddenly register (may be
different with other kits). Also first time driving
you may have the 'Bulb Malfunction' light come
on, this happened to me but as I turned the car
off the light went off.
Hope this has helped!
For safety reasons you MUST check all lights
are working correctly after installation, you can
do this by simply turning on the ignition and
turning the indicators on on the right side, then
the left then trying the hazards. I would also
recommend testing the key fob for 10 minutes
before tidying the cables (just in case something
goes wrong).


