General And so it begins MK3

Currently reading:
General And so it begins MK3

Harllequin

Member
Joined
Dec 7, 2004
Messages
595
Points
132
Location
Durham
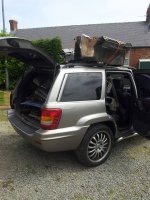
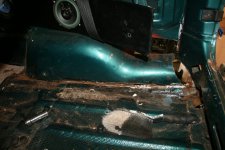
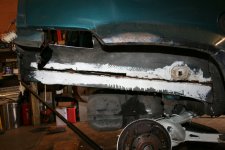
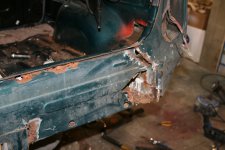
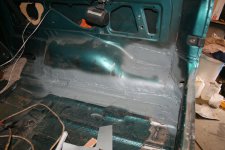
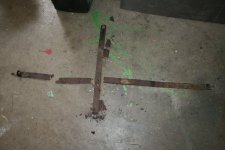
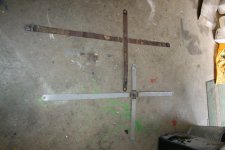
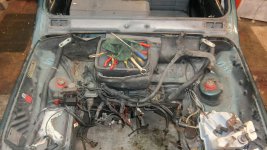
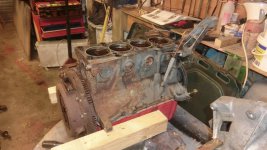
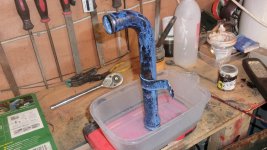
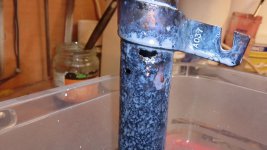
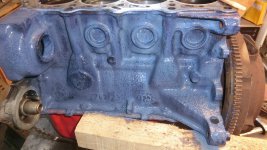
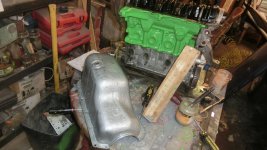
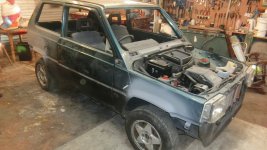
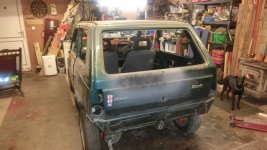
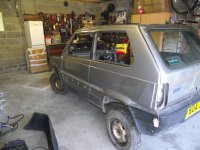
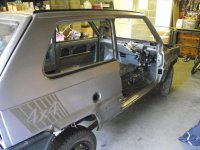
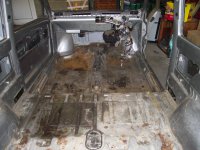
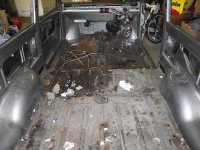
Well guys I have been mentioning The Grey in a few posts now so I thought it time to post a few pics of it and yes that was how I bought it. The littleun went with me to look at it and hith her hands on her hips the little nine year old told me in a stirn voice "Your not going to by THAT are you"

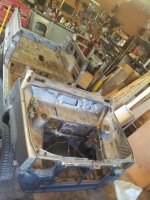
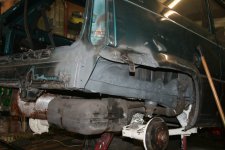
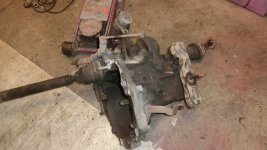
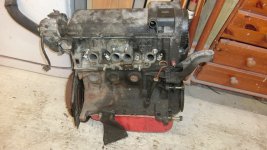
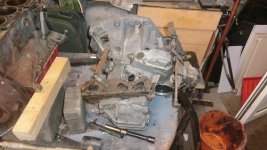
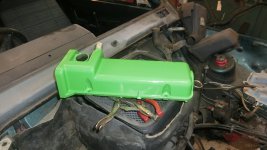
I've had it in the garage a while now, the head from it went to fix BEX and the gearbox also went into BX until I refurb the one that came out of BEX :rolleyes:

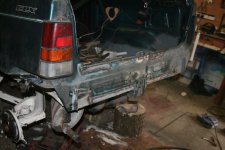
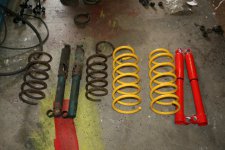
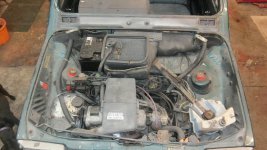
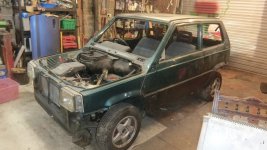
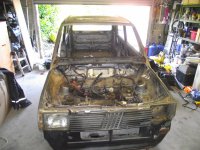
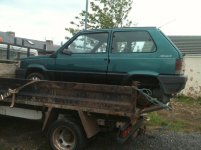
Tonight I picked up the doner vehicle a 2WD CLXie that I will be using quite a few bits from.

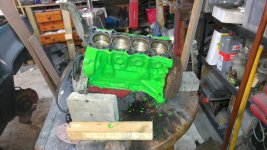
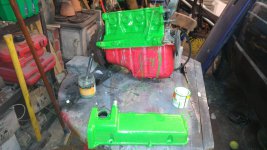
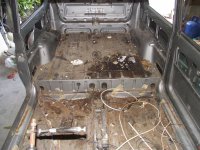
The pics of The Grey are exactly how I bought it for £100 :slayer:

The CLE cost me £250

Now all I need is the garage cleared off the Mini I'm restoring for a friend and I can set too and make a start :)

I think by th time I finish the Mini and spray BEX I'm looking at a month or two then I can get this project started.

I'm still on the look out for a 4x4 Fuel tank and instrument cluster though :bang:
 

Attachments

  • DSCF0003.JPG
    DSCF0003.JPG
    391.6 KB · Views: 32
  • DSCF0005.JPG
    DSCF0005.JPG
    347.2 KB · Views: 27
  • DSCF0006.JPG
    DSCF0006.JPG
    294.1 KB · Views: 20
  • DSCF0008.JPG
    DSCF0008.JPG
    316.6 KB · Views: 25
  • DSCF0011.JPG
    DSCF0011.JPG
    435.4 KB · Views: 22
  • IMG_0470.JPG
    IMG_0470.JPG
    147.8 KB · Views: 32
  • DSCF0021.JPG
    DSCF0021.JPG
    342.1 KB · Views: 24
  • DSCF0019.JPG
    DSCF0019.JPG
    383.3 KB · Views: 36
  • DSCF0017.JPG
    DSCF0017.JPG
    388.1 KB · Views: 25
  • DSCF0015.JPG
    DSCF0015.JPG
    409.2 KB · Views: 33
Last edited:
I didn't get the 4x4 from ebay. It was nose first in a garage in Northumberland, it'd been in there for a few years.

The CLX was from ebay though. again not too far away.
 
Last week I decided to have a good look at 'The Grey' and CLX I got to use for parts.

Long story short I'm not going to put this car back on the road. The rot to the structure of the rear of the car was just too much to do. It would have been fixable with a LOT of time, but not when I have the wife's Celica to paint, the Jeep to tinker with and the..... well you get the idea. I don't want the garage tied up too long with one project.

RIP 'The Grey' I've kept the bits from it like leaf springs, drive train etc. The only new stuff I bought for it that won't go on the CLX is the fuel tank so I'll just stick that back on Ebay I think.

Anyway looking at the CLX I got for it's parts it is in really rather good condition, I've only spotted a bit of welding needed on the rear floor and on the rear quarter after it's had a nock. So I'm going to put that one back on the road.

I've already stripped the rear suspension and ordered some bits like springs and rubbers. I'll kick off another thread about that one soon. For now though MK3 is now closed.

It's quit nice to know that a panda body shell can fit into a Jeep Grand Cherokee though :cool:
 

Attachments

  • gone.jpg
    gone.jpg
    108.9 KB · Views: 22
  • fallen to bits.jpg
    fallen to bits.jpg
    288 KB · Views: 28
  • bottom shot.jpg
    bottom shot.jpg
    116.3 KB · Views: 28
  • Topless.jpg
    Topless.jpg
    117.5 KB · Views: 24
I doubt it. Not sure what I'll use them for, but you never know. I've never owned / run a 2wd panda and we don't really need 2 4x4s
 
After 3 years I've finally decided to do something with the CLX.

Although I still have the box, propshaft assembly, springs and rear axel from the silver 4x4 I'm not going to use them. I'm going to keep this one a 2wd.

There was a bit of rust on the rear end to sort out. It looks like it has had a slight bump on the rear end of the drivers side and that has let the tin work get in.

The tailgate area was also not very well. All sorted now though.
 

Attachments

  • Rusted sections fixed 1.JPG
    Rusted sections fixed 1.JPG
    202.3 KB · Views: 21
  • Rusted sections fixed.JPG
    Rusted sections fixed.JPG
    183.7 KB · Views: 19
  • Rusted sections removed 2.JPG
    Rusted sections removed 2.JPG
    217.5 KB · Views: 24
  • Rusted sections removed 1.JPG
    Rusted sections removed 1.JPG
    204.4 KB · Views: 23
  • Rusted sections removed.JPG
    Rusted sections removed.JPG
    187.9 KB · Views: 22
  • Rusted sections fixed 2.JPG
    Rusted sections fixed 2.JPG
    208.5 KB · Views: 23
Also found the tank hanging bracket was part its best.

Nice easy fix that one though.
 

Attachments

  • Fule tank hanging bracket a bit unwell.JPG
    Fule tank hanging bracket a bit unwell.JPG
    205.3 KB · Views: 15
  • new tank hanging bracket made.JPG
    new tank hanging bracket made.JPG
    201.7 KB · Views: 14
Had a bit play with the running gear too.

New springs and shockers all round. Painted to keep tin worm at bay too.
 

Attachments

  • New shockers and springs.JPG
    New shockers and springs.JPG
    229.1 KB · Views: 15
Wouldn't be right to now pull the engine and box out and sort that out too though would it.
 

Attachments

  • Old gearbox.JPG
    Old gearbox.JPG
    262.7 KB · Views: 14
  • Dirty Engine.JPG
    Dirty Engine.JPG
    277.8 KB · Views: 18
  • Engine and box out.JPG
    Engine and box out.JPG
    273.9 KB · Views: 13
  • Time to sort the engine and box.JPG
    Time to sort the engine and box.JPG
    267.7 KB · Views: 20
Not happy with the gearbox, syncro from second to third was shot. Luckily I found a low millage one one Ebay. It was rather dirty when it came, so I've had the steam cleaner on it.
Also cleaned the engine up and removed the head to to a leak down test on it.
 

Attachments

  • Replacement box cleaned up a bit.JPG
    Replacement box cleaned up a bit.JPG
    273.2 KB · Views: 12
  • block cleaned and leak down test started.JPG
    block cleaned and leak down test started.JPG
    267.8 KB · Views: 13
  • block cleaned and leak down test started 1.JPG
    block cleaned and leak down test started 1.JPG
    258.8 KB · Views: 13
Rust converter time.

Block looking good.

Same can't be said for the water pipe :eek:
Good job I've got rust converter and resin repair paint to address that pipe!!
 

Attachments

  • Rust converter on water pipe after grinding.JPG
    Rust converter on water pipe after grinding.JPG
    267.6 KB · Views: 15
  • Water pipe a bit poorly.JPG
    Water pipe a bit poorly.JPG
    214.1 KB · Views: 13
  • Water pipe a bit poorly 1.JPG
    Water pipe a bit poorly 1.JPG
    203.7 KB · Views: 10
  • Rust Converter on Block.JPG
    Rust Converter on Block.JPG
    319.6 KB · Views: 13
  • Rust Converter on Block 1.JPG
    Rust Converter on Block 1.JPG
    303.8 KB · Views: 13
Head stripped ready for new seals and a clean up and port.

Cleaned up, valves and seat re ground and all reassembled.
 

Attachments

  • Re ground valve seats.jpg
    Re ground valve seats.jpg
    241.3 KB · Views: 11
  • cleaned and re ground.jpg
    cleaned and re ground.jpg
    236.9 KB · Views: 9
  • cleaned and re ground 1.jpg
    cleaned and re ground 1.jpg
    257.1 KB · Views: 10
  • Dirty Valves.jpg
    Dirty Valves.jpg
    188.4 KB · Views: 9
  • Dirty Valves 1.jpg
    Dirty Valves 1.jpg
    238.2 KB · Views: 10
  • valve stem seals out.jpg
    valve stem seals out.jpg
    365.8 KB · Views: 6
  • Re built head ready.jpg
    Re built head ready.jpg
    325.8 KB · Views: 16
Few pics of the painted block and rocker cover.

The red on the sump has been stripped and rust converted now too. But I didn't get a pic of that.

I did however get a pic of the resin coat paint on it. That stuff is excellent!!!(y)
 

Attachments

  • Block painted Sump sealed with repair resin.JPG
    Block painted Sump sealed with repair resin.JPG
    272.8 KB · Views: 8
  • Rocker cover painted.JPG
    Rocker cover painted.JPG
    234.8 KB · Views: 8
  • Block painted.jpg
    Block painted.jpg
    333.7 KB · Views: 6
  • Block painted 1.jpg
    Block painted 1.jpg
    317.2 KB · Views: 11
Some assorted engine, gearbox and suspension brackets cleaned, rust converted and red oxide added.

Front suspension bushes removed and new ones in. I hate that job. Over an hour for each one :eek:

Bit of polishing done on the gearbox too.
 

Attachments

  • Engine, box and suspenstion parts rust converted and red oxide primer 1.JPG
    Engine, box and suspenstion parts rust converted and red oxide primer 1.JPG
    247.7 KB · Views: 13
  • Engine, box and suspenstion parts rust converted and red oxide primer.JPG
    Engine, box and suspenstion parts rust converted and red oxide primer.JPG
    252.9 KB · Views: 16
  • Engine, box and suspenstion parts rust converted and red oxide primer and gearbox polished a bit.JPG
    Engine, box and suspenstion parts rust converted and red oxide primer and gearbox polished a bit.JPG
    243.2 KB · Views: 15
A little bit of bodywork filling and primer added in places where there were dings etc.
 

Attachments

  • Stripped for painting 1.JPG
    Stripped for painting 1.JPG
    265.9 KB · Views: 14
  • Stripped for painting inc Daisy Photobomb.JPG
    Stripped for painting inc Daisy Photobomb.JPG
    251.2 KB · Views: 16
  • Stripped for painting.JPG
    Stripped for painting.JPG
    264.4 KB · Views: 14
Well that's what I've been doing this last fortnight.

Tomorrow I'm going under the car with a bloody big spike!!!!!
No way there is going to be a BEX mk2!!!!!!!
 
Back
Top