I fitted these to my car over a year ago but I thought I'd give them some testing before posting a recommendation here. Thankfully they've been great (especially in the current weather!), so for all of those with chilly nether regions, here's a festive 'How To'.
I bought a set of Waeco heated seat panels from ebay. They're regularly listed on there and cost around £50-60 a pair. I love heated seats - unfortunately the Multi was never factory-fitted with them.
Disconnect the battery before getting started. Messing around with the seat wiring can upset the side airbags and the last thing you want to do is set those off. Then remove the headrests and get the seat(s) into this sort of position - it makes it much easier to get them out of the car. Don't forget to release the wiring connections under the seat.

Then it's time to strip the covers off of the seats. The pictures below tell most of the story, so I'll leave it to them in the main:

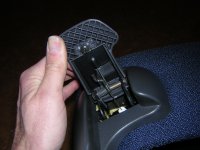
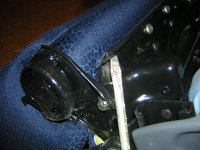
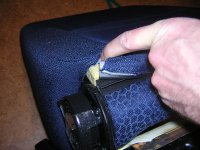
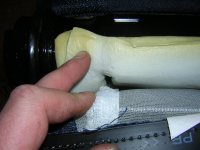
Remove the screw (the one next to my thumb in the picture below) under the lift-up seat adjuster:

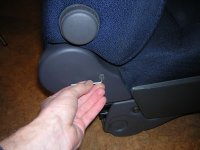
You need to remove the spring clips holding the plastic side trims onto the side of the seats. Do this very carefully - it's easy to damage the plastic spigots or worse still, break them off. I used a very long thin screwdriver (and lots of patience!) You can see the clips in the following photo:

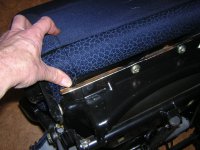
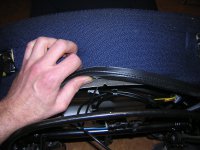
Once the hard plastic trims are off, you can 'flip' the black edge trim off of the seat pans (tough fingers required!):

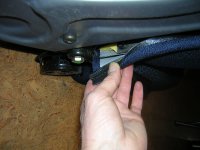
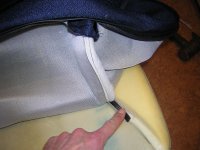
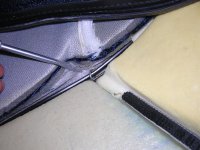
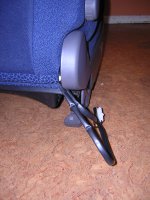
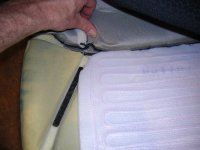
At the back of the seat base there's a black plastic strip, a bit like a poster gripper, which can be prised of with a screwdriver:

A bit of fiddling and forcing of this gripper will push it through the gap between seat back and seat base:

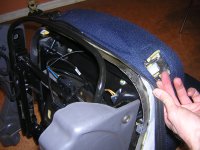
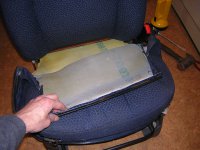
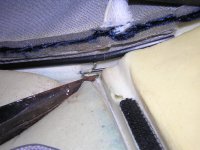
This allows you to peel the seat cover off of the seat. Be careful when you do this as there are some strong velcro-like strips stuck to the foam which you need to part carefully or you'll rip them away from the foam permanently - if this happens, the cover won't follow the shape of the seat any longer:


There's a spring wire running across the seat which has 3 metal rings (which are part of the seat cover) clipped around it. Spread these rings with a pair of long nosed pliers, then the cover will come away from the seat base:


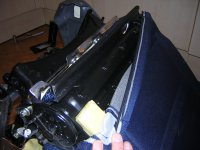
That's the seat base done. Thankfully, the backrest is simpler. At the back of the seat, near where it meets the seat base, there's a two part plastic strip that interlocks. This can be pulled apart, then the seat cover can be peeled off. Look out for more of the velcro strips, so take your time:


That's the tedious stuff done. Now for the good bit!
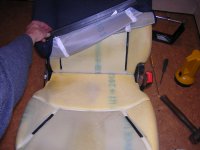
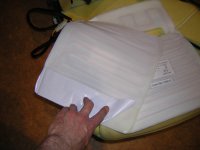
Heating pads (one for base - with the hole in, one for the backrest):

They are self adhesive and stick onto the seat foams a bit like this:


A bit snug, but overall a very good fit for the Multipla seats. Reassembly, as they say in the Haynes manuals, is a reverse of the above.
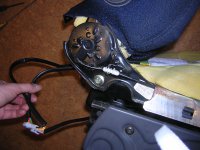
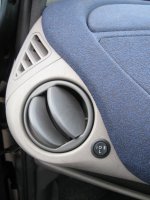
The kit comes with a very long loom which can be run under the door sill covers on both sides of the car to a relay and switches (also supplied with the kit). I tapped into the dash 180W power socket by the ashtray which is a switched live, so leaving the seats on won't flatten the battery. I've got a picture showing where I put the switches (on the little area of grey plastic just inboard of the circular dashboard airvents). I'll post a picture when I've taken one.
I bought a set of Waeco heated seat panels from ebay. They're regularly listed on there and cost around £50-60 a pair. I love heated seats - unfortunately the Multi was never factory-fitted with them.
Disconnect the battery before getting started. Messing around with the seat wiring can upset the side airbags and the last thing you want to do is set those off. Then remove the headrests and get the seat(s) into this sort of position - it makes it much easier to get them out of the car. Don't forget to release the wiring connections under the seat.
Then it's time to strip the covers off of the seats. The pictures below tell most of the story, so I'll leave it to them in the main:
Remove the screw (the one next to my thumb in the picture below) under the lift-up seat adjuster:
You need to remove the spring clips holding the plastic side trims onto the side of the seats. Do this very carefully - it's easy to damage the plastic spigots or worse still, break them off. I used a very long thin screwdriver (and lots of patience!) You can see the clips in the following photo:
Once the hard plastic trims are off, you can 'flip' the black edge trim off of the seat pans (tough fingers required!):
At the back of the seat base there's a black plastic strip, a bit like a poster gripper, which can be prised of with a screwdriver:
A bit of fiddling and forcing of this gripper will push it through the gap between seat back and seat base:
This allows you to peel the seat cover off of the seat. Be careful when you do this as there are some strong velcro-like strips stuck to the foam which you need to part carefully or you'll rip them away from the foam permanently - if this happens, the cover won't follow the shape of the seat any longer:
There's a spring wire running across the seat which has 3 metal rings (which are part of the seat cover) clipped around it. Spread these rings with a pair of long nosed pliers, then the cover will come away from the seat base:
That's the seat base done. Thankfully, the backrest is simpler. At the back of the seat, near where it meets the seat base, there's a two part plastic strip that interlocks. This can be pulled apart, then the seat cover can be peeled off. Look out for more of the velcro strips, so take your time:
That's the tedious stuff done. Now for the good bit!
Heating pads (one for base - with the hole in, one for the backrest):
They are self adhesive and stick onto the seat foams a bit like this:
A bit snug, but overall a very good fit for the Multipla seats. Reassembly, as they say in the Haynes manuals, is a reverse of the above.
The kit comes with a very long loom which can be run under the door sill covers on both sides of the car to a relay and switches (also supplied with the kit). I tapped into the dash 180W power socket by the ashtray which is a switched live, so leaving the seats on won't flatten the battery. I've got a picture showing where I put the switches (on the little area of grey plastic just inboard of the circular dashboard airvents). I'll post a picture when I've taken one.
Last edited: