I’ve just been getting a 2009 Fiat Panda 1.3 Multijet. For some strange reason it doesn’t have a 12v socket for the likes of my sat nav or ipod etc. 
Doing some reading on the Fiat forum it appears that this is not an unusual occurrence for the Panda, and doesn’t necessarily follow any model or spec detail??

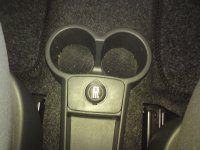
This is where the 12v socket should be in the Panda
Very strange. Why Fiat would leave out a £20 fitting that seems to be standard in all cars is any ones guess, welcome to the world of Fiat I suppose.
So if you are one of the people like me, without a 12v socket but can't do without one, I hope this step by step guide helps you fit your own power socket.
Anyway, after all the searching and reading of the forums two things were clear to me: 1) If the wiring loom had a connector under the central console for a 12v socket, AND 2) You have a fuse sitting in position F85 then I think it’s safe to say that your only missing the 12v socket fitting. (PLEASE NOTE - Some owners have reported having either the connector or the fuse, but not both and in these circumstances any upgrade didn't work! Therefore please check before buying any parts!)
A quick check showed I had both, phew!
In short…. If you have one of these….
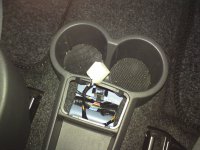
and one of these...
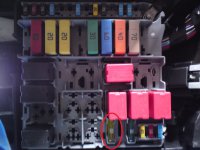
See the highlighted fuse in position F85 (Fuse box in the engine compartment )
Then the chances are you only need this…..
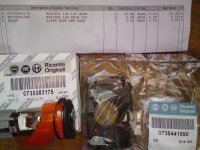
Original part number for the trim 0735441990
Original part number for the 12v socket 0735383175
I got my parts from ebay, but any parts department should be able to get them.
If you have all of the above then you can move on to the next page: Fitting Instructions
Doing some reading on the Fiat forum it appears that this is not an unusual occurrence for the Panda, and doesn’t necessarily follow any model or spec detail??

This is where the 12v socket should be in the Panda
Very strange. Why Fiat would leave out a £20 fitting that seems to be standard in all cars is any ones guess, welcome to the world of Fiat I suppose.
So if you are one of the people like me, without a 12v socket but can't do without one, I hope this step by step guide helps you fit your own power socket.
Anyway, after all the searching and reading of the forums two things were clear to me: 1) If the wiring loom had a connector under the central console for a 12v socket, AND 2) You have a fuse sitting in position F85 then I think it’s safe to say that your only missing the 12v socket fitting. (PLEASE NOTE - Some owners have reported having either the connector or the fuse, but not both and in these circumstances any upgrade didn't work! Therefore please check before buying any parts!)
A quick check showed I had both, phew!
In short…. If you have one of these….

and one of these...

See the highlighted fuse in position F85 (Fuse box in the engine compartment )
Then the chances are you only need this…..

Original part number for the trim 0735441990
Original part number for the 12v socket 0735383175
I got my parts from ebay, but any parts department should be able to get them.
If you have all of the above then you can move on to the next page: Fitting Instructions
Step 2. Fitting Instructions
Ok, here’s your fitting instructions, you need two small flatbed screwdrivers and less than half an hour of your time.
Fitting is quite simple, pop out the tray in the central console with some flat blade screwdrivers.
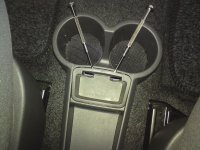
Fit the orange casing through the new console trim making sure you align the cap to the right orientation
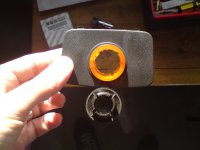
Fit the 12v socket through the orange casing (it will only go in one way)
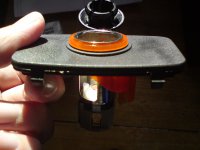
Connect the wiring loom connector to the socket and test with a suitable appliance (sat nav). Remember the socket only has power while the ignition is switch on.
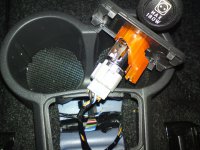
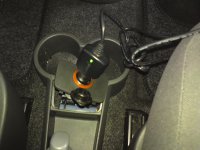
Once you have confirmed power is getting to the socket switch off and snap the trim in to place.
Job done.
Cheers Sean (50p)

