Styling Roof rails on hi-roof Doblò

Currently reading:
Styling Roof rails on hi-roof Doblò

Bidello

New member
Joined
Nov 12, 2012
Messages
12
Points
3
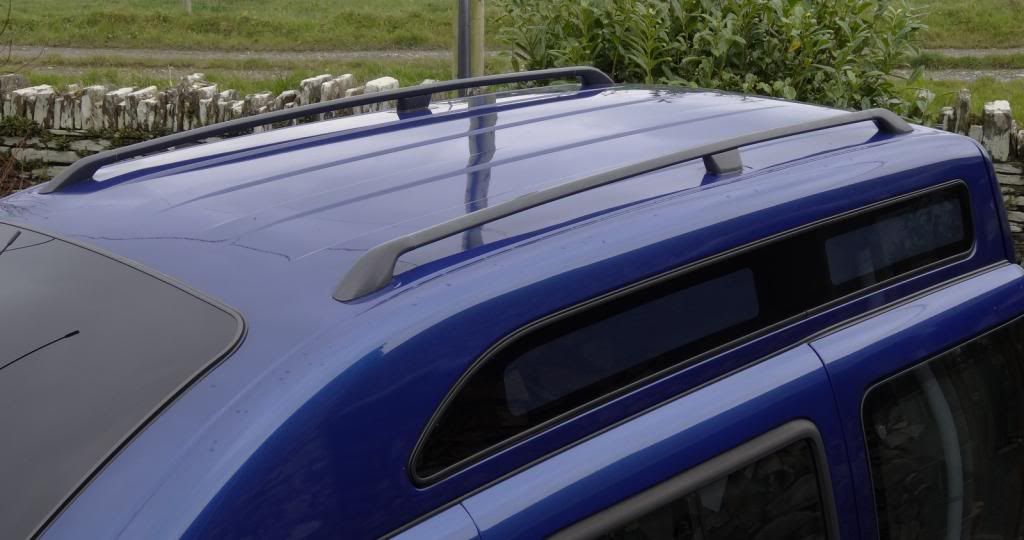
I've been reading various threads about fitting aftermarket roof rails to the dobbie, but can't find anything related to the hi-roof version.

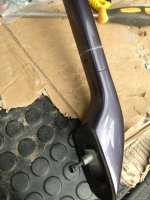
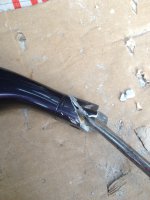
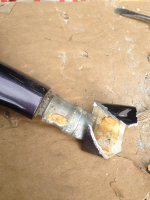
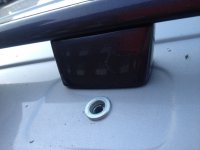
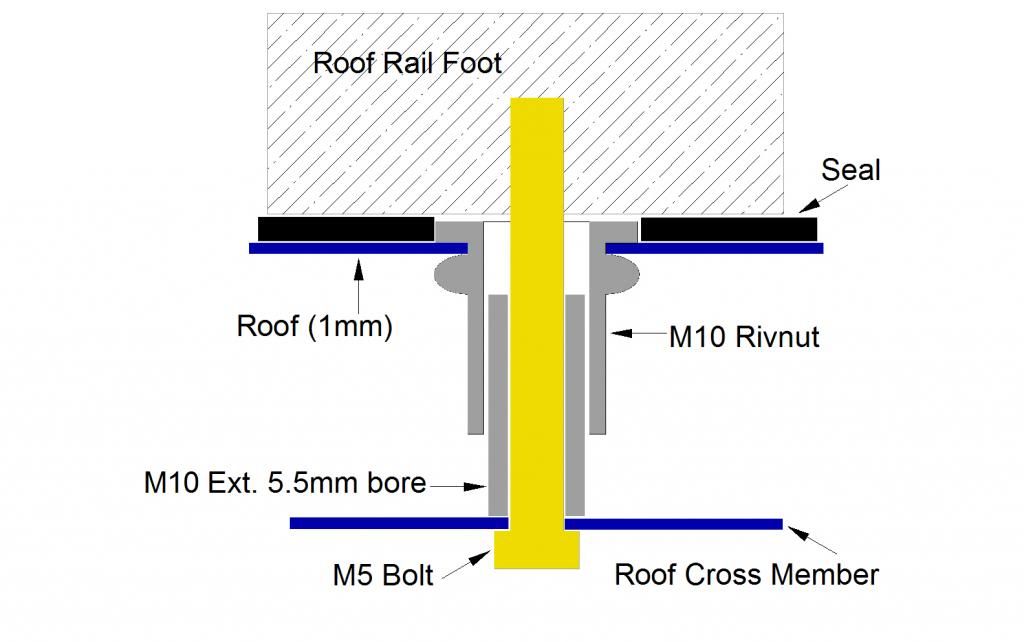
On this model the roof will have to be drilled in order to fit roof rails, as on the top of the roof four small recessed areas for fitting the rails are present but there are no holes.

I am aware of at least one forum member's mod to fit roof rails to the hi-roof model, so I'd appreciate any pointer and comments to the right direction!

Thanks in advance!
 
Hi,

Had the same about a year ago.

Couldn’t find any roof rails off the peg so went to the local breakers yard for some inspiration.

Landed up taking the rails off an R reg Volvo 960 Estate (940 ones are identical). Aluminium, well made and £20.

They are too long to fit straight onto a Doblò high top and need a bit of modding to get them to fit (shortening and gently bending to fit the curve of the roof). Took a bit of time but it is doable.

Fixing to the roof is mostly the same as the fixing method on the Volvo.

Each of the 3 mounting feet is bolted to the roof cross member (these run across the roof underneath the recesses in the Doblò roof) with an M5 socket headed bolt which passes through an M10 threaded tube (5.5mm bore) which is screwed into an M10 Rivnut in the roof.

The mounting method seems a bit involved but it’s designed to transmit the load from the roof rail foot onto the roof cross members (not solely onto the roof!) without deforming the roof itself. The threaded tubes are screwed out just enough to fill the gap between the rivnut and the cross member.

The joint between the roof rail and roof is sealed with some 5mm thick closed cell foam; the correct gap is maintained by the 2mm thick flange of the Rivnut.

It took about a morning+ to do, but I think it’s worth it.

Cheers

Ron

Doblo_Volvo_Roof_Rails.jpg


DobloHighTopRoofRail.jpg
 
  • Like
Reactions: TD5
Excellent writeup Ron!!!

Nicely complemented by your scheme and pic!

Would it be possible to make tag or maybe make a sticky? The above info is going to useful to others no doubt.

I have a question (possibly more I can't think of just now :-D ):

- how difficult/fiddly is to remove the ceiling cover trim and to put it back correctly?

Again thanks so much
 
Hi,

Hmmmm…Removing the ceiling lining; well we planned to take it down to add some insulation and a vapour barrier and whilst it was down do the roof rails at the same time.

The main problem was the fixings; they are quite difficult to get out without either breaking them off or damaging the lining material. Replacements seem hard to find.

Solution was… the “Rivnut” (what an invention!!).

Once the original fixings are out (whole or broken off) fix an M4 rivnut in the 6.5mm hole in the bodywork where the original ceiling fixing would have gone. Re-fix the ceiling with M4 15mm long bolts/screws using a large colour matched screw cup and cover (from eBay).

The M4 bolt holds the lining up and the screw cap covers the holes in the lining well enough (bit more discreet than the factory fitted ones). Also, easily removable in the future.

Cheers

Ron
 
Genius!

Well a rivnut fastener is already on my list of tools to get ASAP then!

Cheers :))))
 
I’ve got a small Rivnut tool (Silverline I think, about a tenner). It’ll do up to M8 Ok but if you need to use a lot of larger ones (like the M10 for the roof rail mod) a heavier duty tool is the one to get.

For the M10 Rivnuts (with only 6 to do) I found a design for home made tool on the web, which isn’t much more than a bolt and a few nuts and washers. It works well and only cost a couple of quid.

Good luck

Ron
 
Agreed, a diy version of the rivnut fastener is the way to go for m10 rivnuts (unless having to do lots of them) as proper tools are expensive - was chatting with a friend last night and he uses a heavy duty one at work (no, he won't be able to let me use it...) and he reckons a home made tool would be much better than any cheap tool out there - unless I wanted to splash out the money for a proper one - not!

Ron, did you use M10 steel or aluminium rivnuts?

Trip to local scrapyard due soon!!
 
Yea, I can’t abide cheap tools but the pukka rivnut tools were a bit on the pricey side; thought I’d try the Silverline one (got OK reviews on Amazon) and for its money has done well and put in a couple of hundred rivnuts without falling apart.

I used the plated steel rivnuts with a 2mm thick flange (same as Volvo used) from Memfast and smeared everything with Waxoyl during assembly. The rivnuts left in the roof of the 960 in the breakers yard were still in newish condition, the closed cell foam should seal out any water. No leaks at all.

I expect the Aluminium ones would be Ok, I just bowed to Volvo’s judgement!

Cheers

Ron
 
Aye, can't go wrong with Volvo's way!

The waxoyl would probably be enough to seal everything, but the closed cell foam is definitely a must, plus it gives a professional finish.

You've done an amazing job Ron, kudos!!
 
Hi Bidello,

If you do find a pair of roof rails on a scrap Volvo and you take them off yourself then the fixing method will become clear.

To get them to fit on your Doblo the end feet need to removed from the rails and then the rails need to be shortened off and with a bit of gentle bending the feet sit snugly in the recesses in roof.

The feet are connected to the rail by a spigot (part of the foot casing) which fits into the ends of the rail, it’s bonded in place with a gap filling adhesive.

I found the best way to remove it was to cross cut the rail just clear of the spigot end (about 40mm in if I remember). Check you aren’t cutting too much off leaving the rail short! Carefully cut along the scrap length of rail left on the foot spigot (without cutting too much into the spigot) and peel/lever it away from the spigot assisted by something like a largish slotted screwdriver.

Once off the old glue will chip off the spigot and the job of gradually curving the rail (soft jaws in a vice to hold it without damage to the paintwork) and incrementally cutting the rail to length can commence.

Next job is to drill the holes in the roof, fix rivnut etc.(Scary bit)

Dry run the modded rail on the roof and if all fits well take apart and smear suitable adhesive over each spigot and in the ends of the rails, reassemble in place and allow adhesive to set.

That’s about it. Load up! :cool:

Cheers

Ron
 
Just a quick comment to say that I think those bars look excellent. Great lateral thinking Poperon (y)
 
Last edited:
OK, first update:

Been to a local scrapyard, no Volvos 940/960:(

However, I did find some Fords roof rail :)

They did look nice, spigots on the feet that fit into the rails by means of a rubber gasket, no glue to be removed....

Bad point was that each foot had a bold embedded in the aluminium, too short to fit on the Doblò:mad:

So didn't get them. Shame, they wanted only £15.

Had a look on the auction site and some are asking £80:eek:

Will find them no doubt at some point(y)
 
Hi all,

It took me a while to find the right rails for the mod and even more time to fit them...but it's done at last!

I started taking picture to aid others in the process, but then it started to snow so hard that I had to stop:mad: Fortunately I had put only one rivnut on so I sealed the hole and waited for next day - more snow....

Anyway I then finished the whole thing last weekend, but never took any other picture:eek:

I will take one last pic of the finished work, although it is not needed as you can see the nice picture of Poperon's Doblò above.

Also, please note that my pictures are only intended to be a visual aid to the excellent step-by-step Poperon guide, stick to it and you'll end up with a nice railed high-roof Doblò:D

Cheers
 

Attachments

  • IMG_2026.jpg
    IMG_2026.jpg
    3.2 MB · Views: 95
  • IMG_2027.jpg
    IMG_2027.jpg
    2.3 MB · Views: 96
  • IMG_2029.jpg
    IMG_2029.jpg
    2.5 MB · Views: 64
  • IMG_2031.jpg
    IMG_2031.jpg
    2.7 MB · Views: 74
  • IMG_2033.jpg
    IMG_2033.jpg
    2.7 MB · Views: 97
  • IMG_2034.jpg
    IMG_2034.jpg
    2.1 MB · Views: 84
Wow..that all looks great.(y)....there's only one drawback, you need to take a set of steps with you to load up ...unless of course you're 7'+ !!

Cheers

Ron
 
Yeah, quite right! I'm buying a foldable step/ladder to access the roof!

I'm also fitting a narrow, long roofbox to carry my gear, so I have the other half of the roofbars free for my longboard(y)

Will take pics ASAP.

Thanks again for all your help Poperon, very much appreciated:slayer:
 
Hi, after reading this thread I managed to pick up a set of Volvo roof rails and I had a question about fitting them. Should the feet on the rails line up perfectly in the middle of the indents on the roof cross sections? As the feet are an inch or so off the centre. Thanks.
 
Hi,

The M5 thread in the feet are pretty much in the centre of the each foot. The rivnuts need to be fixed centrally in the indents which is directly over the centre of the roof cross member. It looks right but also by default the feet therefore line up with the indents in the roof.

The rivnuts have quite a thick flange which raises the foot up a couple of mm above the indent (to about level(ish) with the roof surface) so even if the foot wasn't exactly in the centre of the indent (resulting in a few mm of foot overhanging the edge of the indent) it shouldn't rub on the surrounding roof surface. You can always take a file to the underside of a foot if you thought it was a bit close.

With the feet positioned it's now up to you to carefully bend the hollow rails to fit between them. If I remember the shorter rear section is just cut to length but the front length needs cutting to length and compound bending. I found that bending a little at a time, gradually shortening off and testing for fit was the way. It's worth spending the time!

Hope that helps

Cheers

Ron
 
Thanks for the feedback! I didn't realise from the original thread that you cut both the front and the rear of the rail to size, that's why the first two feet seemed a little off centre. I'll bear that in mind when I'm measuring it up again. The other question I have is: Do I need any special tools or replacement plastic ends when removing the ceiling fabric to get into the cross sections from inside? Where can I find these? I'm assuming the little plastic caps that hold on the ceiling fabric will have to be replaced when removed? Sorry if the questions are obvious but I'm a newbie to this sort of thing.

Thanks again for the feedback.
 
Hi,

Photos attached showing dimensions between feet.


attachment.php


attachment.php


attachment.php


attachment.php


Yep, the plastic fixings snap off, some are recoverable. Once you get the ceiling down you'll see that they push into a 7mm (or something similar) hole in the bodywork. What I did was to fix M4 rivnuts into these holes and fix the lining back with 15mm long M4 Furniture handle screws (they've got a 10mm diameter head) with large diameter (16mm) 2 piece screw caps.

attachment.php


Cheers

Ron
 
Hi Ron,

That's great info and I'm sure it'll help once I get round to installing the rails. Not sure if the pictures uploaded properly but I can't see them on my ipad. One last question! Is there anything I need to do to make the drilled holes watertight? Thanks again.
 
Back
Top