Styling Turbo Banana Seicento Project 2

Currently reading:
Styling Turbo Banana Seicento Project 2

Joined
Mar 7, 2005
Messages
2,859
Points
508
Location
Leicester
Got bored of my last project shouldnt have done the body styling so thats being sold soon on ebay....

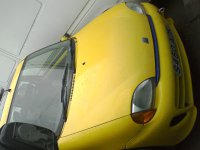
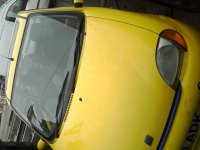
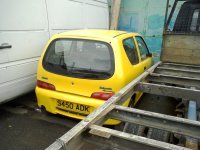
Heres my new beast.....

1998 Secento Sporting in broom yellow

the mods im doing are:

MK1 Uno Turbo calipers all round
Dropped 55mm on shortened shocks
briaded hoses all round
MG TF fuel pump
delocked
Keyless entry and ignition/start (no key needed to start car all going to be hidden behind dash
Custom dash with 1.5" lcd in rev counter, boost guage, rev counter, water temp and oil temp guages built into dash
Turbosmart boost controller
Tints
going to look completely standard from outside except low and tinted

engine mods.... Currently being done

Punto 75 1242cc engine
punto 85 pistons on 16v rods
fully ballanced bottom end and crank
lightened flywheel
stilo 16v clutch and flywheel
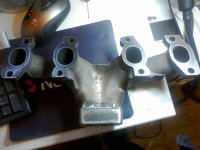
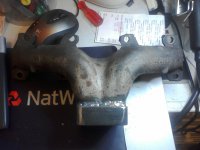
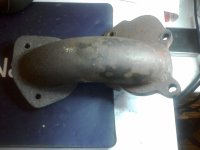
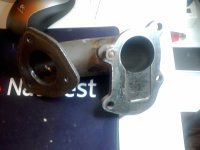
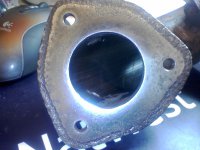
garret hybrid t15/t20 turbo with custom made exhaust manifold ceramic coated inside and out
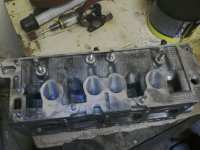
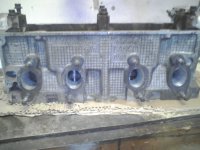
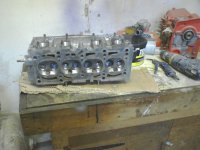
fully ported and polished head with valve guides cut
multi staged valves
punto 75 MPI head for the larger intake valves
MG TF injectors or punto GT aint decided yet
866 CAM from punto 75
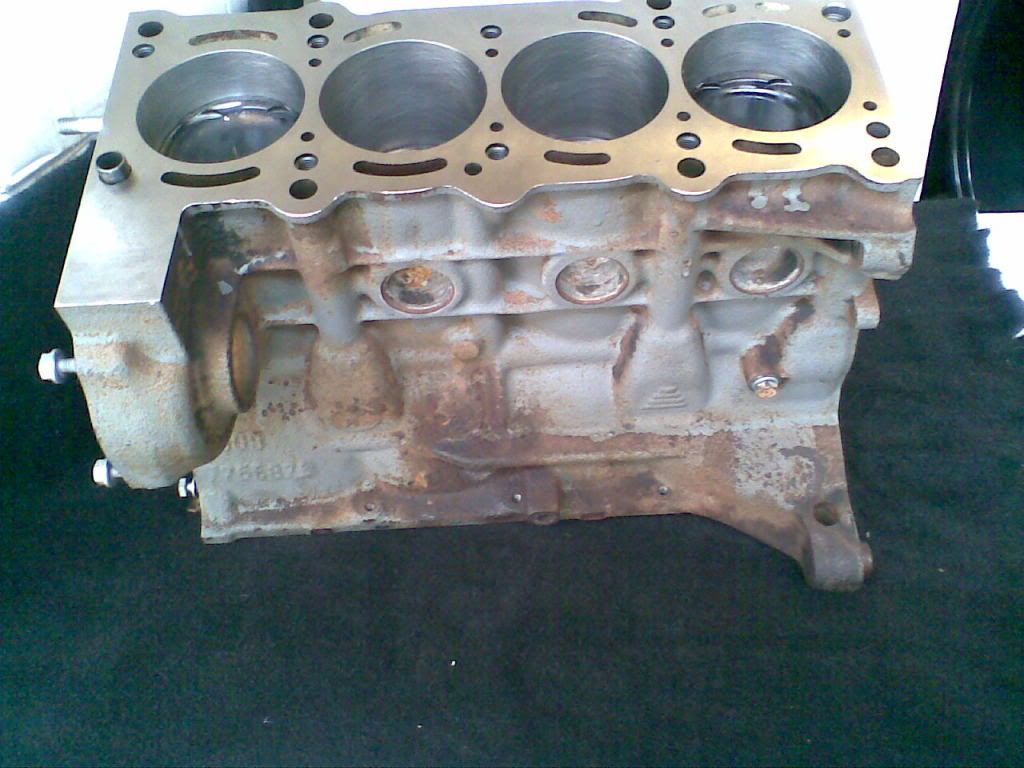
flatted engine block
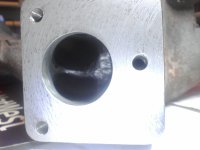
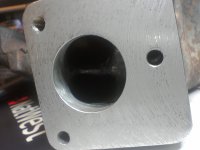
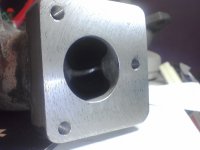
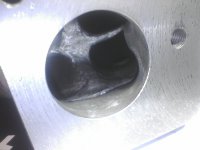
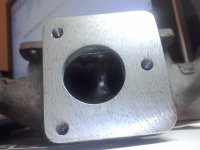
43mm Tricker TB with port polished inlet manifold modified
intercooler
dump valve

running on megasquirt 2 v3

to come...

Gearbox might be getting a LSD Funds permitting once they have been made

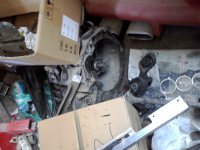
heres few pics of it so far engine is currently being built by zak (slosei) should have for the weekend

pics of manifold to come as its currently at the engineering shop being flatted for a nice smooth mating surface then off to the ceramic coating place

few pics.....
 

Attachments

  • Camera0001.jpg
    Camera0001.jpg
    394 KB · Views: 129
  • Camera0002.jpg
    Camera0002.jpg
    351.6 KB · Views: 86
  • Camera0003.jpg
    Camera0003.jpg
    326.4 KB · Views: 82
  • Camera0004.jpg
    Camera0004.jpg
    391.1 KB · Views: 164
  • Camera0005.jpg
    Camera0005.jpg
    388 KB · Views: 73
  • Camera0008.jpg
    Camera0008.jpg
    324.7 KB · Views: 52
  • Camera0007.jpg
    Camera0007.jpg
    360.1 KB · Views: 53
  • Camera0006.jpg
    Camera0006.jpg
    407.3 KB · Views: 60
Engine.jpg

been told to leave the out side bit, Gaz will be painting that,
 
nice one gaz... same set up as me :D guess youll be wanting to borrow my msq ;)

maybee.... ;) please lol well for starters to get it running lol once its done wont be for about a month yet

Engine.jpg

been told to leave the out side bit, Gaz will be painting that,

yeah outside will be getting wirebrushed, and pinted good n propper, look at the flatness :D its looking good (y) cheers
 
right i now have my engine back and done a huge thanks to Zak for doing it for me :)

now ive been told to use my copper decomp plate with this instead of a headgasket....

now the decomp plate i have is 1.5mm thick and made of solid copper.

on a standard 1108cc sporting it drops the ratio to 8.2-1

my block has been skimmed and so will the head be so both surfaces will be highly flat

i want to be running around 1bar of boost maybe more.

if i put this decomp plate on i then have even lower compression due to the punto 85 pistons and the decomp plate.

will this be ok for my turbo application?
 
why you gotta use that instead of a head gasket? sounds a bit dodgy. most engines that have a solid gasket like that have firerings... this where they mill a ring around the combustion chambers on the head and block and fit stainless (or other metal) rings that seal them.

you really need to work out the CR. if you run to low you wont have any power off boost. horrid to drive.
really you want as high as compression you can that it allowed for the boost you plan to use.
 
yep! i would fit a normal gasket to start with anyway. in fact my engine now has a used gasket lol
when i took the engine apart to fit the 16valve pistons the head gasket came off easy and had only been used for a short time.

I just thought it looked fine and saves me wasting money if the 16valve pistons of unknown history where scrap.
 
Last edited:
good luck with your new toy mate, it is a shame about your other one, after all that pain and work, but if its not to be, then i guess its not to be, it sounds like you've got some good plans lined up. I don't suppose you'd sell the exhaust off your old one would you?:chin:
 
Just to get the point accross, measure the CR or get someone to do it.

Burette's are not too expensive to buy. If I had one I'd lend it but sadly I don't. I know JonSpeed mini's in nuneaton sell them in their store and ebay. Maybe ring them and pick one up, not too far :)

Kristian
 
Last edited:
also a good way to see if your valve seats are doing the job.

I lapped all my mini valves in(well thought i had) went to measure the CR and half of them leaked:rolleyes:
 
the block has been skimmed so the pistons protrude out the block 0.3-0.4mm iirc
my mistake i thought the copper gasket was 1mm thick
dont want the pistons having contact with the head or valves,rods do stretch dont they? @high revs?
Zak:)
 
right not much has been done really as at the mo im wirebrusing all the rust off the block and going to spray it with high temp paint :)

got my manifold back from the machine shop after being flatted ****ing bank holiday has been aload of **** because post had stopped and none of the things i ordered come so iive had feck all to do.

few pics of my manifold are here just got to send them off for ceramic coating now in white or black not sure yet

as you can see ive grinded out most of the cross sectional bit inside had a new block welded on and tapped (no more crappy elicoils) ported it all out to more or less give it smooth flow inside the manifold :)
 

Attachments

  • Camera0005.jpg
    Camera0005.jpg
    284.9 KB · Views: 38
  • Camera0004.jpg
    Camera0004.jpg
    330.4 KB · Views: 37
  • Camera0003.jpg
    Camera0003.jpg
    336.3 KB · Views: 32
  • Camera0002.jpg
    Camera0002.jpg
    344.3 KB · Views: 46
  • Camera0001.jpg
    Camera0001.jpg
    368.5 KB · Views: 3,781
  • Camera0006.jpg
    Camera0006.jpg
    294.2 KB · Views: 31
  • Camera0007.jpg
    Camera0007.jpg
    278.1 KB · Views: 44
  • Camera0008.jpg
    Camera0008.jpg
    394.1 KB · Views: 30
  • Camera0009.jpg
    Camera0009.jpg
    287.2 KB · Views: 33
  • Camera0010.jpg
    Camera0010.jpg
    303.3 KB · Views: 41
  • Camera0011.jpg
    Camera0011.jpg
    396.9 KB · Views: 36
Back
Top