D81_6510.jpg

Panda 2012+ Our 2014 Multijet 4x4

With winter pack.

Introduction

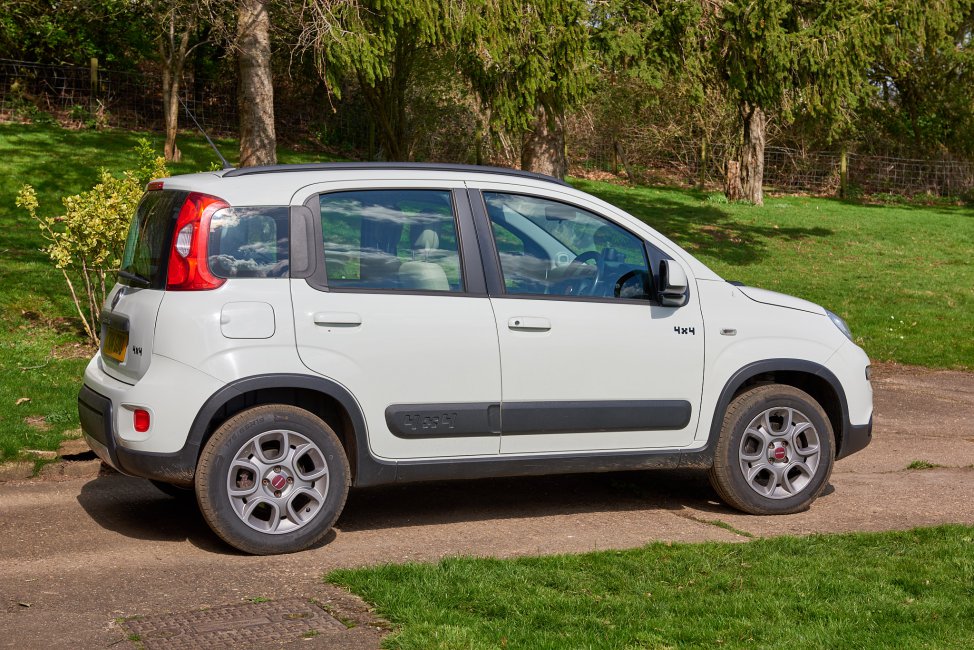
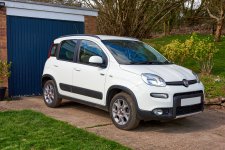
Purchased with 83,000 on the clock but mileage doesn't worry me as much as some. It's excellent condition inside and the bodywork as well. I intend to make this a keeper and use it regulary as I want to keep the mileage down on my other car, a slightly more expensive Alfa Giulia Quadrifoglio.

Jobs I am going to do regardless of whether needed, but probably are:

Drivers seat bolster and covering ripped, needs replacing --- Done, see here: Seat repair
OSF DRL stone damaged --- S/H DRL sourced, waiting on plastic screws, will replace this weekend - done.
Replace DMF, clutch, release bearing, crank seal --- booked in to the Alfa Workshop in 2 weeks time.
Timing chain --- will do this myself, just need some summer weather first, couple of months?
Sump guard --- held on by 4 bolts & 2 tie wraps. 2 bolts sheared removing them. Need to scratch head and decide whether to go through the hassle of drilling out the old bolts or trying to drill and tap but as they are only M6 there is not a lot to work with. Might end up leaving it off...
EGR replacement --- will most probably fit a new one for peace of mind.
Ahh, ok. I must admit, I would rather it be on than off. Thanks for the comment - now I need to see if I can drill those old bolts out. I think I might employ the trick that one of the other members mentioned and use a jack to put steady pressure on the drill as it seems like a sensible idea, especially working underneath the car..
 
I believe all that is required is a good set of tools (which I have) and a sound understanding of the processes required to do the job. I have absorbed multiple videos, some in English, most in Italian or Russian and I am happy I now know the pitfalls, shortcuts and required parts. I think the biggest problem is lack of space in the Panda engine compartment.

I am planning to install the car in my garage and work on it over a period of as many days as is required. If I hit a snag that requires tools or materials I don’t possess then I will buy those items and carry on. If I need extra muscle, well, that what sons are for!
The other thing my mechanic said he couldn’t have done it without the locking tool I bought a cheap kit on eBay which done the trick you are right about the space in the engine he removed the whole front off my car
 
@DaveMcT has rebuilt a mJet engine in a 169 Panda after a broken camchain; there's a whole thread detailing the story, it may be worth your while to read it.

Obviously access isn't a problem with the engine on the bench. I'm wondering if it would actually be worth pulling the engine out of the car to change the chain? It would also give you better access for some of the other things you might want to do.
 
Funny you should mention that. I had already found a local company that is willing to rent out a heavy duty engine hoist for a couple of weeks at a time. It will be helpful that the Alfa/Fiat workshop will already have loosened and dealt with all the difficult bolts driveshafts etc., in order to do the clutch and DMF.

Would be a damn sight easier doing both the chain and the EGR with the engine out…will give that some serious thought.
 
Finally done after two attempts. After the first attempt I had to give up and purchase some of the plastic screws that refused to come undone. These are used on the top and bottom of the bumper. For those interested the sequence was:

1. Jack up and remove wheel for the side concerned, in my case the drivers side.
2. Remove 4 or 5 crosshead screws (one under car), 1 x M10 plastic nut, 1 x metal M10 nut and 1 x M10 bolt. Pull inner wing out.
3. Remove Torx screw holding bumper to wing. Unplug the DRL and fog lamp connectors or else the wires may break when the bumper comes away.
4. In my case, cut off all plastic screws along the bottom of the bumper.
5. Remove or cut off plastic screws on top of bumper in engine compartment. Remove 2 x Torx screws.
6. Using a plastic tool for leverage, carefully pull the bumper away from the wing. Keep working the join and the clips will separate, don’t force it!
7. I held the bumper in place with hands/knees and undid the three retaining screws holding the DRL unit.

Reverse the procedure and replace any plastic screws you cut off. These just push straight into their fixing points.

I now have a working, condensation free DRL. Another job off the list.
So, back from the Alfa workshop where the Panda spent the last two days having the clutch, DMF, concentric release bearing, crank oil seal and gearbox/transfer box fluids changed. For those interested the total cost was round about £1300.

Unfortunately, I still have a squeaky clutch pedal so it wasn’t the release bearing as I had thought. I had a look at the pedal box and there is grease everywhere so I guess the previous owner or their mechanic already had a go in that area. I think this means that the only culprit left is the master cylinder. Now, do any of you know how a new master cylinder is bled when connected to a concentric bearing? Obviously the bearing can’t be accessed so if the hydraulic line is opened to fit the master cylinder air must get in so how to get that out? Any thoughts or suggestions appreciated.

Whilst with the workshop they discovered that the centre propshaft bearing is close to failure so I am going to fit a new one. Anybody see a problem with this one below?

Purchased the propshaft I previously mentioned as set about replacing the old one last weekend. Got the original shaft out, some pics including the new one to go in:


IMG_3986.JPG
IMG_3987.JPG

IMG_3988.JPG
IMG_3989.JPG


Cleaned all the bolts by wire brushing then degreased in acetone. Started to fit the new shaft and began to suspect that it may not be of the best quality. The CV joints were extremely stiff, could barely move them. It had quite a few balance weights on it and when we offered it up it was a tight fit and the centre bearing bracket holes didn't quite line up, had to force the bolts in.

All finished, took it out for a test drive and was not happy. The shaft was noticably sapping power (presumably the CV joints) and began to vibrate at 45mph right through to 60mph. It produced a thrumming throughout the whole cabin. I had a word with another member who had a similar problem with a shaft from this source but his vibration wasn't as bad and disappeared afte a short while. I thought I would give mine a few days but there was no improvement. So, yesterday I ordered a new one from Des Shelly Shafts in Wolverhampton.

It arrived today and I set about doing my second propshaft change in a week. I forgot to take some pics, doh! The new shaft is of a much higher quality - better welding, the CV joints move easily and smoothly, only two small weights for balancing. It fitted perfectly, went on a treat. The test drive was a joy, all the power was back and not a trace of vibration anywhere. Job done.


The other shaft is going back Monday.
Back
Top