D81_6510.jpg

Panda 2012+ Our 2014 Multijet 4x4

With winter pack.
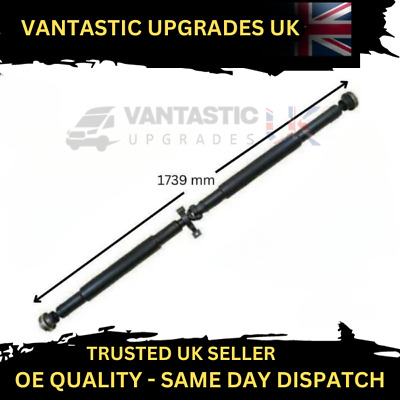
Purchased the propshaft I previously mentioned as set about replacing the old one last weekend. Got the original shaft out, some pics including the new one to go in:


IMG_3986.JPG
IMG_3987.JPG

IMG_3988.JPG
IMG_3989.JPG


Cleaned all the bolts by wire brushing then degreased in acetone. Started to fit the new shaft and began to suspect that it may not be of the best quality. The CV joints were extremely stiff, could barely move them. It had quite a few balance weights on it and when we offered it up it was a tight fit and the centre bearing bracket holes didn't quite line up, had to force the bolts in.

All finished, took it out for a test drive and was not happy. The shaft was noticably sapping power (presumably the CV joints) and began to vibrate at 45mph right through to 60mph. It produced a thrumming throughout the whole cabin. I had a word with another member who had a similar problem with a shaft from this source but his vibration wasn't as bad and disappeared afte a short while. I thought I would give mine a few days but there was no improvement. So, yesterday I ordered a new one from Des Shelly Shafts in Wolverhampton.

It arrived today and I set about doing my second propshaft change in a week. I forgot to take some pics, doh! The new shaft is of a much higher quality - better welding, the CV joints move easily and smoothly, only two small weights for balancing. It fitted perfectly, went on a treat. The test drive was a joy, all the power was back and not a trace of vibration anywhere. Job done.


The other shaft is going back Monday.
So, back from the Alfa workshop where the Panda spent the last two days having the clutch, DMF, concentric release bearing, crank oil seal and gearbox/transfer box fluids changed. For those interested the total cost was round about £1300.

Unfortunately, I still have a squeaky clutch pedal so it wasn’t the release bearing as I had thought. I had a look at the pedal box and there is grease everywhere so I guess the previous owner or their mechanic already had a go in that area. I think this means that the only culprit left is the master cylinder. Now, do any of you know how a new master cylinder is bled when connected to a concentric bearing? Obviously the bearing can’t be accessed so if the hydraulic line is opened to fit the master cylinder air must get in so how to get that out? Any thoughts or suggestions appreciated.

Whilst with the workshop they discovered that the centre propshaft bearing is close to failure so I am going to fit a new one. Anybody see a problem with this one below?

Finally done after two attempts. After the first attempt I had to give up and purchase some of the plastic screws that refused to come undone. These are used on the top and bottom of the bumper. For those interested the sequence was:

1. Jack up and remove wheel for the side concerned, in my case the drivers side.
2. Remove 4 or 5 crosshead screws (one under car), 1 x M10 plastic nut, 1 x metal M10 nut and 1 x M10 bolt. Pull inner wing out.
3. Remove Torx screw holding bumper to wing. Unplug the DRL and fog lamp connectors or else the wires may break when the bumper comes away.
4. In my case, cut off all plastic screws along the bottom of the bumper.
5. Remove or cut off plastic screws on top of bumper in engine compartment. Remove 2 x Torx screws.
6. Using a plastic tool for leverage, carefully pull the bumper away from the wing. Keep working the join and the clips will separate, don’t force it!
7. I held the bumper in place with hands/knees and undid the three retaining screws holding the DRL unit.

Reverse the procedure and replace any plastic screws you cut off. These just push straight into their fixing points.

I now have a working, condensation free DRL. Another job off the list.
Back
Top