AndrewHarvey
Established member
- Joined
- Jan 17, 2015
- Messages
- 1,471
- Points
- 290
Hi - had a great day building the front of my 500........but I've hit a snag.
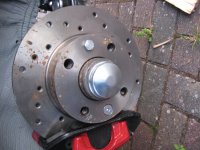
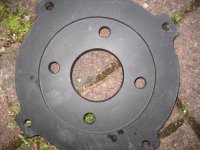
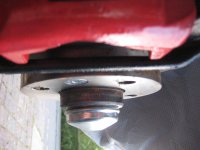
I bought a disc conversion with spacers and I've found a problem fitting the spacers on the hubs.
You will see a bolt head holding the hub on in picture 1
This clashes with the spacer mating surface in picture 2
If I remove the bolt, the spacer will sit flush on the hub, and will rub the caliper in picture 3 and what do I replace the bolt with??
Your experiences will be welcomed


")