2013-09-23 16.50.07.jpg

Panda (Classic) Mk1 Panda 4x4 long term project

Introduction

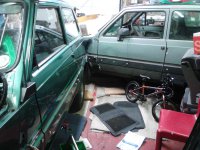
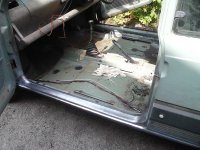
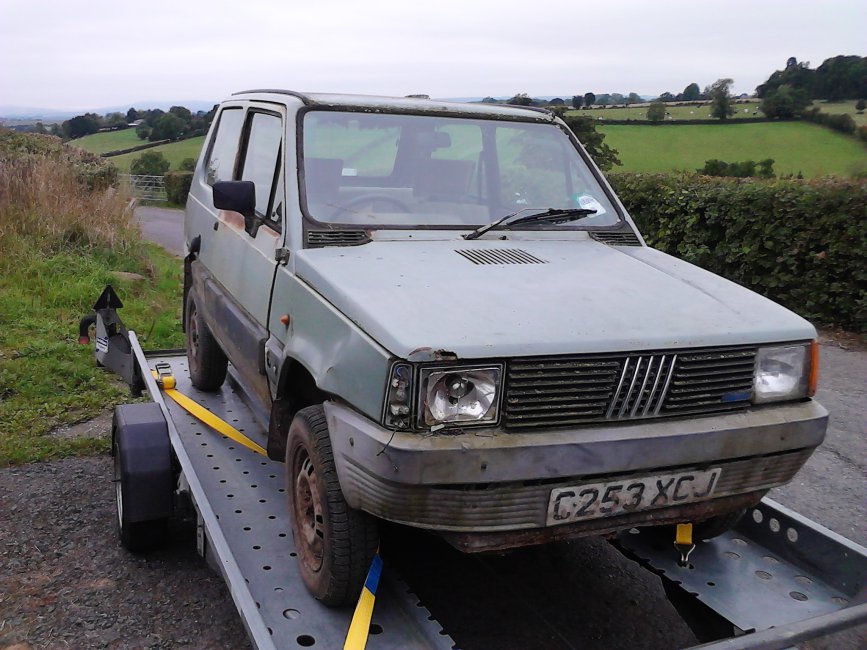
So here's the car when I picked it up:

(same model/colour as Sam (@goodgirl156)'s, but that's currently where the similarities end!)

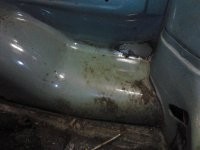
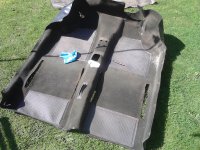
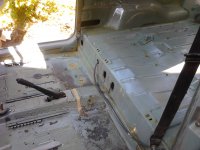
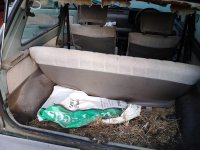
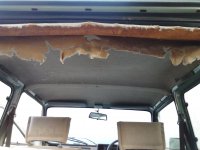
Had half an hour free this afternoon so started to have a look over, and clear out the minging interior. Plan is to strip out the interior to keep it safe from my inevitable welding fires, and to try and get rid of the smell! Always find it interesting cleaning out cars I've bought - highlight in this one is an invoice for animal feed (no surprise given the amount of hay in it). Lowlight is the evidence of mice..

Have had a go at a video but it's amateurish to say the least. Bit like the welding will be to start off with, but there's plenty of "opportunity" to improve both...

[video wouldn't upload, will try again!]
Hi Sam

The short answer is: it's going very slowly! Wayne did a great job on the welding, but the project's now stalled with me while other things get in the way. Am part way through stripping the donor Country Club but swapping the engine will be more difficult than expected as the previous owner has already part dismantled (unbeknown to me) and a number of parts are damaged. I have a plan B though.

Anyhow, next stage is to paint the floor and get the carpet/trim back in, following your lead as inspiration! In the meantime old and new are sharing (untidy) garage space.

All the best

David
 

Attachments

  • 2 Panda Garage.jpg
    2 Panda Garage.jpg
    561.9 KB · Views: 115
Last edited:
The two Andys (AndyPanda and andyholli) have given me incentives to pick this up, so work has started again (albeit slowly!!).

First task: find clipboard, make lo-ong list.
Second task: little bit of welding Wayne missed - cut a jigsaw piece last night, tonight's job will be to weld it in.
 

Attachments

  • 2014-07-16 22.24.42.jpg
    2014-07-16 22.24.42.jpg
    509.5 KB · Views: 144
Quick update: small weld done, interior painted (bit obsessively - welds and new steel taken back to bare metal, primed with Electrox Zinc primer, then topcoated, all covered with a thin layer of Dynax and cavities injected). Added some extra soundproofing (drop in the ocean!). Bit gutted to find paint had spilled on the carpet whilst stored in shed..

Next stage is some minor repairs and painting around windscreen and door seams.
 

Attachments

  • 2014-07-27 15.18.39.jpg
    2014-07-27 15.18.39.jpg
    1 MB · Views: 102
  • 2014-07-27 14.30.35.jpg
    2014-07-27 14.30.35.jpg
    579.5 KB · Views: 98
  • 2014-07-26 13.48.21.jpg
    2014-07-26 13.48.21.jpg
    738.4 KB · Views: 95
Quick update: small weld done, interior painted (bit obsessively - welds and new steel taken back to bare metal, primed with Electrox Zinc primer, then topcoated, all covered with a thin layer of Dynax and cavities injected). Added some extra soundproofing (drop in the ocean!). Bit gutted to find paint had spilled on the carpet whilst stored in shed..

Next stage is some minor repairs and painting around windscreen and door seams.

Looks fantastic! Great level of protection done too :)
 
Looking good!
Mine is being used daily at the moment, still working out the niggles but no oil, coolant or other bodily fluid loss so were all good :)

Cheers Sam, good to hear from you. Good news yours is running well. Are you still selling it or have you decided to keep hold? If I wasn't already committed to mine, I'd definitely want to buy yours.
 
Good progress David - she'll soon be ready for the Yorkshire weekend! ;)

Andy, I'm glad you weren't specific about which Yorkshire weekend... she won't be ready for this one, but I'm enjoying making slow and steady progress. And painting things. Am treating/painting/protecting underbody one side at a time, and working round suspension and brakes one corner at a time. Has taken a long time and a fair amount of heat/force to get some things off. And isn't it satisfying to start attaching shiny new bits!

Current 'challenge' is around rear seat belts - will do a separate post on that.

David
 

Attachments

  • 2014-09-04 19.07.14.jpg
    2014-09-04 19.07.14.jpg
    952.2 KB · Views: 116
  • 2014-08-27 22.03.12.jpg
    2014-08-27 22.03.12.jpg
    1.3 MB · Views: 110
Project is inching along, slowly.. Just refitting some of the interior (dash, steering wheel etc) before some more significant work.

Question for the Mk1 guys in particular: how does the cable for the hand throttle attach? Cable was missing when I stripped the car and I can't find a route to the carb other than the accelerator pedal itself. Does the hand throttle cable attach to the pedal?....

Ta

David

Hi David,

Yes, I can help. The cable for the engine speed adjuster does indeed attach at the pedal in the same place (slot) where the accelerator cable attaches to the pedal.

It is hard to find a route for the cable which doesn't rub on the steering column as you turn the wheel though! :eek:

Will try to grab a picture in a mo...if not too dark!
 
Et voila:
Photo2609.jpg


So you can see the long slit which the cable sits in at the top of the go pedal lever. The cable then follows back up towards the dash and goes through another bracket (where you can see the green sheath of the cable starts - top centre of the picture). That then goes up to the spinny screw adjuster which you turn to change the engine idle speed. It literally just tugs on the throttle pedal (you can see it moves down when you turn it!!)

Hope that helps. Sorry I took a picture of Chichi's one which has a missing throttle cable but QingQing is asleep under her winter coat on the driveway and didn't want to to disturb her :eek:
 
exactly so :D

Although I chose to fit a manual choke to the white 4x4 as the auto choke was proving unreliable again. This adjuster is completely separate idea to a choke. It is the equivalent of pressing the accelerator more. Whereas the choke makes the air fuel ratio more rich in fuel. The purpose of this engine speed adjuster was to be used at high altitude where the air is thinner to avoid stalling :cool: and probably also useful while going through water to keep revs up and again avoid stalling from water up the exhaust.
 
Back
Top