Hi all!
I've recently installed my newly purchased hawk remote central locking upgrade kit into my 03 plate mk2 punto and wanted to share with everyone how to do with step by step pictures and instructions...
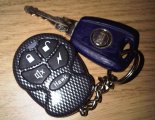
Here is the link to the kit i purchased: HAWK UNIVERSAL REMOTE UPGRADE SYSTEM. My fobs look like the one in my guide title picture though .
.
The main reason for wanting to share is because i can't believe how easy it all actually is! Especially after you read this guide (hopefully)!.
Lets get started! Onto Page 1. Check List!
I've recently installed my newly purchased hawk remote central locking upgrade kit into my 03 plate mk2 punto
Here is the link to the kit i purchased: HAWK UNIVERSAL REMOTE UPGRADE SYSTEM. My fobs look like the one in my guide title picture though
The main reason for wanting to share is because i can't believe how easy it all actually is! Especially after you read this guide (hopefully)!.
Lets get started! Onto Page 1. Check List!
Check List!
Equipment list and tools!
You will need:
- Pliers
- Flat head screwdriver
- Hawk Universal Remote Central Locking Upgrade Kit
- Cable ties
- Wire Connector blocks
- 10mm spanner
- 5/6mm Allen key (sorry can't remember what size it is).
- Velcro with adhesive backing
- some patience
connector blocks (i think thats their names) look like this:
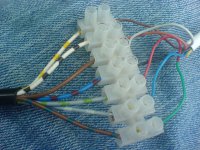
You could use scotch locks instead (I did actually use them too). However the only problem i had with my installation was a scotch lock failing to splice the wire so for that reason i will in future avoid them like the plague! Use them if you like but for certainty use connector blocks! Another alternative is bullet connectors and crimps but this is pretty fiddly given the restricted space.
Some wire strippers would make your life a bit easier too but i just used my pliers.
Your hawk upgrade kit will look daunting but don't fear it's not so hard!
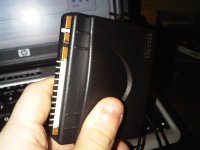
The main hawk device
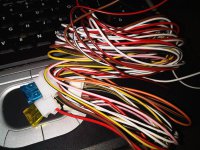
Eek Wires
Onto Page 2.
Preparation!
First of all safety first! Disconnect the battery from the car so no one gets electrocuted! Next, we need to get into the drivers side fuse box. To do this turn the 2 plastic screws(?), they won't come out, they just move. Once both are turned the fusebox should be revealed and looks like this:
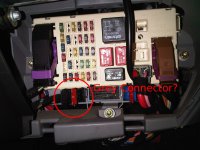
I've circled connector that we will be splicing wires from! It's labeled grey connector despite it being black for a good reason but all will be revealed soon!
Now that the fusebox is open and i've tricked you into a false sense of security on with the trickiest bit of the job! (it's not that bad though really!)
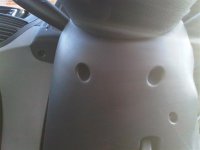
We need to remove the lower steering wheel shroud, to do this we need an Allen key! The first 2 bolts that need undoing are at the top (near the wheel). See the picture:
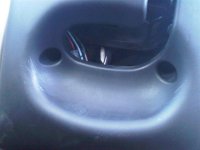
The next 2 are slightly hidden! Pull out the lever that allows you to move the wheel up and down and they will be revealed! See the picture:
Now the shroud is undone, you need to wiggle it off! Be careful not bust any of the tabs at the top. It's a bit tricky but it is possible i promise!
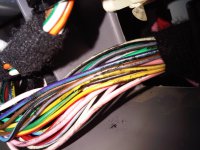
The one but last part of the preparation is to remove the nasty black tape stuff that holds all the wires together on the 'grey connector'. See picture:
The very last part of the preparation is quite tricky but not to bad is to feed the wires from your hawk kit down to the back of your foot well. Before doing this plug in the wires to the main block thing. At this stage you can do what i did and snip the spare wires... This is purely down to you! I was getting mad trying to feed the wires down and snipped them however if your planning on adding extras it might be worth keeping them. See the follow pic of where to feed the wires:
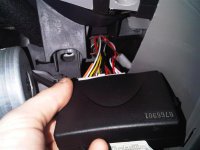
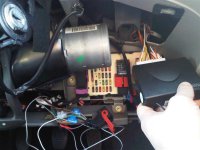
Don't tuck the block into the little nook just yet thou just encase u drop it down somewhere. Just leave it hanging!
Preparation complete!
Onwards to Page 3. Splicing!
Splicing!
Okay there are a total of 6 wires that need connecting into the car! But before we attach anything first of all we need to link together some wires that are coming from the hawk kit!
1) Cut 6 inches or so of the black wire off the end and strip both ends.
2) Strip the end of both the yellow and the yellow and black wire.
3) Using a connection block push the yellow, yellow and black and black wires into one end, Tighten good!
4) In the other end of the connector block put in the 6 inches of black wire.
Now we are ready to start connecting wires to your car! We will do it in the following order:
- Negative Wire
- Positive Wire
- Indicator Wire 1
- Indicator Wire 2
- Locking Wire
- Unlocking Wire
Wire 1. Negative Wire:
Grab the 6 inches of negative wire that you just added onto the end of the yellow, yellow and black and black wires. This needs connecting to an earth (anywhere on the car chassis). I used the following bolt that is underneath the steering wheel, see picture:
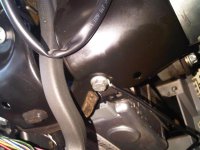
Undo the bolt with your 10mm spanner and push the metal plate up so there is space for your wire. Slip the wire under the bolt and retighten the bolt so it's snug! Make sure after tightening that the wire has a good and solid connection. Put a bit of insulation tape across it if you like
Wire 1. DONE!
Wire 2. Positive Wire:
First study this picture:
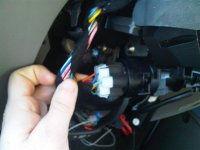
This is where we will be getting our positive feed from but not where we will be connecting! Trace the wire down the loom and remove some more of the black crap and splice in the red wire from the hawk kit. See picture:
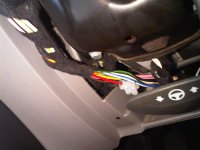
This is where i connected the red wire. To do it snip the wire with your pliers and strip both ends. Also strip the red wire from your hawk kit! Then place the source red wire (from the lock bit) in one side and in the other side place the original red wire (the other side) and also the hawk red wire.
Wire 3. Indicator Wire 1:
My hawk kit came with the the brown wire already spliced into 2, if yours hasn't do this now. (just snip some off the brown wire and splice) Just to be clear the brown hawk wire should now look like the letter 'Y'.
Take one of the brown wires and strip the end. Now remove the cars connector from the fusebox! To do this push down the small tab next to the red securing arm. Whilst pushing this down move the arm to the right.
Now take a flat head screwdriver and push how the grey connector! (thats why i originally called the connector the grey one. Note on the block before you push out the grey part the small numbers on it!
Count along to pin 3
Using the same method as mentioned before splice one of the brown wires onto this PINK wire.
See the following picture for an example of where i spliced everything:
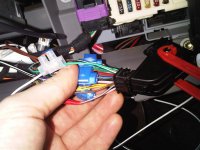
Wire 3. DONE!
Wire 4. Indicator Wire 2:
The other brown wire needs connecting to wire number 12 in the grey connector block! The wire in the grey connector block should be PINK and WHITE.
Splice this just like the other!
Wire 5. Locking Wire:
Nearly there now! Not too much left to do, the locking wire is either GREEN and WHITE or BLACK and WHITE. Either way the most important piece of information is that the wire to splice is at pin 34 which is in the black connector block instead of the grey one!
Splice this wire just like the others!
Wire 5. DONE!
Wire 6. Unlocking Wire:
The unlocking wire is MAUVE which is situated on pin 24, again in the black connector block
Onto Finishing up!
Finishing up!
Okay last things last, grab your velcro with adhesive backing, stick some on the hawk black thing, and the other side just past the lip of the nook bit. See picture:
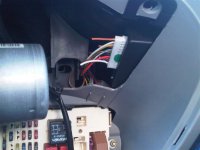
now grab your cable ties and tidy all the excessive wires from the hawk kit.
As for the rest... it's just a reverse of the preparation instructions! Oh! One thing first thou! Check it works!!!!
Reconnect your battery and check your fob operates correctly! Then disconnect it again!!!
Then put the lower steering wheel shroud back on and put the fusebox cover back
Jobs a goodun!


