Splicing!
Okay there are a total of 6 wires that need connecting into the car! But before we attach anything first of all we need to link together some wires that are coming from the hawk kit!
1) Cut 6 inches or so of the black wire off the end and strip both ends.
2) Strip the end of both the yellow and the yellow and black wire.
3) Using a connection block push the yellow, yellow and black and black wires into one end, Tighten good!
4) In the other end of the connector block put in the 6 inches of black wire.
Now we are ready to start connecting wires to your car! We will do it in the following order:
- Negative Wire
- Positive Wire
- Indicator Wire 1
- Indicator Wire 2
- Locking Wire
- Unlocking Wire
Wire 1. Negative Wire:
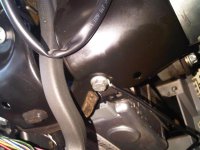
Grab the 6 inches of negative wire that you just added onto the end of the yellow, yellow and black and black wires. This needs connecting to an earth (anywhere on the car chassis). I used the following bolt that is underneath the steering wheel, see picture:

Undo the bolt with your 10mm spanner and push the metal plate up so there is space for your wire. Slip the wire under the bolt and retighten the bolt so it's snug! Make sure after tightening that the wire has a good and solid connection. Put a bit of insulation tape across it if you like
Wire 1. DONE!
Wire 2. Positive Wire:
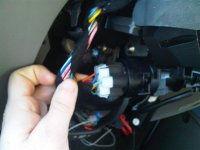
First study this picture:

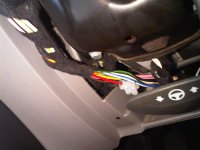
This is where we will be getting our positive feed from but not where we will be connecting! Trace the wire down the loom and remove some more of the black crap and splice in the red wire from the hawk kit. See picture:

This is where i connected the red wire. To do it snip the wire with your pliers and strip both ends. Also strip the red wire from your hawk kit! Then place the source red wire (from the lock bit) in one side and in the other side place the original red wire (the other side) and also the hawk red wire.
Wire 3. Indicator Wire 1:
My hawk kit came with the the brown wire already spliced into 2, if yours hasn't do this now. (just snip some off the brown wire and splice) Just to be clear the brown hawk wire should now look like the letter 'Y'.
Take one of the brown wires and strip the end. Now remove the cars connector from the fusebox! To do this push down the small tab next to the red securing arm. Whilst pushing this down move the arm to the right.
Now take a flat head screwdriver and push how the grey connector! (thats why i originally called the connector the grey one. Note on the block before you push out the grey part the small numbers on it!
Count along to pin 3
Using the same method as mentioned before splice one of the brown wires onto this PINK wire.
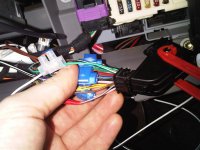
See the following picture for an example of where i spliced everything:

Wire 3. DONE!
Wire 4. Indicator Wire 2:
The other brown wire needs connecting to wire number 12 in the grey connector block! The wire in the grey connector block should be PINK and WHITE.
Splice this just like the other!
Wire 5. Locking Wire:
Nearly there now! Not too much left to do, the locking wire is either GREEN and WHITE or BLACK and WHITE. Either way the most important piece of information is that the wire to splice is at pin 34 which is in the black connector block instead of the grey one!
Splice this wire just like the others!
Wire 5. DONE!
Wire 6. Unlocking Wire:
The unlocking wire is MAUVE which is situated on pin 24, again in the black connector block
Onto Finishing up!

