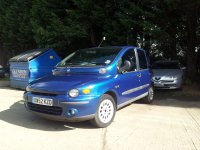
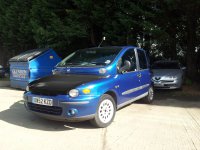
Quiet at work so thought I would post a quick tutorial of how I did it so you can have a go yourself (in Photoshop)...
First of all I took a carbon texture I actually had made already. This was made using the "halftone pattern" filter with a number of other tweeks and a gradient overlay. Nothing complicated.

The above is just a low res example but works for me to show you.
I placed the carbon texture into the Multipla picture as a new layer. I sized it so it covered the whole of the bonnet.
Next I used warp tool (right click on the layer bounding box and select warp) to shape the carbon texture layer to roughly match the curves of the bonnet but leaving a bit over the edge. This gives some realism to the texture as the lines follow the real lines of the car.
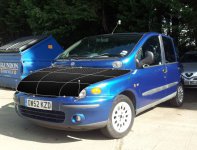
Next I trimmed the edge to the exact shape of the bonnet. Reduce the transparency of the carbon texture layer so you can see the bonnet underneigh. Use the point to point section tool with a 1px feather to cut the texture out using the outline of the bonnet. Once done, with the cut still selected, click the select tab and goto refine edge. Here you can alter the smoothness, feather and contrast etc to get the selection just right. Click ok when happy. With the selection tool still selected, right click on the selection and choose "select inverse". Then hit delete. This will trim the excess and you will now have a texture the correct shape.
Put the transparency of the texture back up to 100% and set the layer style to "overlay".
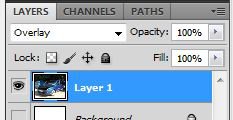
This makes the layer semi transparent but to certain rules. Overlay works well for what we are doing here. Have a try of the other styles to see what they do.
Having chosen overlay, you will see that the carbon texture is now blue but with the reflections from the original bonnet showing through. This is because overlay allows the colour and saturation from the lay bellows show through.
Right click on the carbon texture layer image in the layers tab, select "select pixels". This will "cut out" the area the texture covers. Now click on the multipla picture tab and click the image tab at the top of the screen. Go to adjustments then select "desaturate". This will make the carbon effect black again but still allow the relections from the bonnet show through.
At this point I also lightened the selection on the multipla picture slightly and reduced the contrast a touch. I also ran a dust and scratches filter on it too to get rid of the stone chips in the bonnet.
A few minor tweeks to levels later and all done

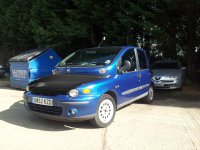
 I tried to follow the guide for photoshop above, but I don't have photoshop, so have been trying to use GIMP, and I can't get it to do what I need. Can anyone photoshop a carbon (wrap) bonnet onto this picture (or explain the differences in what photoshop does and what GIMP does)? If you double click the picture, you can see the extent of the mad stonechip effect currently!