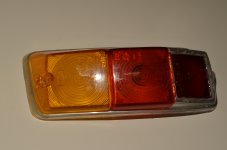
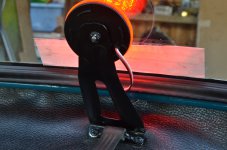
I had a thought about fitting a rear fog light into the standard back light fitting.
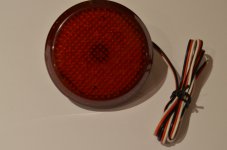
On eBay there are lots of sellers offering 68mm circular LED "reflector" fittings for Toyota Corolla and several other types of (mainly Japanese) cars. I worked out that these could probably be trimmed down to make an approximately 50mm square component which I might be able to fit in the place of the reflector of the standard light. OK, so I would be missing a reflector, which makes something else to think about, but I decided to go ahead anyway.
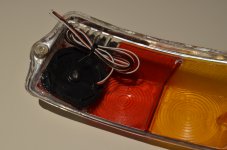
I chose one in which I could see that the LED cluster was likely to be outside of the range of the necessary trimming. Cutting a square out of the polycarbonate lense was quite tricky, even with the super-Dremel") and after a couple of pieces split away from it I resorted to cannibalising a more resilient lense from another vehicle.
and after a couple of pieces split away from it I resorted to cannibalising a more resilient lense from another vehicle.
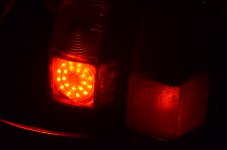
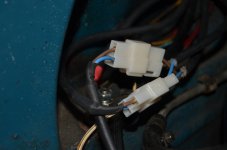
Trimming the backing to the LED cluster was more straightforward. Neatly cutting the reflector out of my spare rear lense was another challenge on which I failed:bang: Neatly glueing in the new lense and then the LEDs likewise. But I have proved that my device works as intended although I'm not sure it will fit onto the light-fitting without more surgery which I will be reluctant to carry out on my original lights.
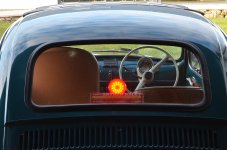
After this prototype I will probably buy a couple of matching brand new rear light covers and start again from scratch...it's going to look a bit odd with non-matching ones. I even had a thought that the idea could be adapted and used to replace the tail/stoplight bulb because the LED unit has two brightnesses and two input connections (three including the ground), one of which is 30% of the brightest intensity shown in the image. For comparison, the standard tail-lamp is also showing in the image
By the way, this is not a modification because I haven't put it on the car (yet).
On eBay there are lots of sellers offering 68mm circular LED "reflector" fittings for Toyota Corolla and several other types of (mainly Japanese) cars. I worked out that these could probably be trimmed down to make an approximately 50mm square component which I might be able to fit in the place of the reflector of the standard light. OK, so I would be missing a reflector, which makes something else to think about, but I decided to go ahead anyway.
I chose one in which I could see that the LED cluster was likely to be outside of the range of the necessary trimming. Cutting a square out of the polycarbonate lense was quite tricky, even with the super-Dremel
and after a couple of pieces split away from it I resorted to cannibalising a more resilient lense from another vehicle.Trimming the backing to the LED cluster was more straightforward. Neatly cutting the reflector out of my spare rear lense was another challenge on which I failed:bang: Neatly glueing in the new lense and then the LEDs likewise.
But I have proved that my device works as intended although I'm not sure it will fit onto the light-fitting without more surgery which I will be reluctant to carry out on my original lights.After this prototype I will probably buy a couple of matching brand new rear light covers and start again from scratch...it's going to look a bit odd with non-matching ones. I even had a thought that the idea could be adapted and used to replace the tail/stoplight bulb because the LED unit has two brightnesses and two input connections (three including the ground), one of which is 30% of the brightest intensity shown in the image. For comparison, the standard tail-lamp is also showing in the image
By the way, this is not a modification because I haven't put it on the car (yet).