My daughter and I were tooling around in my new-to-me 1968 Fiat 500L, me w/ an ear-to-ear smile. This car is just sooo much fun.
Then, all of a sudden, the engine seemed almost like it ran out of gasoline, but not quite. It would "run" horribly when started w/ the gas pedal floored, then die immediately once releasing the pedal.
It was discovered that the "operation" was unchanged w/ the front spark plug wire removed and the engine was totally dead w/ the rear spark plug wire removed. Clearly a dead front cylinder problem.
The spark plug wire resistance was measured, both wires at near zero Ohms, not resistor wires. A spark plug simulator was attached to the engine block with the alligator clip, with the simulator gap set to the specified 0.0197" to 0.0236", with the each spark plug wire plugged into the simulator. The engine was cranked showing a healthy spark on both cylinders.
The compression was measured, zero PSI on the front cylinder, great on the rear.
An examination of the valve clearance, w/ the rocker cover removed, showed the rocker gap on the front cylinder was excessive, not moving the valves at all while cranking.
The rocker clearance was set to specifications on all four valves. The engine fired immediately and again ran perfectly. The compression was now great on both cylinders.
Once again happy, I decided to take a short spin to warm the oil for my first oil change. Made it almost to the end of the looong driveway and it again died w/ the SAME symptoms. Pushed it back to the garage, grrr (great it's sooo light).
This time the rear cylinder had zero PSI compression and the front was fine. This time the rear rocker clearance was not actuating the rear valves.
Discovered the nuts retaining the rocker assembly to the head was loose, so I attempted to tighten to the specified very low torque, of 15.2 ft-lbs when the rear stud snapped within the head, SUPER grrr!
The front stud unscrewed from the head w/o issue, but the threads on that stud were covered / flush w/ head aluminum.
My Post Mortum supposition is that a PO overtightened the nuts retaining the rocker shaft to the head, harming the front stud head threads. That caused the rear stud to do all the work, weakening the stud. Then when I went to tighten that weakened rear stud it snapped.
Okay, repair time, I got a thread repair kit and quickly determined a drill press was required. It is impossible to drill the front stud location w/ the head in the vehicle, w/o using a 90° drill. I wanted / needed more control / visibility than that drilling method would afford. I also discovered that it was VERY difficult to unscrew the broken rear stud. I used my Irwin 11119 left hand Cobalt drills and extractor kit. Previously, sooo many times the broken part just unscrews from drilling w/ the reverse bit, but not here. I was unable to budge the broken stud part w/ the extractor, even after packing w/ ice followed by quickly heating the surrounding metal.
My plan was then to soak the detached head in the freezer, then use my SUPER DUTY Master Appliance HG-801D 1,400°F heat gun w/ the blast directed at the underside, right where the head holds the broken part. That location is VERY exposed when looking from the bottom. Even this rapid thermal shock, contracted cold steel stud w/ expanded hot aluminum bore had ZERO effect, the broken stud was NOT moving!
FINALLY resigned myself that I NEEDED to drill out the broken stud, instead of my hoped / planned unscrewing that broken part. I carefully used my Porter Cable 10" bench drill press and drilled out the broken part. Fortunately a magnet revealed almost all the metal removed was stud steel, not head aluminum.
Once the broken stud was removed, I drilled (used the kit-specified, but not included, 21/64" bit) and tapped (P/N 45081 tap included w/ kit) for the Fix-A-Thred M8-1.25 insert at both rocker stud locations. Installing the insert was easy. Use the tool, engaged on the tang to screw the insert into the head until flush, then set ¼ to ½ turn below the surface. Remove the tool, rotate the tool a half turn, place tool against the tang and give a sharp impact. In both cases the tangs snapped off cleanly w/ a whack of my hand on the tool.
Now the fresh / new studs properly screw into the head.
While everything was apart I gave everything a good cleaning, including the head and the pushrod tubes. Gave my ultrasonic cleaner a workout. (It did a really nice job on the inside of the pushrod tubes.) One image shows the pushrod tubes exterior before, another shows four partially cleaned w/ scraping and SOS pad with one fully cleaned and the last shows all five fully cleaned. The fully cleaned parts are wet sanded from 250 to 2,000 grit. Let's see how they look after time, even though they look good now. Those tubes are RIGHT in the hot air / engine cooling stream, at the HOTTEST location.
Also removed the valves for inspection and cleaning. Everything looked good before, now very good. Discovered the tip of the two exhaust valves, where acted upon by the rocker arms, had mushroomed very slightly, but enough to prevent valve removal past the valve guide. The sides of those tips were carefully filed back flush, to remove that minor mushrooming, permitting normal removal of the valves from the head. Removal of the split circle valve keepers was difficult on both exhaust valves, speculating that was related to the slightly mushroomed tips.
Inspected the head for flatness and that looks amazingly good. Inspected the cylinder bores, also looks great.
Cleaned the rocker shaft. The motion on almost all rockers were initially very stiff. I worked everything back and forth by hand and most got really good. Everything got MUCH better after ultrasonic cleaning. The end rockers were removed, retained to the shaft by external snap rings in a shaft groove w/ a washer and it was discovered that the internal oil passage under those end rockers was mostly obstructed for both, even after the one hour 80°C ultrasonic cleaning, then used poking and LOTS of HOT water to flush out that internal oil passage, now the shaft internal is fully clean. The front exhaust rocker had great motion until the front snap ring was installed. The washer and snap ring parts were abrasively cleaned on a flat surface and got better, but still not fully free, so I filed the sides of that rocker to be slightly more narrow. Now all four have excellent free motion when fully assembled. My hope / expectation is this new slight rocker gap will permit pressurized lubrication oil to flow / reach the end rockers better than before.
Decided to clean / paint the exhaust and manifolds while everything was removed. Changed the visual appearance from old / not great to nice. We'll see how that holds up...
Did my oil change w/ also removing the oil pan, permitting internal inspection of the engine bottom internals. Everything looked good. There was a thin layer of sludge in the bottom, probably caused by the drain plug bottom lip not permitting complete draining. It looks like blocking the driver's side higher would permit better draining during an oil change. Cleaned the oil slinger w/ a toothbrush and solvent. Replaced cover w/ fresh O-Ring seal. Not happy that oil slinger internal access w/ the cover removed is partially obstructed by the rear engine mount. The next oil change will use my engine lift as a temporary support to permit removal of that rear engine mount for a proper cleaning of the oil slinger.
The threads on all of the studs, bores, screws and nuts were properly chased w/ the correct tap and die, then properly cleaned of any dislodged crud prior to assembly. A M6-1.0 bottoming tap was purchased to chase the five holes on the cylinder head top perimeter that retain the cooling air sheet metal. Now those screws fully hand tighten into the head.
All the exhaust fasteners were treated w/ a very light layer of On and Off high temperature grease. Many of the other fasteners were properly treated either w/ the appropriate Loctite or lubricant.
Settled on the PennGrade 1 20W-50 motor oil for this engine, operated in a tropical climate, because of the high Zinc, high Phosphorus, semi synthetic ZDDP formula.
One interesting thing I noticed, but haven't located in the Shop Manual, is that there are special drilled out bolts, w/ clearance through holes from the exterior face through the entire bolt length, to the interior tip of the bolt. These are almost like a Banjo bolt, except the hole / passage goes all the way through, instead of exiting at the sides near the bolt head. These unique bolts are screwed into the head, right below the exhaust manifold, on both cylinders. The cylinder head has corresponding internal passages. These appear to be for some sort of crankcase vent. The head gasket has a corresponding slot hole, but the cylinder has no hole, it is solid metal, except it appears to align w/ the cylindrical shallow channel cut into the top of the cylinder, around the piston. Those channels were cleaned on my cylinders prior to assembly. Does all this stuff: hollow bolts; head passages and head gasket hole exist so that shallow cylindrical channel on top of the cylinder may remain at atmospheric pressure? If someone has better info on these bolts, please chime in.
Followed normal assembly per the specs, using new gaskets and seals and everything came nice. Wasn't anticipating having to spend this much time / money repairing the engine, but I'm glad it is now again all set.
One longer term, future modification would be to clean and paint the exterior cylinder fins black, w/ extreme temperature paint. Has anyone done that mod? Long term feedback / results? What product was used? There is Rustoleum 2,000°F aerosol paint, w/ lots of prep and curing steps. The existing unpainted steel cylinders does not currently have a terrific appearance.
Spark Plug Tester

Broken Rear Rocker Stud

Pulled Out Front Rocker Stud - Threads Covered w/ Head Aluminum

Attempting Broken Stud Removal
EZ Out Failing to Unscrew

Head in Freezer Followed by Extreme Heat Shock / Expansion Failing to Unscrew

Drill Press Drilling Out Snapped Stud

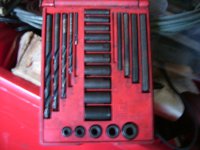
Insert Thread Repair Kit

Insert Tangs Snapped Off

New Rocker Shaft Studs Installed

Cleaning and Inspection
Pistons Up

Pistons Down

Rocker Shaft Cleaning
After 80°C for an Hour - End Oil Ports Still Blocked

After Poking Holes and Extreme Oil Passage Hot Water Flush - Entire Oil Passages Now Fully Clean

Pushrod Tube Cleaning
Initial As-Received Condition

End Tubes Cleaned w/ SOS Pads and Scraping - Central Tube Wet Sanded

All Five Tubes Wet Sanded 250 to 2,000 Grit

Initial Exhaust

Cleaned / Painted Exhaust

Oil Change w/ Pan Removal

Bottom of Engine

Oil Slinger Cleaned

Oil Slinger Cover Removed and Cleaned


Cylinders

Pushrods and Tubes Installed

Setting Rocker Clearance

Engine Assembled

Then, all of a sudden, the engine seemed almost like it ran out of gasoline, but not quite. It would "run" horribly when started w/ the gas pedal floored, then die immediately once releasing the pedal.
It was discovered that the "operation" was unchanged w/ the front spark plug wire removed and the engine was totally dead w/ the rear spark plug wire removed. Clearly a dead front cylinder problem.
The spark plug wire resistance was measured, both wires at near zero Ohms, not resistor wires. A spark plug simulator was attached to the engine block with the alligator clip, with the simulator gap set to the specified 0.0197" to 0.0236", with the each spark plug wire plugged into the simulator. The engine was cranked showing a healthy spark on both cylinders.
The compression was measured, zero PSI on the front cylinder, great on the rear.
An examination of the valve clearance, w/ the rocker cover removed, showed the rocker gap on the front cylinder was excessive, not moving the valves at all while cranking.
The rocker clearance was set to specifications on all four valves. The engine fired immediately and again ran perfectly. The compression was now great on both cylinders.
Once again happy, I decided to take a short spin to warm the oil for my first oil change. Made it almost to the end of the looong driveway and it again died w/ the SAME symptoms. Pushed it back to the garage, grrr (great it's sooo light).
This time the rear cylinder had zero PSI compression and the front was fine. This time the rear rocker clearance was not actuating the rear valves.
Discovered the nuts retaining the rocker assembly to the head was loose, so I attempted to tighten to the specified very low torque, of 15.2 ft-lbs when the rear stud snapped within the head, SUPER grrr!
The front stud unscrewed from the head w/o issue, but the threads on that stud were covered / flush w/ head aluminum.
My Post Mortum supposition is that a PO overtightened the nuts retaining the rocker shaft to the head, harming the front stud head threads. That caused the rear stud to do all the work, weakening the stud. Then when I went to tighten that weakened rear stud it snapped.
Okay, repair time, I got a thread repair kit and quickly determined a drill press was required. It is impossible to drill the front stud location w/ the head in the vehicle, w/o using a 90° drill. I wanted / needed more control / visibility than that drilling method would afford. I also discovered that it was VERY difficult to unscrew the broken rear stud. I used my Irwin 11119 left hand Cobalt drills and extractor kit. Previously, sooo many times the broken part just unscrews from drilling w/ the reverse bit, but not here. I was unable to budge the broken stud part w/ the extractor, even after packing w/ ice followed by quickly heating the surrounding metal.
My plan was then to soak the detached head in the freezer, then use my SUPER DUTY Master Appliance HG-801D 1,400°F heat gun w/ the blast directed at the underside, right where the head holds the broken part. That location is VERY exposed when looking from the bottom. Even this rapid thermal shock, contracted cold steel stud w/ expanded hot aluminum bore had ZERO effect, the broken stud was NOT moving!
FINALLY resigned myself that I NEEDED to drill out the broken stud, instead of my hoped / planned unscrewing that broken part. I carefully used my Porter Cable 10" bench drill press and drilled out the broken part. Fortunately a magnet revealed almost all the metal removed was stud steel, not head aluminum.
Once the broken stud was removed, I drilled (used the kit-specified, but not included, 21/64" bit) and tapped (P/N 45081 tap included w/ kit) for the Fix-A-Thred M8-1.25 insert at both rocker stud locations. Installing the insert was easy. Use the tool, engaged on the tang to screw the insert into the head until flush, then set ¼ to ½ turn below the surface. Remove the tool, rotate the tool a half turn, place tool against the tang and give a sharp impact. In both cases the tangs snapped off cleanly w/ a whack of my hand on the tool.
Now the fresh / new studs properly screw into the head.
While everything was apart I gave everything a good cleaning, including the head and the pushrod tubes. Gave my ultrasonic cleaner a workout. (It did a really nice job on the inside of the pushrod tubes.) One image shows the pushrod tubes exterior before, another shows four partially cleaned w/ scraping and SOS pad with one fully cleaned and the last shows all five fully cleaned. The fully cleaned parts are wet sanded from 250 to 2,000 grit. Let's see how they look after time, even though they look good now. Those tubes are RIGHT in the hot air / engine cooling stream, at the HOTTEST location.
Also removed the valves for inspection and cleaning. Everything looked good before, now very good. Discovered the tip of the two exhaust valves, where acted upon by the rocker arms, had mushroomed very slightly, but enough to prevent valve removal past the valve guide. The sides of those tips were carefully filed back flush, to remove that minor mushrooming, permitting normal removal of the valves from the head. Removal of the split circle valve keepers was difficult on both exhaust valves, speculating that was related to the slightly mushroomed tips.
Inspected the head for flatness and that looks amazingly good. Inspected the cylinder bores, also looks great.
Cleaned the rocker shaft. The motion on almost all rockers were initially very stiff. I worked everything back and forth by hand and most got really good. Everything got MUCH better after ultrasonic cleaning. The end rockers were removed, retained to the shaft by external snap rings in a shaft groove w/ a washer and it was discovered that the internal oil passage under those end rockers was mostly obstructed for both, even after the one hour 80°C ultrasonic cleaning, then used poking and LOTS of HOT water to flush out that internal oil passage, now the shaft internal is fully clean. The front exhaust rocker had great motion until the front snap ring was installed. The washer and snap ring parts were abrasively cleaned on a flat surface and got better, but still not fully free, so I filed the sides of that rocker to be slightly more narrow. Now all four have excellent free motion when fully assembled. My hope / expectation is this new slight rocker gap will permit pressurized lubrication oil to flow / reach the end rockers better than before.
Decided to clean / paint the exhaust and manifolds while everything was removed. Changed the visual appearance from old / not great to nice. We'll see how that holds up...
Did my oil change w/ also removing the oil pan, permitting internal inspection of the engine bottom internals. Everything looked good. There was a thin layer of sludge in the bottom, probably caused by the drain plug bottom lip not permitting complete draining. It looks like blocking the driver's side higher would permit better draining during an oil change. Cleaned the oil slinger w/ a toothbrush and solvent. Replaced cover w/ fresh O-Ring seal. Not happy that oil slinger internal access w/ the cover removed is partially obstructed by the rear engine mount. The next oil change will use my engine lift as a temporary support to permit removal of that rear engine mount for a proper cleaning of the oil slinger.
The threads on all of the studs, bores, screws and nuts were properly chased w/ the correct tap and die, then properly cleaned of any dislodged crud prior to assembly. A M6-1.0 bottoming tap was purchased to chase the five holes on the cylinder head top perimeter that retain the cooling air sheet metal. Now those screws fully hand tighten into the head.
All the exhaust fasteners were treated w/ a very light layer of On and Off high temperature grease. Many of the other fasteners were properly treated either w/ the appropriate Loctite or lubricant.
Settled on the PennGrade 1 20W-50 motor oil for this engine, operated in a tropical climate, because of the high Zinc, high Phosphorus, semi synthetic ZDDP formula.
One interesting thing I noticed, but haven't located in the Shop Manual, is that there are special drilled out bolts, w/ clearance through holes from the exterior face through the entire bolt length, to the interior tip of the bolt. These are almost like a Banjo bolt, except the hole / passage goes all the way through, instead of exiting at the sides near the bolt head. These unique bolts are screwed into the head, right below the exhaust manifold, on both cylinders. The cylinder head has corresponding internal passages. These appear to be for some sort of crankcase vent. The head gasket has a corresponding slot hole, but the cylinder has no hole, it is solid metal, except it appears to align w/ the cylindrical shallow channel cut into the top of the cylinder, around the piston. Those channels were cleaned on my cylinders prior to assembly. Does all this stuff: hollow bolts; head passages and head gasket hole exist so that shallow cylindrical channel on top of the cylinder may remain at atmospheric pressure? If someone has better info on these bolts, please chime in.
Followed normal assembly per the specs, using new gaskets and seals and everything came nice. Wasn't anticipating having to spend this much time / money repairing the engine, but I'm glad it is now again all set.
One longer term, future modification would be to clean and paint the exterior cylinder fins black, w/ extreme temperature paint. Has anyone done that mod? Long term feedback / results? What product was used? There is Rustoleum 2,000°F aerosol paint, w/ lots of prep and curing steps. The existing unpainted steel cylinders does not currently have a terrific appearance.
Spark Plug Tester
Broken Rear Rocker Stud
Pulled Out Front Rocker Stud - Threads Covered w/ Head Aluminum
Attempting Broken Stud Removal
EZ Out Failing to Unscrew
Head in Freezer Followed by Extreme Heat Shock / Expansion Failing to Unscrew
Drill Press Drilling Out Snapped Stud
Insert Thread Repair Kit
Insert Tangs Snapped Off
New Rocker Shaft Studs Installed
Cleaning and Inspection
Pistons Up
Pistons Down
Rocker Shaft Cleaning
After 80°C for an Hour - End Oil Ports Still Blocked
After Poking Holes and Extreme Oil Passage Hot Water Flush - Entire Oil Passages Now Fully Clean
Pushrod Tube Cleaning
Initial As-Received Condition
End Tubes Cleaned w/ SOS Pads and Scraping - Central Tube Wet Sanded
All Five Tubes Wet Sanded 250 to 2,000 Grit
Initial Exhaust
Cleaned / Painted Exhaust
Oil Change w/ Pan Removal
Bottom of Engine
Oil Slinger Cleaned
Oil Slinger Cover Removed and Cleaned
Cylinders
Pushrods and Tubes Installed
Setting Rocker Clearance
Engine Assembled
Last edited: