Technical Project Paolo

Currently reading:
Technical Project Paolo

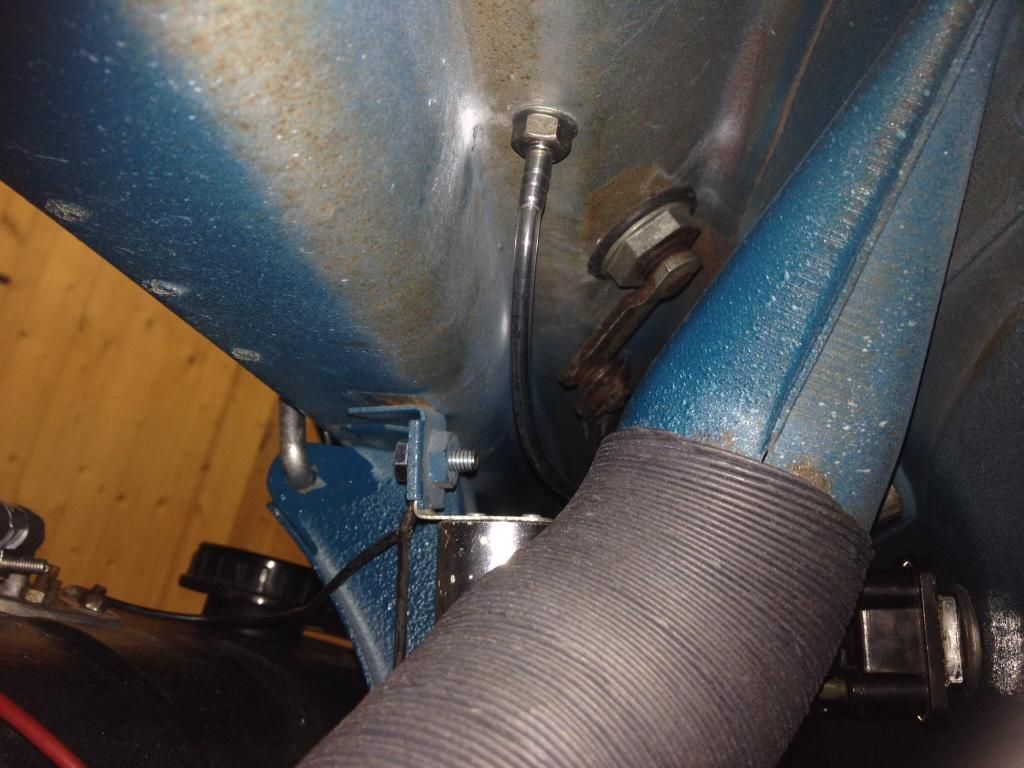
I just took a picture on my car and it doesn't make any difference if the car is LHD or RHD the wipers are mounted in the same place. As Peter said it looks like different to mine.


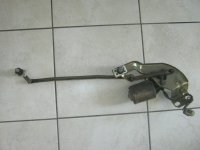
It seems Fiat changed the mechanism design when the L came out and as my car is an F it won't be much good to you but the one on the F just slips out with ease as it is much thinner.

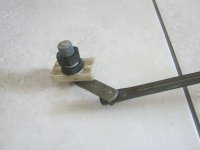
Is that white bit pressed up against the cowling made of plastic?
 
The wiper pivots are actually in very different positions for RHD and LHD- I have converted the wipers on my Giardiniera from LHD to RHD and had to weld up and redrill the holes in mirror image. the 'slave' pivot is interchangeable for RHD/LHD but I have never seen the large spline pivots used on any RHD 500's even up to late 1972- were they used on LHD models? :confused:
 
Correct Damon, as I found having to weld them and redrill on the repair panel for that area, which is made for LHD. If anything, I would think a LHD would present fewer difficulties with catching on the ducts as that is the way it was primarily designed. I still think the key is taking off that adaptor, if that is what it is.

Great photo Tony by the way; do you have one of those endoscopic cameras?:)
 
Last edited:
Thanks guys. I think the easiest thing for me to do is to cut away the white plastic on mine and then it should come away more easily. I'll then have to look into getting a similar mechanism to what Tony has got. Mine is an F model so should have been the same

Damian
 
Yes Peter it's called an iPhone.;)

That's not what my doctor used ;)

Looking again at that photo could it be that someone has shoved in that plastic as a crude spacer to put some tension on the arm as it fits to the activating linkage, to stop it rotating on the shaft having come loose?. I think I had one come adrift there once.
 
Last edited:
That's not what my doctor used ;)

Looking again at that photo could it be that someone has shoved in that plastic as a crude spacer to put some tension on the arm as it fits to the activating linkage, to stop it rotating on the shaft having come loose?. I think I had one come adrift there once.

I think someone has done a bodge job Peter. Looking at the picture you can see that the thread part appears to be plastic as well, in the other picture it looks the same plus the splines are totally wrong. Here is a picture of the splines on my car, this is before the I put the retaining bolts on to hold the splines in place, there should be little nuts on the end that hold the wipers on.

 
True it's a bit odd, but further down it does show one similar to mine labelled N/D, so either my car has an older style assembly fitted and Damian's the newer. Considering they are both 500 F's on D plates is even more confusing. The only difference being mine is RHD and his LHD. I am 99.9% that I was the first person to remove the assembly from my car, so I am confident it is original.

The only reasonable conclusion I can come up with. Is obviously they would have come down different production lines for assembly. Because there would have been less RHD being made perhaps they had plenty of the older type wiper assemblies left over and continued to use them all up and on the LHD production line they started to use the newer ones as shown in Damian's picture?????
 
Mine is definitely plastic with plastic nuts holding it on. If I had a choice I would rather fit back the old N/D version because it will just slide back in whereas mine will be a struggle and I don't want to end up damaging the new paint job trying to get it back in. I'm off to Italy in August so I think I will hunt out a Fiat 500 spares shop and see what versions they have available. Watch this space come the rebuild to see how it concludes.

Damian
 
Mine is also the plastic type.
I had no problem removing it.
disconnect the wiring socket, unbolt the motor body bracket from the car.
remove the 2 plastic nuts.
move the motor until the drivers side (LHD) splined shaft is out of its hole, then pull the motor so that the small arm on the passenger side is fairly straight with the connecting arm, then you should be able to pull the drivers side splined shaft easy out of it hole and remove it all in one piece.

Worked for me with no problems & just tried putting it back in.
 

Attachments

  • IMG_5953.JPG
    IMG_5953.JPG
    397 KB · Views: 67
  • IMG_5954.JPG
    IMG_5954.JPG
    316.1 KB · Views: 47
Well I've got it out thanks to Seans suggestion. You wouldn't think I was an engineer. I wouldn't say it was as easy as Sean made out. The plastic screw thread scraped on the body hole and had got damaged but I think this is because the body hole was out of round. Will redress the holes and have a practice at refitting before the new paint job
 
So a bit of advice/discussion needed please. To underseal the underneath and wheelarches or not? And if I do, do you do that first and then get it resprayed or vice versa? Surely you risk damaging the new paint by doing it afterwards? Who's gone sealed and who's gone bare?

Damian
 
Damian, technically I think underseal or stone-chip paint, should really be used.
Being overpaintable you would probably be better doing stone-chip before painting and then you could even make it match the bodywork.. If you use traditional or waxy underseal I think you would be asking for problems with paint contamination so apply afterwards.

Personally, having seen how underbody treatments can trap moisture if imperfectly applied, I scraped it off, where it hadn't come off anyway or where I had used new panels. After degreasing and rust treatment I painted the whole underneath with "Rustseal"...like POR 15 that you hear more about. I think this is very resistant to chipping by stones although it does nothing to reduce "drumming".

At least I can see any rust if it forms and it doesn't stop me retro-fitting underseal. I have given rust prone areas an coating of Waxoyl.
_JAN2671.JPG
 
I agree with Peter. On my car I didn't have to replace any major metal work and the underside is coated in tarry under seal which in the ideal world I would like to have removed but it appears that underneath that it has been painted with an anti rust zinc primer, so there really wasn't a great deal to be gained from scrapping it all off.

My engine bay had been done in the same way but as it gets so hot the under seal used to melt and was just a gooey tarry mess so I did scrape it off.

I finished it with a paint called anti chip which has a slightly rubbery feel and a dimpled finished and can be sprayed over with whatever colour the car is going to be. If it was me I would do the whole of the underside with it and then paint over with primer and top coat.

Here's a few before and after shots. Cleaning the tarry under seal off was a night mare it went everywhere!!!!!

This is halfway through


Then finally clean


Then anti chip


Finally top coat
 
I'm half way through getting that tarry mess off my engine bay as well. It's a nightmare but well worth doing
 
I left mine on. It was OK. I think I must be the only one though.

Mine wasn't the original stuff Peter. My whole engine bay had been painted with a black bitumen based under seal like Waxoyl make, it was always slightly tacky because of the heat. As soon as you stuck your arm in the engine bay and slightly brushed the side you ended up covered in the stuff.
 
So a bit of a landmark reached today in that I got all the doors apart and off and all the glass out! I reckon it's now the point of no return in that it's just as easy to carry on to the end rather than just put it all back together. So far I've not had a major showstopper and once you get into it it's actually quite enjoyable.
When getting the glass out the first one I tried was rear quarter. Struggled a bit and didn't want to be too forceful and end up breaking the glass so I cut the rubber. On the others I just ended up being a bit more forceful and they came out a treat. Think I'll replace all rubbers as a matter of course as they are all 48 years old! Attached some photos of where I'm up to now and that show the rusty areas. Comparing mine to some of the other restoration projects on here I think I've got it easy and I've caught it early, another couple of years and it could have been a different story. Saying that replacing a panel is the same if you've got a small hole or a great big one.
DSCF3196.JPG

DSCF3197.JPG

DSCF3198.JPG

DSCF3199.JPG

Just got to remove the tunnel bits and take out all the cables and then I can move onto the underneath. Want to take everything off underneath and give it a good clean and respray.

Damian
 
Back
Top