General Introduction and my new 1969 500L

Currently reading:
General Introduction and my new 1969 500L

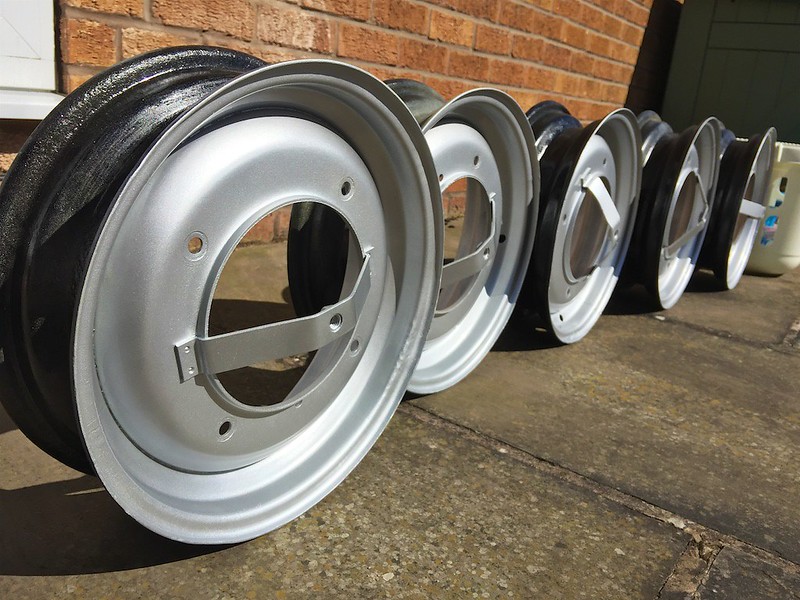
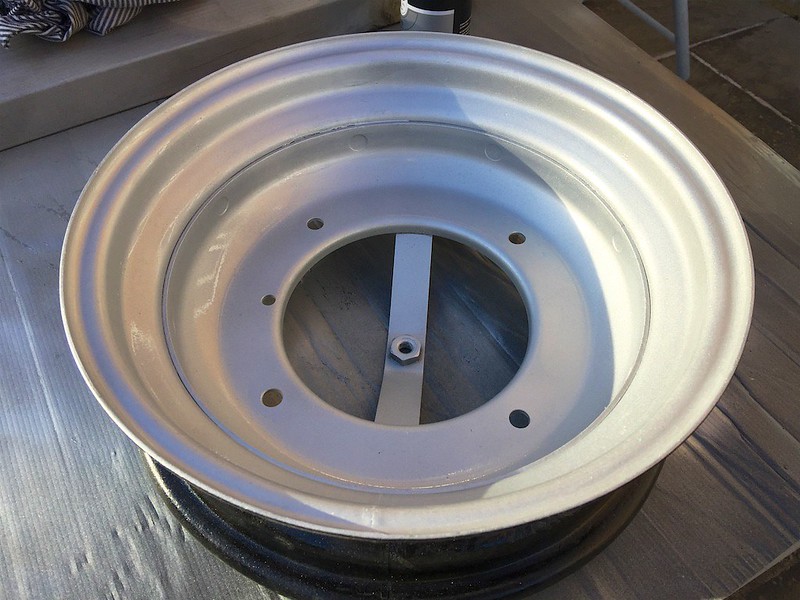
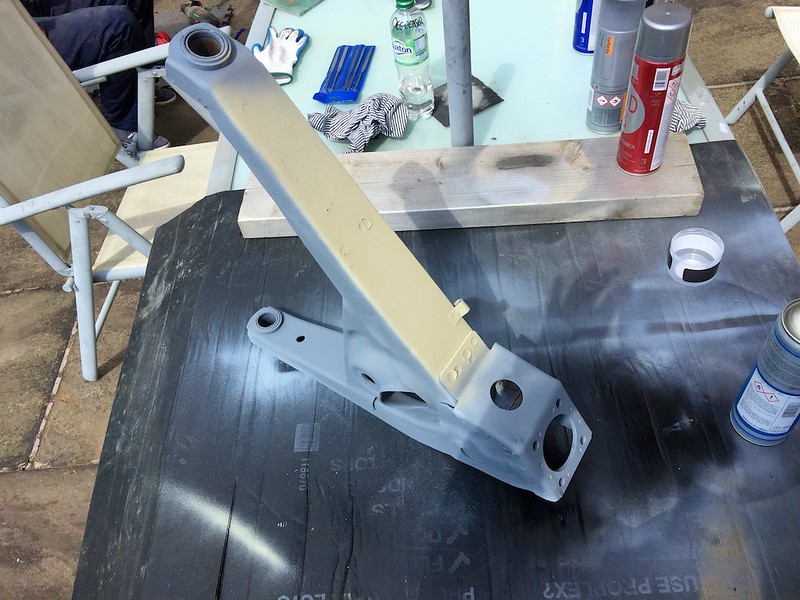
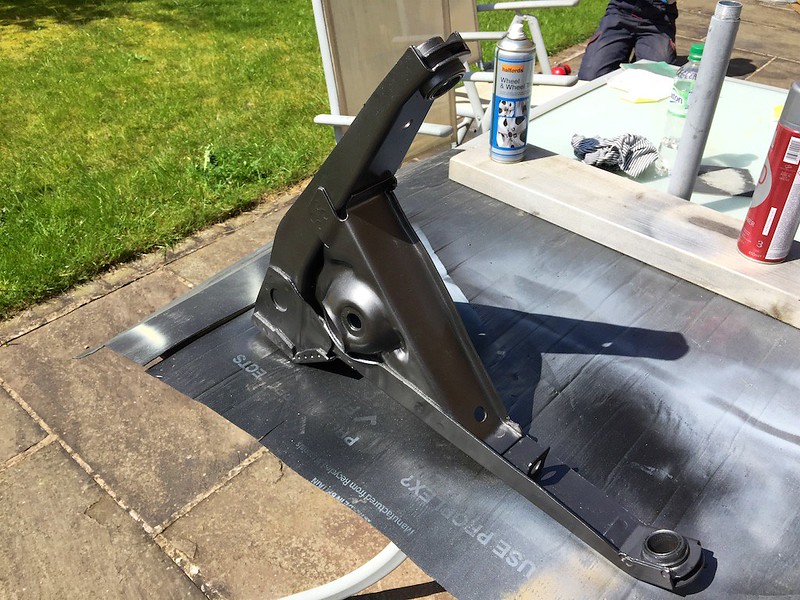
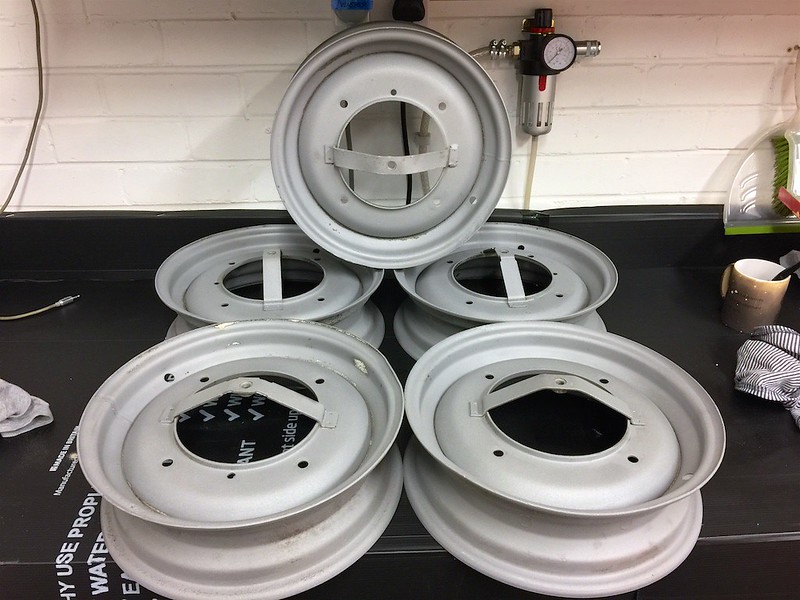
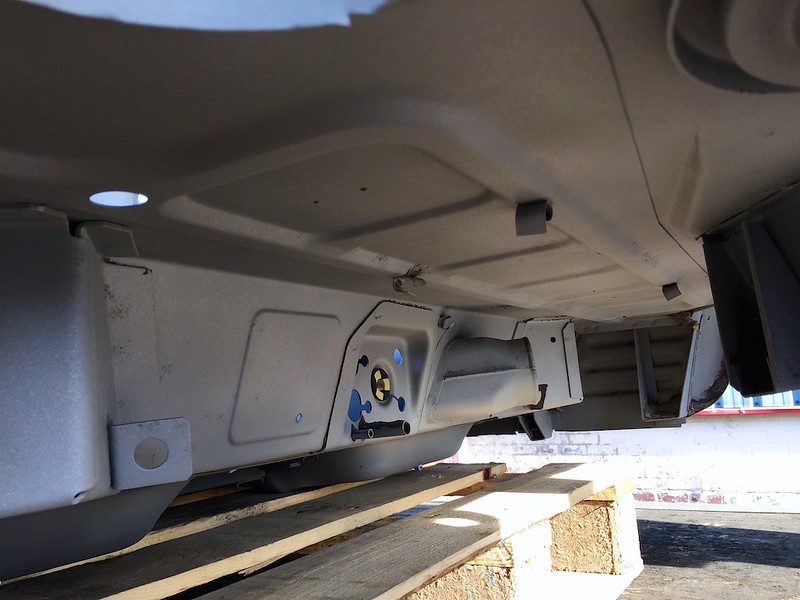
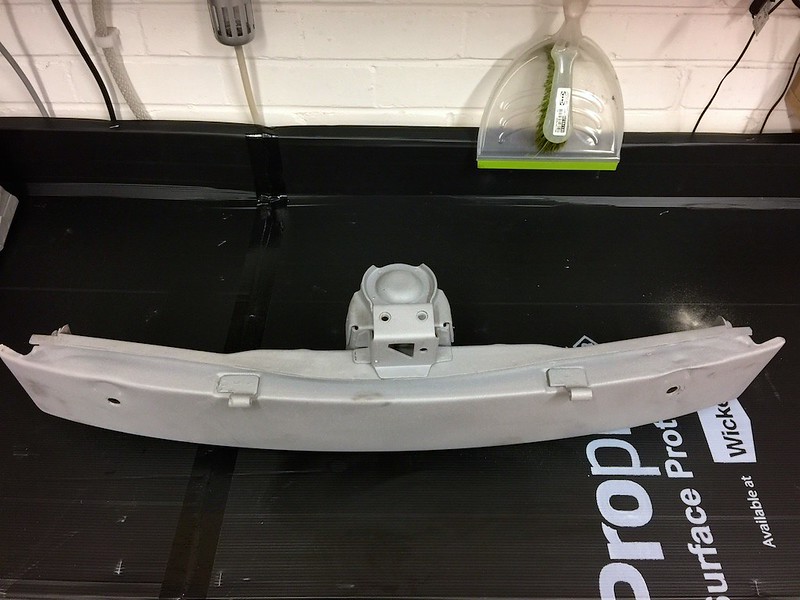
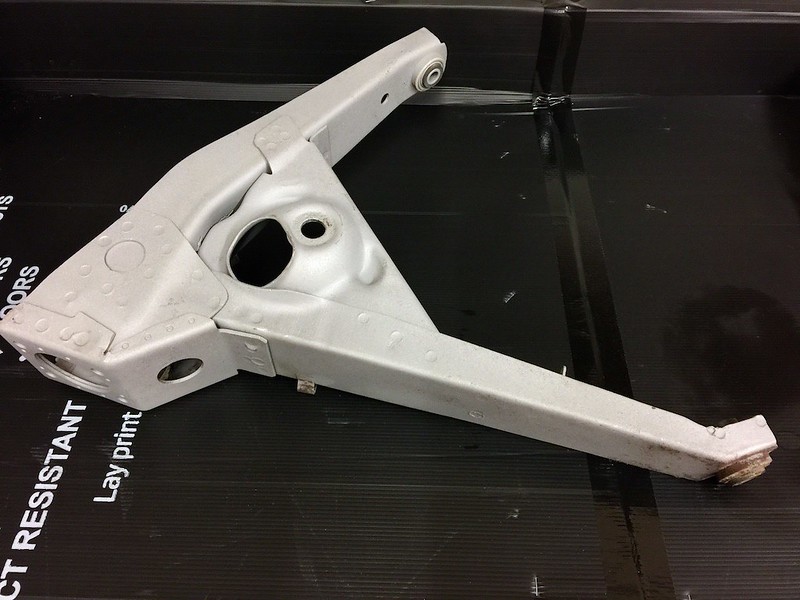
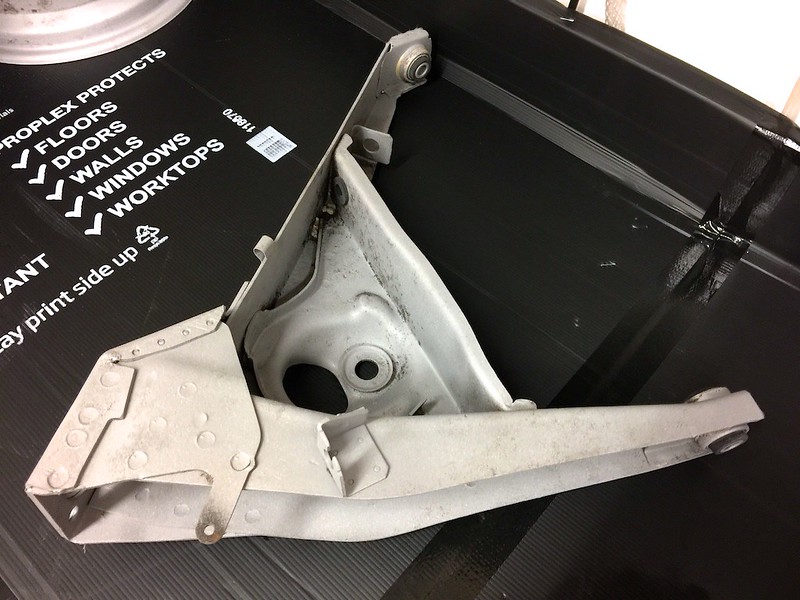
The big news (for Buzz at least) is he’s had a day trip out to the blasters. I decided this was the best course of action, because with the time/money invested in this resto I wanted to be fully aware of what was lurking beneath the paint and see the condition of the shell. So the decision was made to take the car to Soda Blasting Limited in Wolverhampton. They did the shell, doors, engine cover, rear beam, trailing arms and 5 wheels.


33730624636_f52e68e631_c.jpg


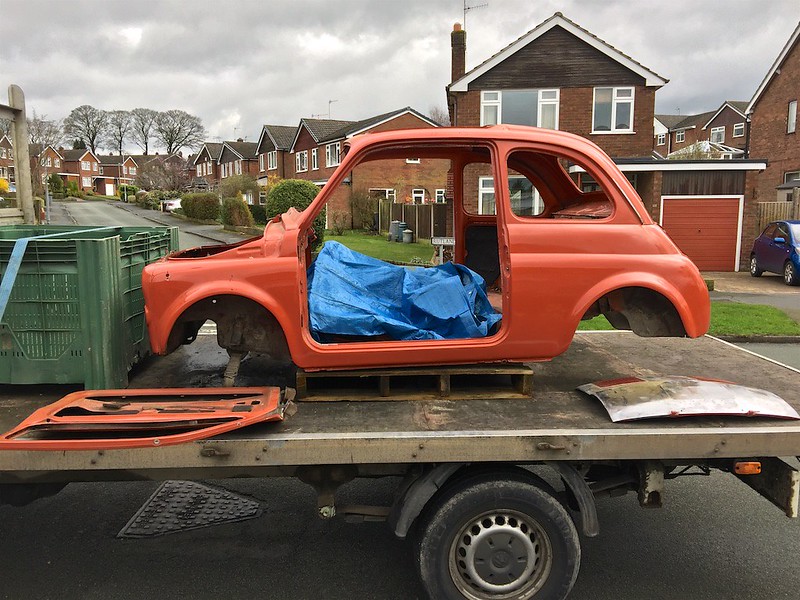
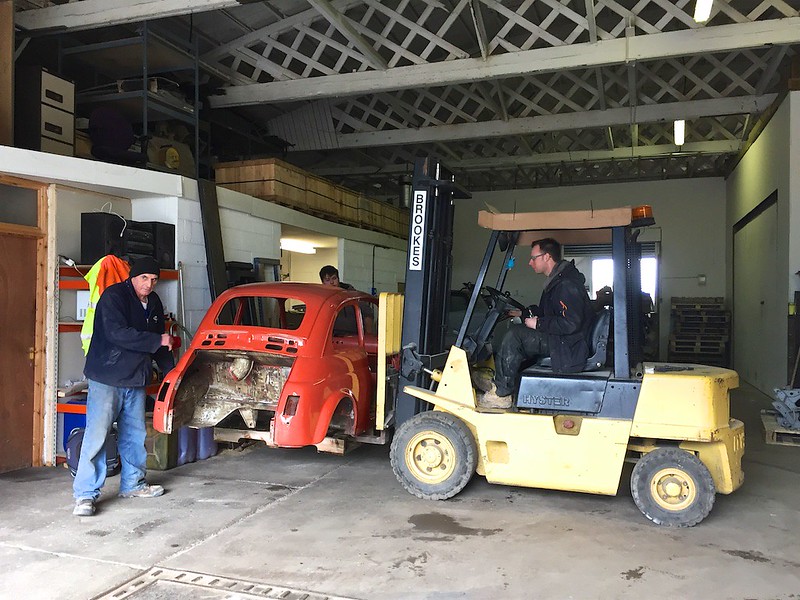
With the help of some neighbors, we loaded Buzz onto the back of my dad’s low-loader and took him down the M6 to Wolverhampton. This is easily the fastest he’s ever been. :slayer:

32958370973_a245ac7e0d_c.jpg


33730625296_ed854407fd_c.jpg


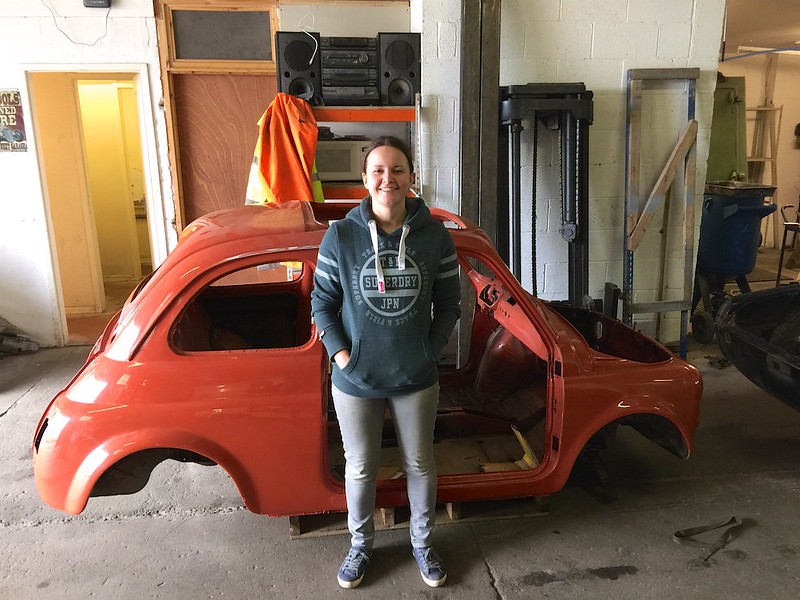
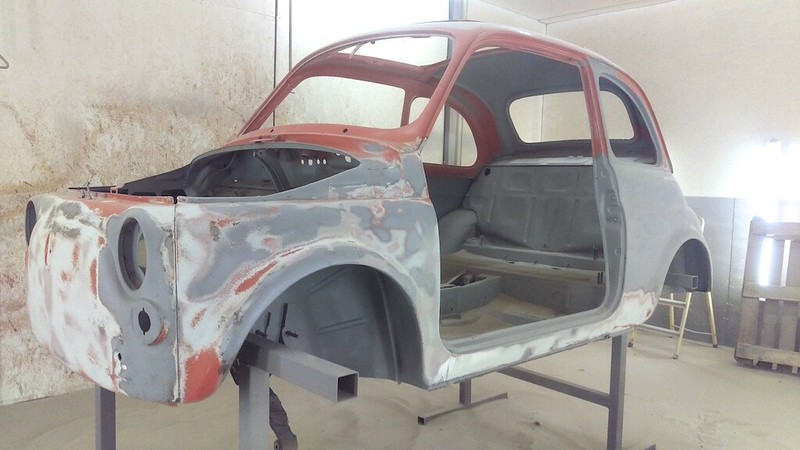
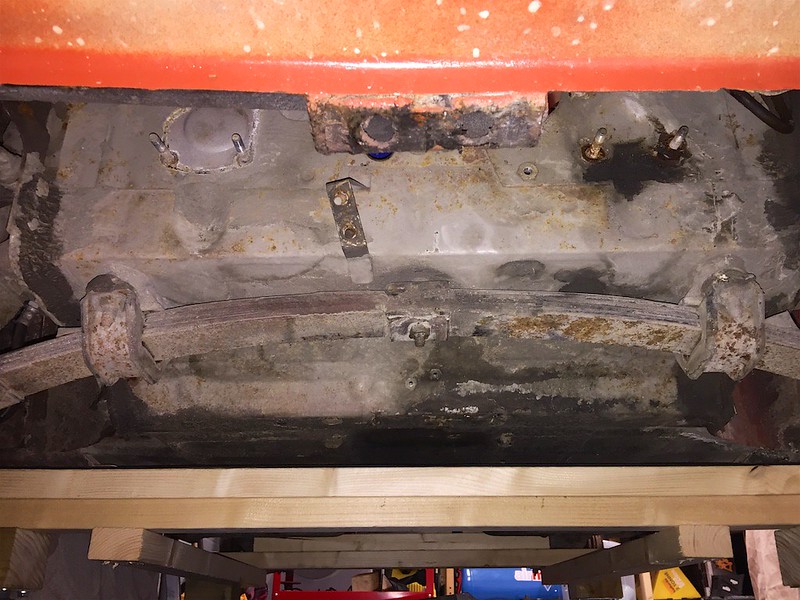
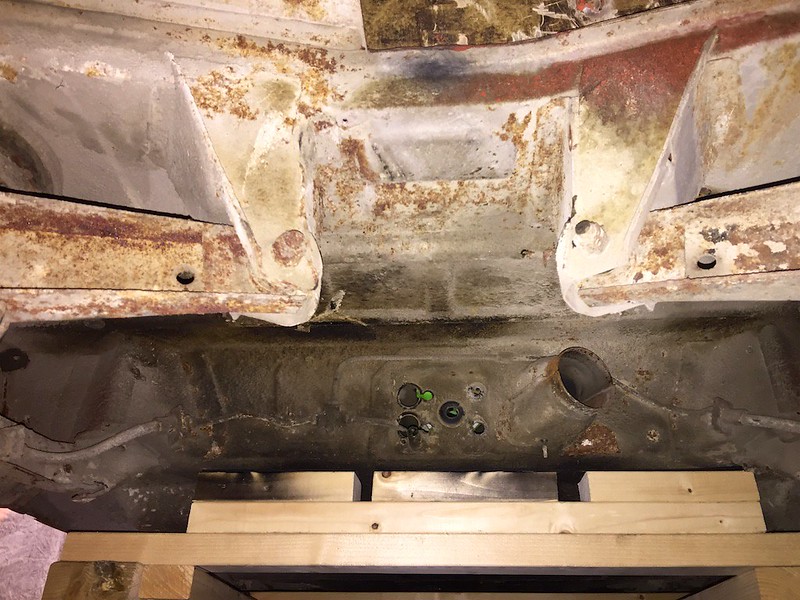
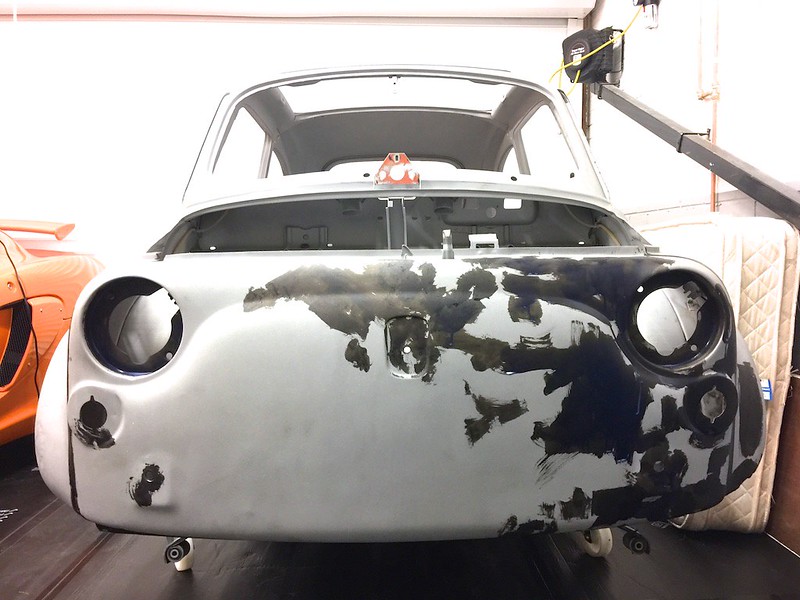
This is the last time Buzz will be wearing red!

33730624996_f127804e2d_c.jpg


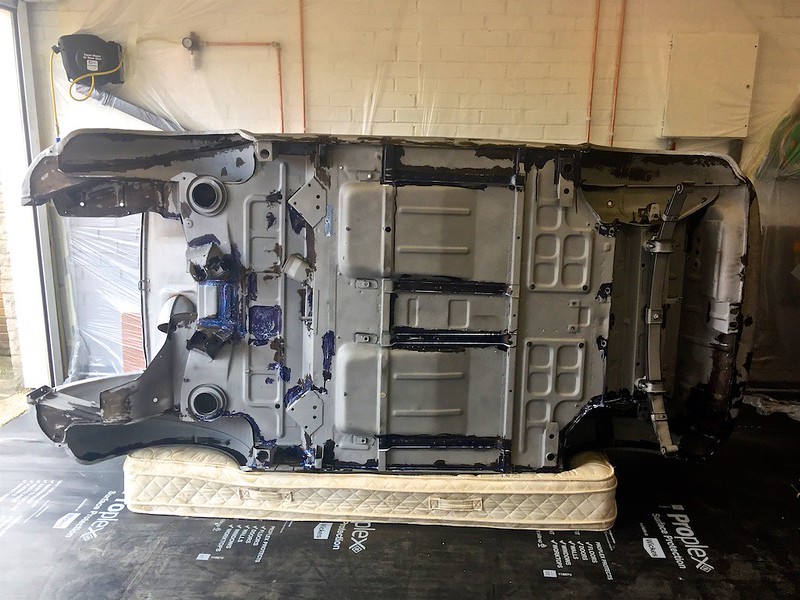
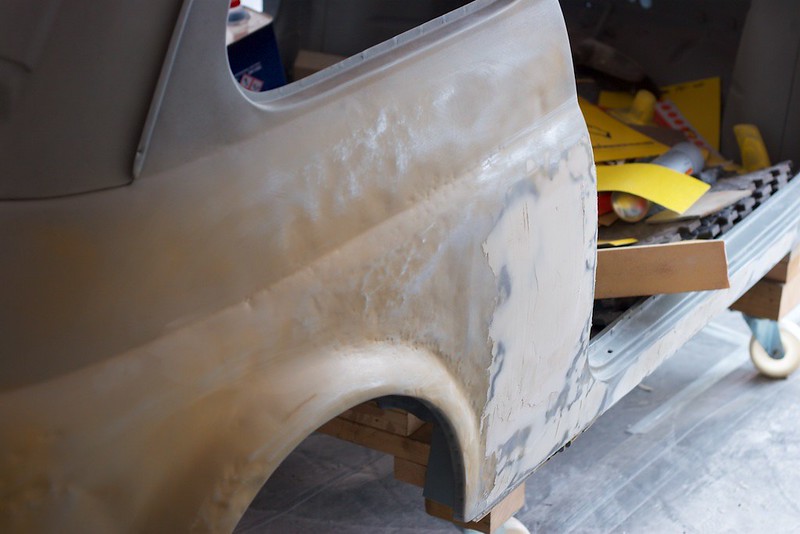
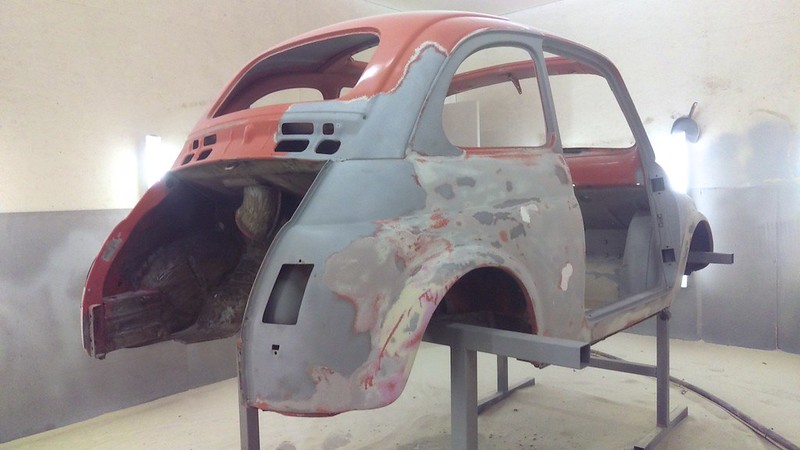
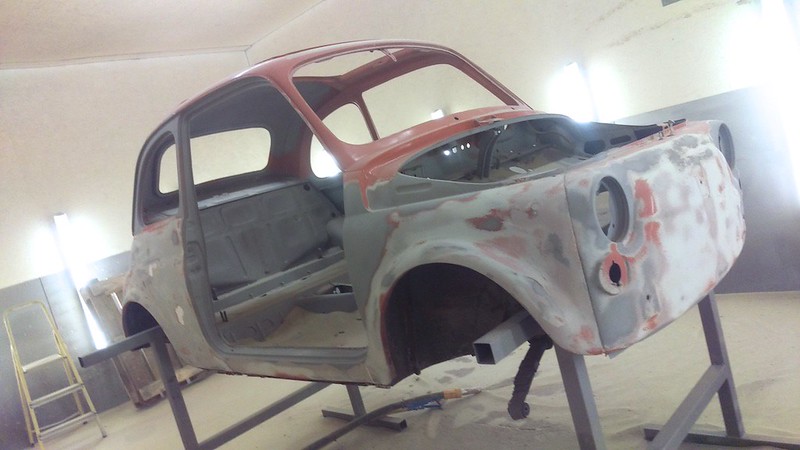
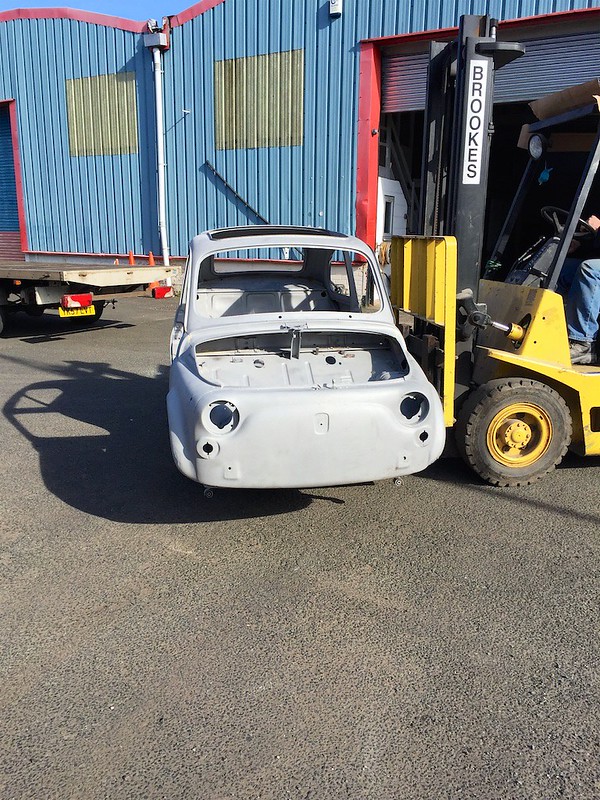
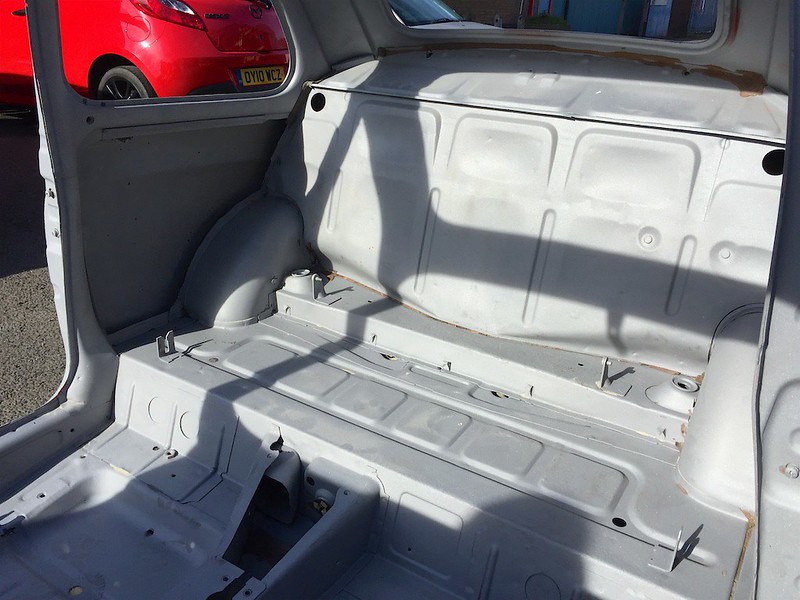
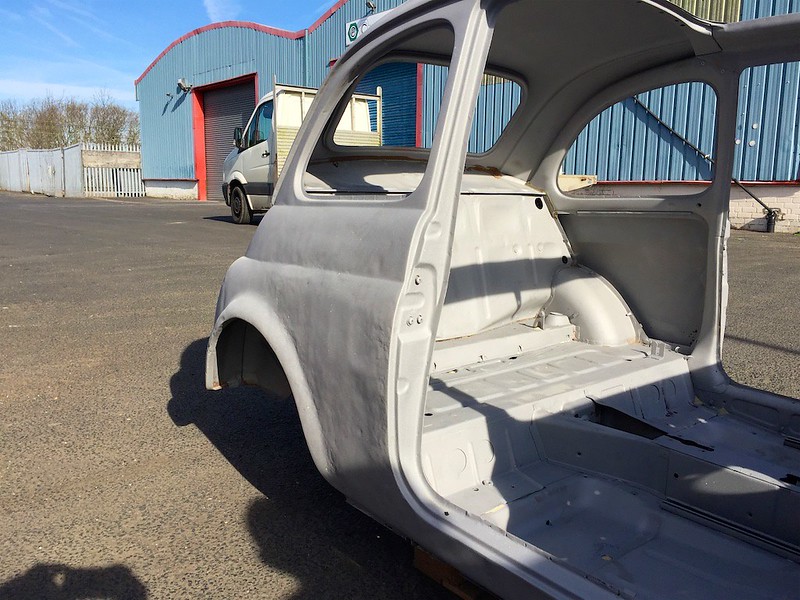
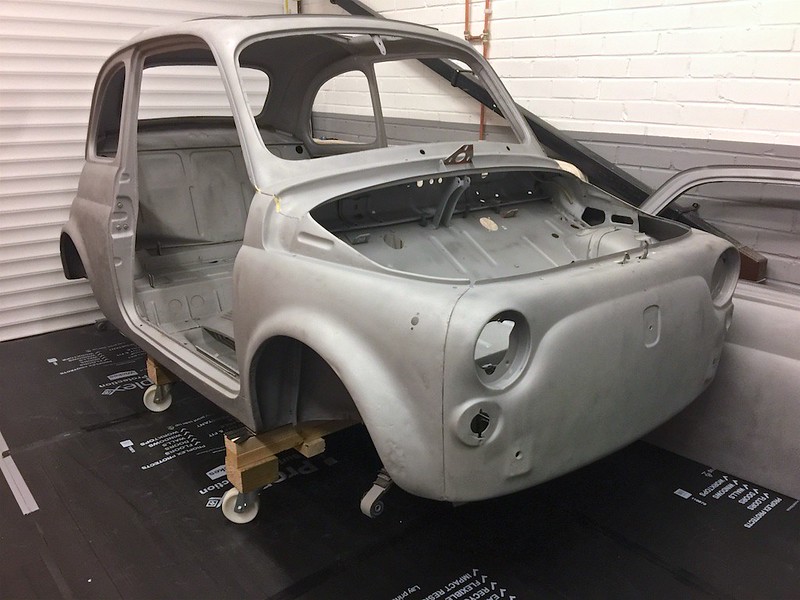
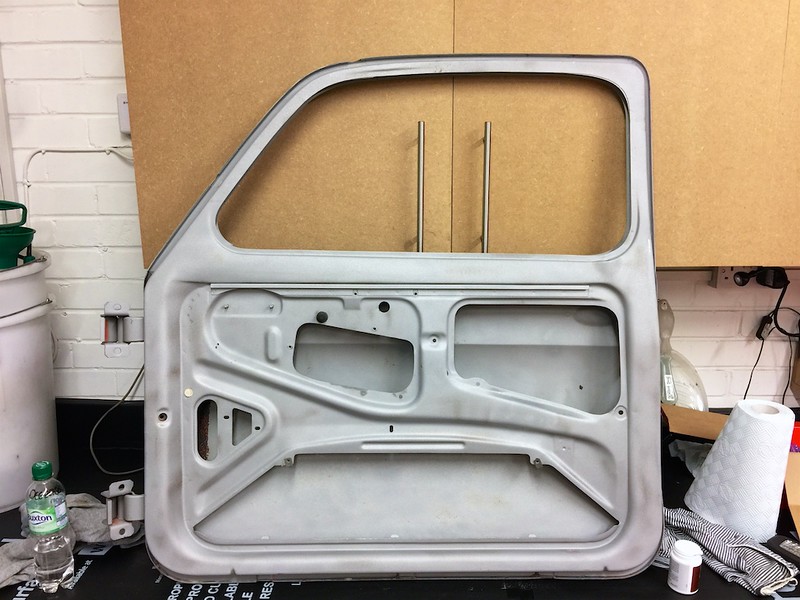
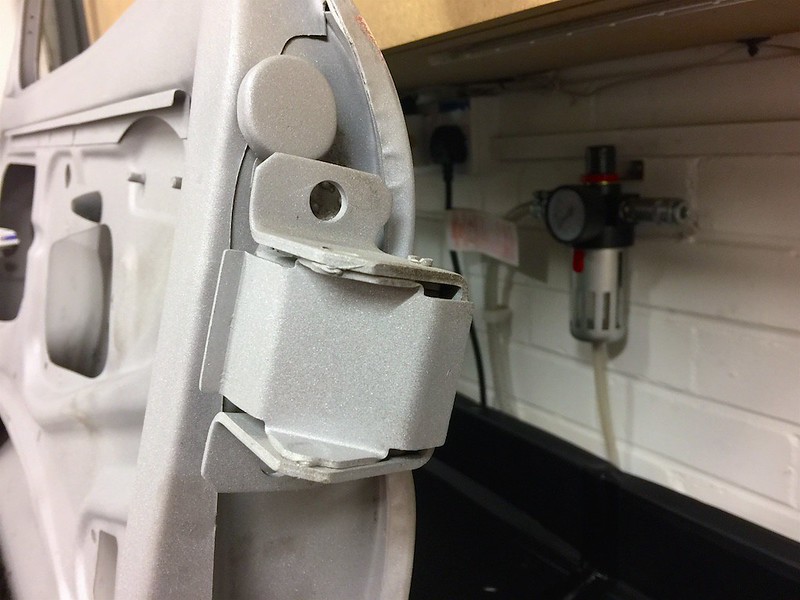
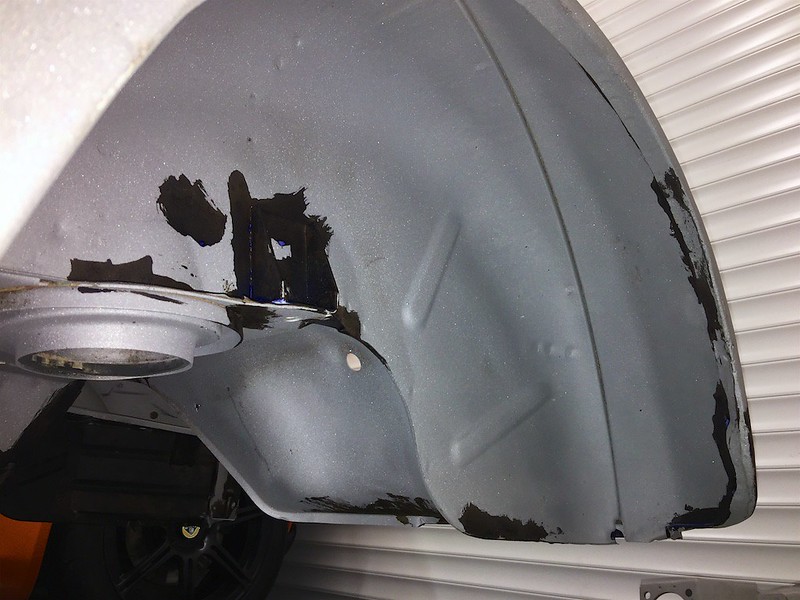
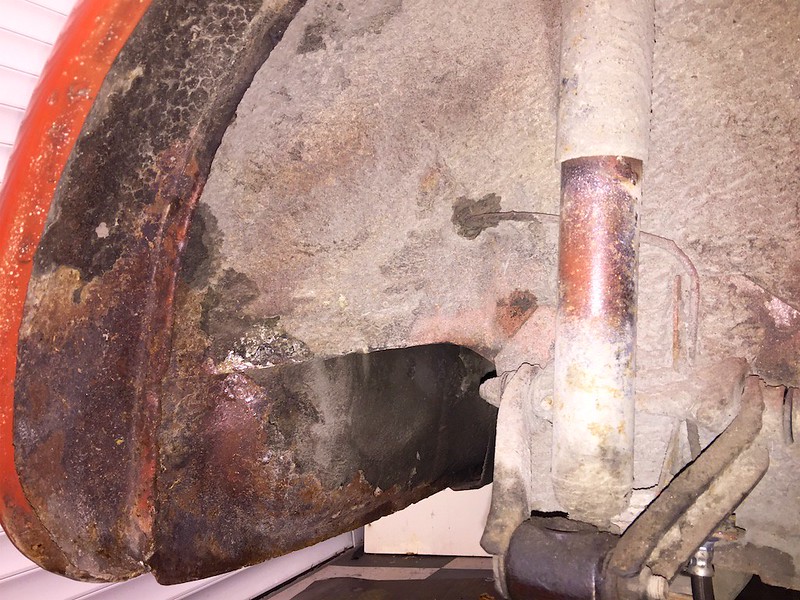
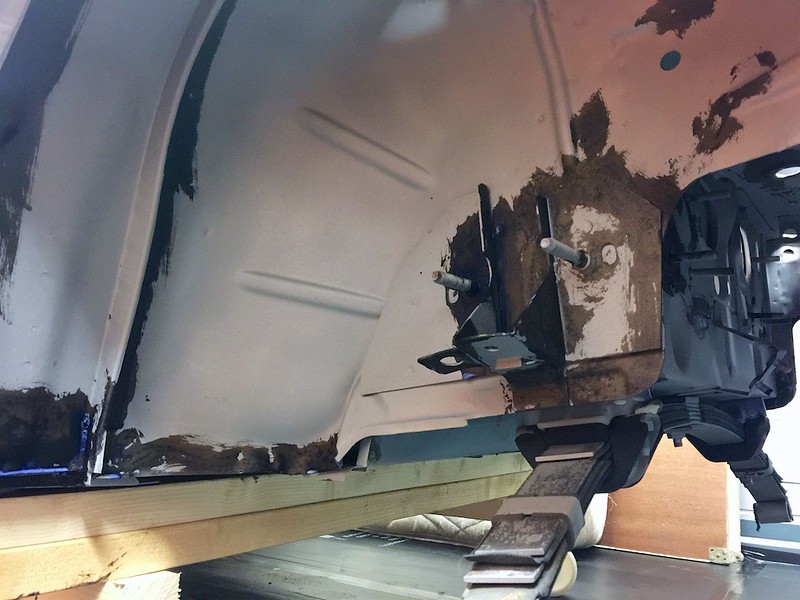
These pics were sent to me by the guys doing the blasting. In the booth.

32928324704_cafb4c0e32_c.jpg


33771464105_e7004afab2_c.jpg


32928324744_cd5b1b7f7c_c.jpg


32928329224_51b642487c_c.jpg


33730627876_18287ae440_c.jpg


32928329194_1ce011390f_c.jpg


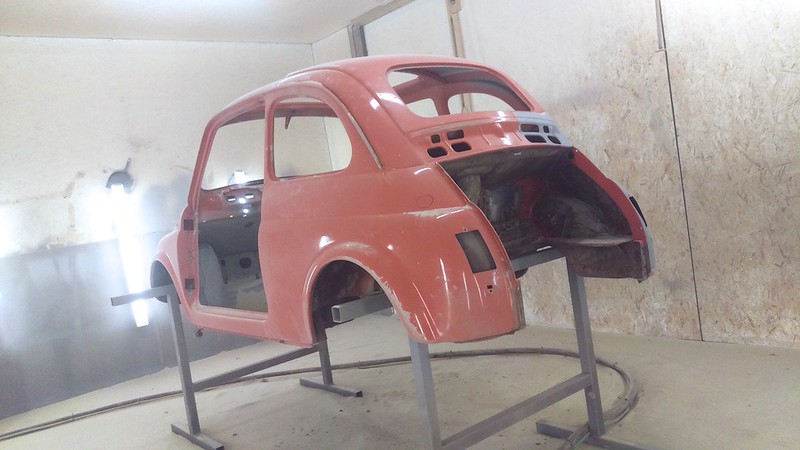
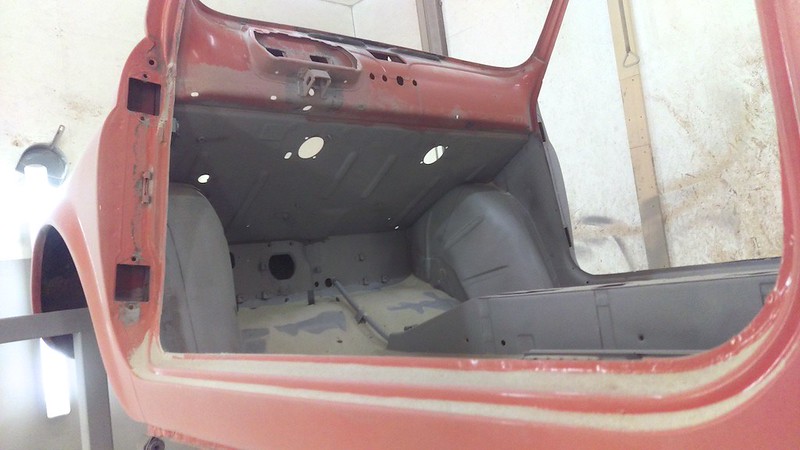
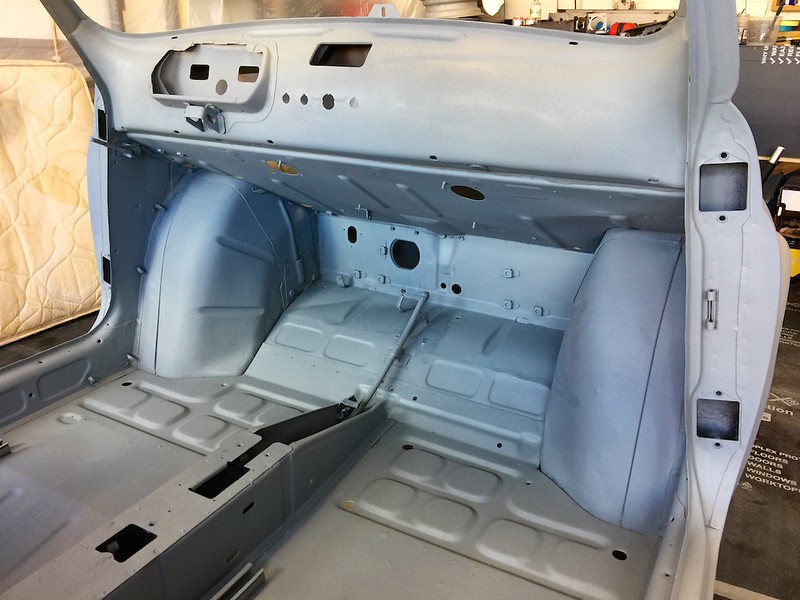
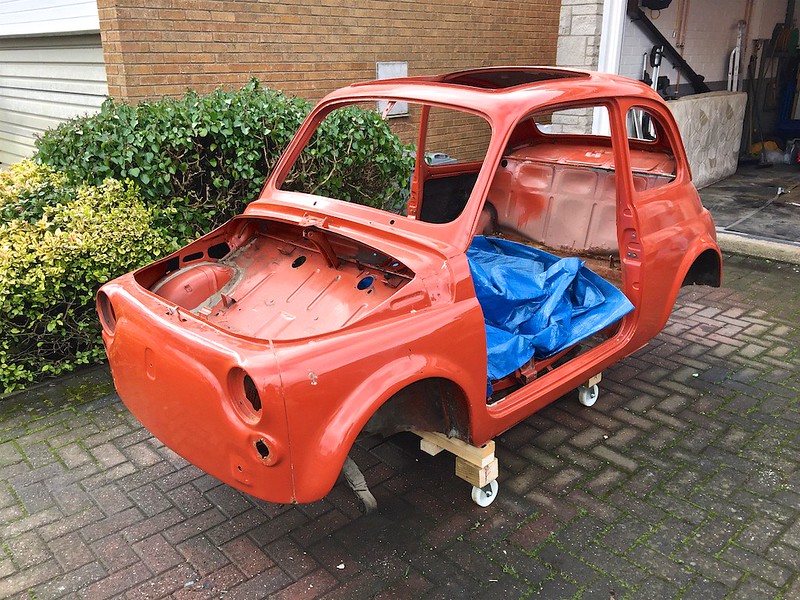
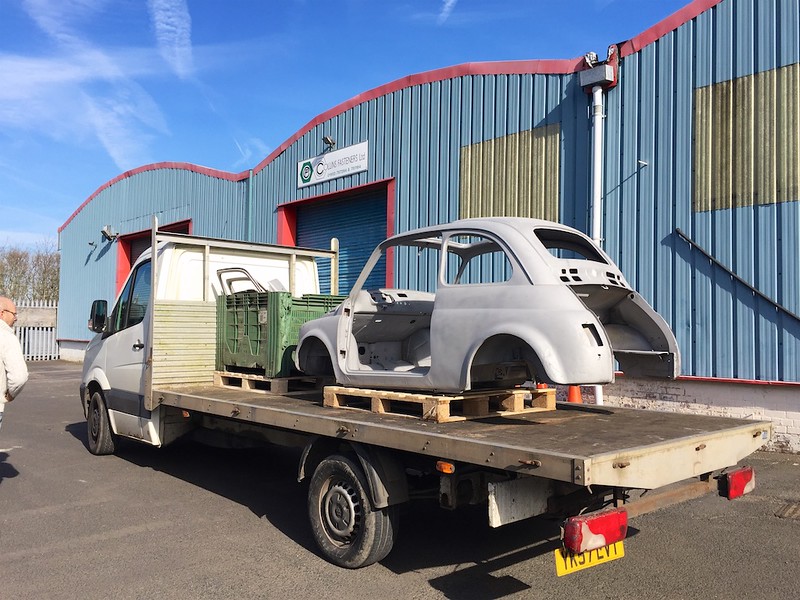
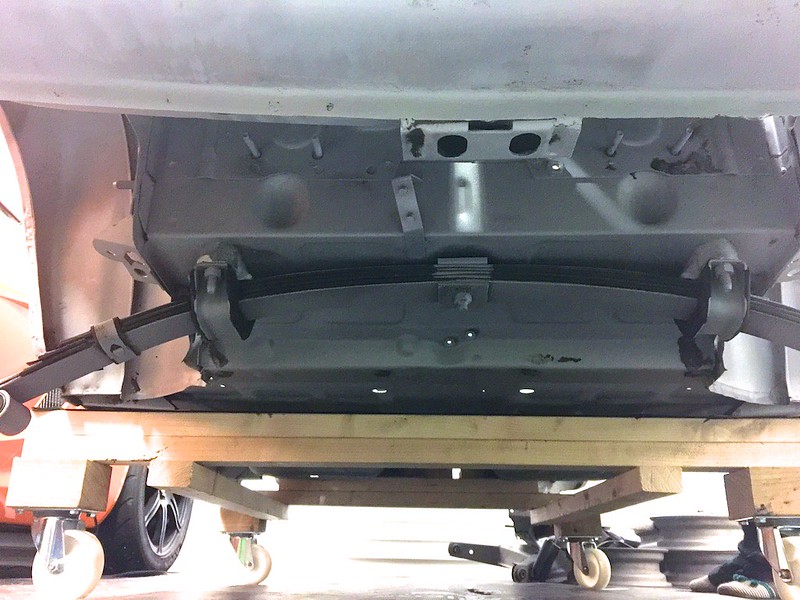
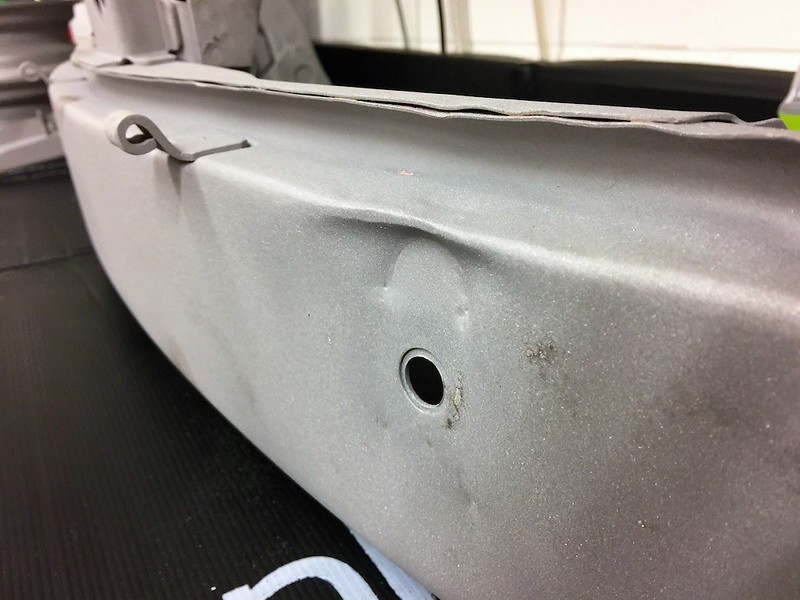
Last Saturday we went to pick him up, he looked a little…different!

33730625446_427ef581a9_c.jpg


33730625626_e112b7cfab_c.jpg


32928327144_c1f72d3a0c_c.jpg


33730625566_80eea450dc_c.jpg


33730625476_6c1801d0c2_c.jpg


32928327424_56f40bbc69_c.jpg


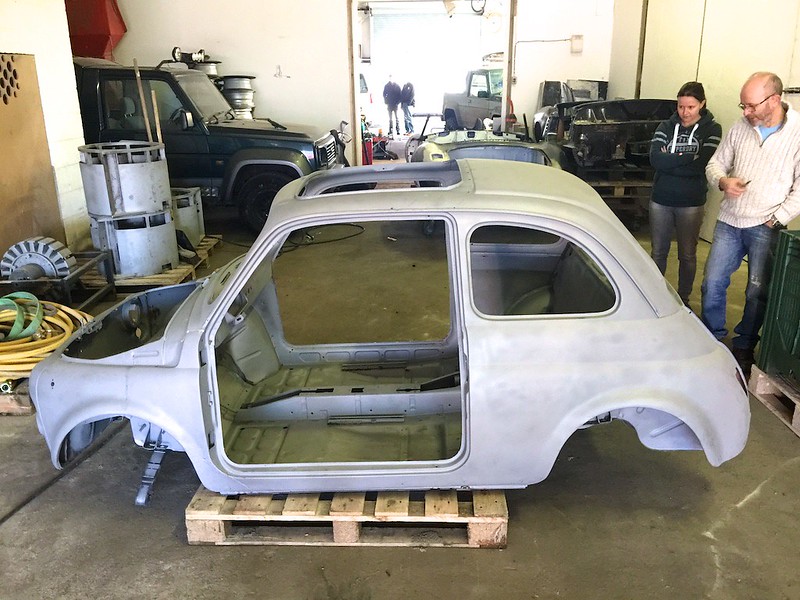
We loaded him back onto the truck and trundled home.

33730625666_7bfe59fbca_c.jpg


One advantage of having a fun little car like this is that there’s no shortage of very interested neighbours who want to know what we’re upto, so within a few minutes of being home we had a team of 6 to carefully take him off the truck and put him back on the wooden dolly I’d made earlier.

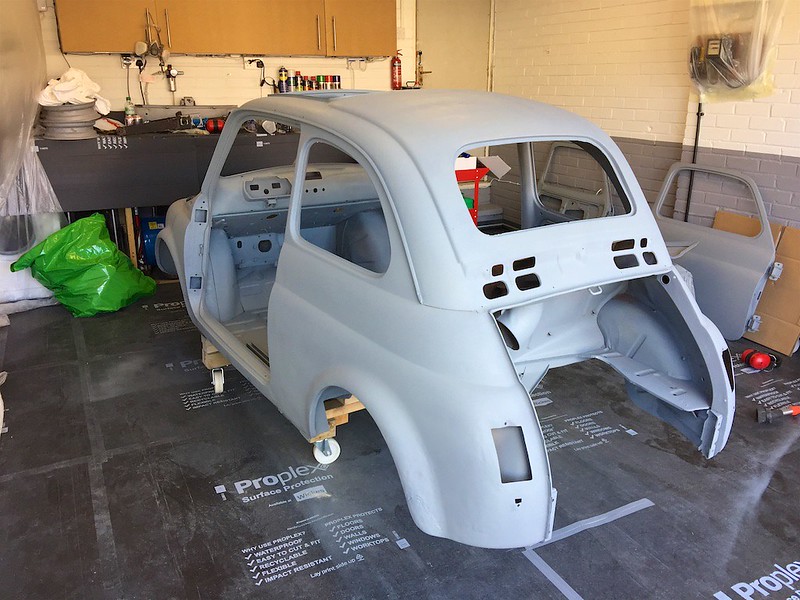
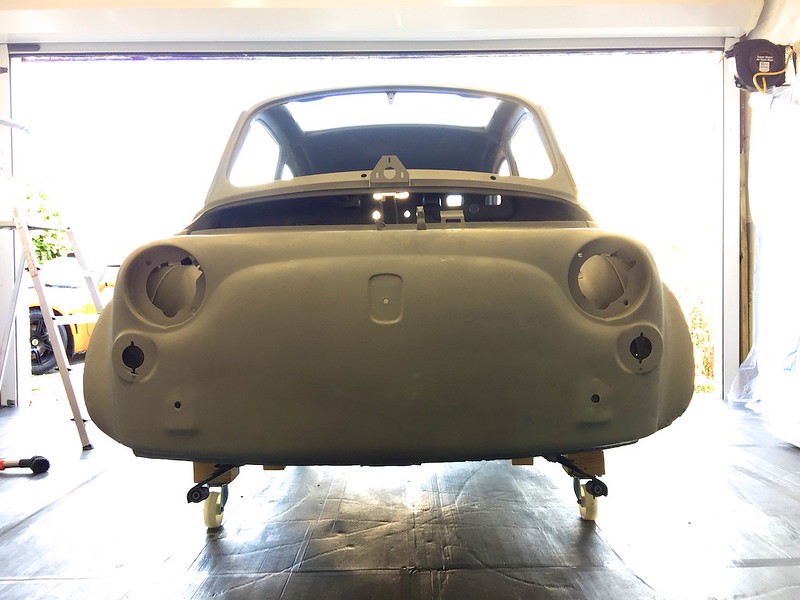
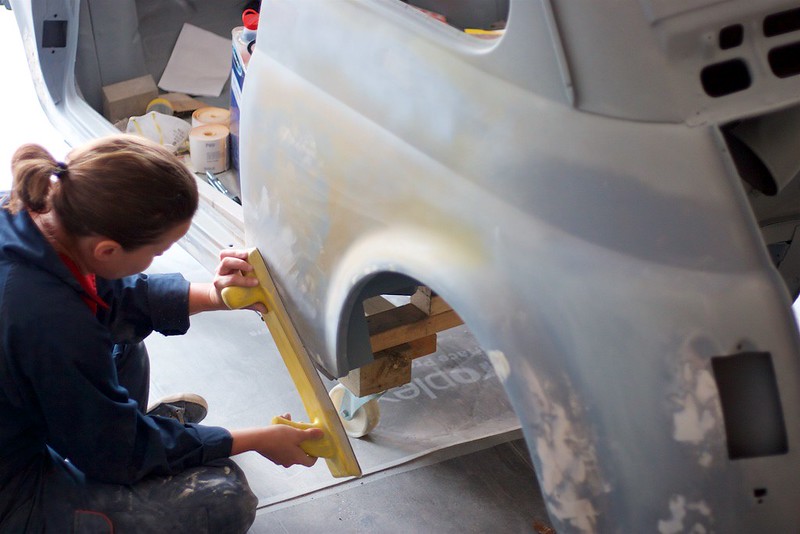
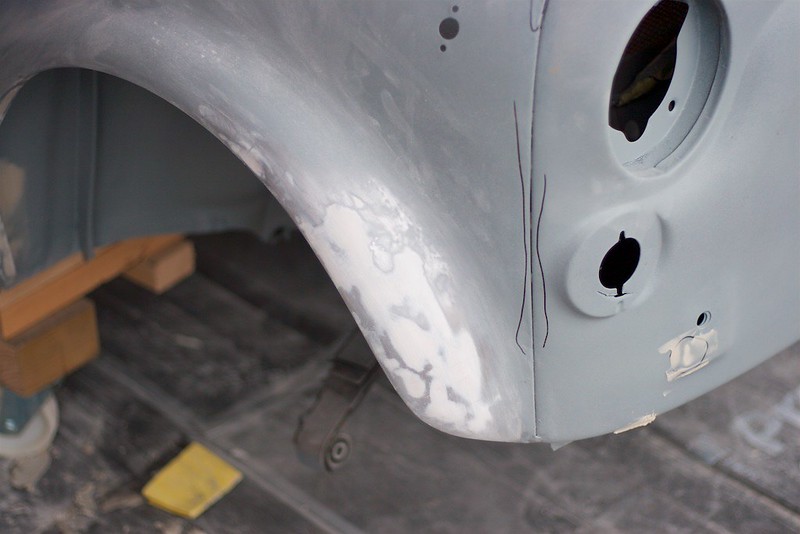
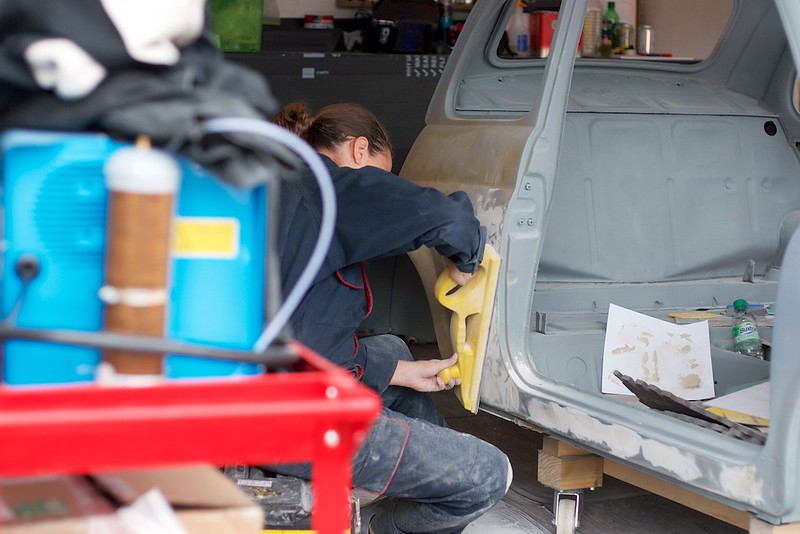
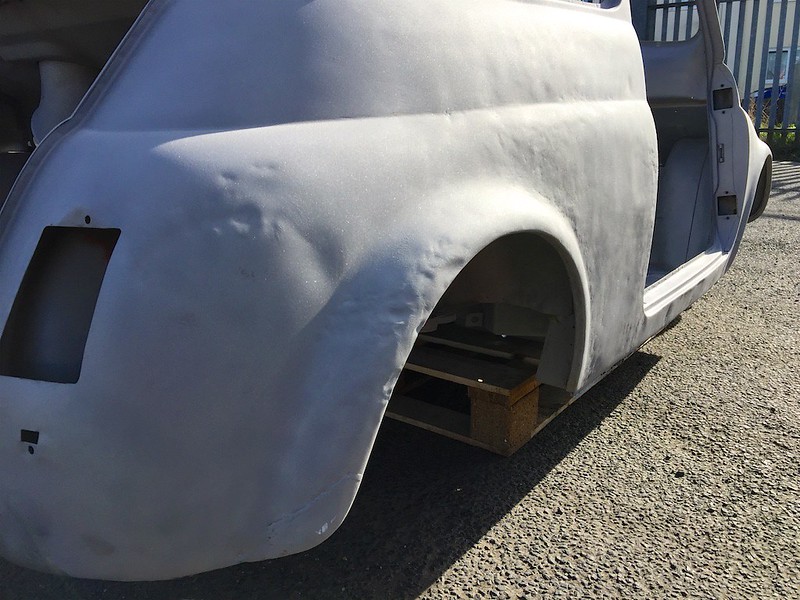
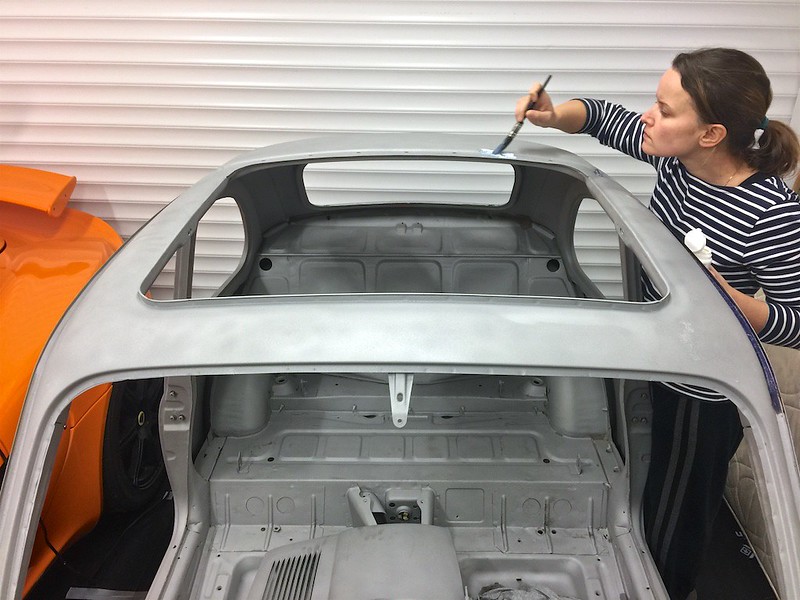
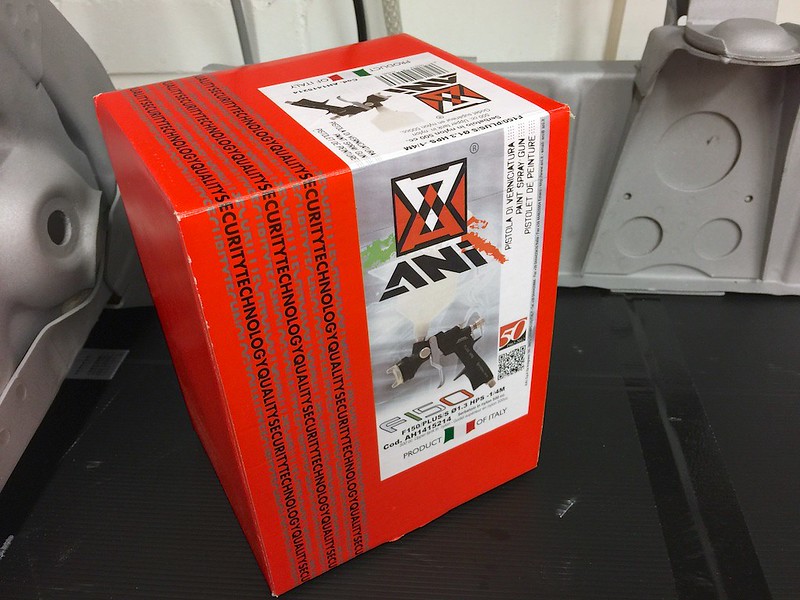
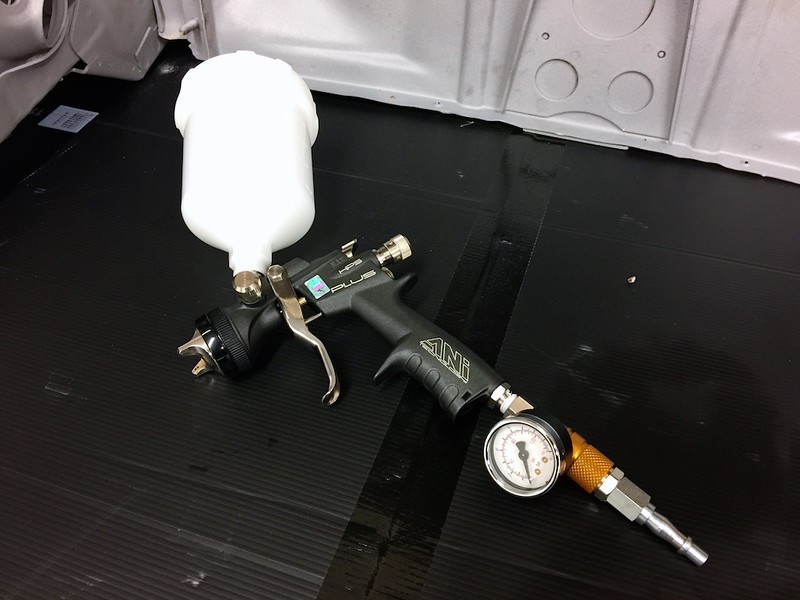
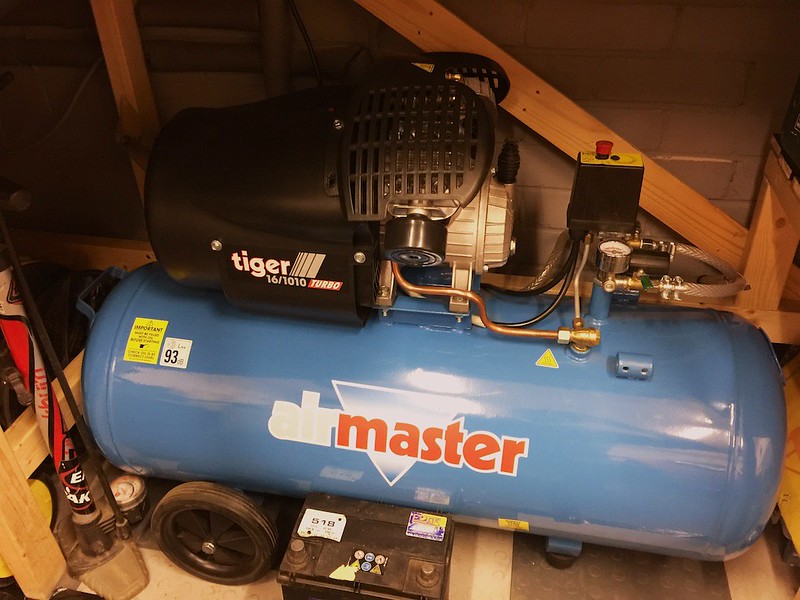
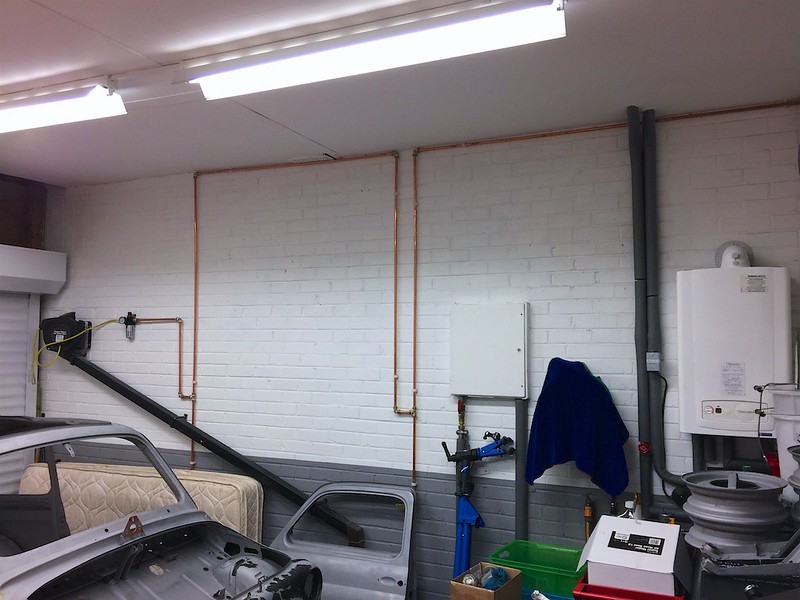
This marked something of a turning point in the project, as it’s almost the end of all the “dirty” grinding jobs, so I took the opportunity to give the garage a much needed clean and put some protective sheeting on the floor, as the next step will be spraying.

32928327584_c0f55b3f1f_c.jpg


More to come!
 
Now the car was back home I had the chance to check it over properly. Overall, it’s cleaned up very well, there are a few small holes and other areas that need attention, and obviously the car has had some ugly, but at least structurally sound repairs in the past. It also seems that the car was approximately 20% filler by mass!

Although the blasting cleaned up the car really well, there were a few areas with some pitting/dark spots that the blaster could not remove - this was intentional as I didn’t want the panels to become damage/warped by blasting with an aggressive media like sand or iron oxide. I set about treating any suspect areas with rust converter to stabilise any small pits of rust that remained in the steel.

33730625946_6aeeaf29f8_c.jpg


33730627446_ee647995ca_c.jpg


33730627186_b49acdb274_c.jpg


32928328554_80530cb109_c.jpg


32928328694_9ec0d80564_c.jpg


And a few cheeky before and afters.

Before

33386783140_5957cdff56_c.jpg


After

33730626706_e3bc0e5f45_c.jpg


Before

33730623576_df4d102dba_c.jpg


After

33730626006_2a7de7bb95_c.jpg


Before

33730623746_d14f36b1e0_c.jpg


After

33730625766_9969c2ec84_c.jpg


33730627636_ec11fe859f_c.jpg


33730626416_c3990f3b94_c.jpg


33730627526_26c9e7ebed_c.jpg


32928328854_90e6423f9b_c.jpg


The rear bar is pretty crumpled!

32928328904_fc7f0d66b9_c.jpg


The next job is to prime the parts with etch prime before he starts to rust again. I’ll grind back any areas that require filler/bodywork – it’s a bit of a faff but it means he’s protected in the meantime and I can take my time to get things right 1st time.

Here is the gun I’ll be using

32928328944_610cd33d0f_c.jpg


33730627736_c455141b16_c.jpg


Here is the compressor setup, V-Twin, 100L, 14.5cfm

32928329024_bcf5927101_c.jpg


And here is my rudimentary heat exchanger, to trap the water that’s introduced as the air is heated/compressed.

32928329104_0224d14cc6_c.jpg


The plan is to spray tomorrow if the weather is good and I can put the Lotus outside, wish me luck! (y)
 
Looking fairly solid, a few old repairs but no major corrosion from the images supplied.
I'm sure you are on it already but I wouldn't leave it too long before giving buzz a coat of etch primer. He wont take long before surface rust appears.
 
Hi all,

It's been a little while since my last post, We've been in France for just over a month but have been cracking on since! Here are a few progress photos. The rest can be seen in the album (link in signature)

First up was to sort out the remaining small areas of rust pitting after the soda blasting then a coat of etch primer


The wheels were also blasted and we have now painted these ready for new rubber


The lower wishbones have also been acid etched and painted gunmetal grey


One part I forgot to take to the blasters was the rear grille. It took me 2 days to grind the paint back to bare metal, etch prime and finally prime with high build to fill in some of the marks made by the wire disc I used


Here are few other refurbished parts including the screwdriver handle from the tool kit


The past week has been spent trying to get to grips with bodywork (another new skill for us to learn). I think we are getting there! Lots more filling and sanding to come over the next month or so :)

We have also bought a MIG welder and have been practicing on an old panel before using it in anger to replace the battery tray and sort out a few holes.


Well done Katie (and husband!)--you are doing a superb job on your car. It will a darn site better than the bulk of the "fully restored" cars that get imported from Italy. When you come to refitting the suspension (especially the rear) don't forget, I can supply you with a copy of the pages with all the angles--I can also lay my hands on a set of the old Dunlop wheel alignment gauges for when you set up the suspension. Although I wouldn't be able to leave the gauges with you, I am very happy to bring them over and give you a hand to set-up the alignment.
thumb.gif
smile.gif
 
Katie, how on earth do you keep everything so clean and tidy with such messy jobs? I seem to be working in a midden for most of the time.:D
You chose the car well if it needs so little welding.(y)
It looks like the car will be a showstopper.:)
 
Well done Katie (and husband!)--you are doing a superb job on your car. It will a darn site better than the bulk of the "fully restored" cars that get imported from Italy. When you come to refitting the suspension (especially the rear) don't forget, I can supply you with a copy of the pages with all the angles--I can also lay my hands on a set of the old Dunlop wheel alignment gauges for when you set up the suspension. Although I wouldn't be able to leave the gauges with you, I am very happy to bring them over and give you a hand to set-up the alignment.
thumb.gif
smile.gif

Thank you, that's very generous. I managed to find a reprinted copy of the workshop manual which has been invaluable so far!
 
Katie, how on earth do you keep everything so clean and tidy with such messy jobs? I seem to be working in a midden for most of the time.:D
You chose the car well if it needs so little welding.(y)
It looks like the car will be a showstopper.:)

My car shares our garage with my husband's pride and joy so at the end of each day we clean and tidy the garage so that it can be put back in minus all the abrasive dust and power tools etc. My living room however is another story! That is currently housing everything but the body shell.

It does seem remarkably hole free. It has had some knocks and bumps, there were a couple of cracks underneath that required welding and a hole in the roof that has also been welded. We also need to put in a new battery tray. My initial plan was to remove the very dented rear quarter and weld in a new one but I'm keen to keep as many original panels as possible so we're currently trying to knock out the major dents and fill the remainder. If it goes badly I'll give in and replace the panel. Filling and contouring was really difficult at first having never done anything like that previously, but as with most things the correct tools for the job, a little determination and some YouTube videos have gone a long way and we seem to be getting the hang of it (y)
Thanks, I hope so! I can't wait to take it to a show. There never seem to be any 500s at the ones I go to (mainly in the north west)
 
I agree with you Katie---at nearly all the shows I go to my car is the only 500. There is another that occasionally turns up (very neat red one), but the elderly gent running it usually has to go home quickly to look after very poorly wife. There used to be a yellow one that appeared occasionally, but that gent usually turns up in his X1/9 these days. Lastly, there is a 500 being restored in Middlewich which should be around next year. All being well I will be at Cholmondeley on the 3rd Sept. There is also the Cheshire 'cars and coffee' at Manley Mere (the wind-surfing centre just outside Chester--WA6 0PE)--the next one is on Sept 17th--8.00am to 10.30am--all being well I will be there in my 500, come along in the Lotus.
thumb.gif
smile.gif
 
Fantastic work and a lot of love going in there. Certainly puts me to shame. On my 500 the lower section of the heater tunnel had rusted away and I could not find a replacement. Compared it with a 126 one and the lower section was the same so it was a simple case of drilling out some spot welds to replace that lower bit:)
 
Very impressive workmanship (or should that be workpersonship, I'm not too pc!) so far.

Just throwing out a few tips that might help with the bodywork repairs:-

It's a pity you don't have access to Oxy-Acetylene welding equipment because it could be used to anneal the metal in the rear quarter panel, I'm sure most of the dents could then be tapped-out.

Re: The detachable rear (engine) panel. Bodyshops have equipment which temporarily welds metal tabs/pins on low spots which are then pulled out using a slide-hammer before removing the tabs/pins. Might not cost much if you just walked in with the panel under your arm - just a thought. Alternatively you might be able to get a lever/bar in through any holes in the rear of the panel and ease the dents out. Saves using a load of filler!

You can make templates from the good quarter panel to check progress on the damaged quarter panel using wire bent to follow the curves. Aluminium wire is easy to bend but coat-hangers will work, just harder to bend. Or just cut some cardboard as templates.

A 12 steel rule is useful when applying filler over a large area, it can be drawn over the filler applied by spatula before the filler goes-off - saves a lot of sanding. Use it held straight for flat panels, flex it slightly to fit slightly curved panels.

Don't forget to use guide coats ( a light spray of a dark colour paint) over filler before sanding when you think you have it nearly right, to locate any low-spots requiring further filling.

I sometimes use a film of oil to check if a panel requires further work when panel-beating but this is a big no-no when using filler. Your fingertips are the best guide.

Hth,

Al.
 
Hi Katie,

Really enjoying the work you guys are putting into the 500!

I'm quite amazed at the zinc plating and what a difference it makes.

I had a question about the poly brush you mentioned, is that a nylon type brush (with varying grit levels) that attaches to a drill? Any reason why you used that rather than the metal brush extension for the handbrake paint removal?

Also, what kind of vinegar bath are you doing? I'd like to start cleaning up certain interior bits and bobs in the near future...

Keep up the great work!

Thank you :)

I love the zinc plating, its such a satisfying process and a great way to keep hold of the original parts.

The vinegar bath is just malt vinegar from the supermarket (5-10% acetic acid). It takes a while for the really rusted parts to clean up but after a few days the rust is easily removed.

I have used metal brush extensions but found they scored lots of marks in the metal. I used them for the stubborn rusted bits or parts that have many layers of paint but for the more delicate parts I have used the poly brushes. They are abrasive coated nylon and work really well for paint removal as long as the part is dry and grease free (otherwise they just heat it up and smear everything around) They also hold on to their strands unlike the metal ones which I find let go of theirs after a while.
 
Very impressive workmanship (or should that be workpersonship, I'm not too pc!) so far.

Just throwing out a few tips that might help with the bodywork repairs:-

It's a pity you don't have access to Oxy-Acetylene welding equipment because it could be used to anneal the metal in the rear quarter panel, I'm sure most of the dents could then be tapped-out.

Re: The detachable rear (engine) panel. Bodyshops have equipment which temporarily welds metal tabs/pins on low spots which are then pulled out using a slide-hammer before removing the tabs/pins. Might not cost much if you just walked in with the panel under your arm - just a thought. Alternatively you might be able to get a lever/bar in through any holes in the rear of the panel and ease the dents out. Saves using a load of filler!

You can make templates from the good quarter panel to check progress on the damaged quarter panel using wire bent to follow the curves. Aluminium wire is easy to bend but coat-hangers will work, just harder to bend. Or just cut some cardboard as templates.

A 12 steel rule is useful when applying filler over a large area, it can be drawn over the filler applied by spatula before the filler goes-off - saves a lot of sanding. Use it held straight for flat panels, flex it slightly to fit slightly curved panels.

Don't forget to use guide coats ( a light spray of a dark colour paint) over filler before sanding when you think you have it nearly right, to locate any low-spots requiring further filling.

I sometimes use a film of oil to check if a panel requires further work when panel-beating but this is a big no-no when using filler. Your fingertips are the best guide.

Hth,

Al.

Hi Al,

Thank you :)

My other half Ric tried what you suggested with the rear panel at the weekend. He managed to get something through the hole at the back and knock most of the dent back out. We didn't really want to fill it too much as its where the bumper will mount on so I guess its not ideal.

I like the idea of using the wire as a template. There was a fairly large but not very deep depression on the other side that I've managed to get just about right with filler so I'll give that a go at the weekend once I know I'm happy with the other side. I think we're going to mount the door to check the lines.

I will also use the ruler tip :) Any sanding that can be avoided at this stage will save us a lot of time.

We have been using guide coats, they may not be too obvious as they are yellow. I have a fair bit of excess yellow paint from all the samples I've had made up because I still can't decide on a final colour, so I've been using them. They can be fairly hard to see though so I might get a darker one.

Thanks for the tips, much appreciated!

Katie
 
Another approach to removing a serious dent in the rear panel would be to cut the whole area out using a 1mm cutting disk. Then flatten it out on the bench and weld it back in. Alternatively you could simply cut another piece of steel to fit and weld that in.

I've always used a black aerosol of paint as my guide-coat...probably done several cars with one tin.:D

Things that have made spreading filler easier for me.

https://www.toolstation.com/shop/p98277?table=no

https://www.toolstation.com/shop/p84678?table=no
 
Last edited:
Thank you :)

I love the zinc plating, its such a satisfying process and a great way to keep hold of the original parts.

The vinegar bath is just malt vinegar from the supermarket (5-10% acetic acid). It takes a while for the really rusted parts to clean up but after a few days the rust is easily removed.

I have used metal brush extensions but found they scored lots of marks in the metal. I used them for the stubborn rusted bits or parts that have many layers of paint but for the more delicate parts I have used the poly brushes. They are abrasive coated nylon and work really well for paint removal as long as the part is dry and grease free (otherwise they just heat it up and smear everything around) They also hold on to their strands unlike the metal ones which I find let go of theirs after a while.

Thanks for the suggestions.

I found three types of nylon cup brushes, in varying grit levels, 80, 120 & 240 grit.

Is this the type of brush you mean?
51FkrAKzD1L.jpg


thanks

Dario
 
Yep very similar to that. I use this shape more often though, it's easier to get in tight spaces. There is no grit level quoted though, they was only 1 option.
Hope that helps.
 

Attachments

  • IMG_4435.JPG
    IMG_4435.JPG
    153.7 KB · Views: 20
Removing rust using Malt Vinegar works!
So does White Vinegar, Molasses, electrolysis using washing soda and....

deox-C or deox-gel

take a look at www.bilthamber.com for further info.

The above 2 products are frequently highly recommended in some of the classic car magazines.

There are also kits available to do your own zinc? plating at home using electrolysis.

Hth,

Al.
 
Hi Katie,

A few other tips occurred to me that might help you.

If trial fitting a stripped door to check panel fit etc. it might be a good idea to place some something weighty (I've used some truck toolkit tools) inside the door to replicate the true weight of the completely assembled door. I weigh the parts removed from a door (glasses, winder, lock, handles, trim panel etc. It's surprising how much all this stuff weighs and can affect door alignment. You might imagine that with a good solid door panel, unworn hinges, secure A post etc. that it won't make any difference. I've been caught out by assuming this.....

When filling a large area of panel e.g. as in you r.h. quarter panel, stop sanding if a spot of metal appears. Panel beaters use what is called a 'pick hammer' to tap down any high metal spots that appear. Otherwise you can end up applying layer after layer of filler plus all the associated sanding and a resulting thick layer of filler. You can use a dull centre punch or small drift to do the same. Just tap down the centre of the metal high spot and just fill this small area, before resuming the sanding process. Don't get discouraged, you'll eventually get it right. (Note:- I didn't say how long it'll take. :D ).

When filling a damaged panel such as the rear panel, it's preferable to not use filler up to an edge on a panel as you may have problems later. Same applies to door edges etc. Sometimes you can get access through a drain hole and use a long slim rod to tap out a dent. Some people drill a small hole , insert a self-tapping screw and use a slide hammer with an attachment to pull out a dent. There's slide-hammer kits available for not too much money but I'd rather not drill holes unless I can weld them up afterwards. Try your best to raise the metal where the bumper mountings fit so that they're not clamping against filler. But don't get too stressed about this as this area is not very noticeable when the bumper is fitted.

I don't know what tools/equipment you have or can access/want to buy but, without thinking, I mentioned using an Oxy-Acetylene welding torch to heat metal before. You could also use a propane torch or possibly a blowtorch, anything that will heat metal red hot will work. It really makes a big difference. Annealing the metal makes it much easier to work. When red hot, dents can literally be pressed out. :D

You probably don't have much paint left to remove, but don't forget about paint-stripper. I reckon it would have made stripping that rear grill panel much easier and faster.

I'm curious as to why you didn't remove the front transverse suspension spring before sending the bodyshell for blasting? It's a good idea to check that spring and it's components carefully. Sometimes a leaf can be broken and not readily apparent. I've found worn centre bolts (which clamp all the spring leaves together) resulting in a hard-to-trace wandering problem on the road. To say nothing about possible hidden corrosion. I noticed that the rear spring top seatings were not removed also. Corrosion can lurk unseen in these areas also. Worth checking if you haven't done so.

Keep up the great work, I'm looking forward to the next instalment,

Regards,

Al.

Hi Al,

Thanks for the tips.

Regarding the leaf spring: I would have removed it but I don't have the correct tool and from what I read, it's not something to be tackled without it? Also, it was covered in underseal and appears to be in good nick. If I can get hold of the tool I'd take it off and replace any parts that required it.

The rear spring top seatings - how are these removed? I wasn't aware that they came off.

We don't have any specialist tools, just standard home garage stuff. Neither of us have tackled anything like this before. My husband is familiar with the mechanical side of things as he services and maintains our other cars but in terms of restoration and bodywork this is all new to both of us.

Cheers,

Katie
 
Back
Top