Gavins_Sisley_001.jpg

Panda (Classic) Blue Sisley, my first Panda.

Introduction

Starting this thread for Gavin (Palio) as the car is with me for work at the moment. Gavin, feel free to back fill details of history. (y)


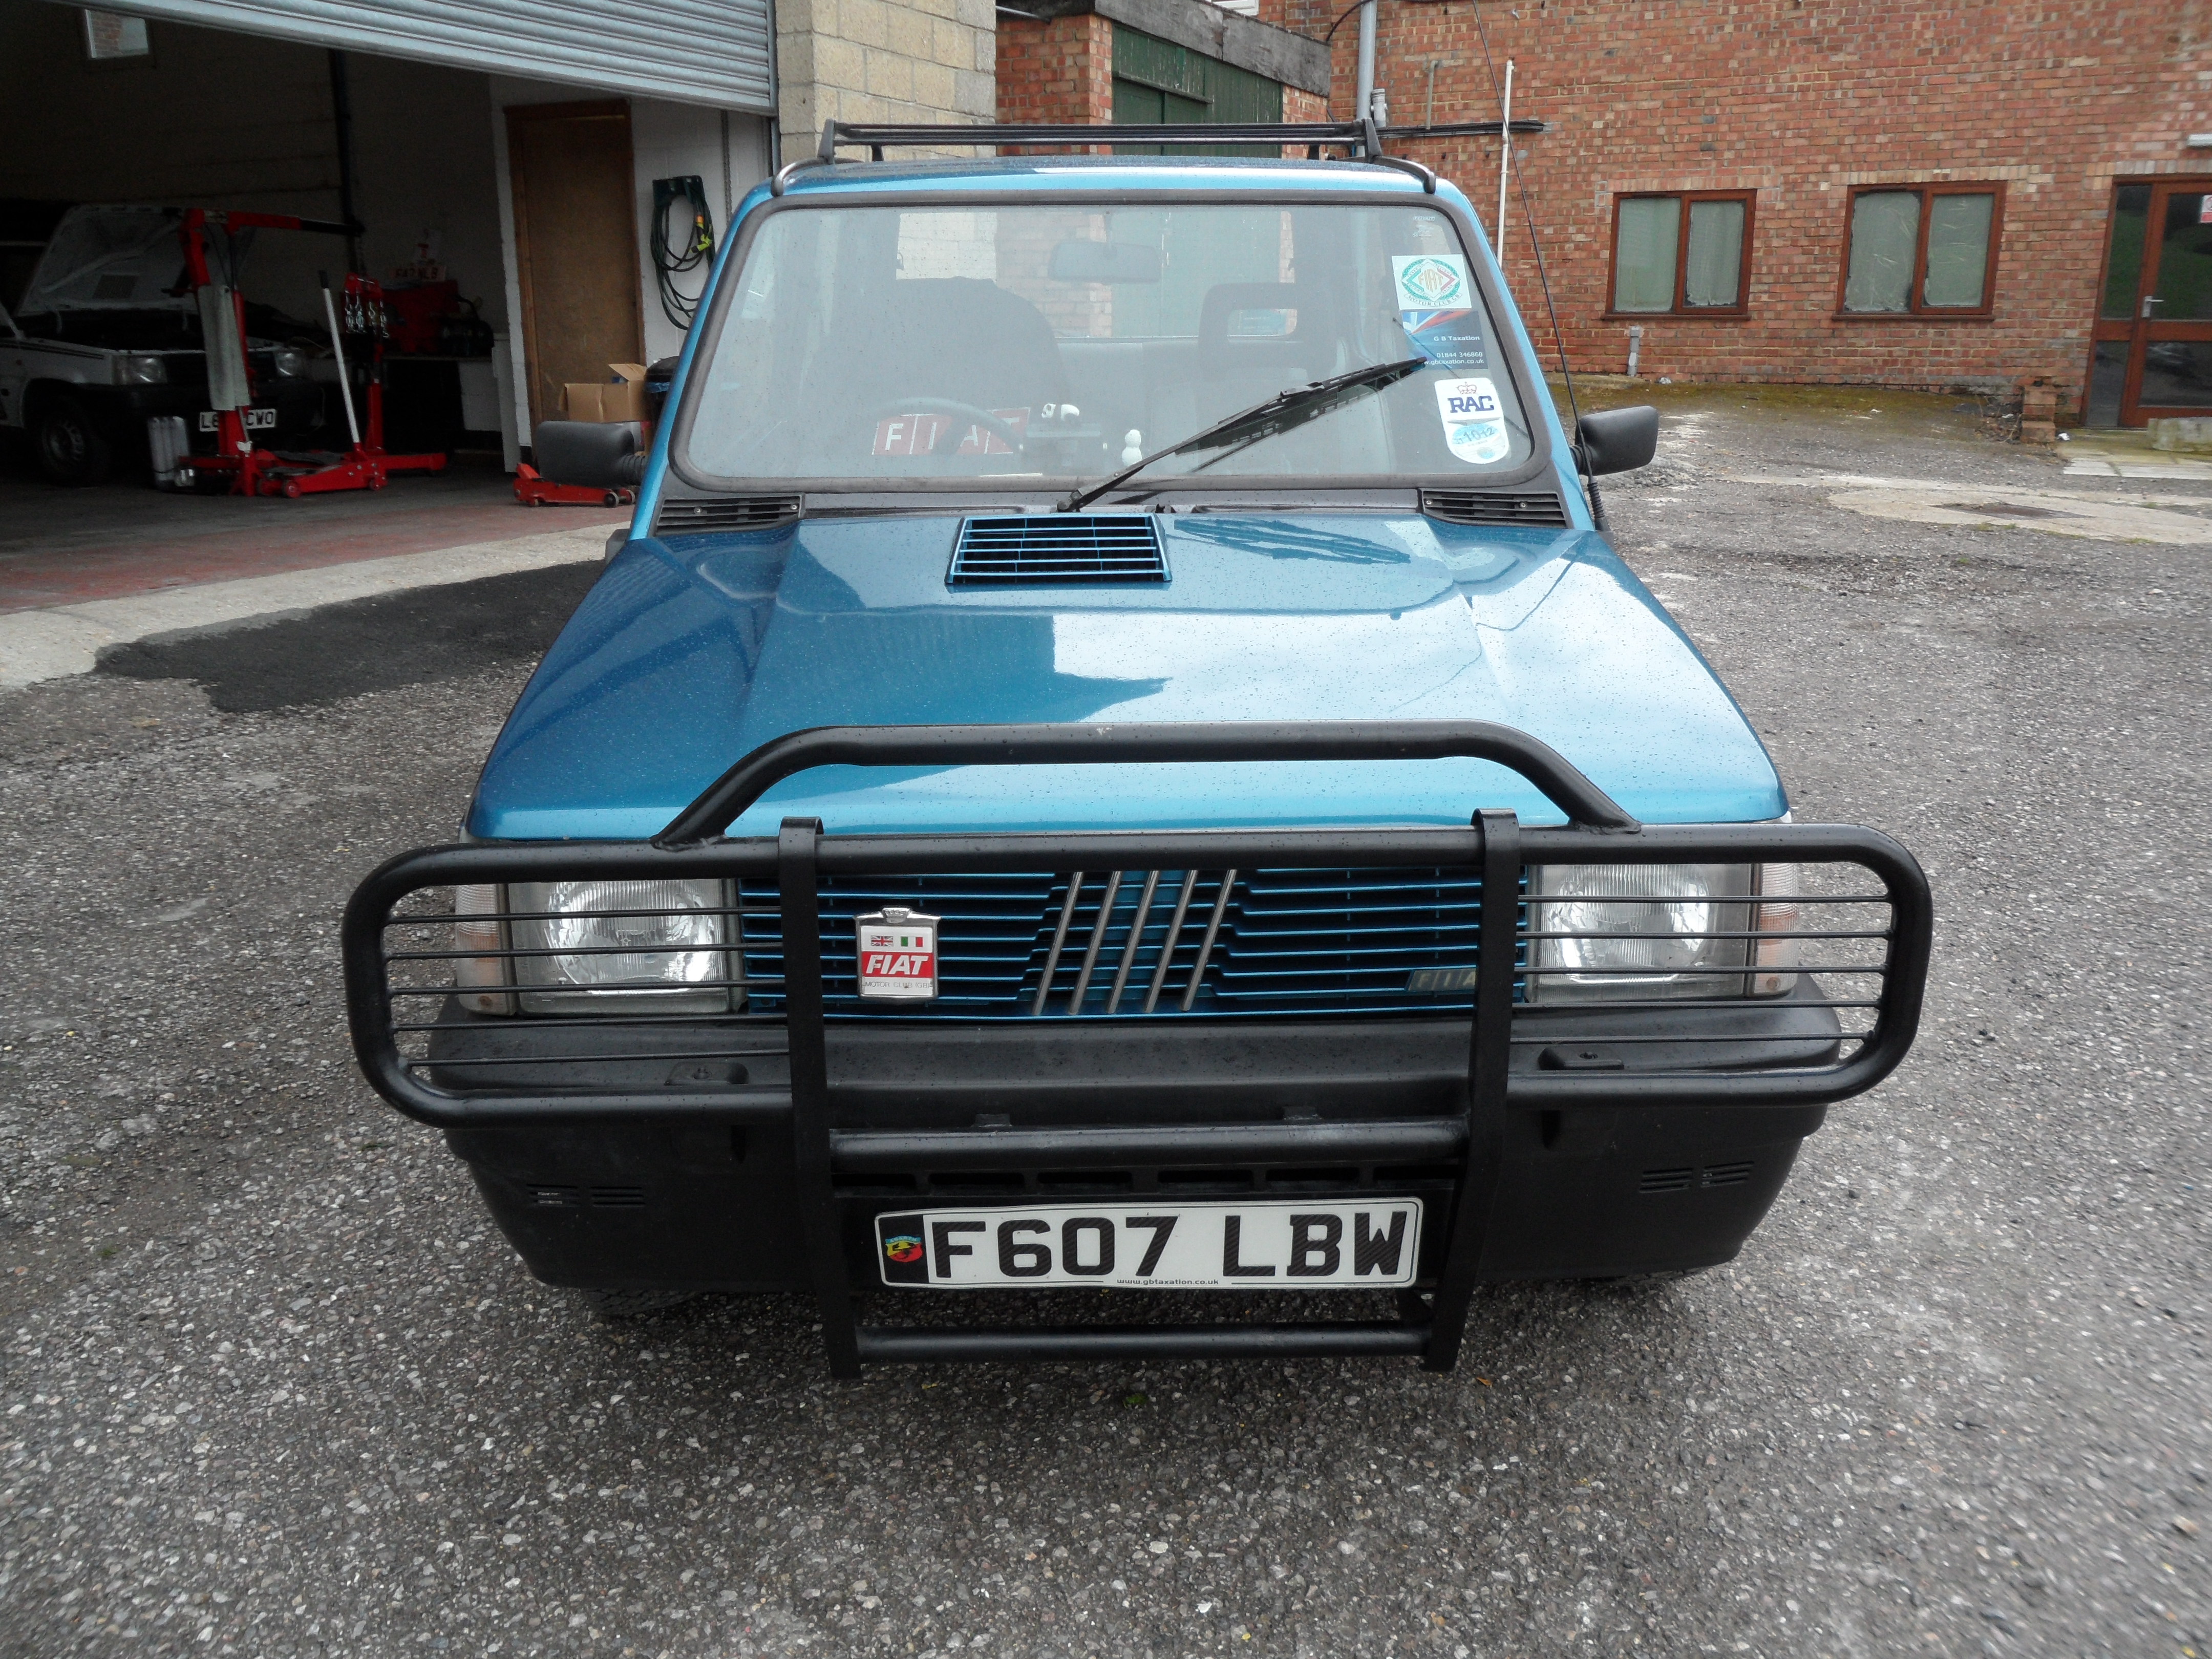
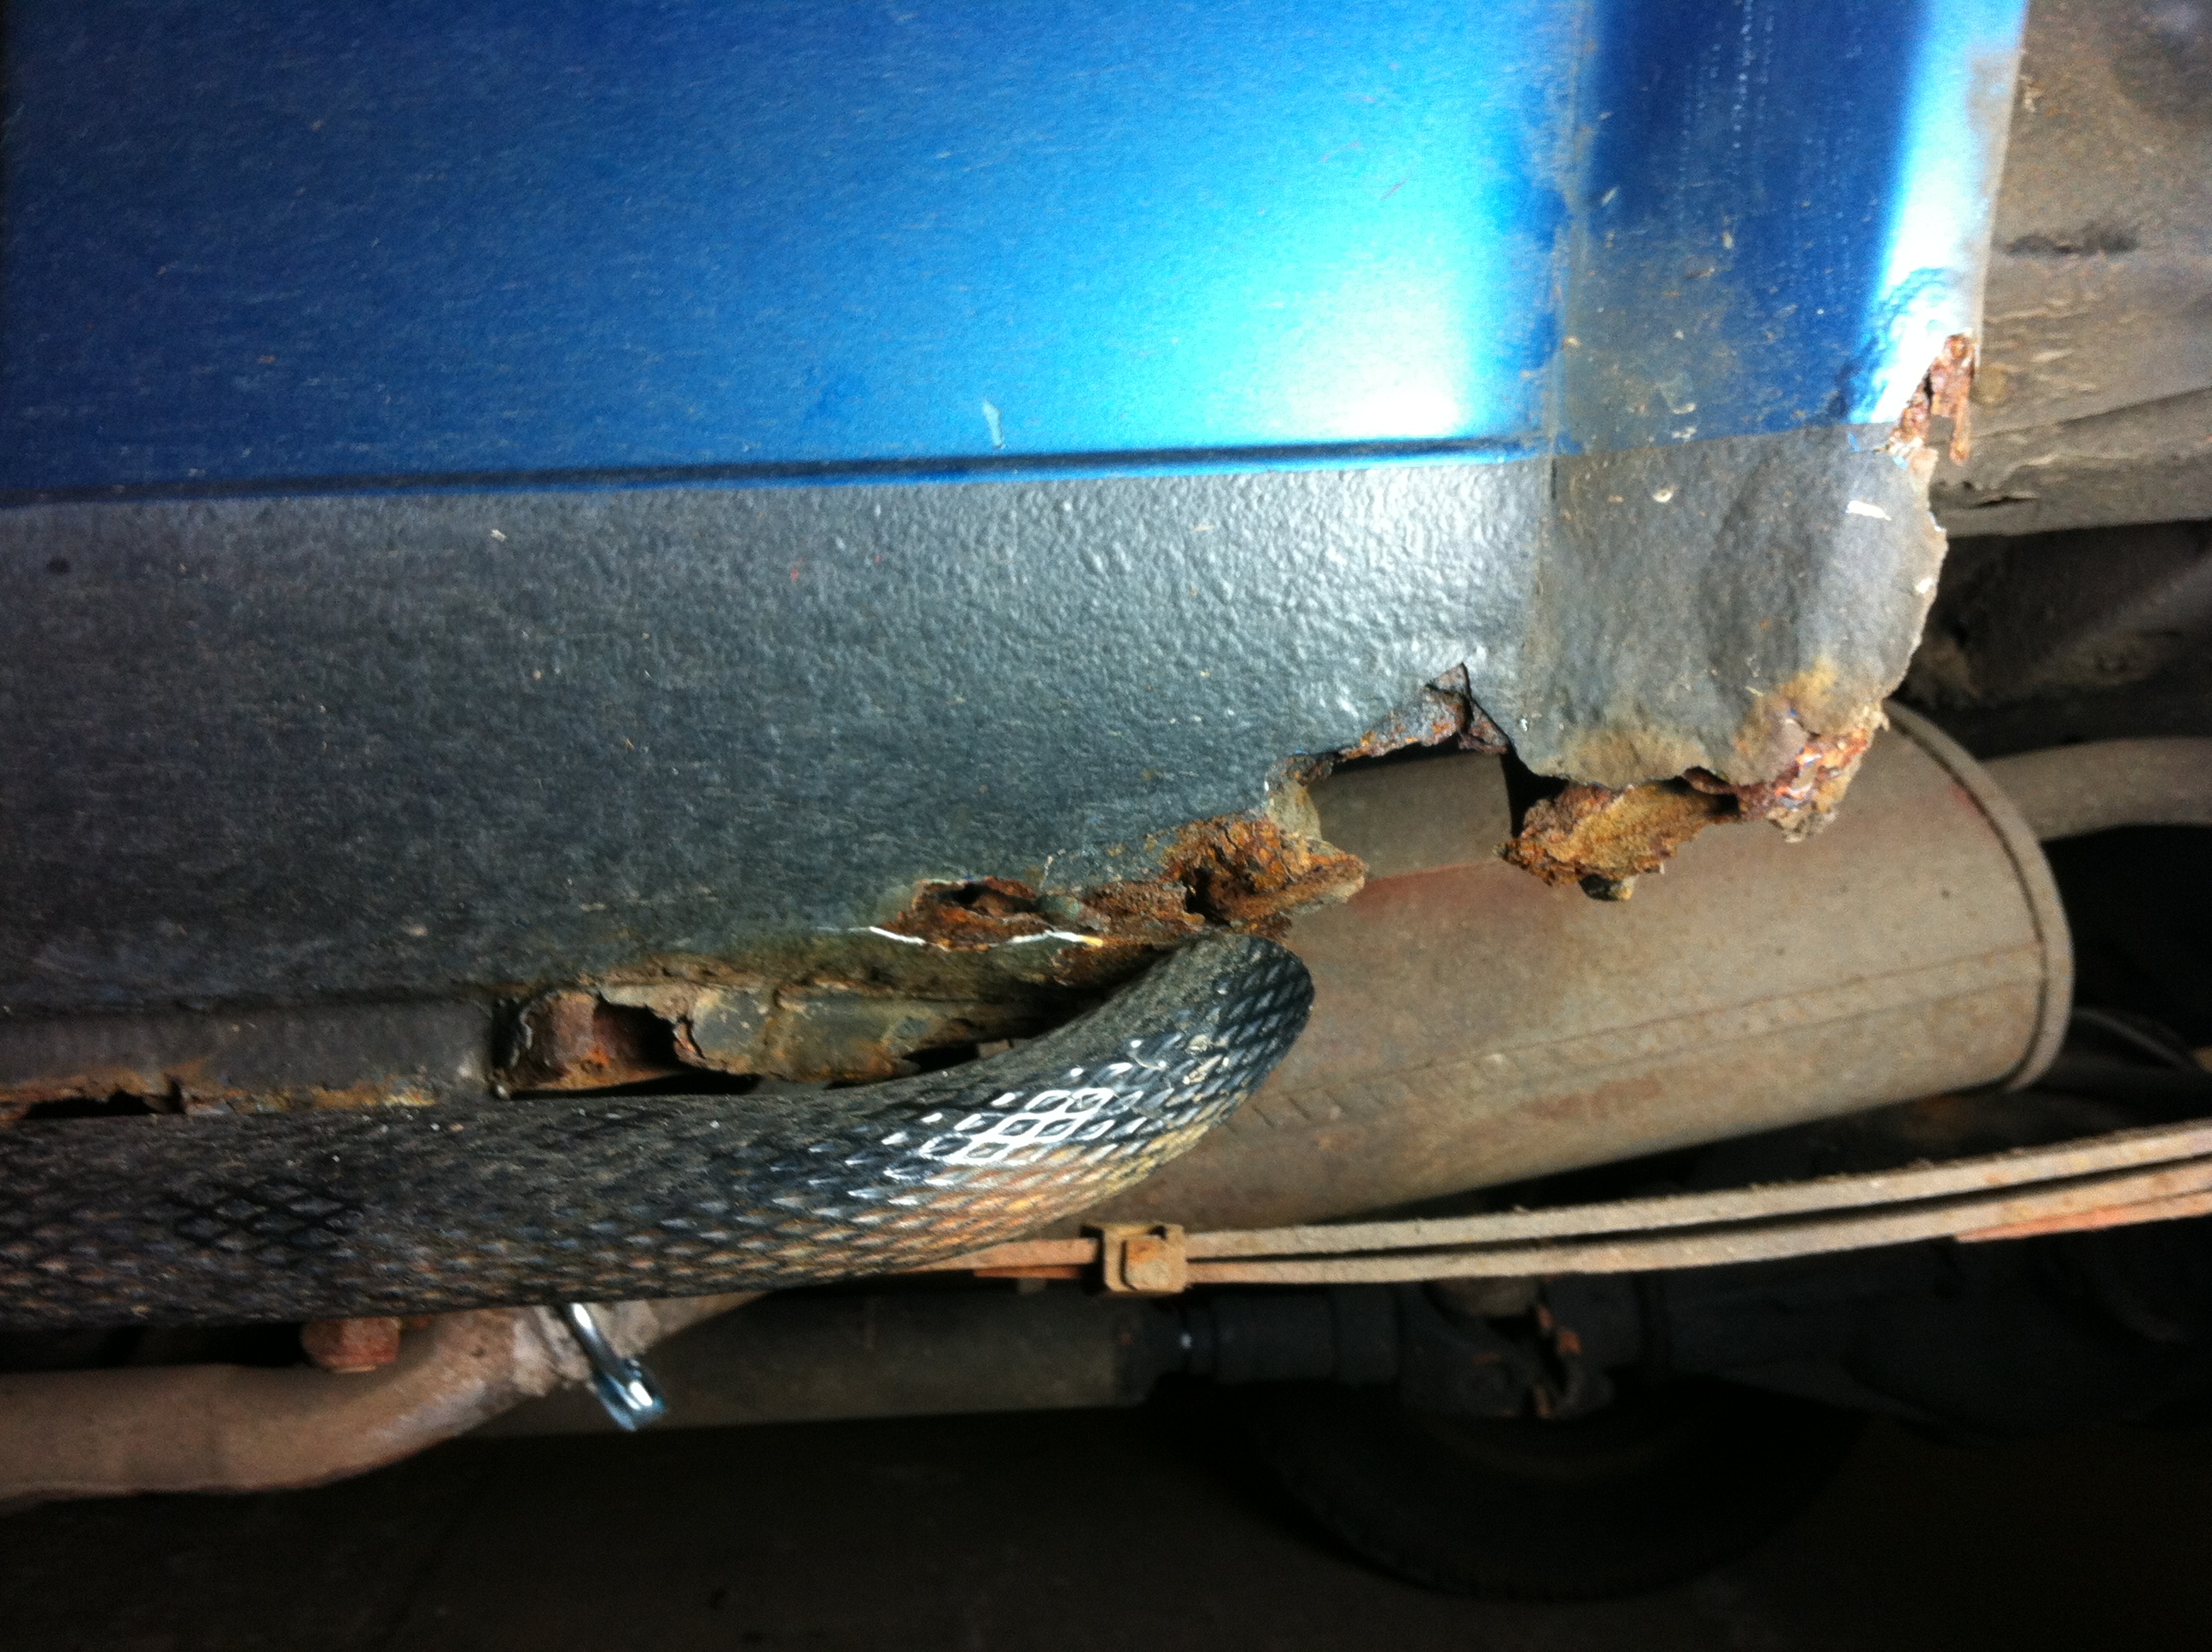
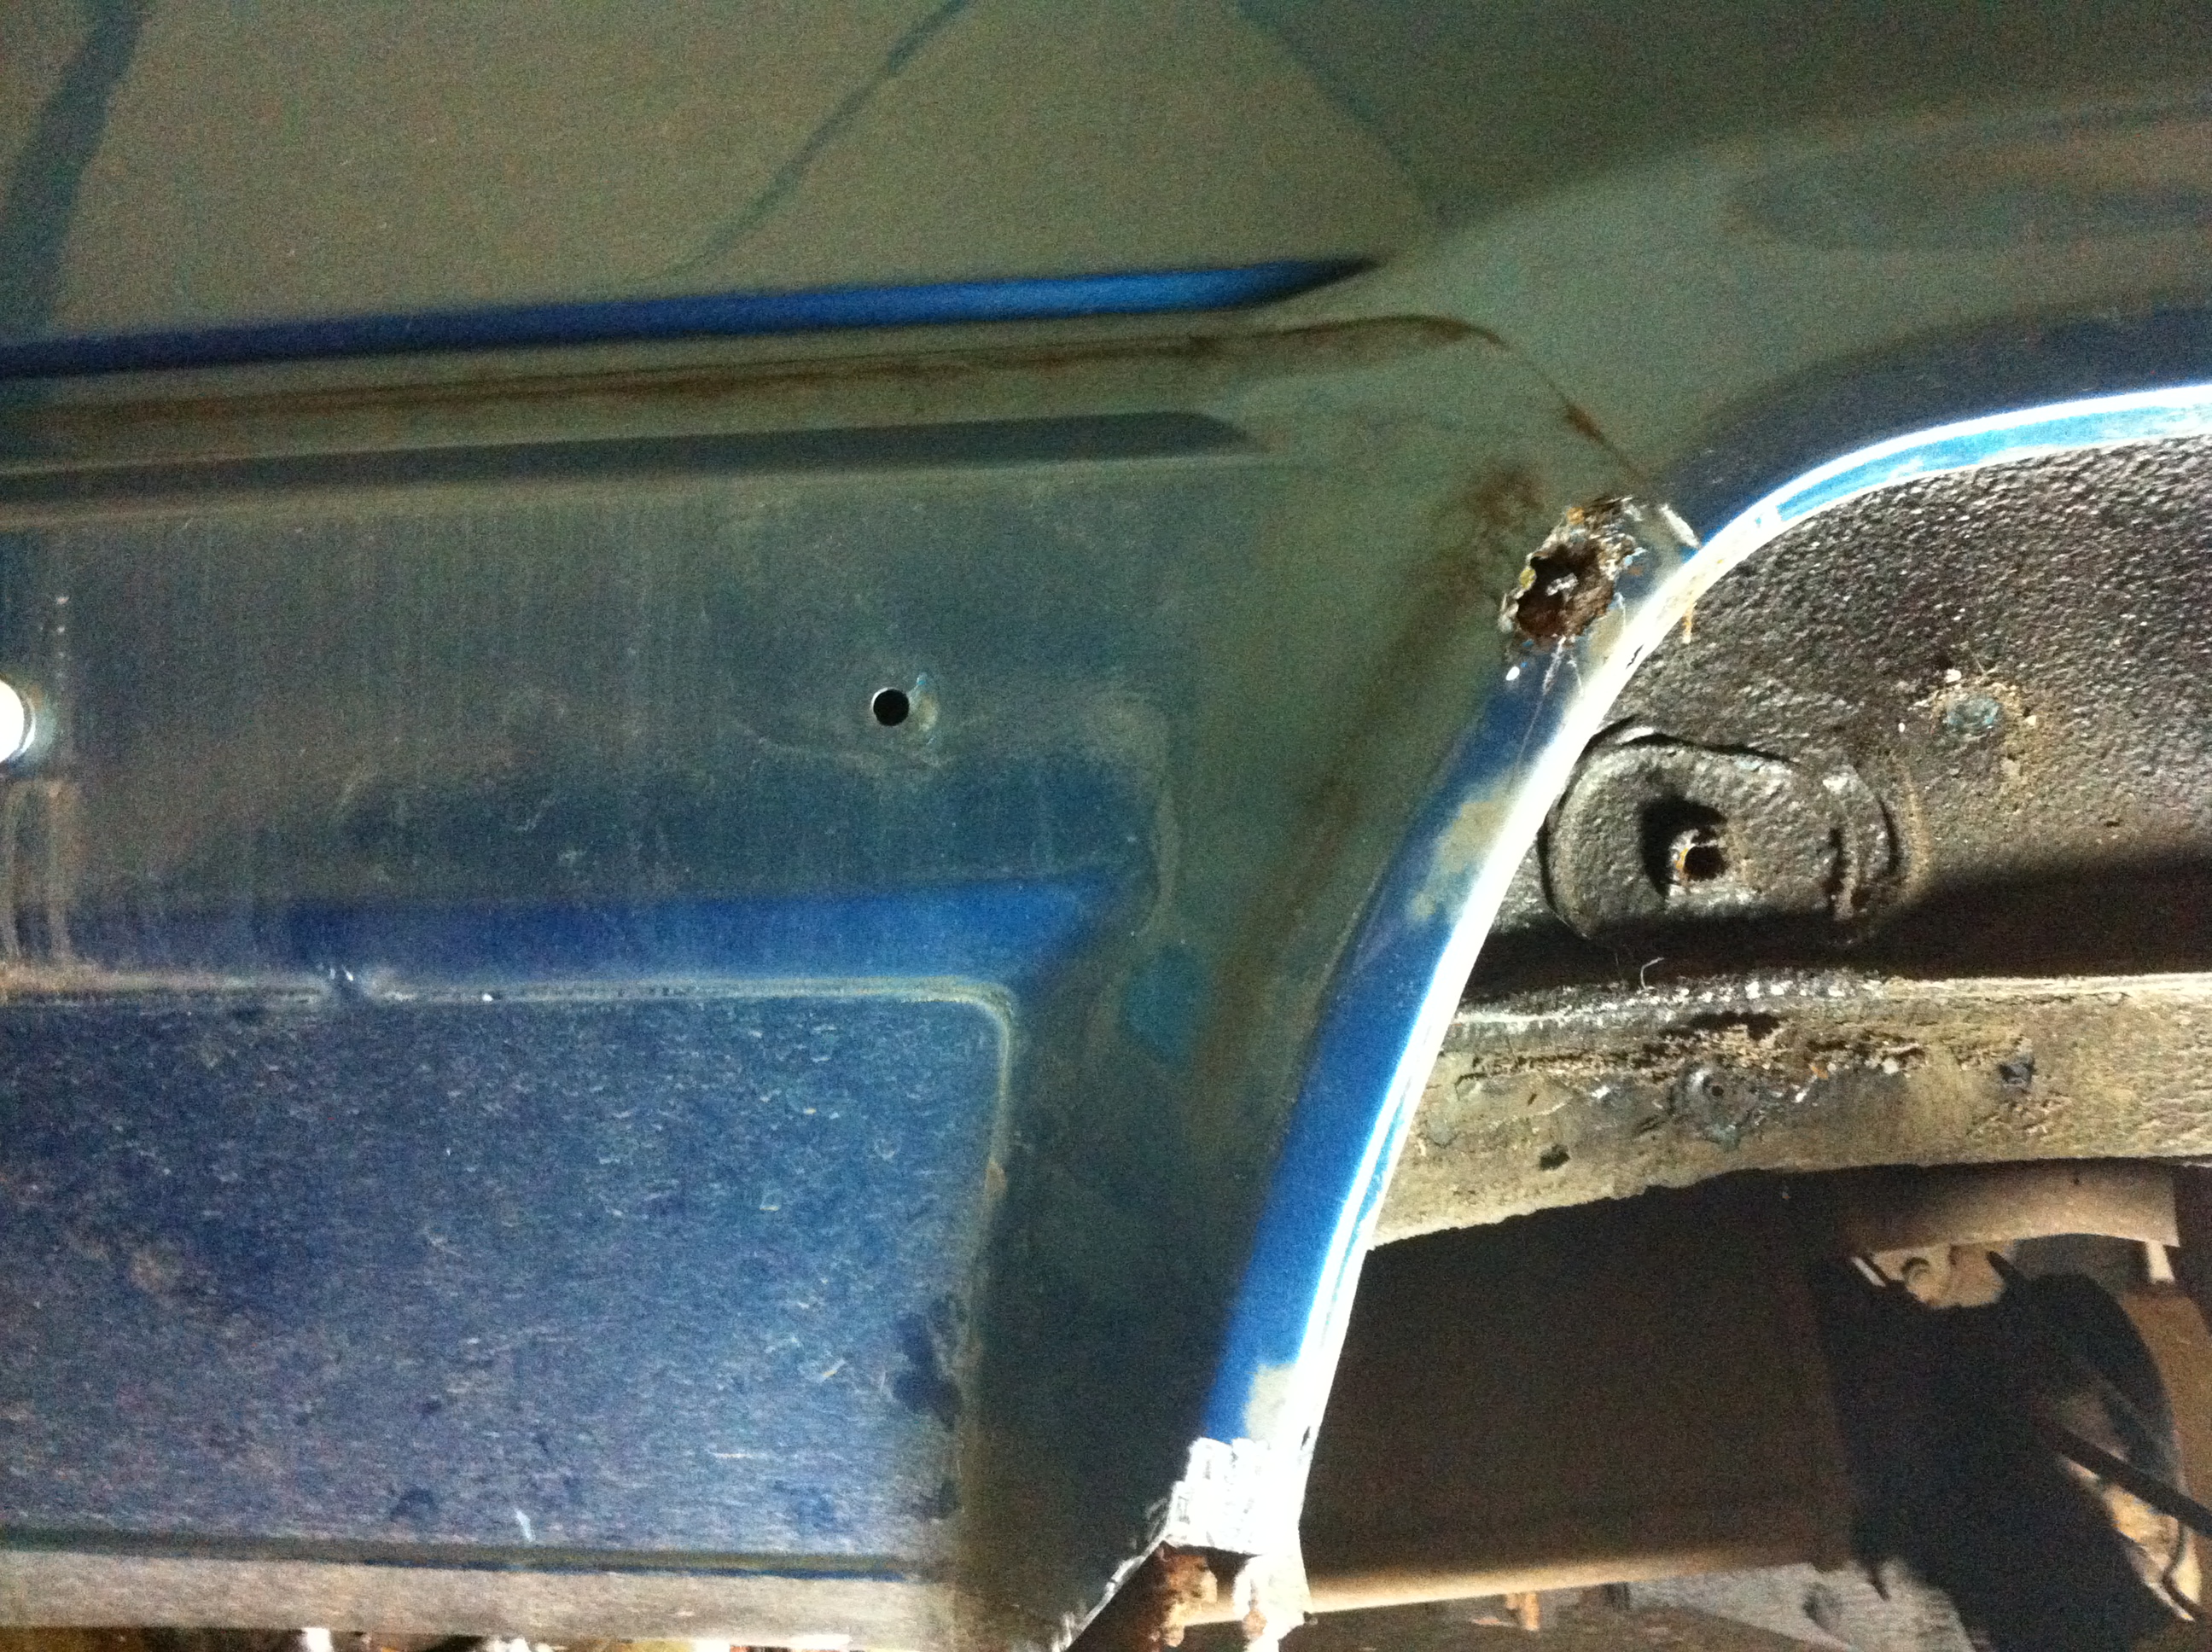
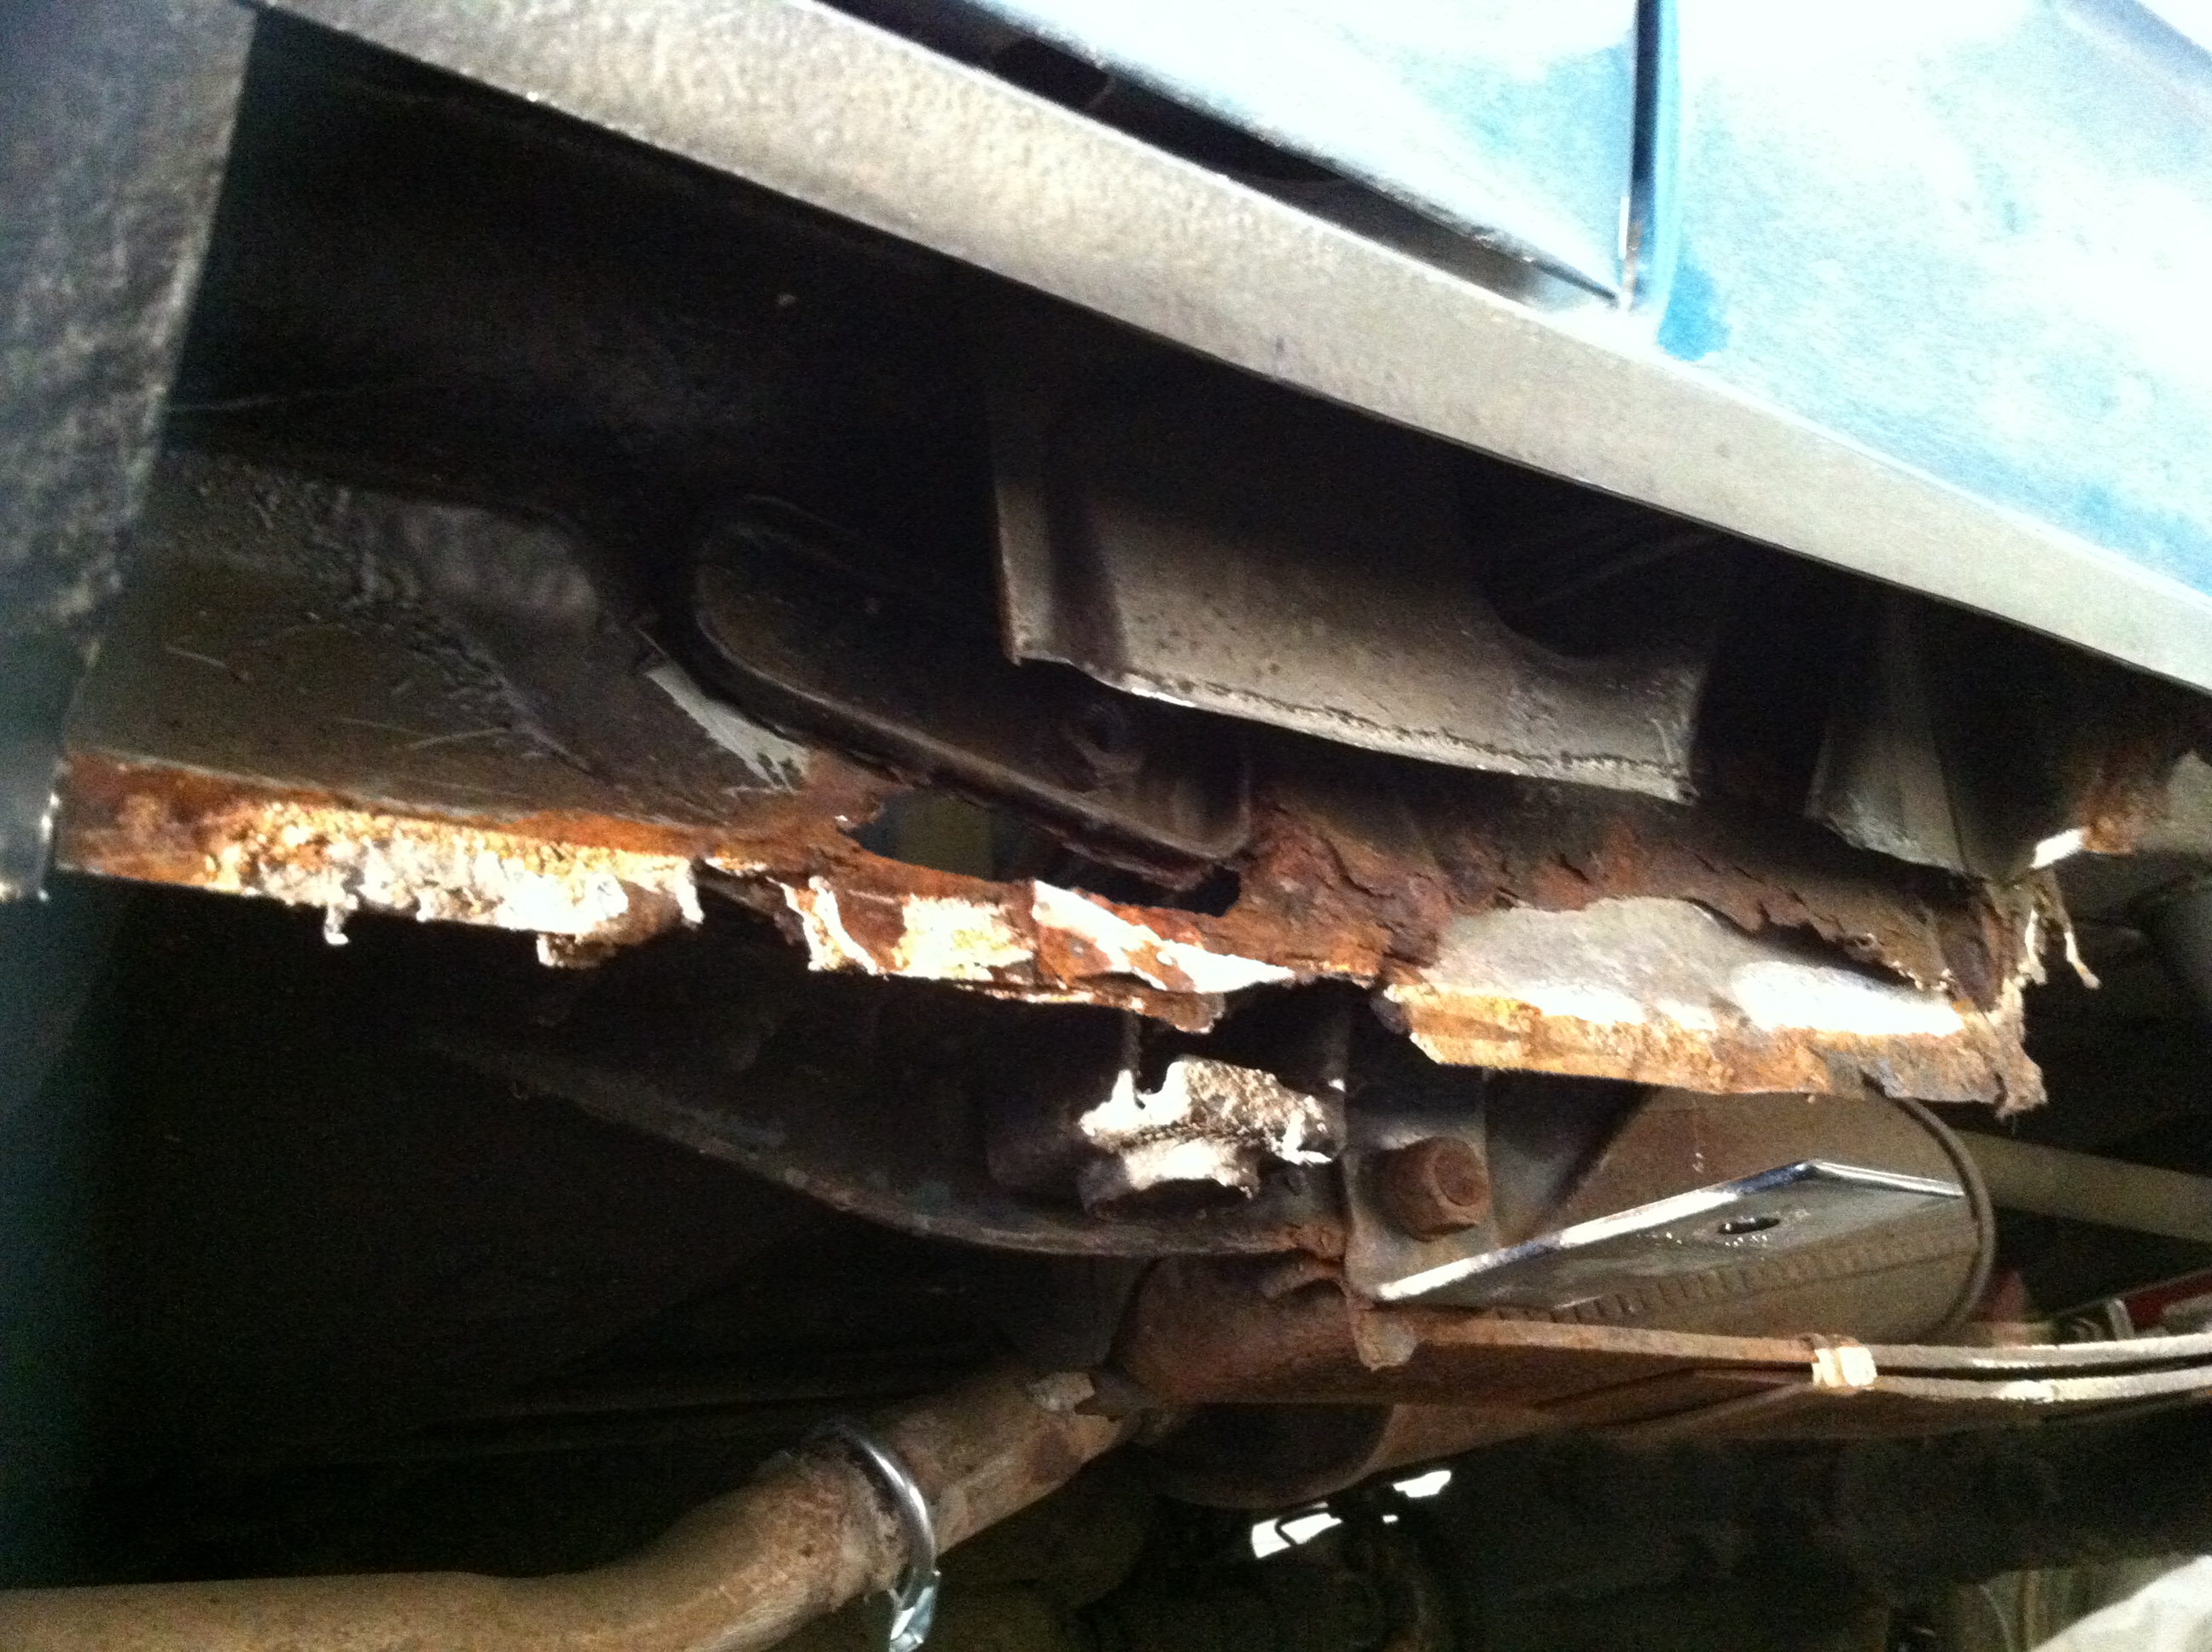
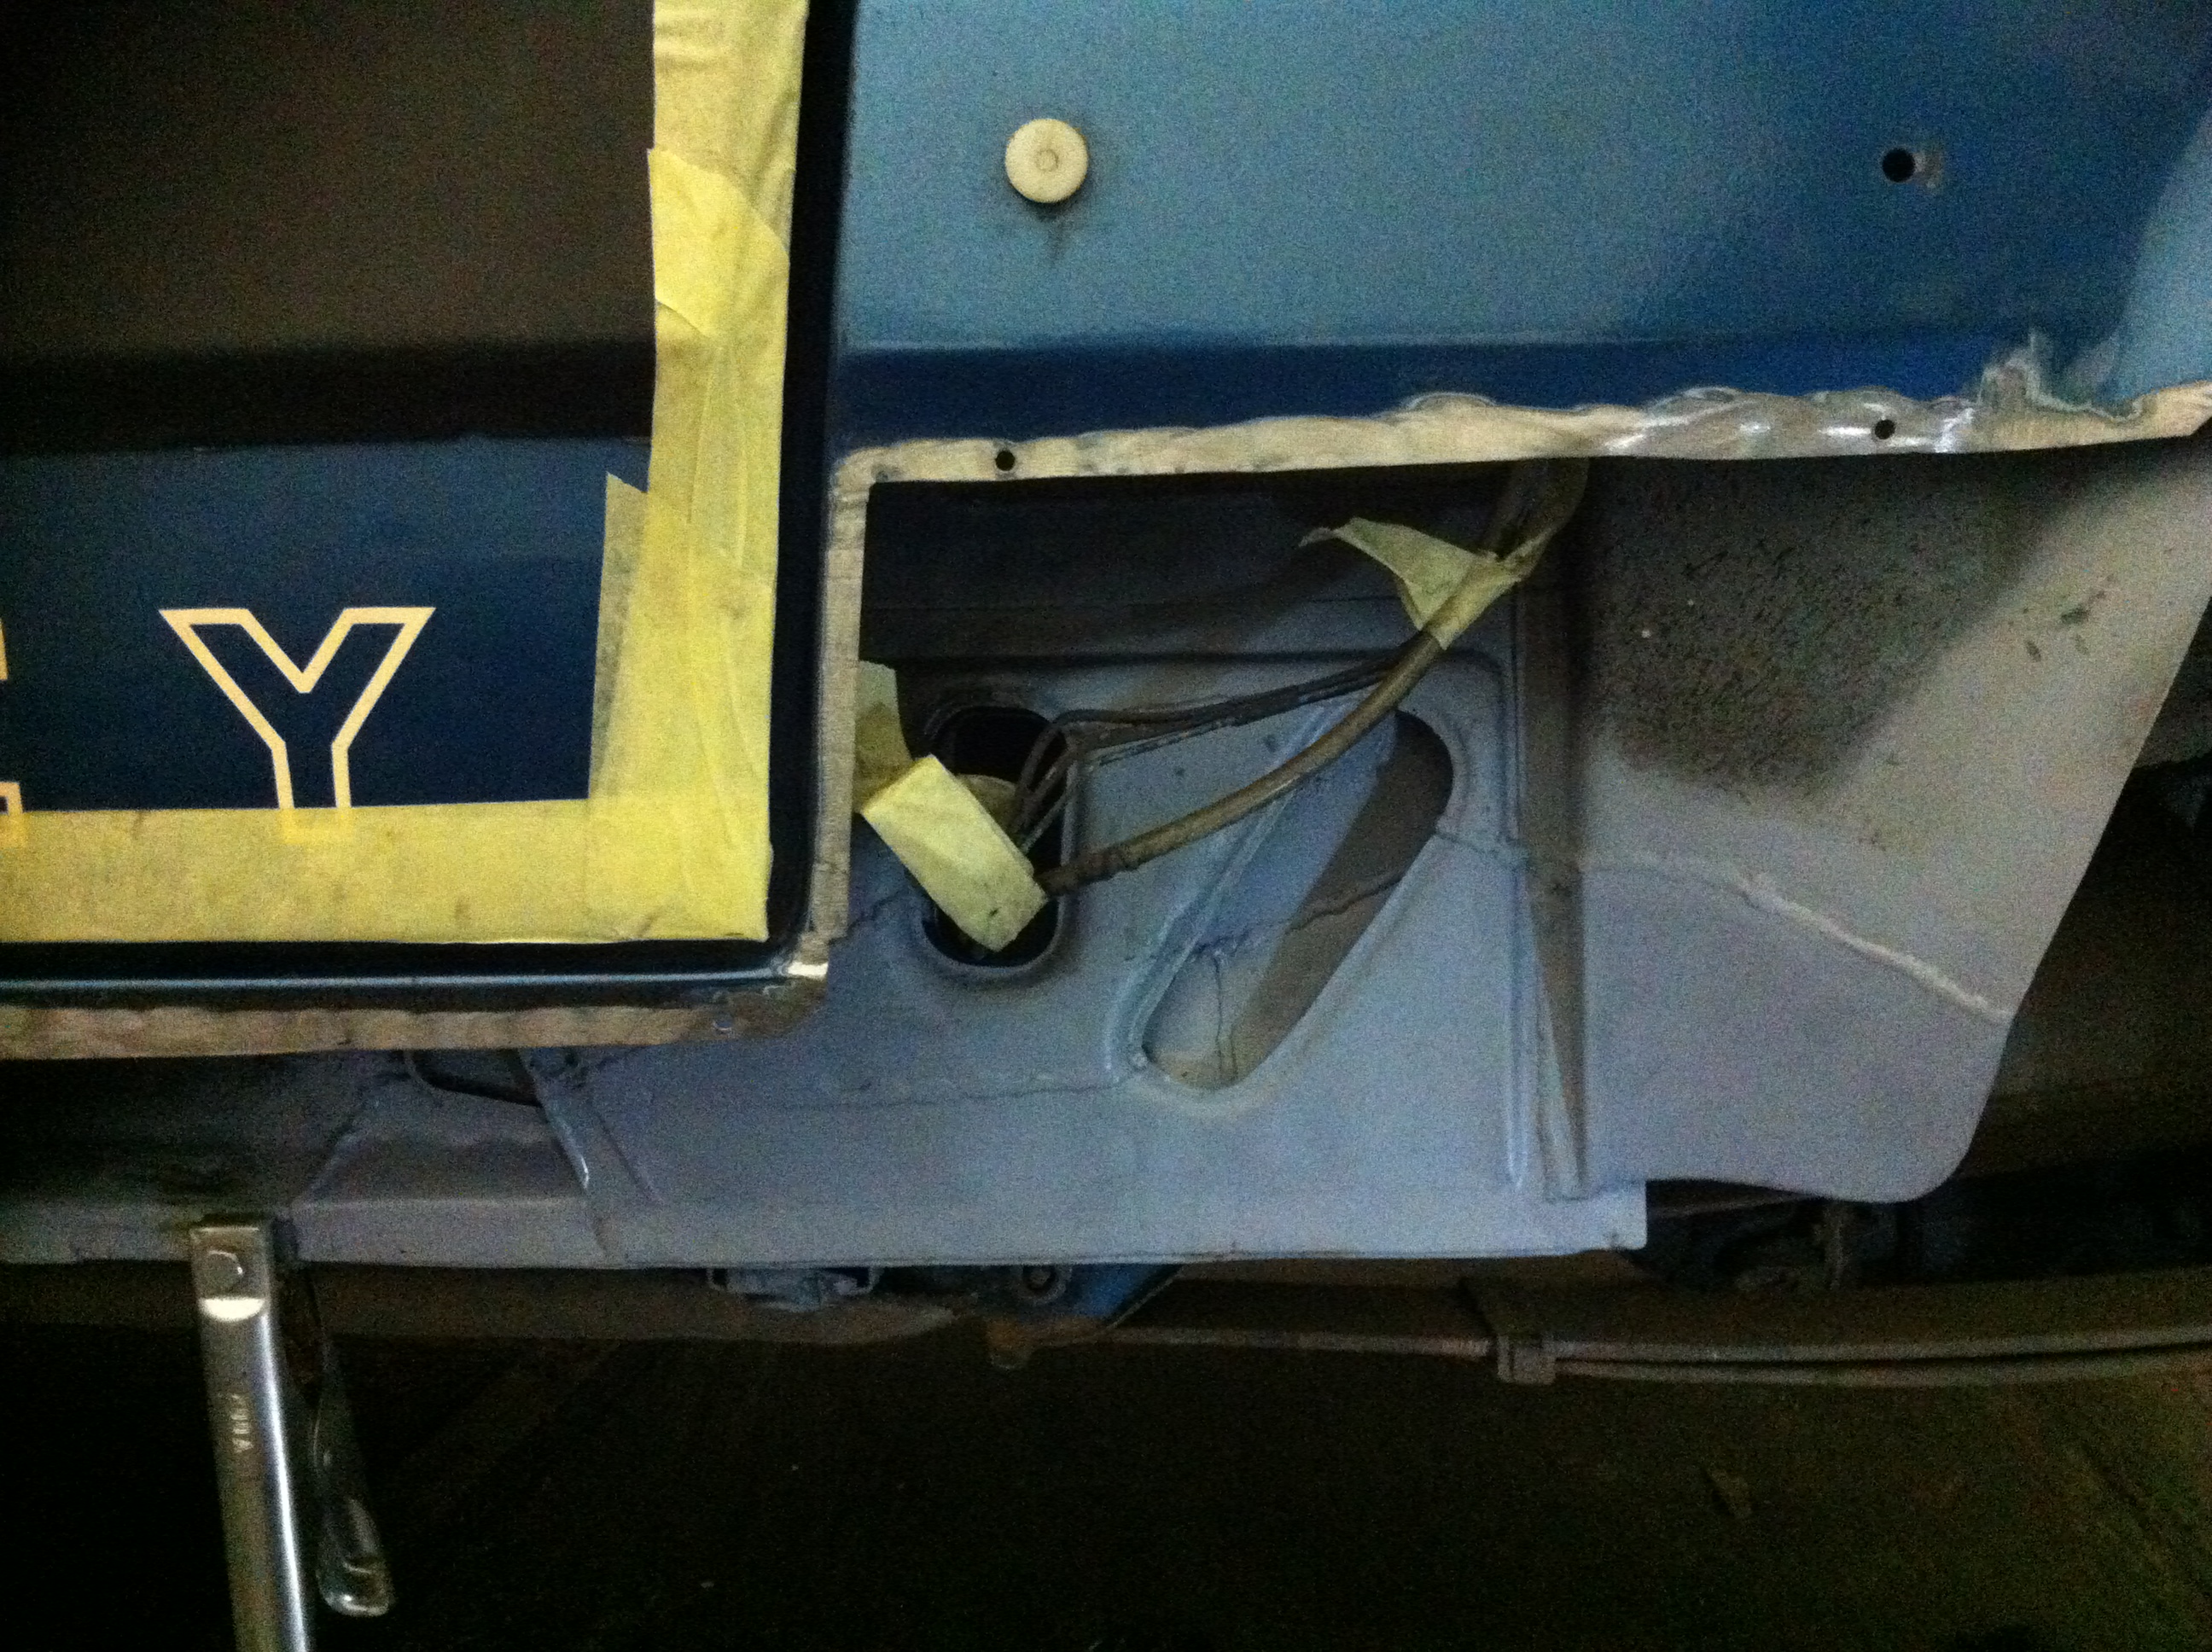
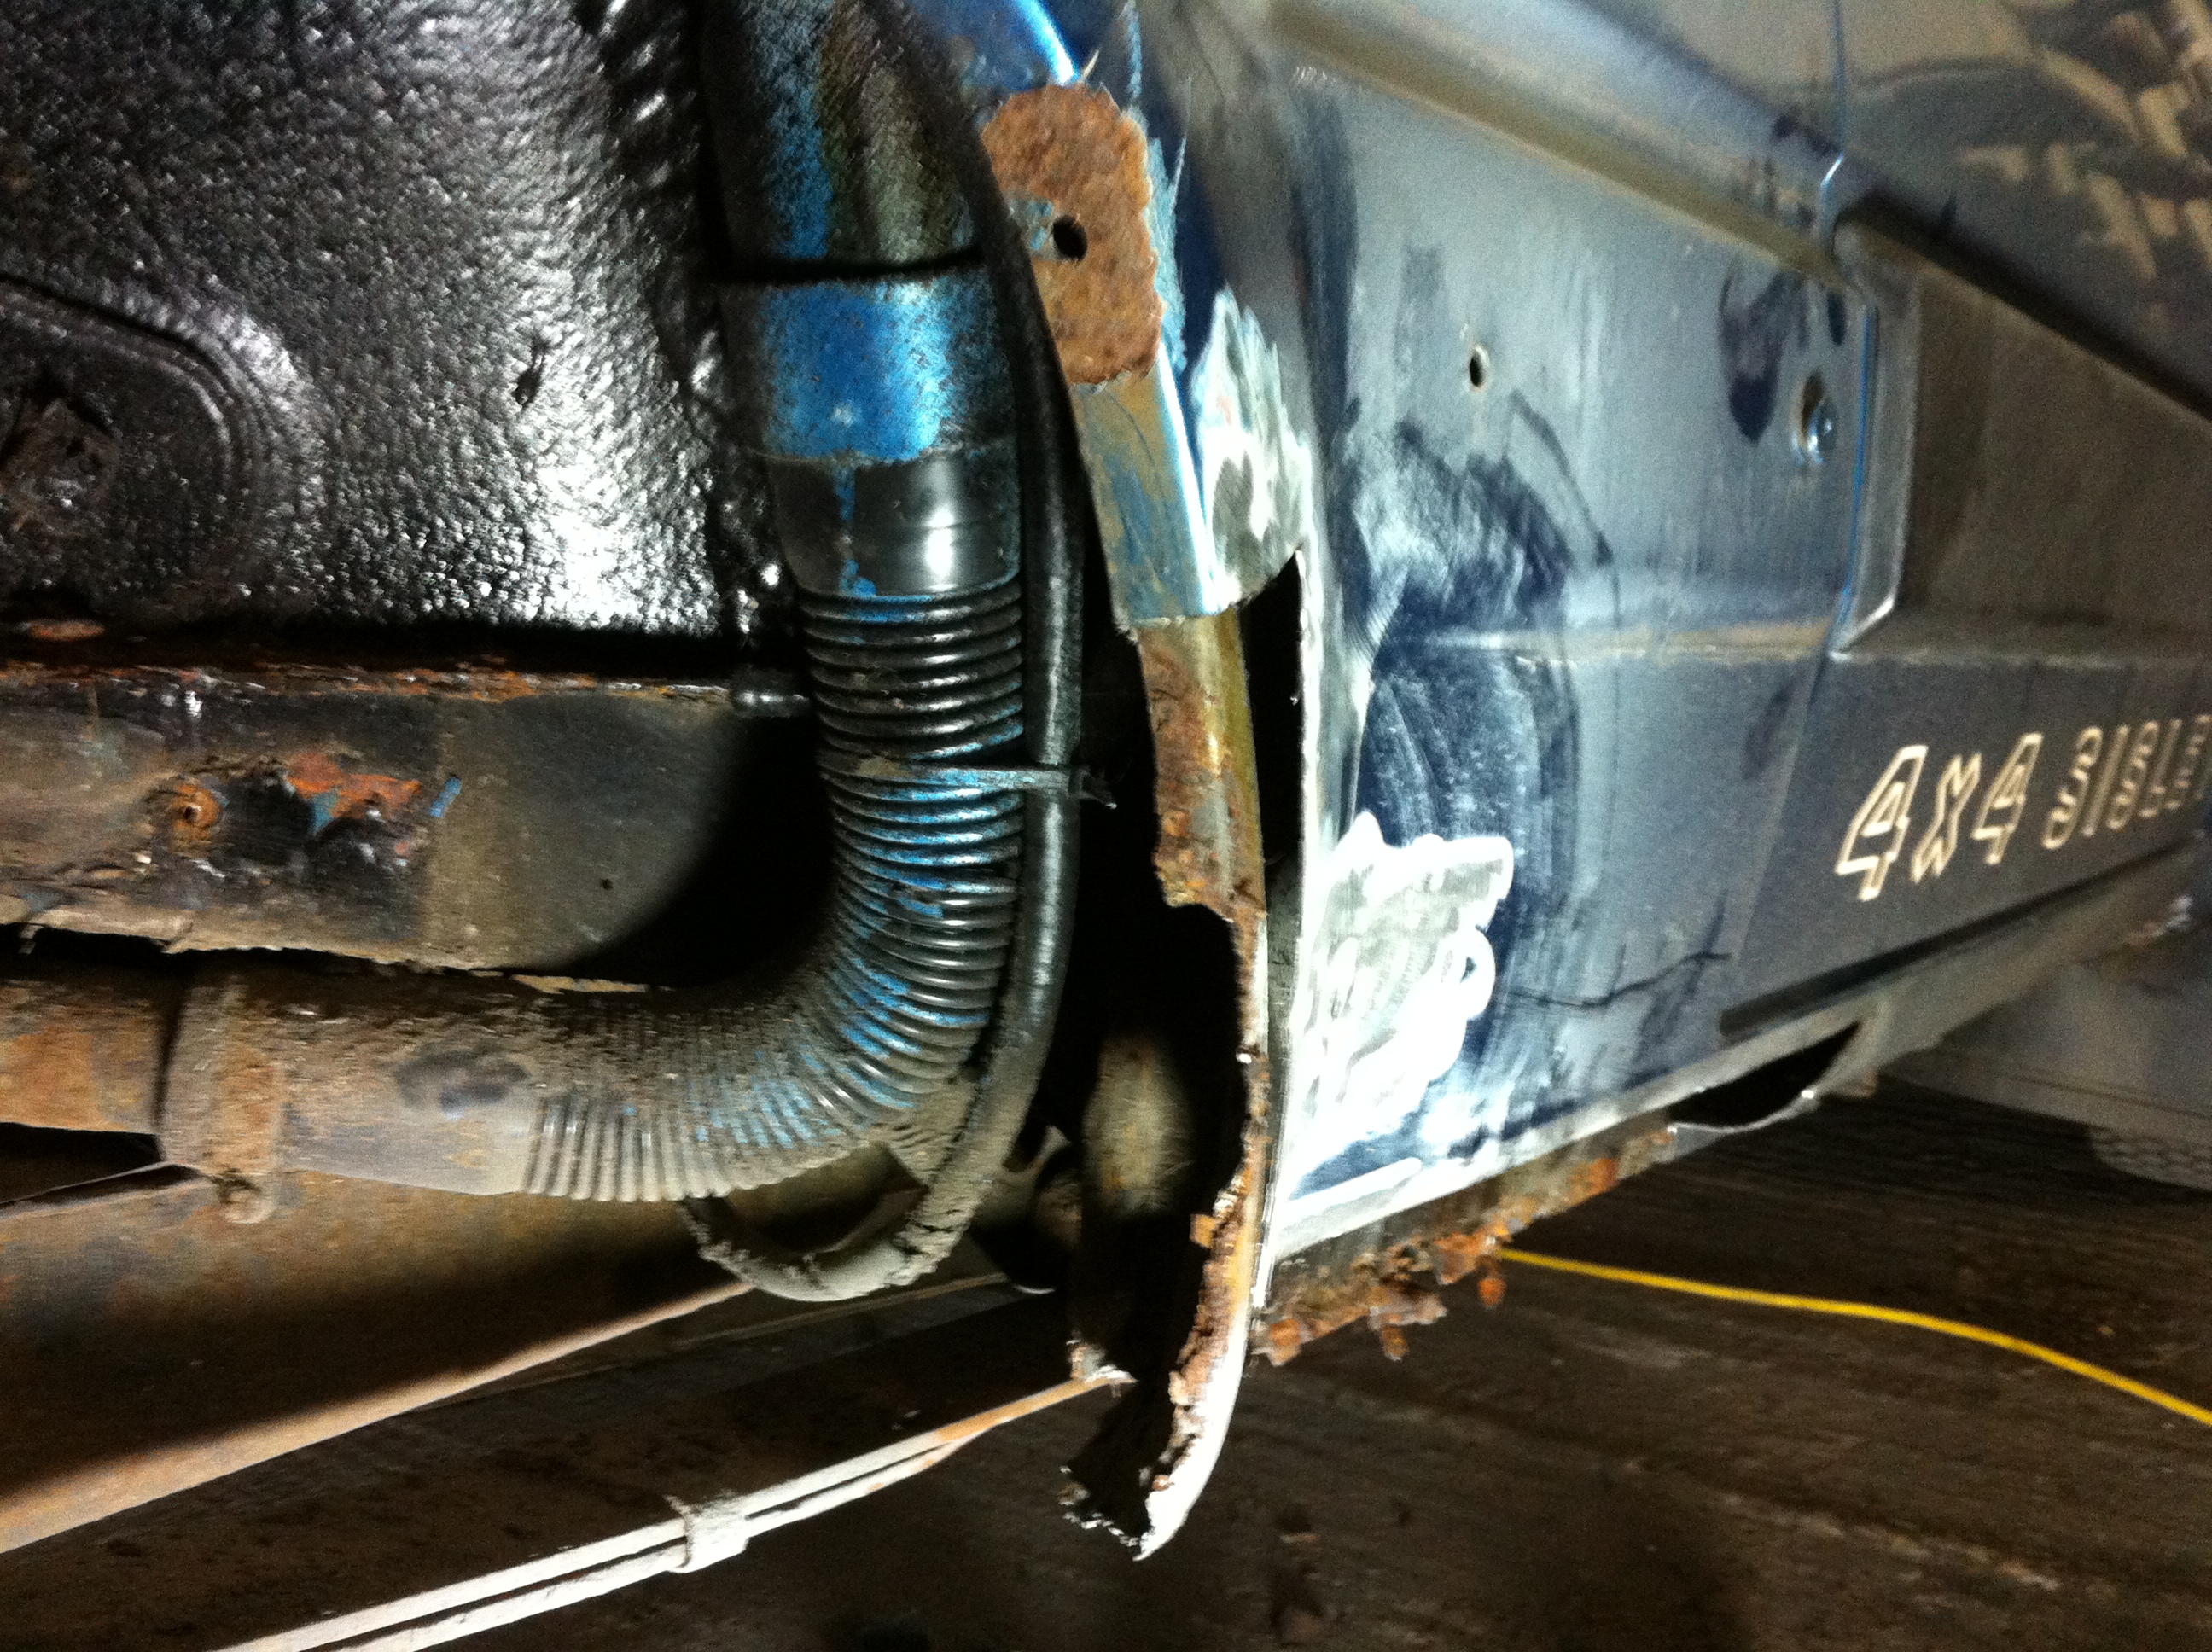
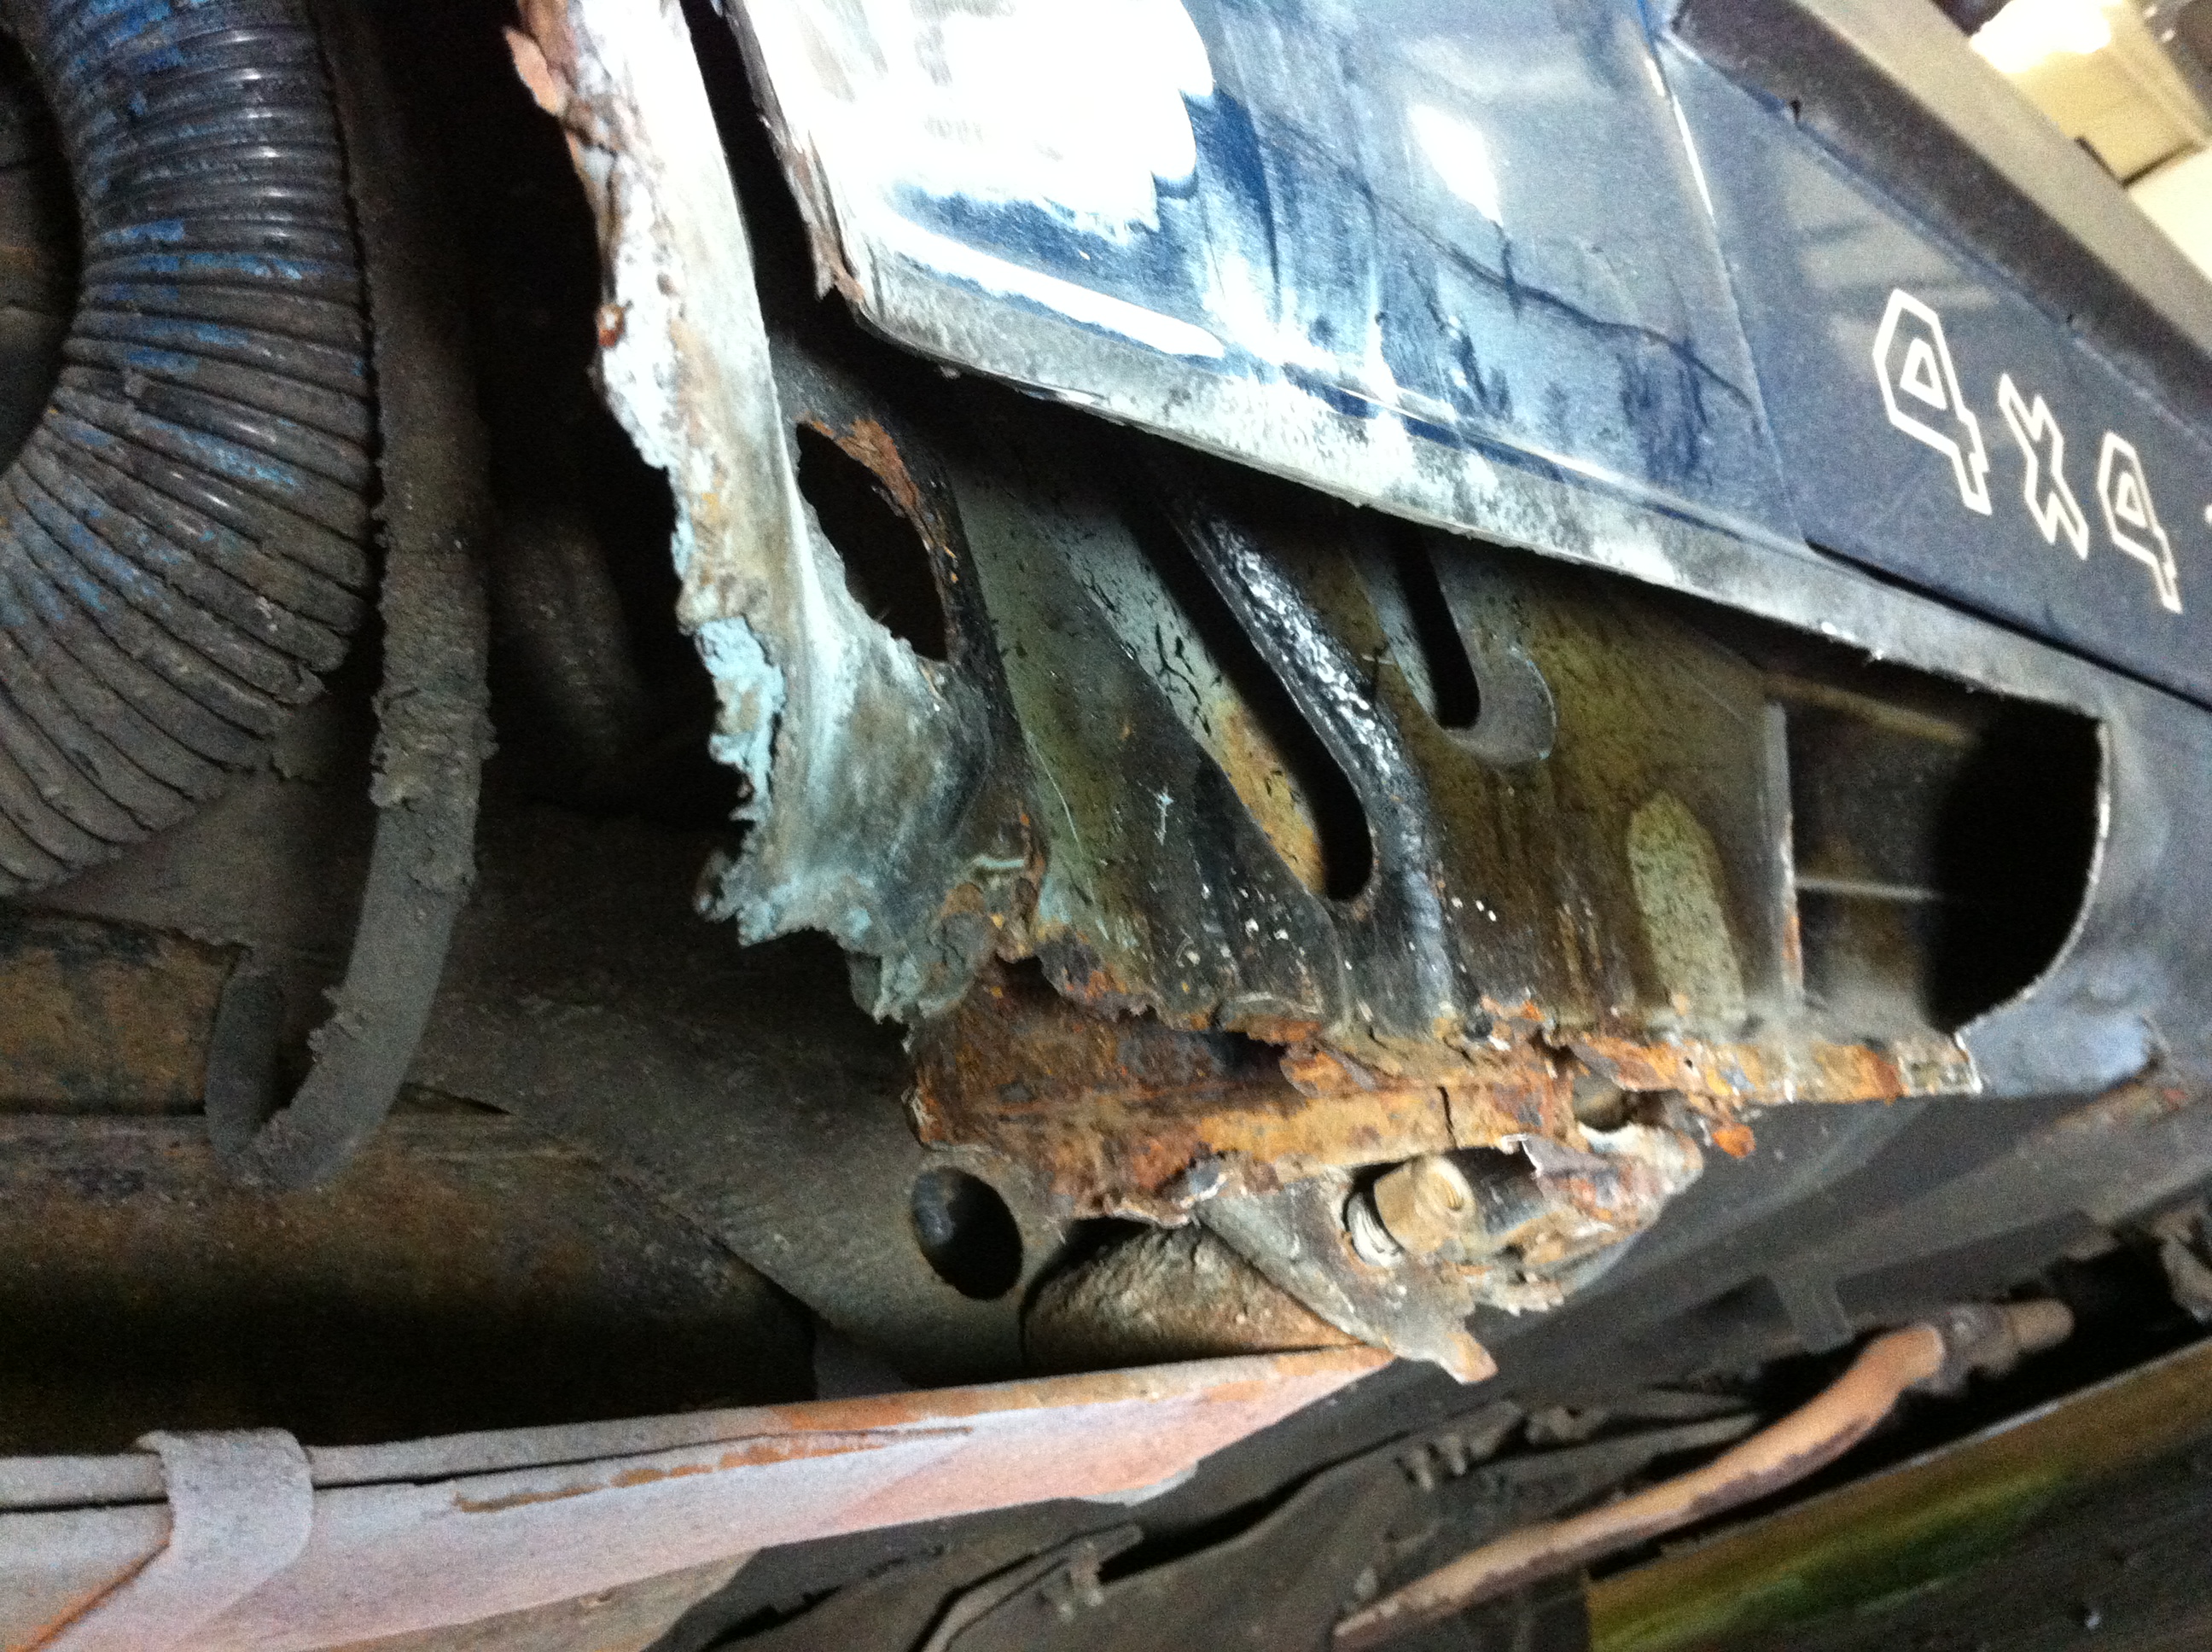
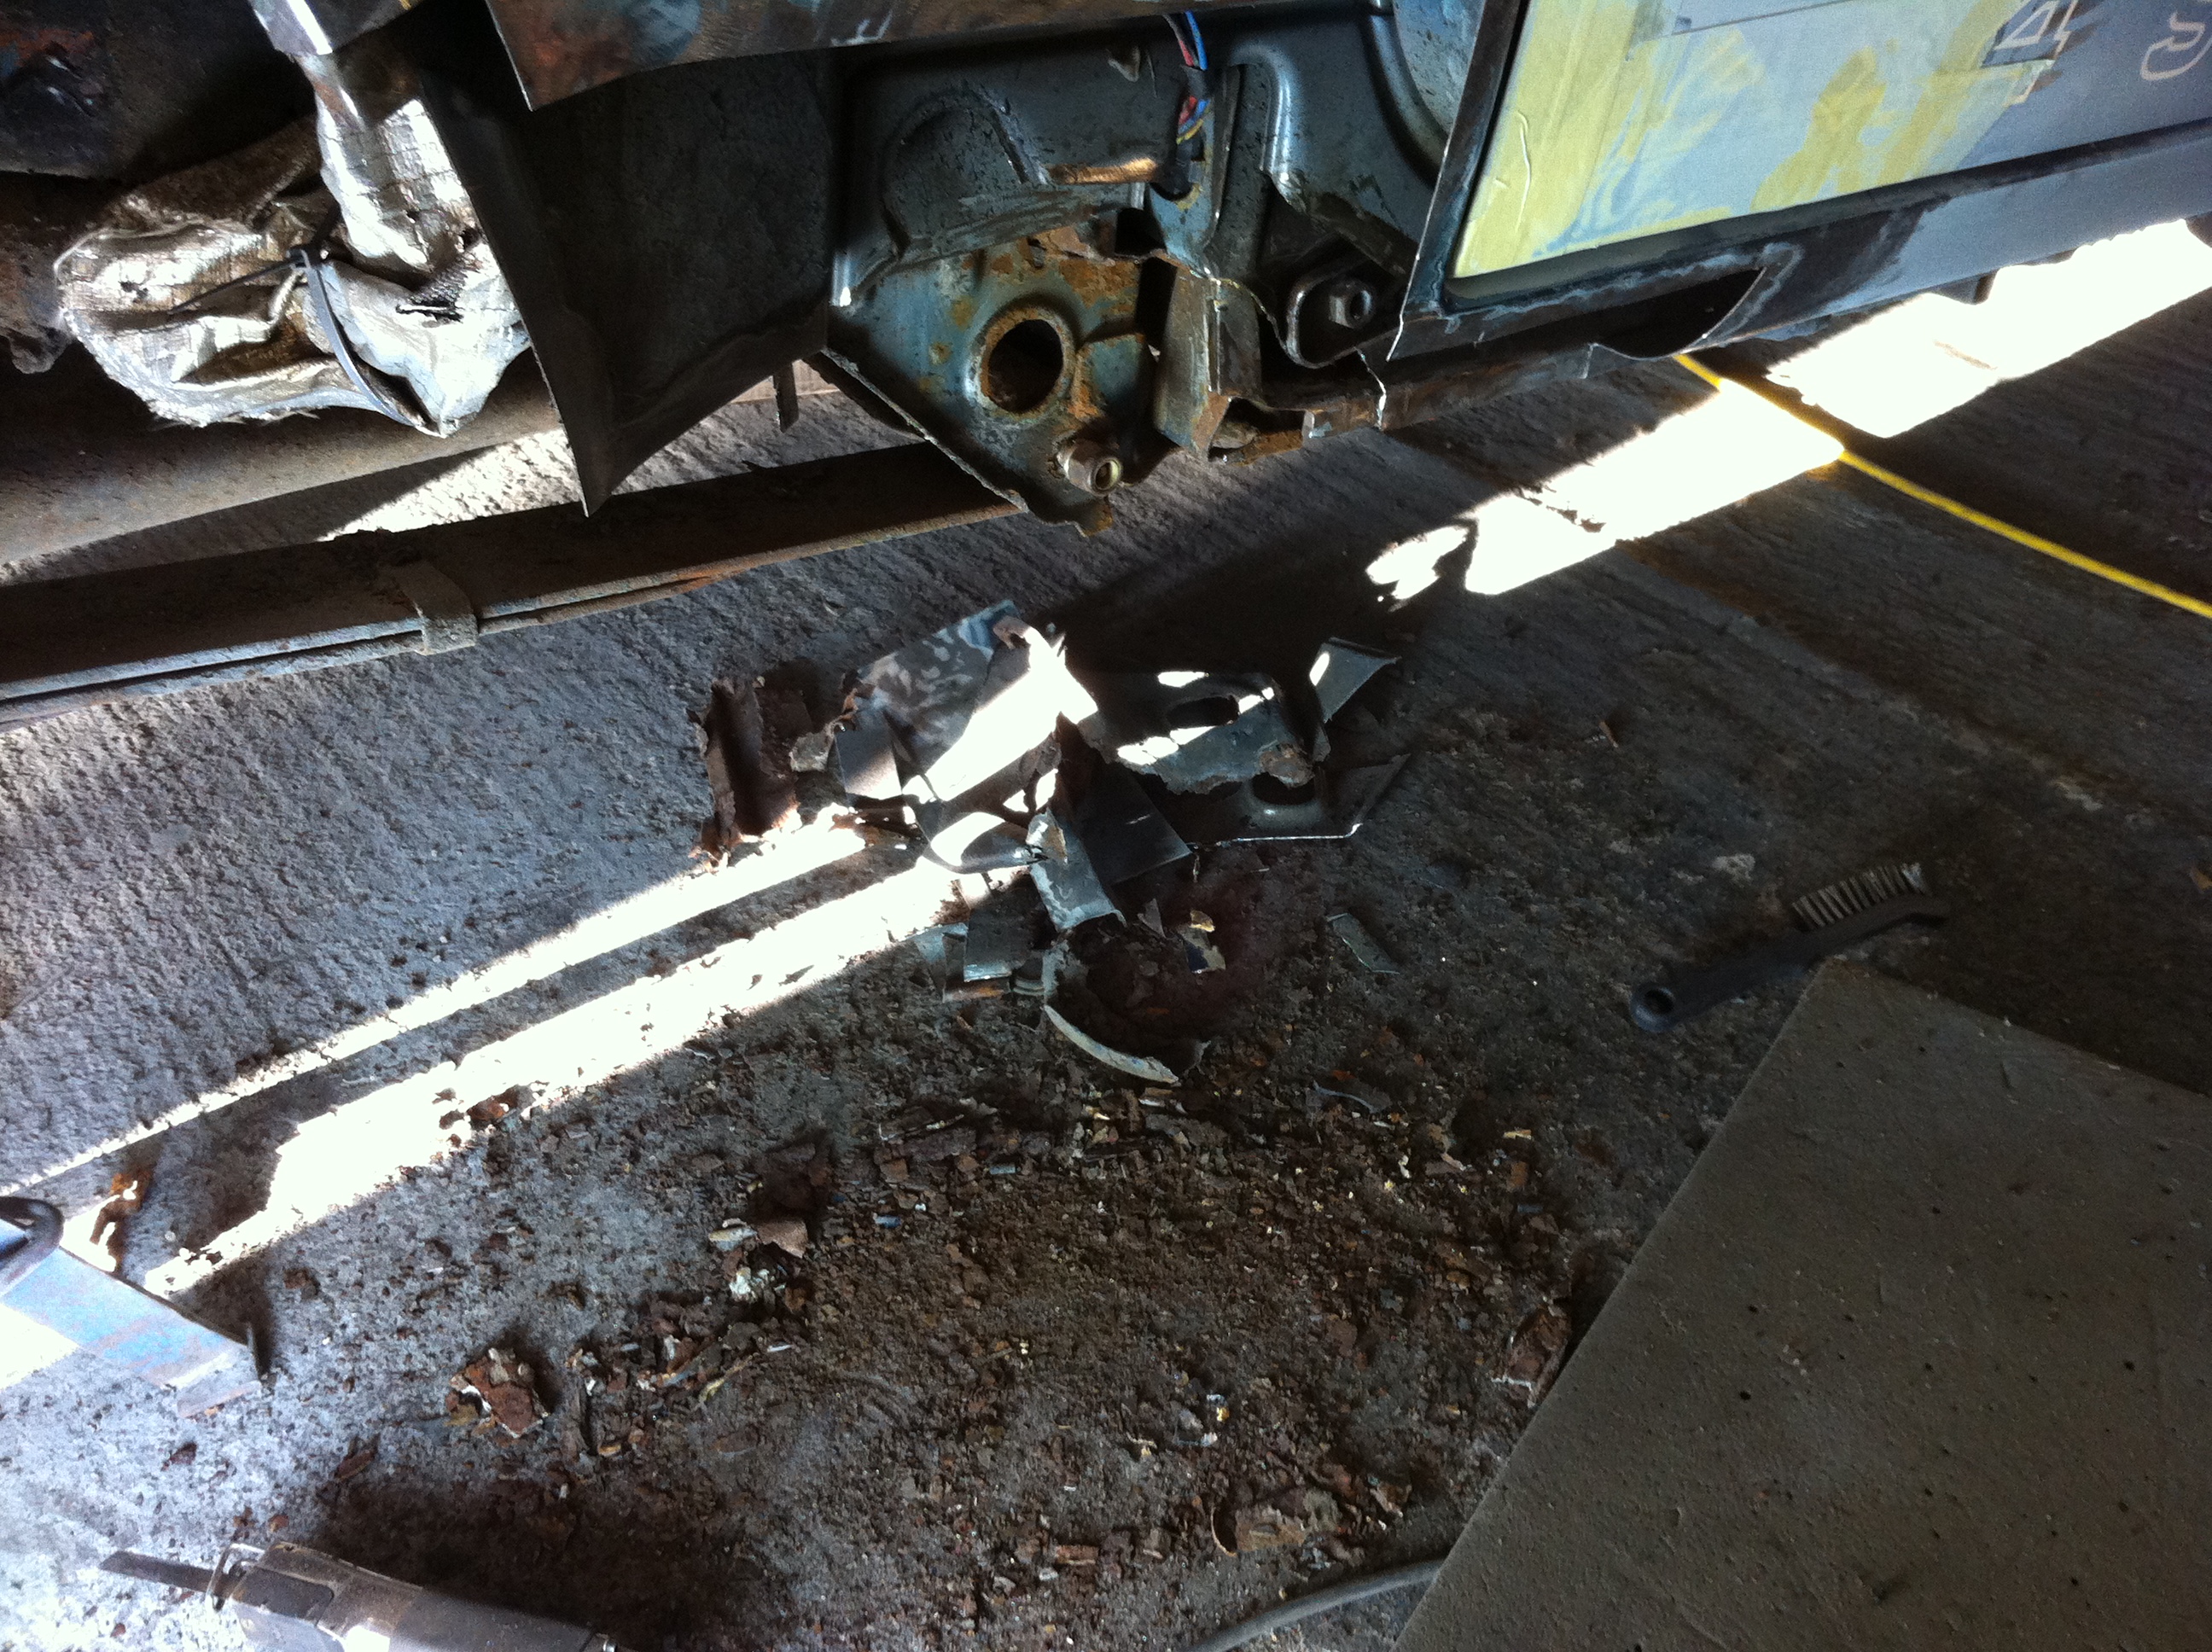
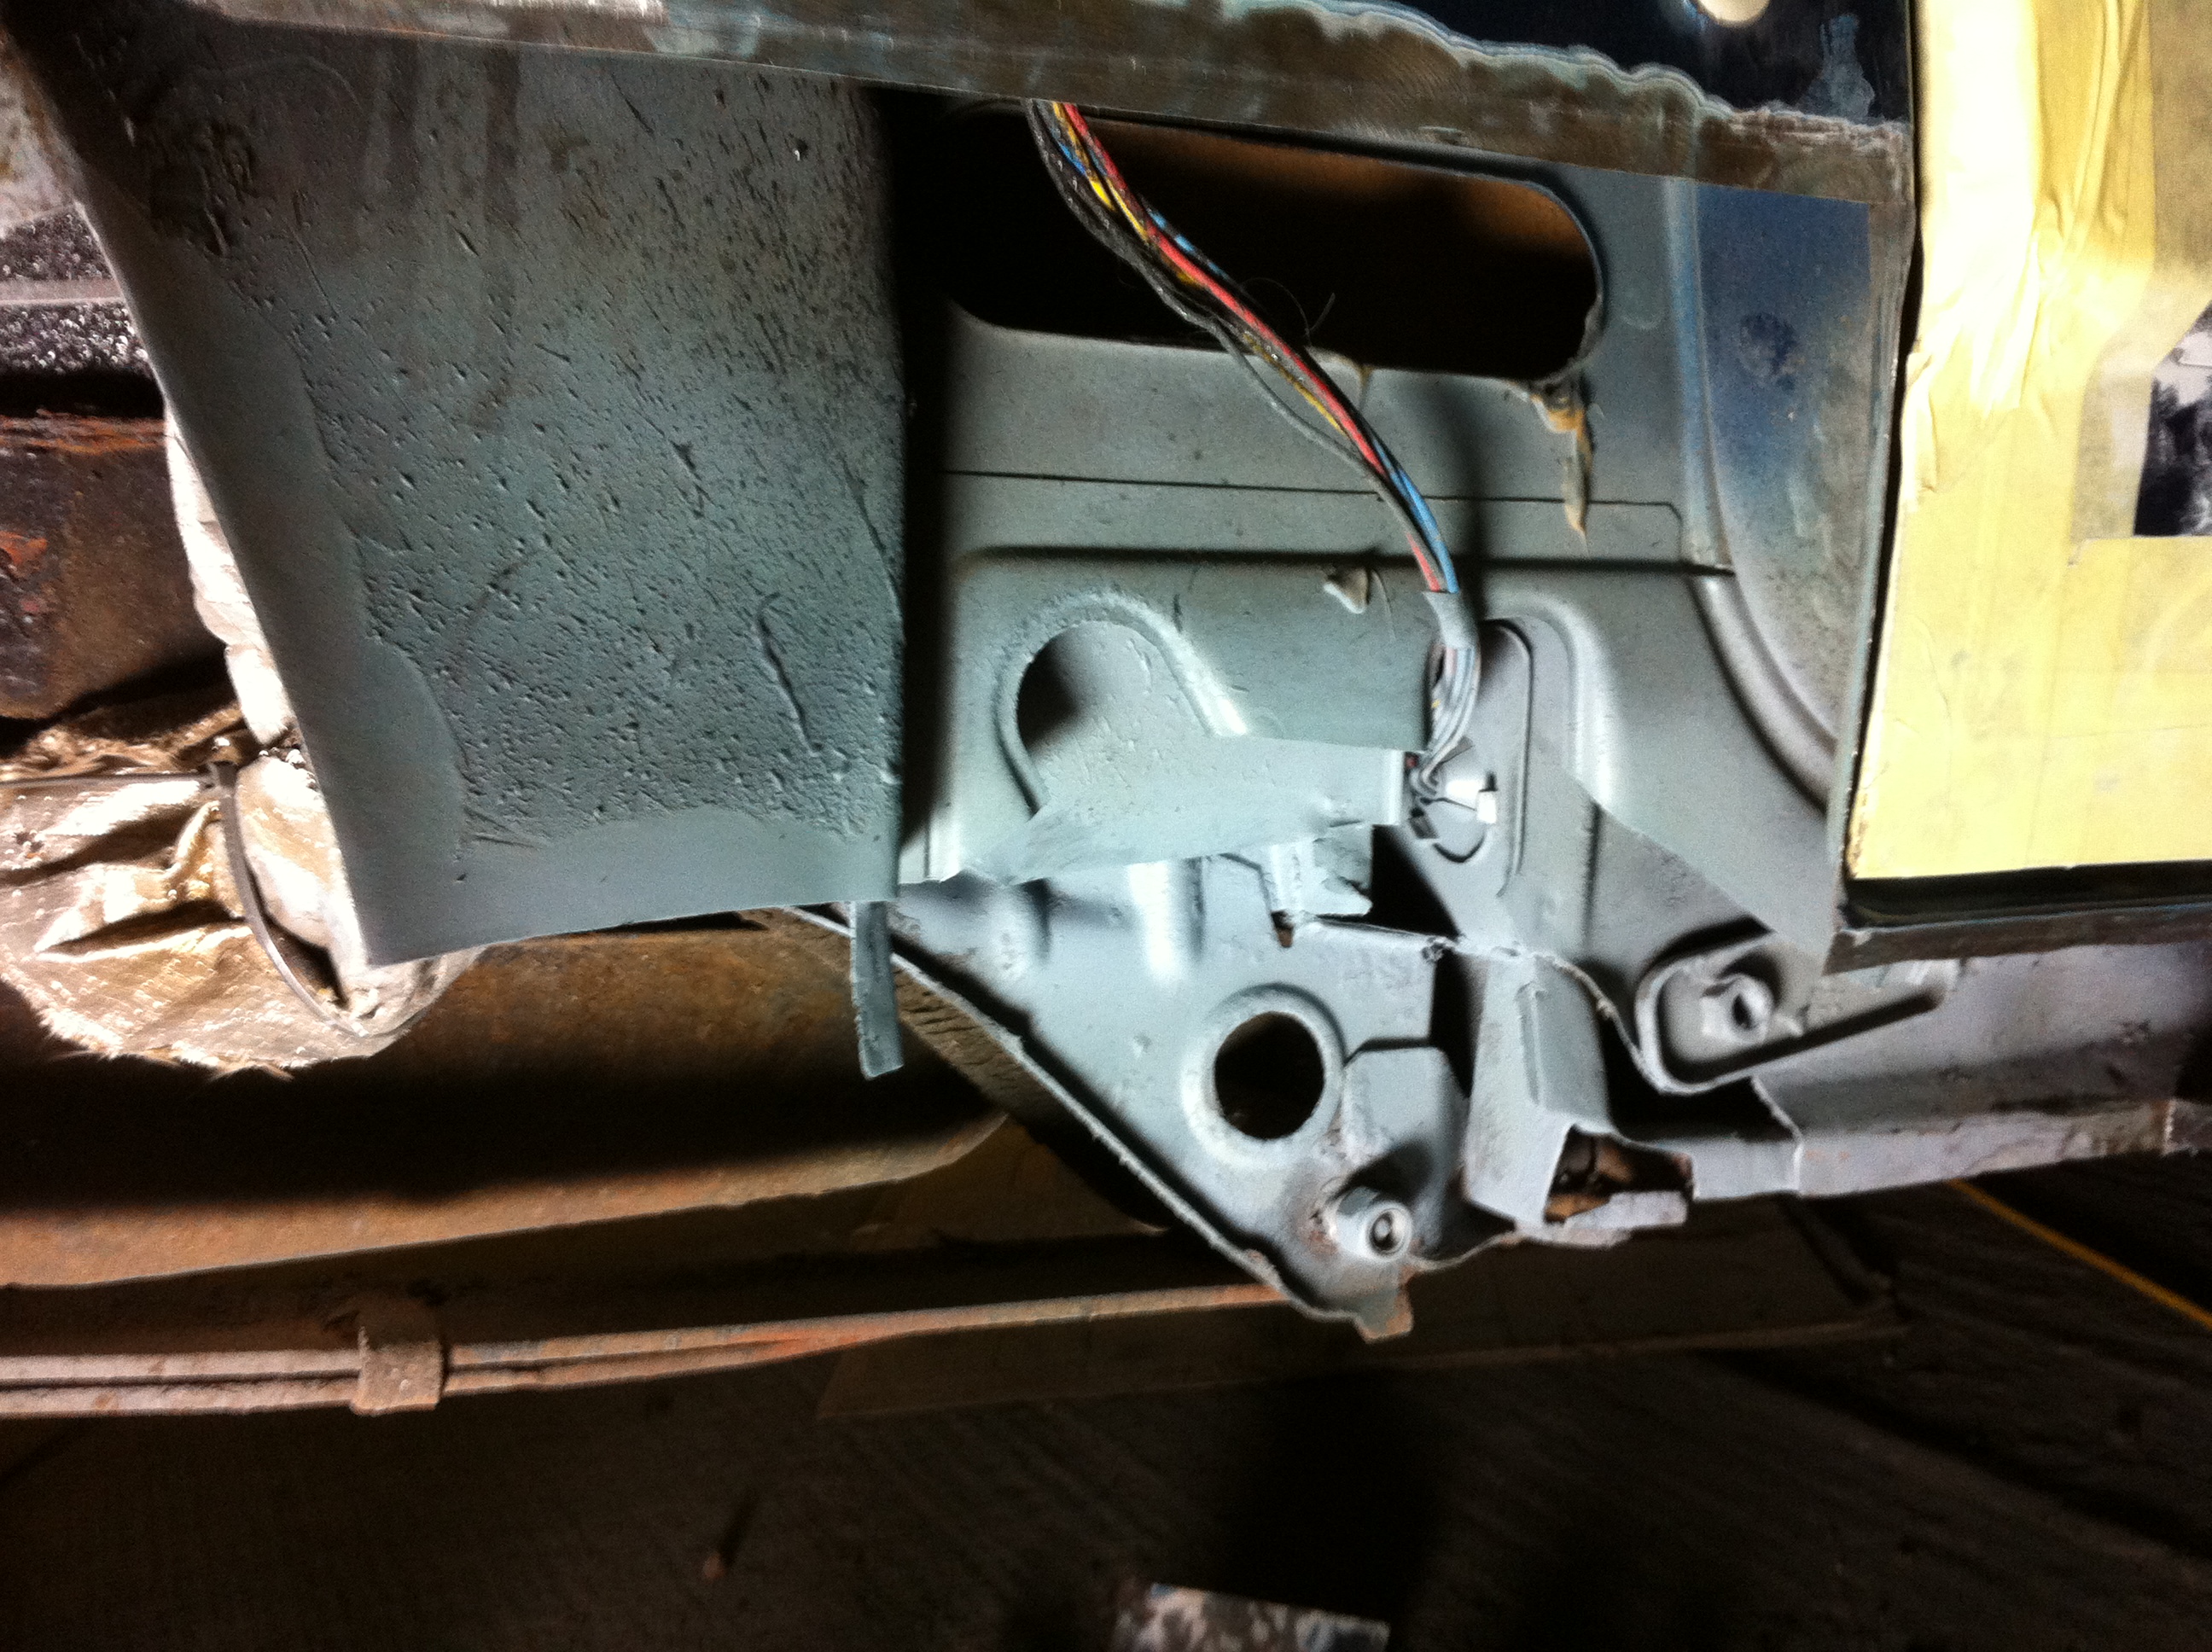
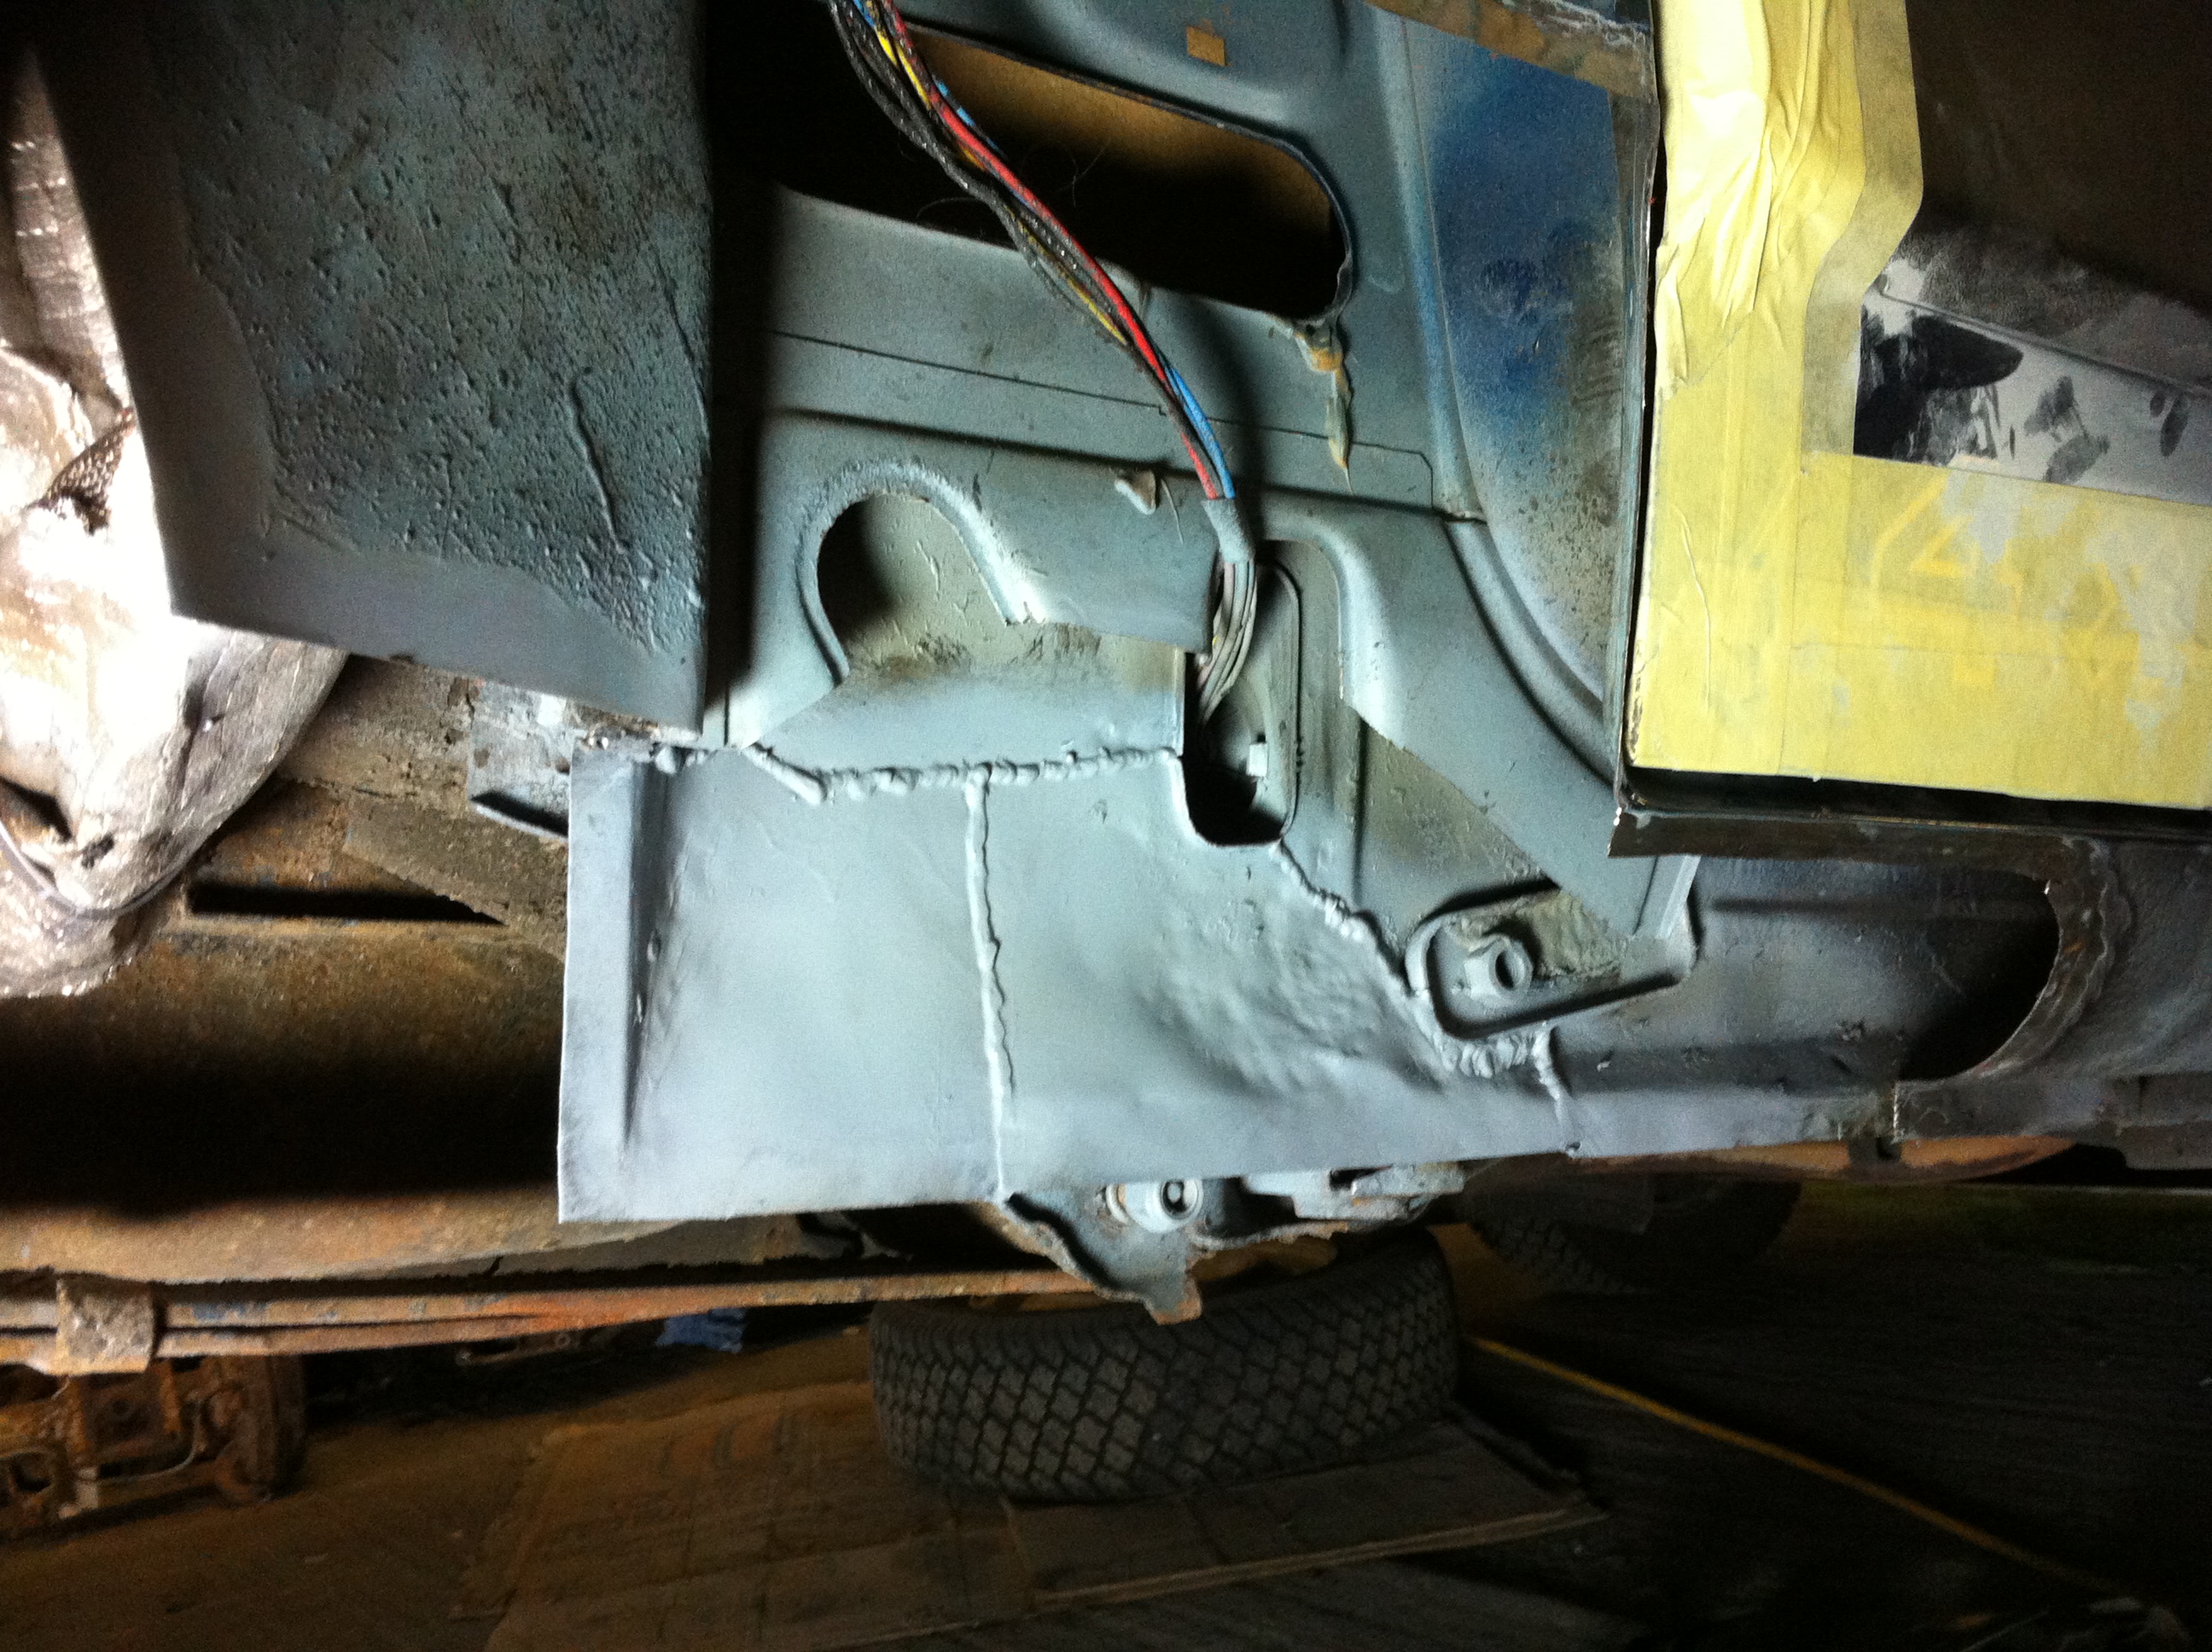
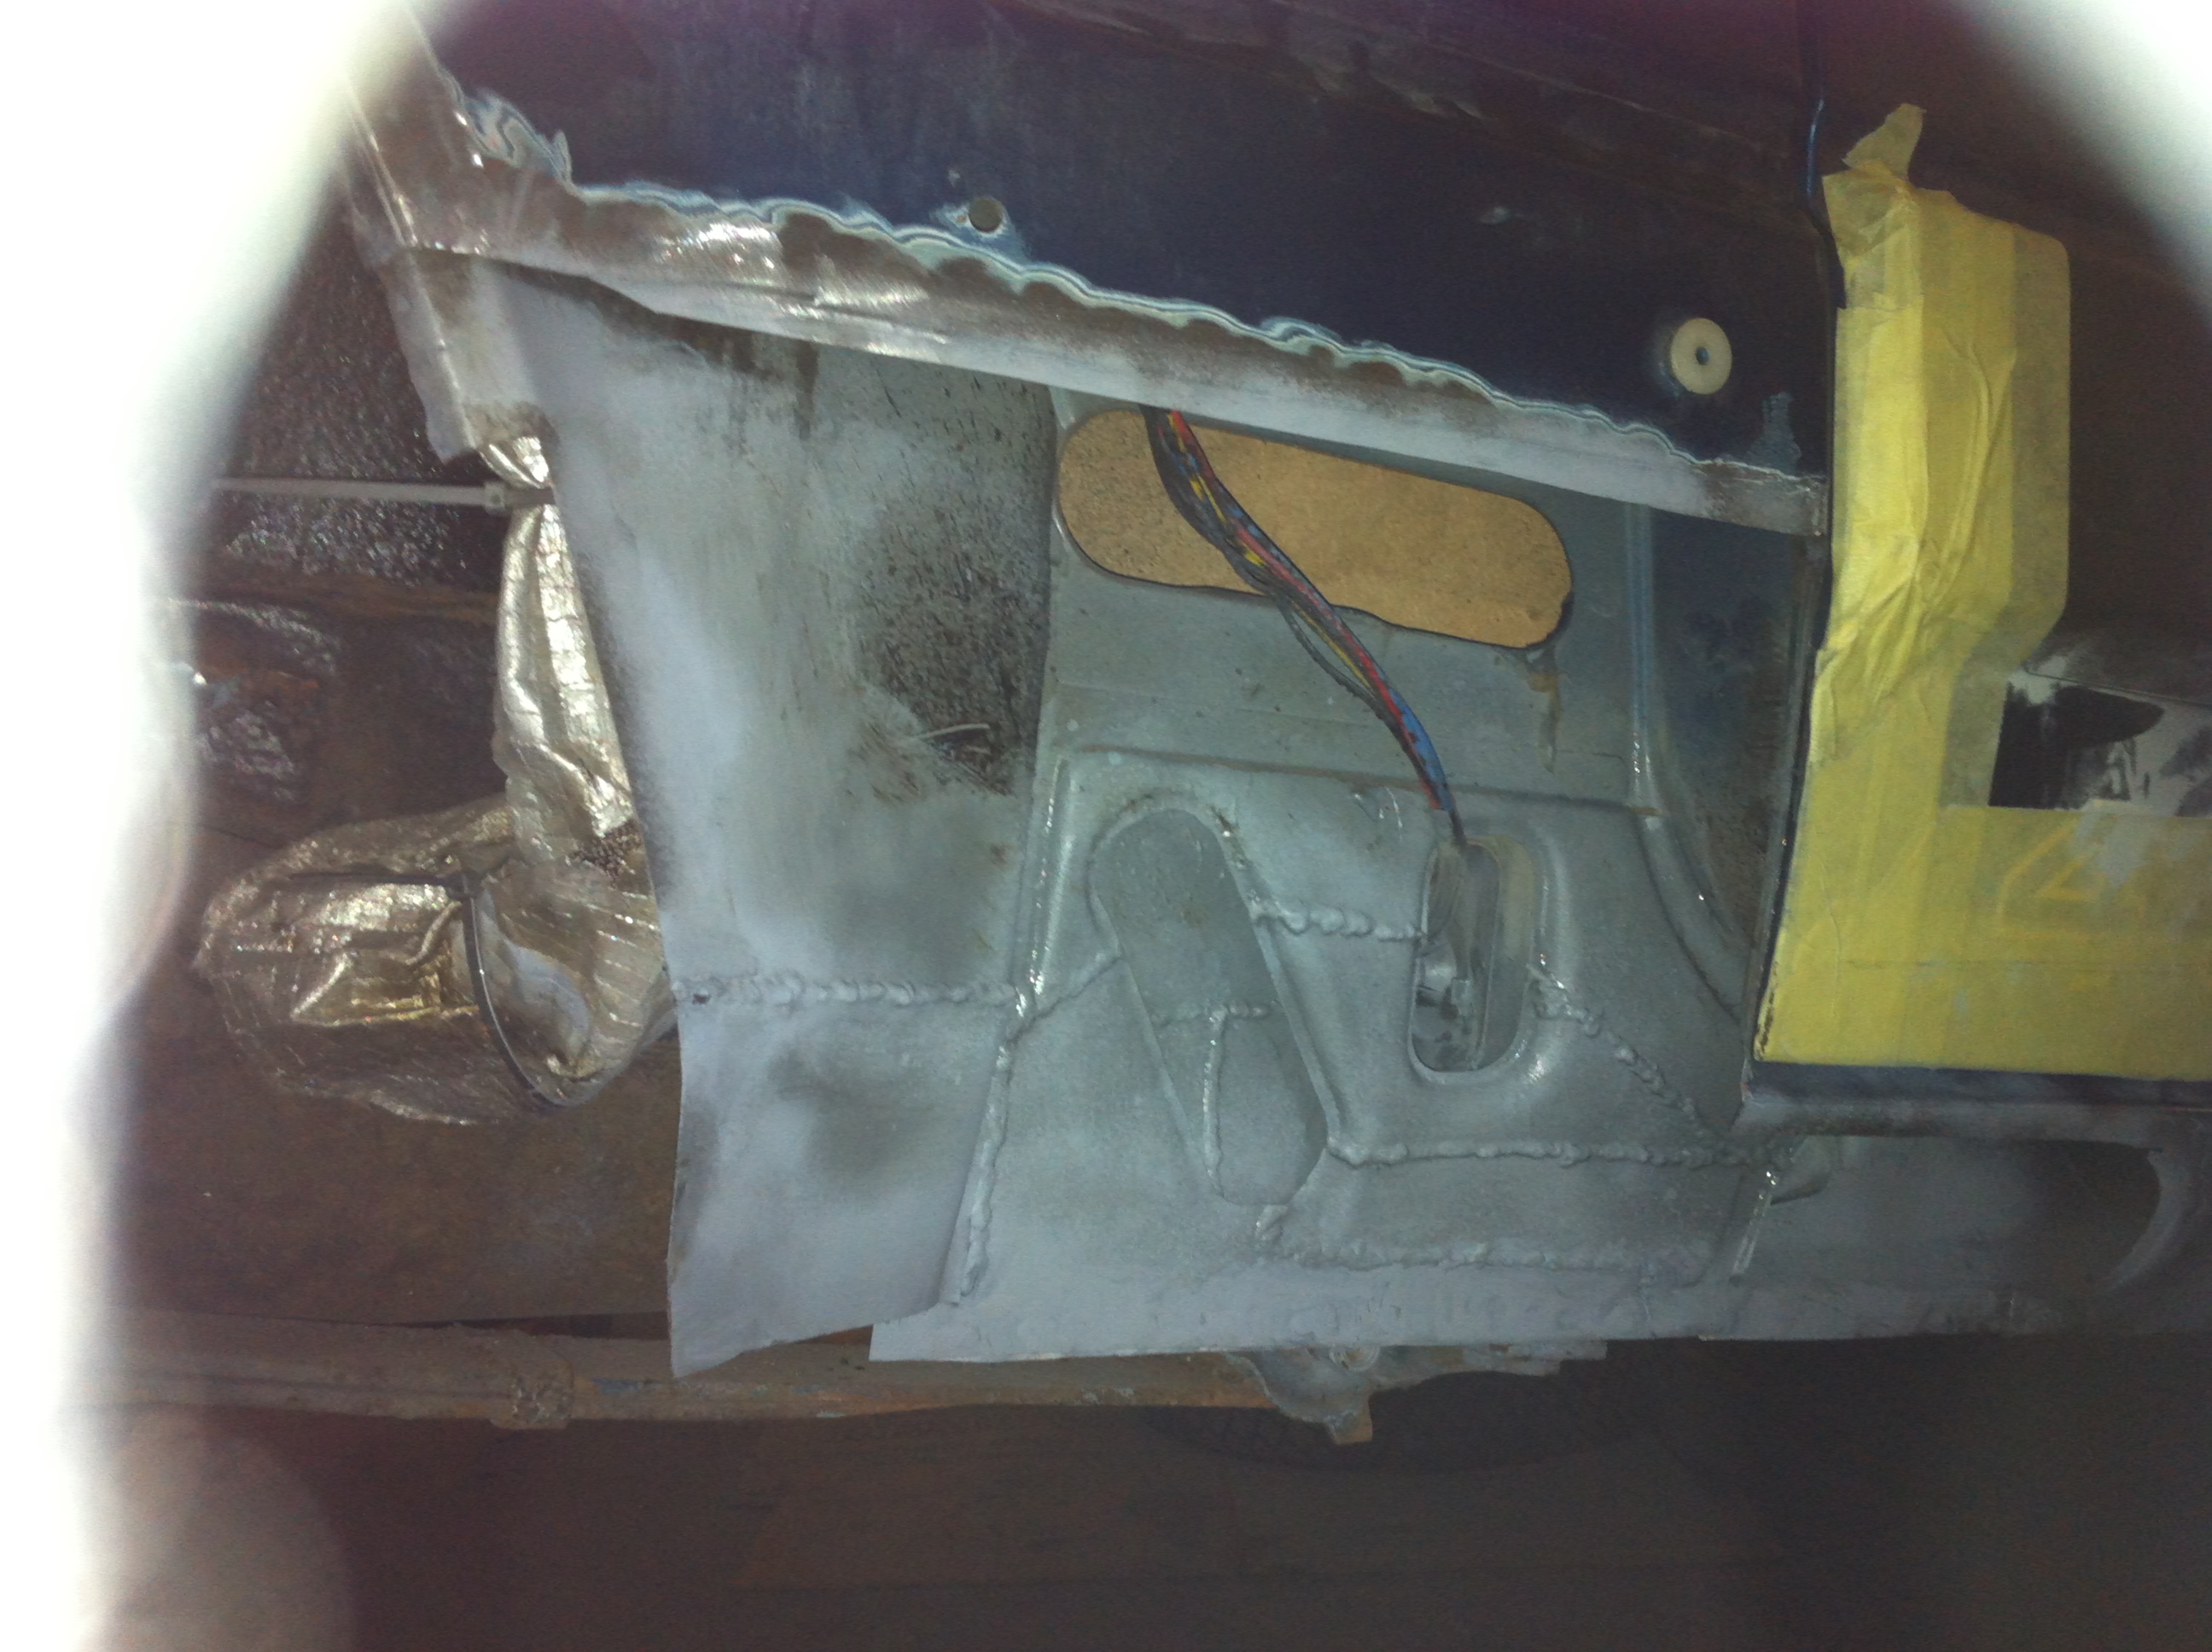
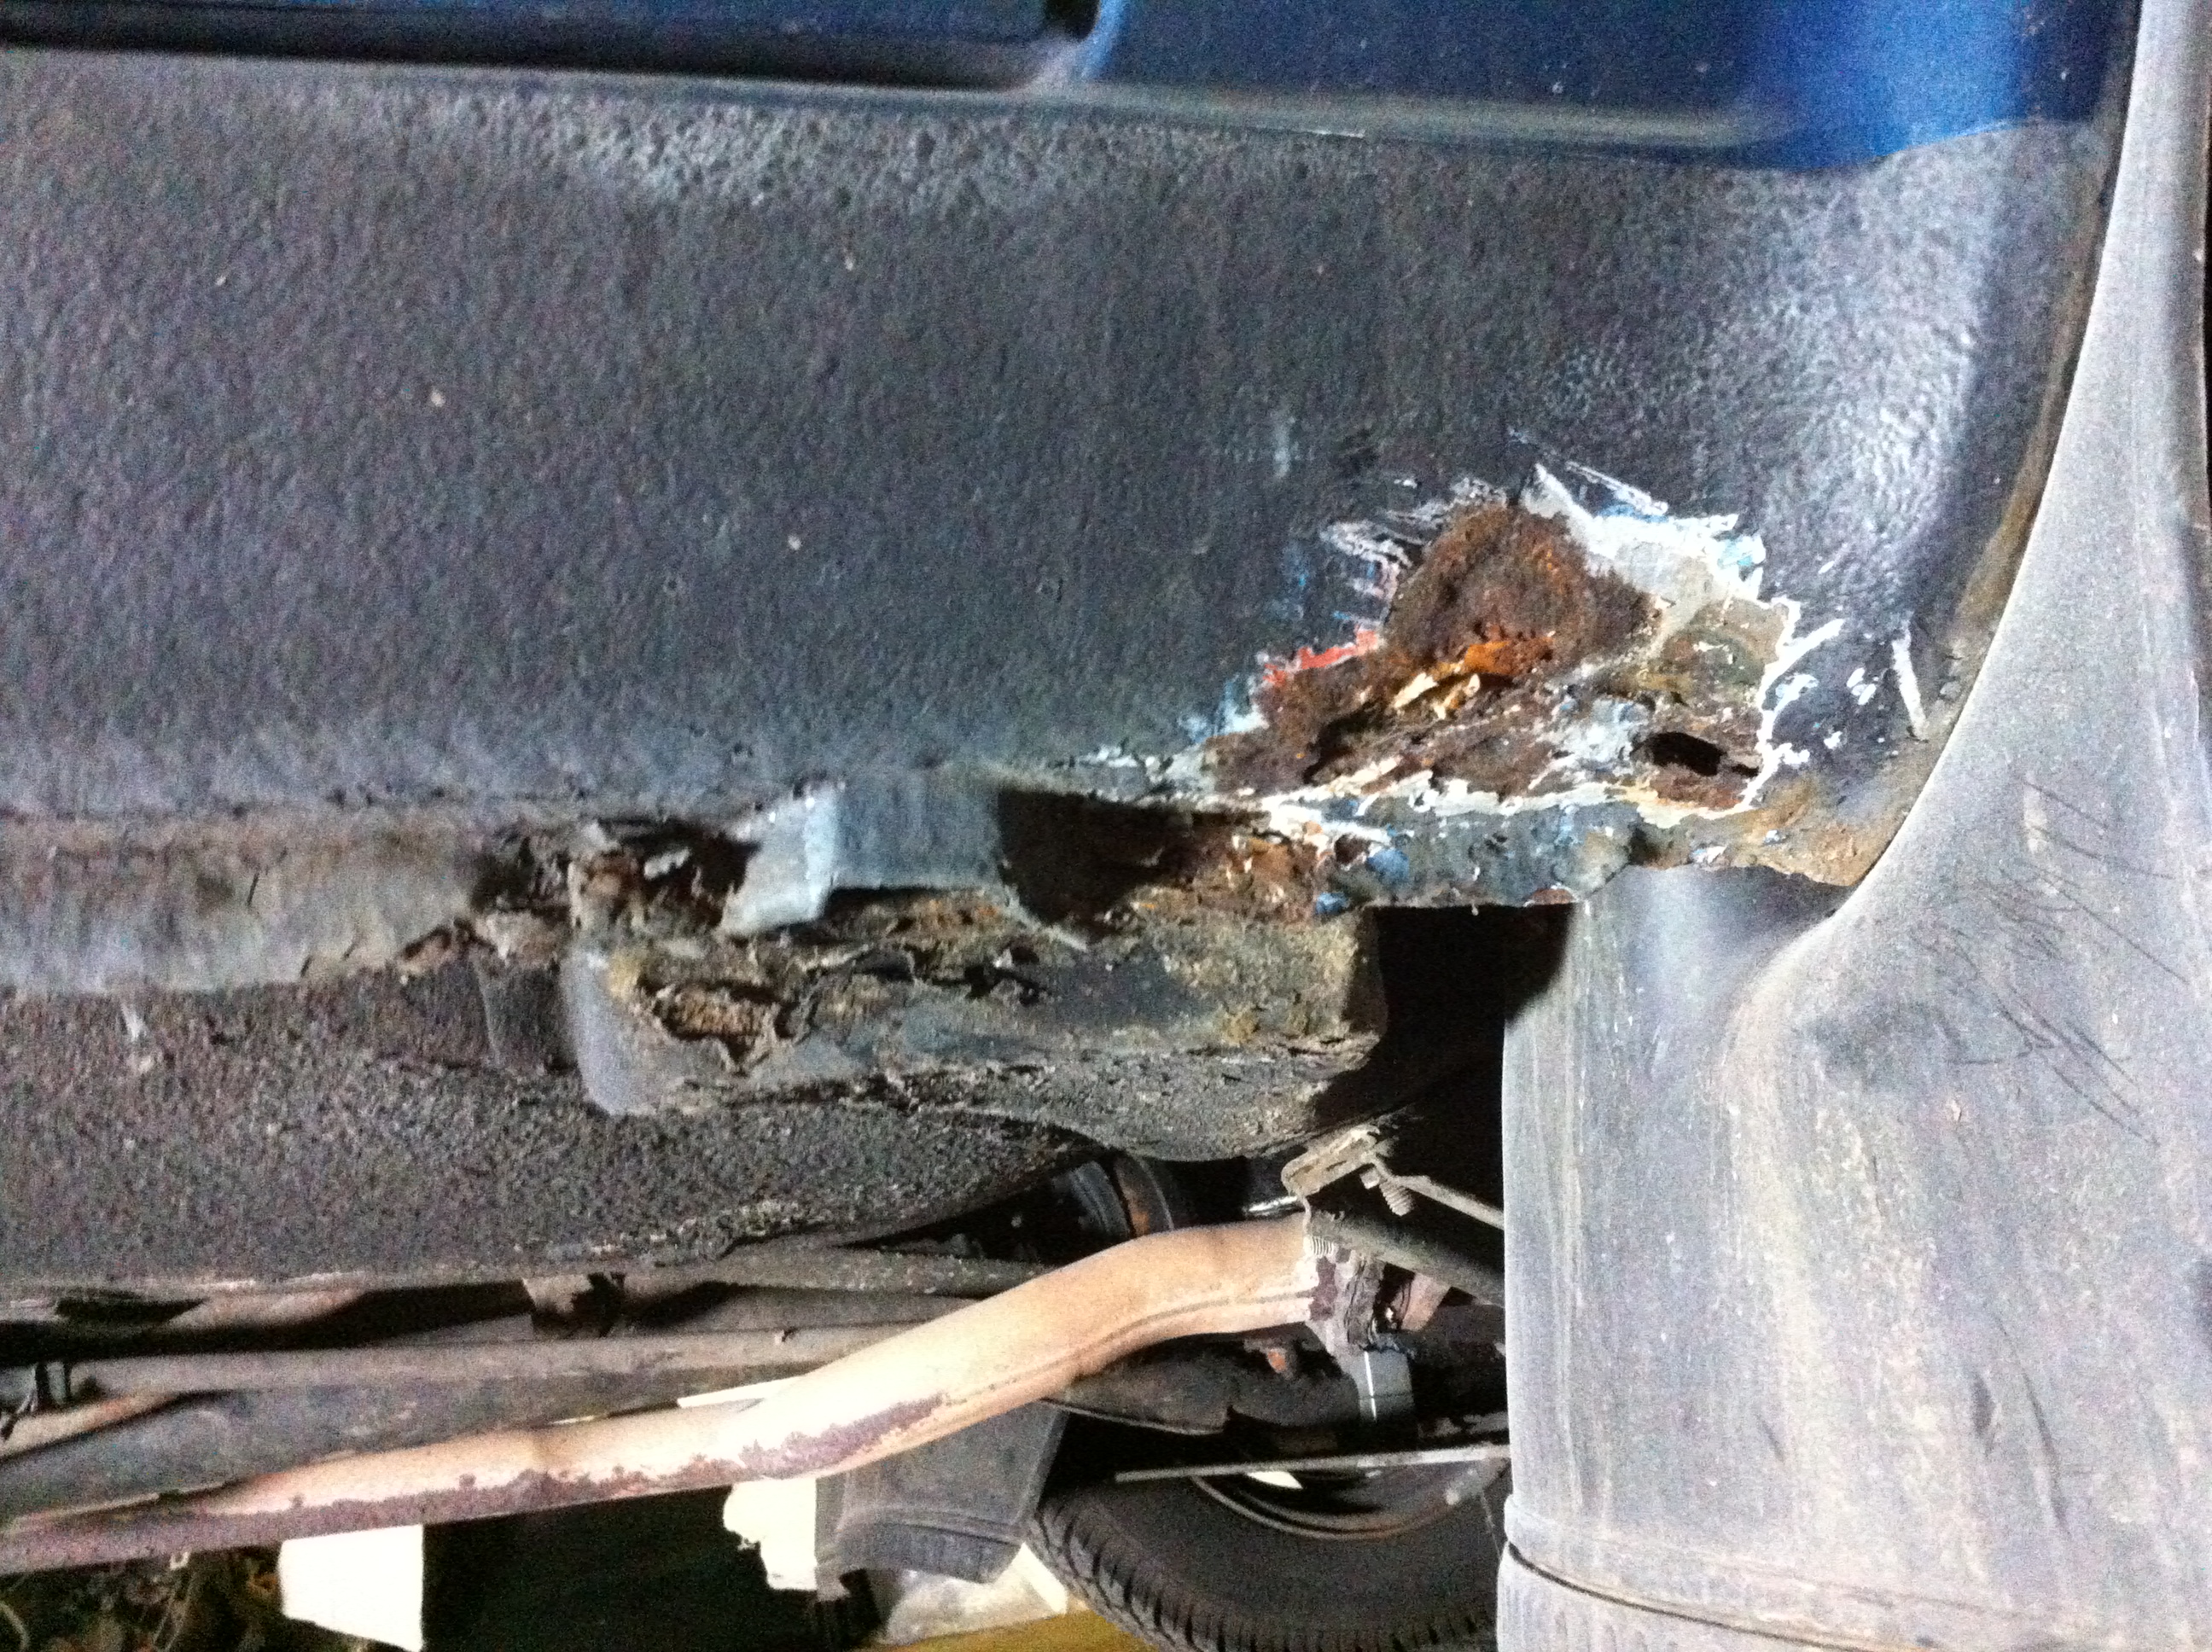
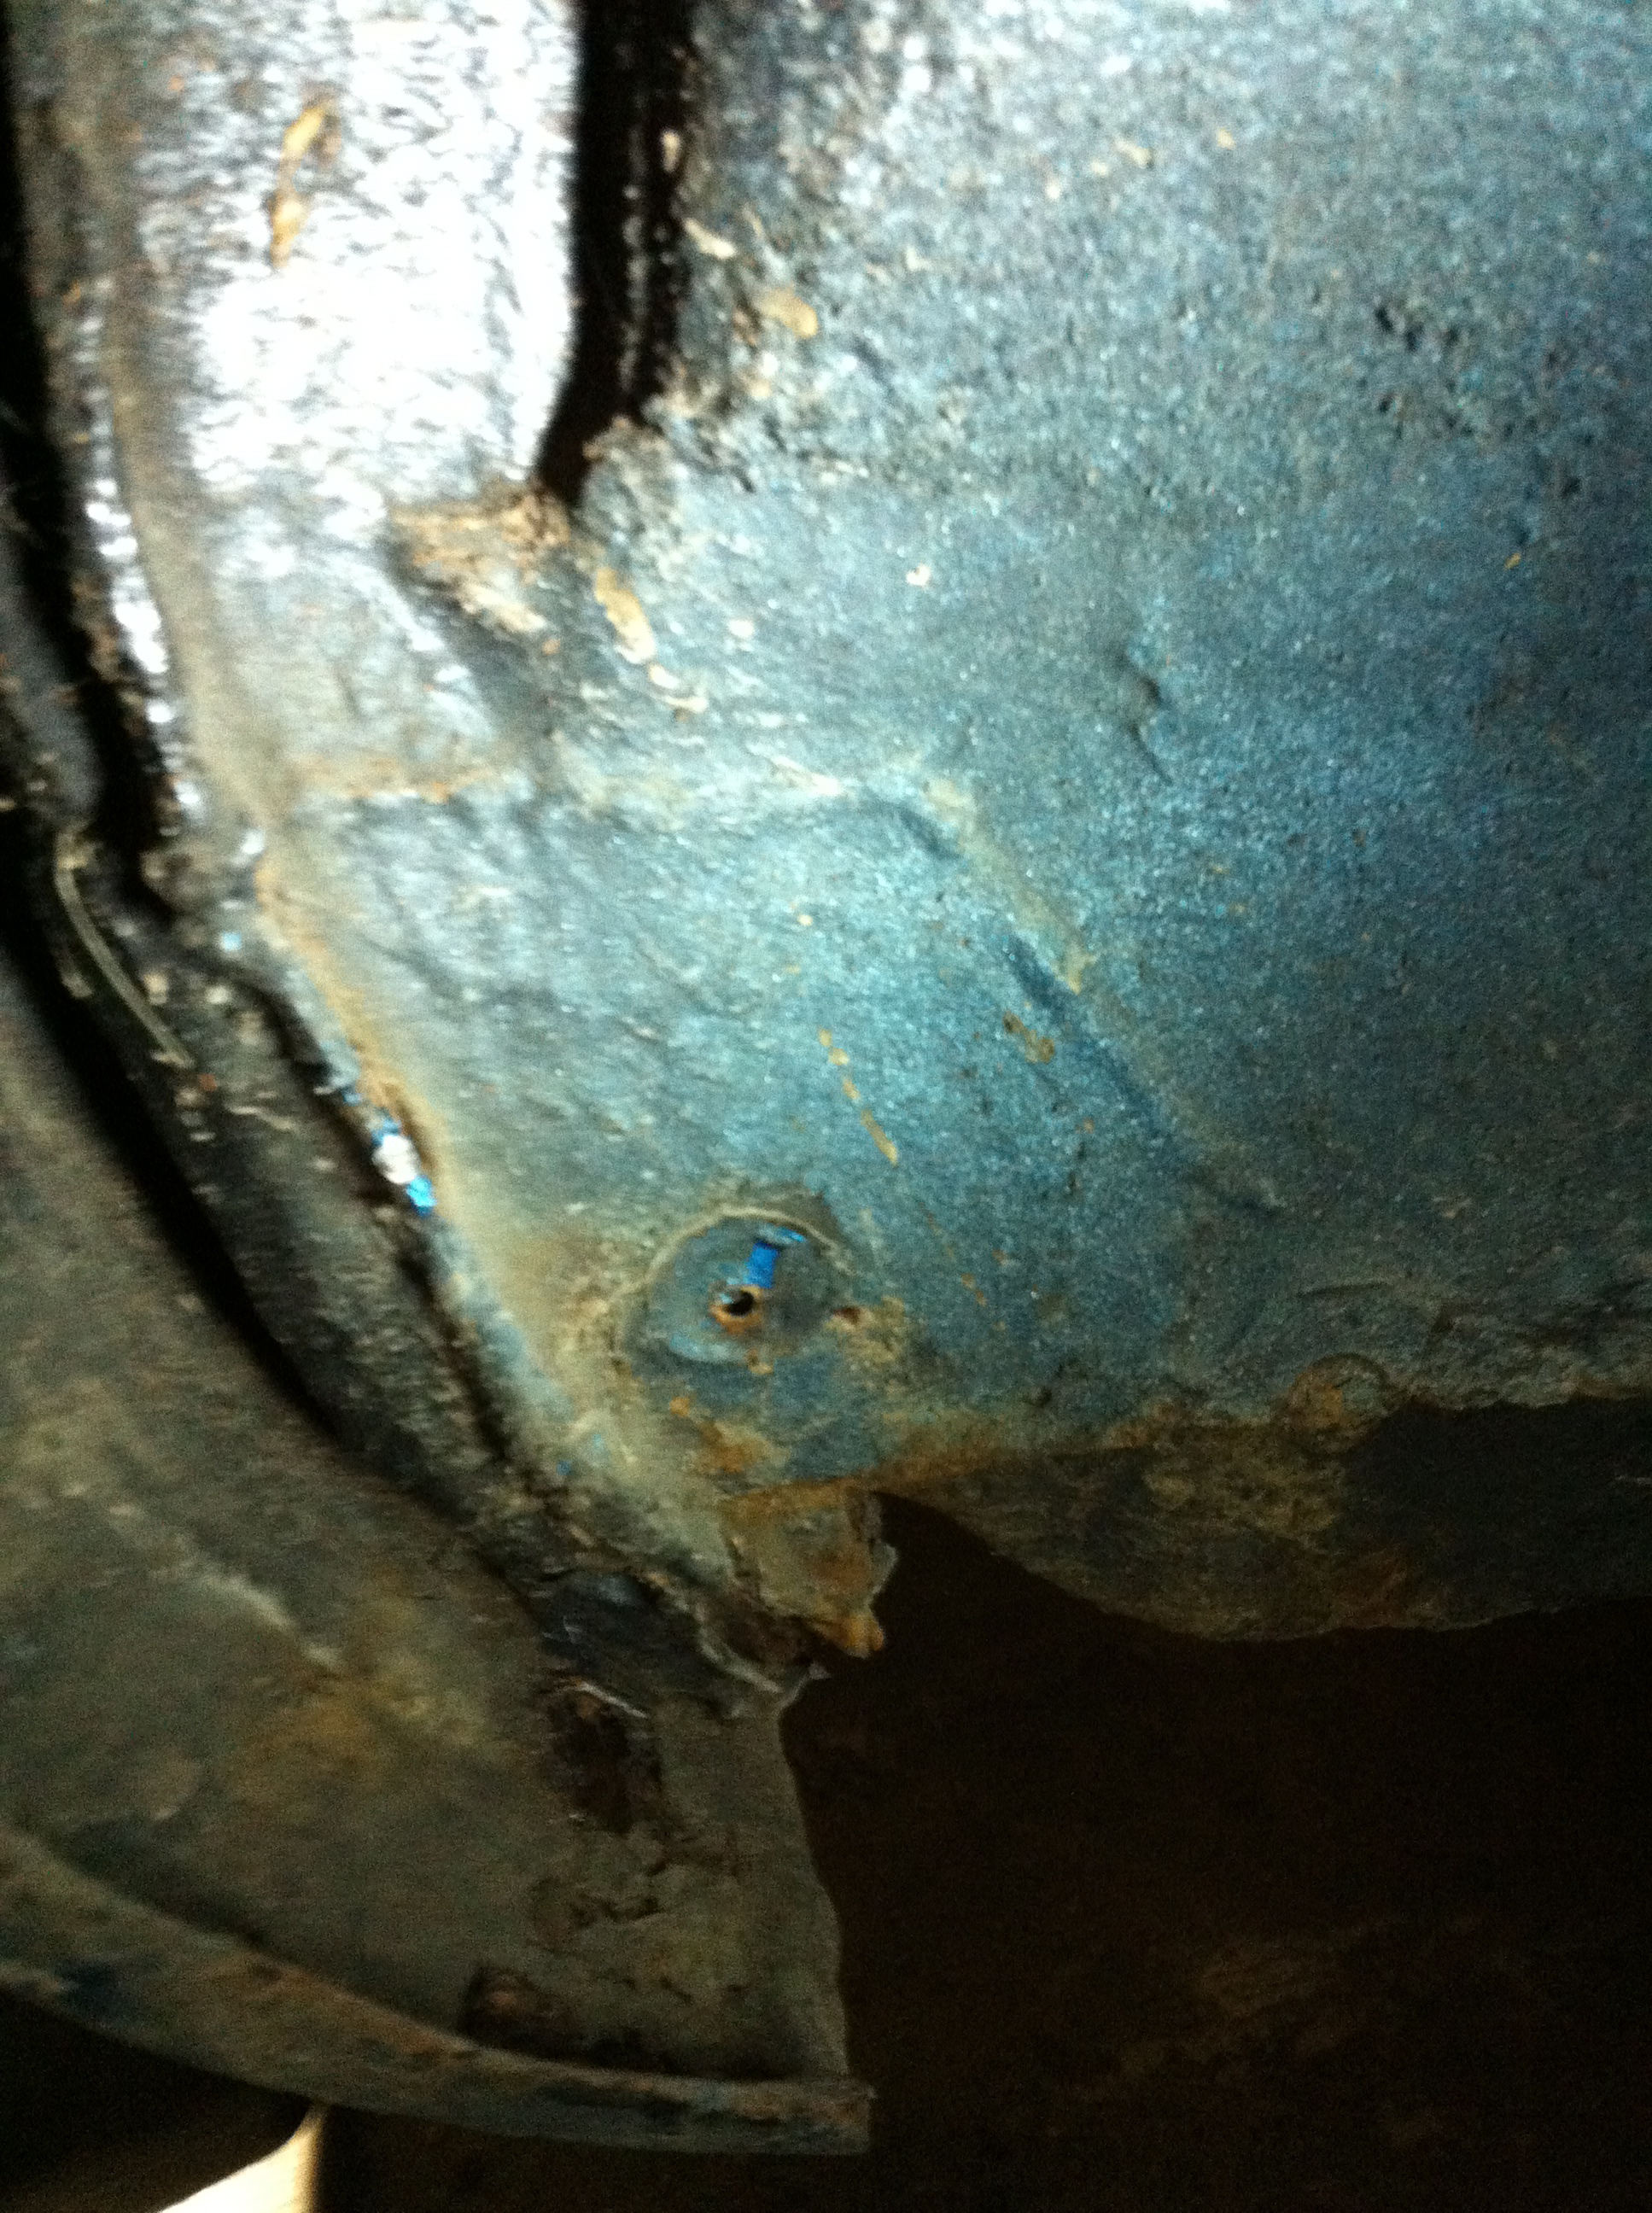
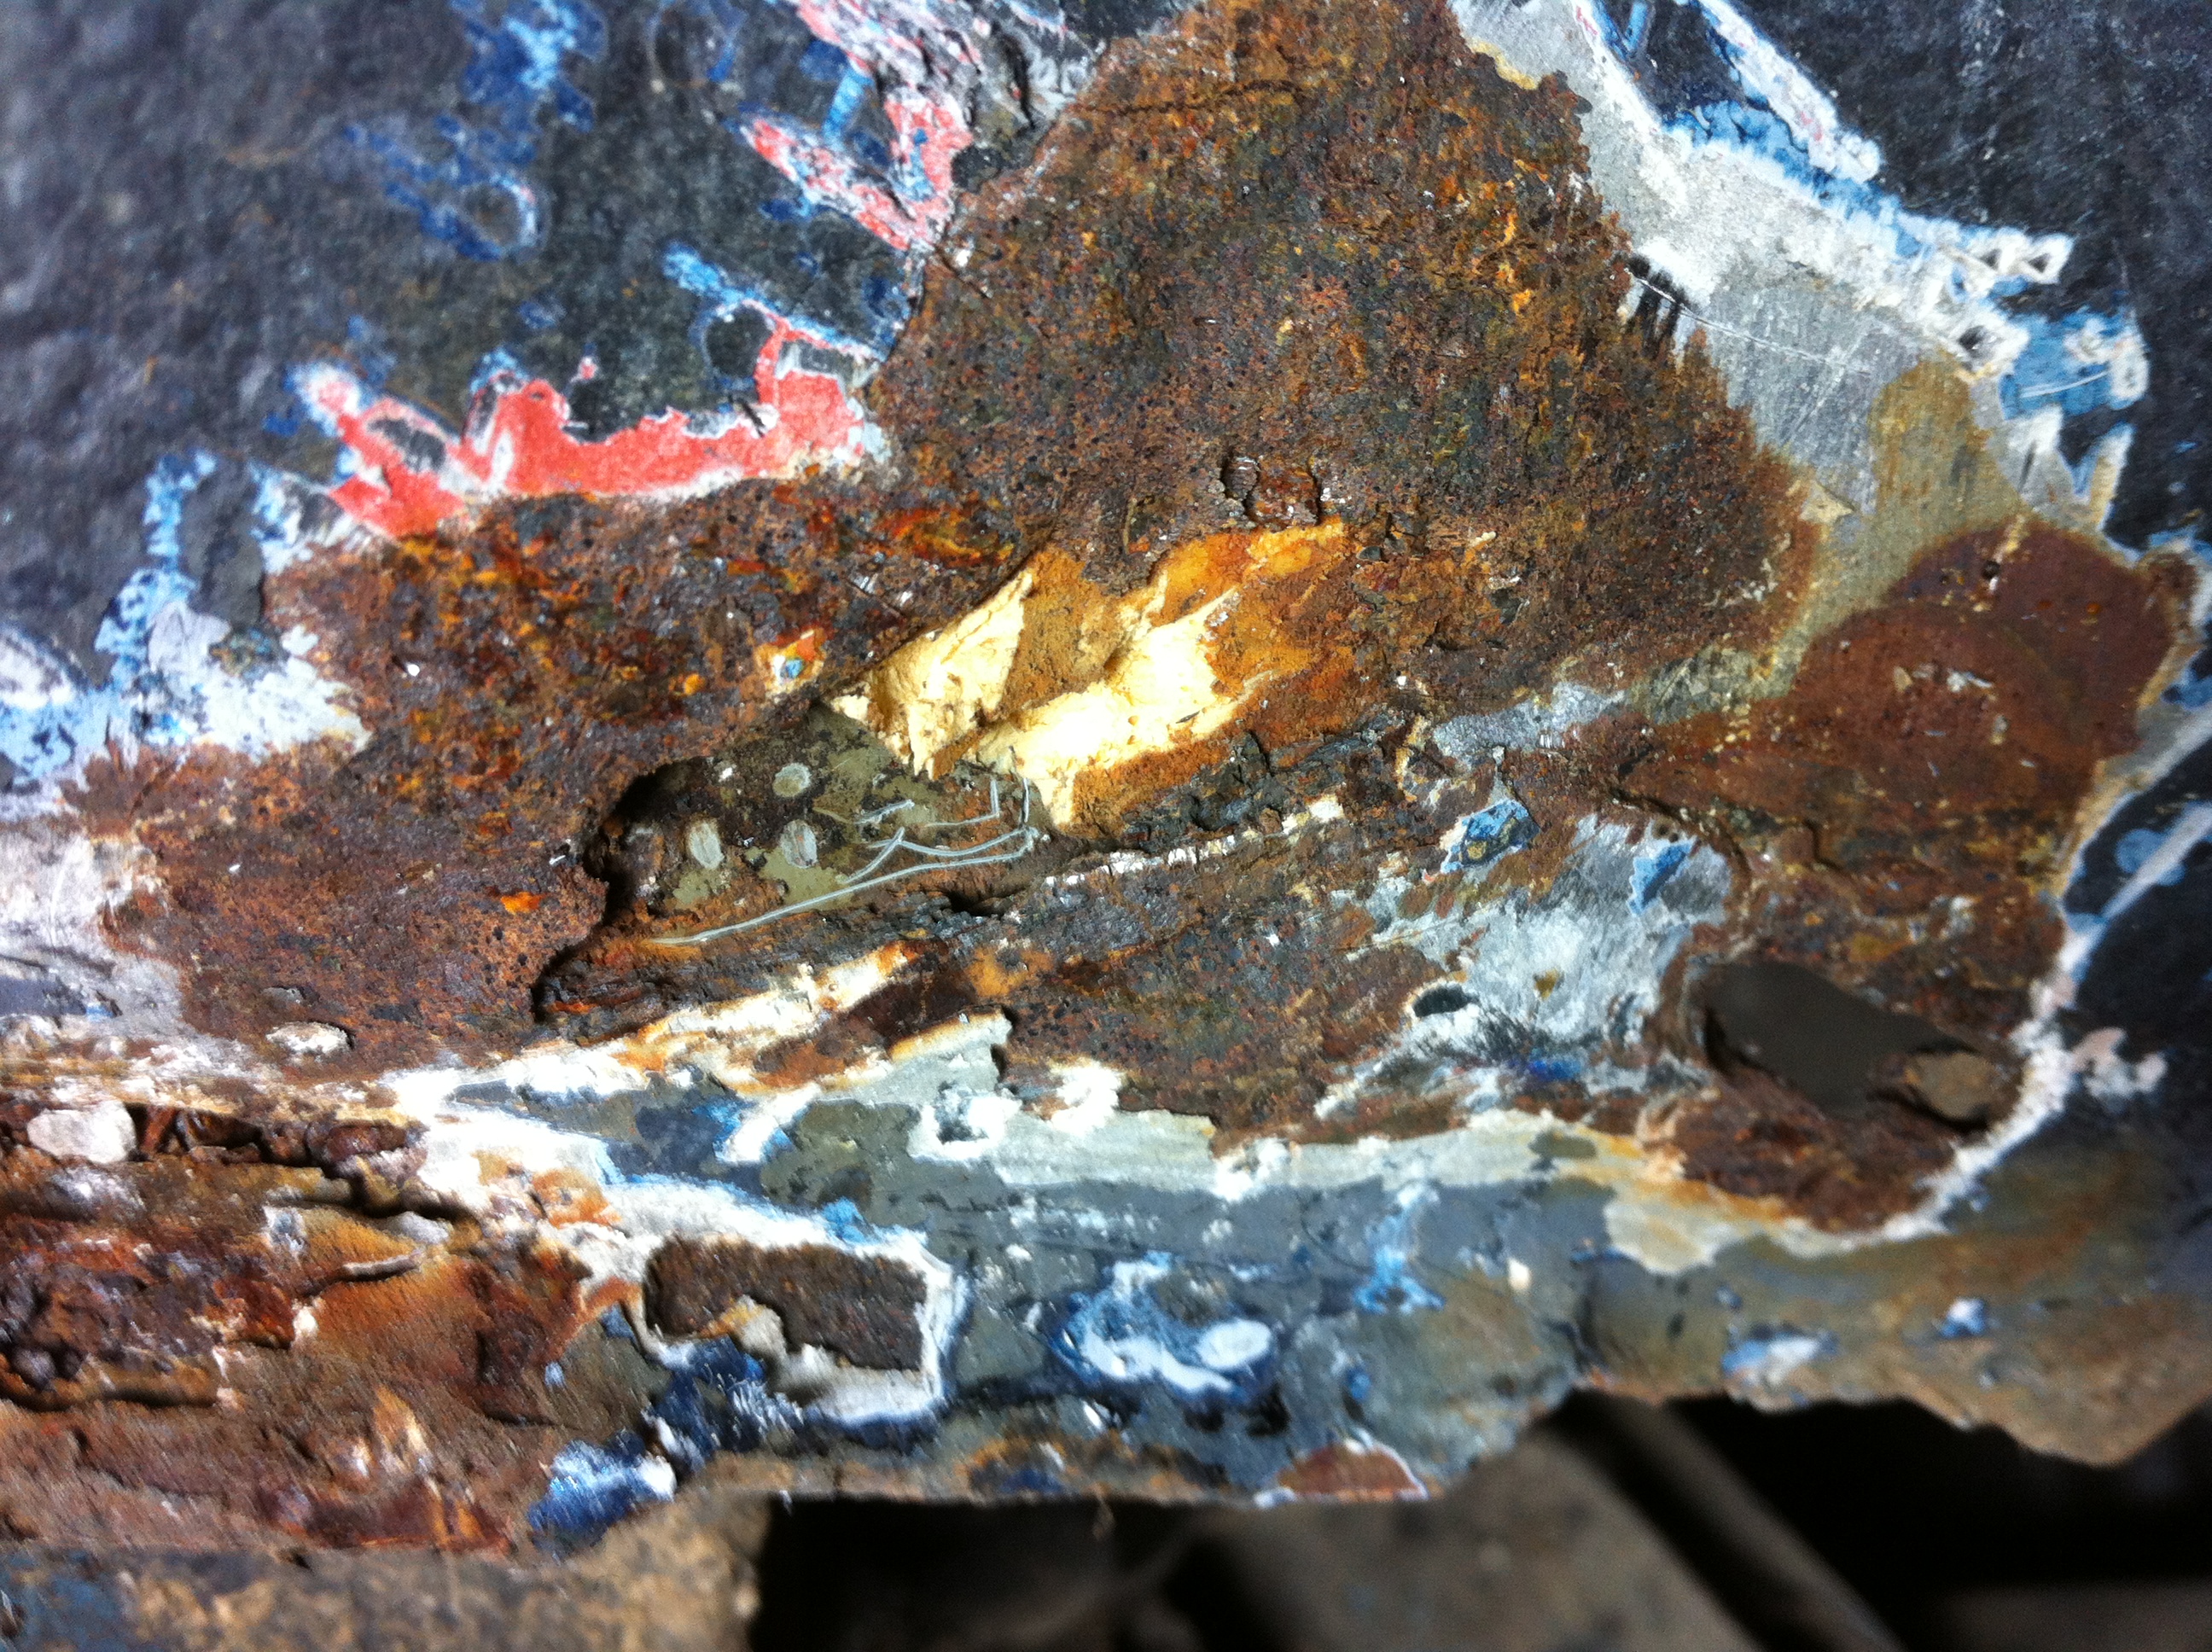
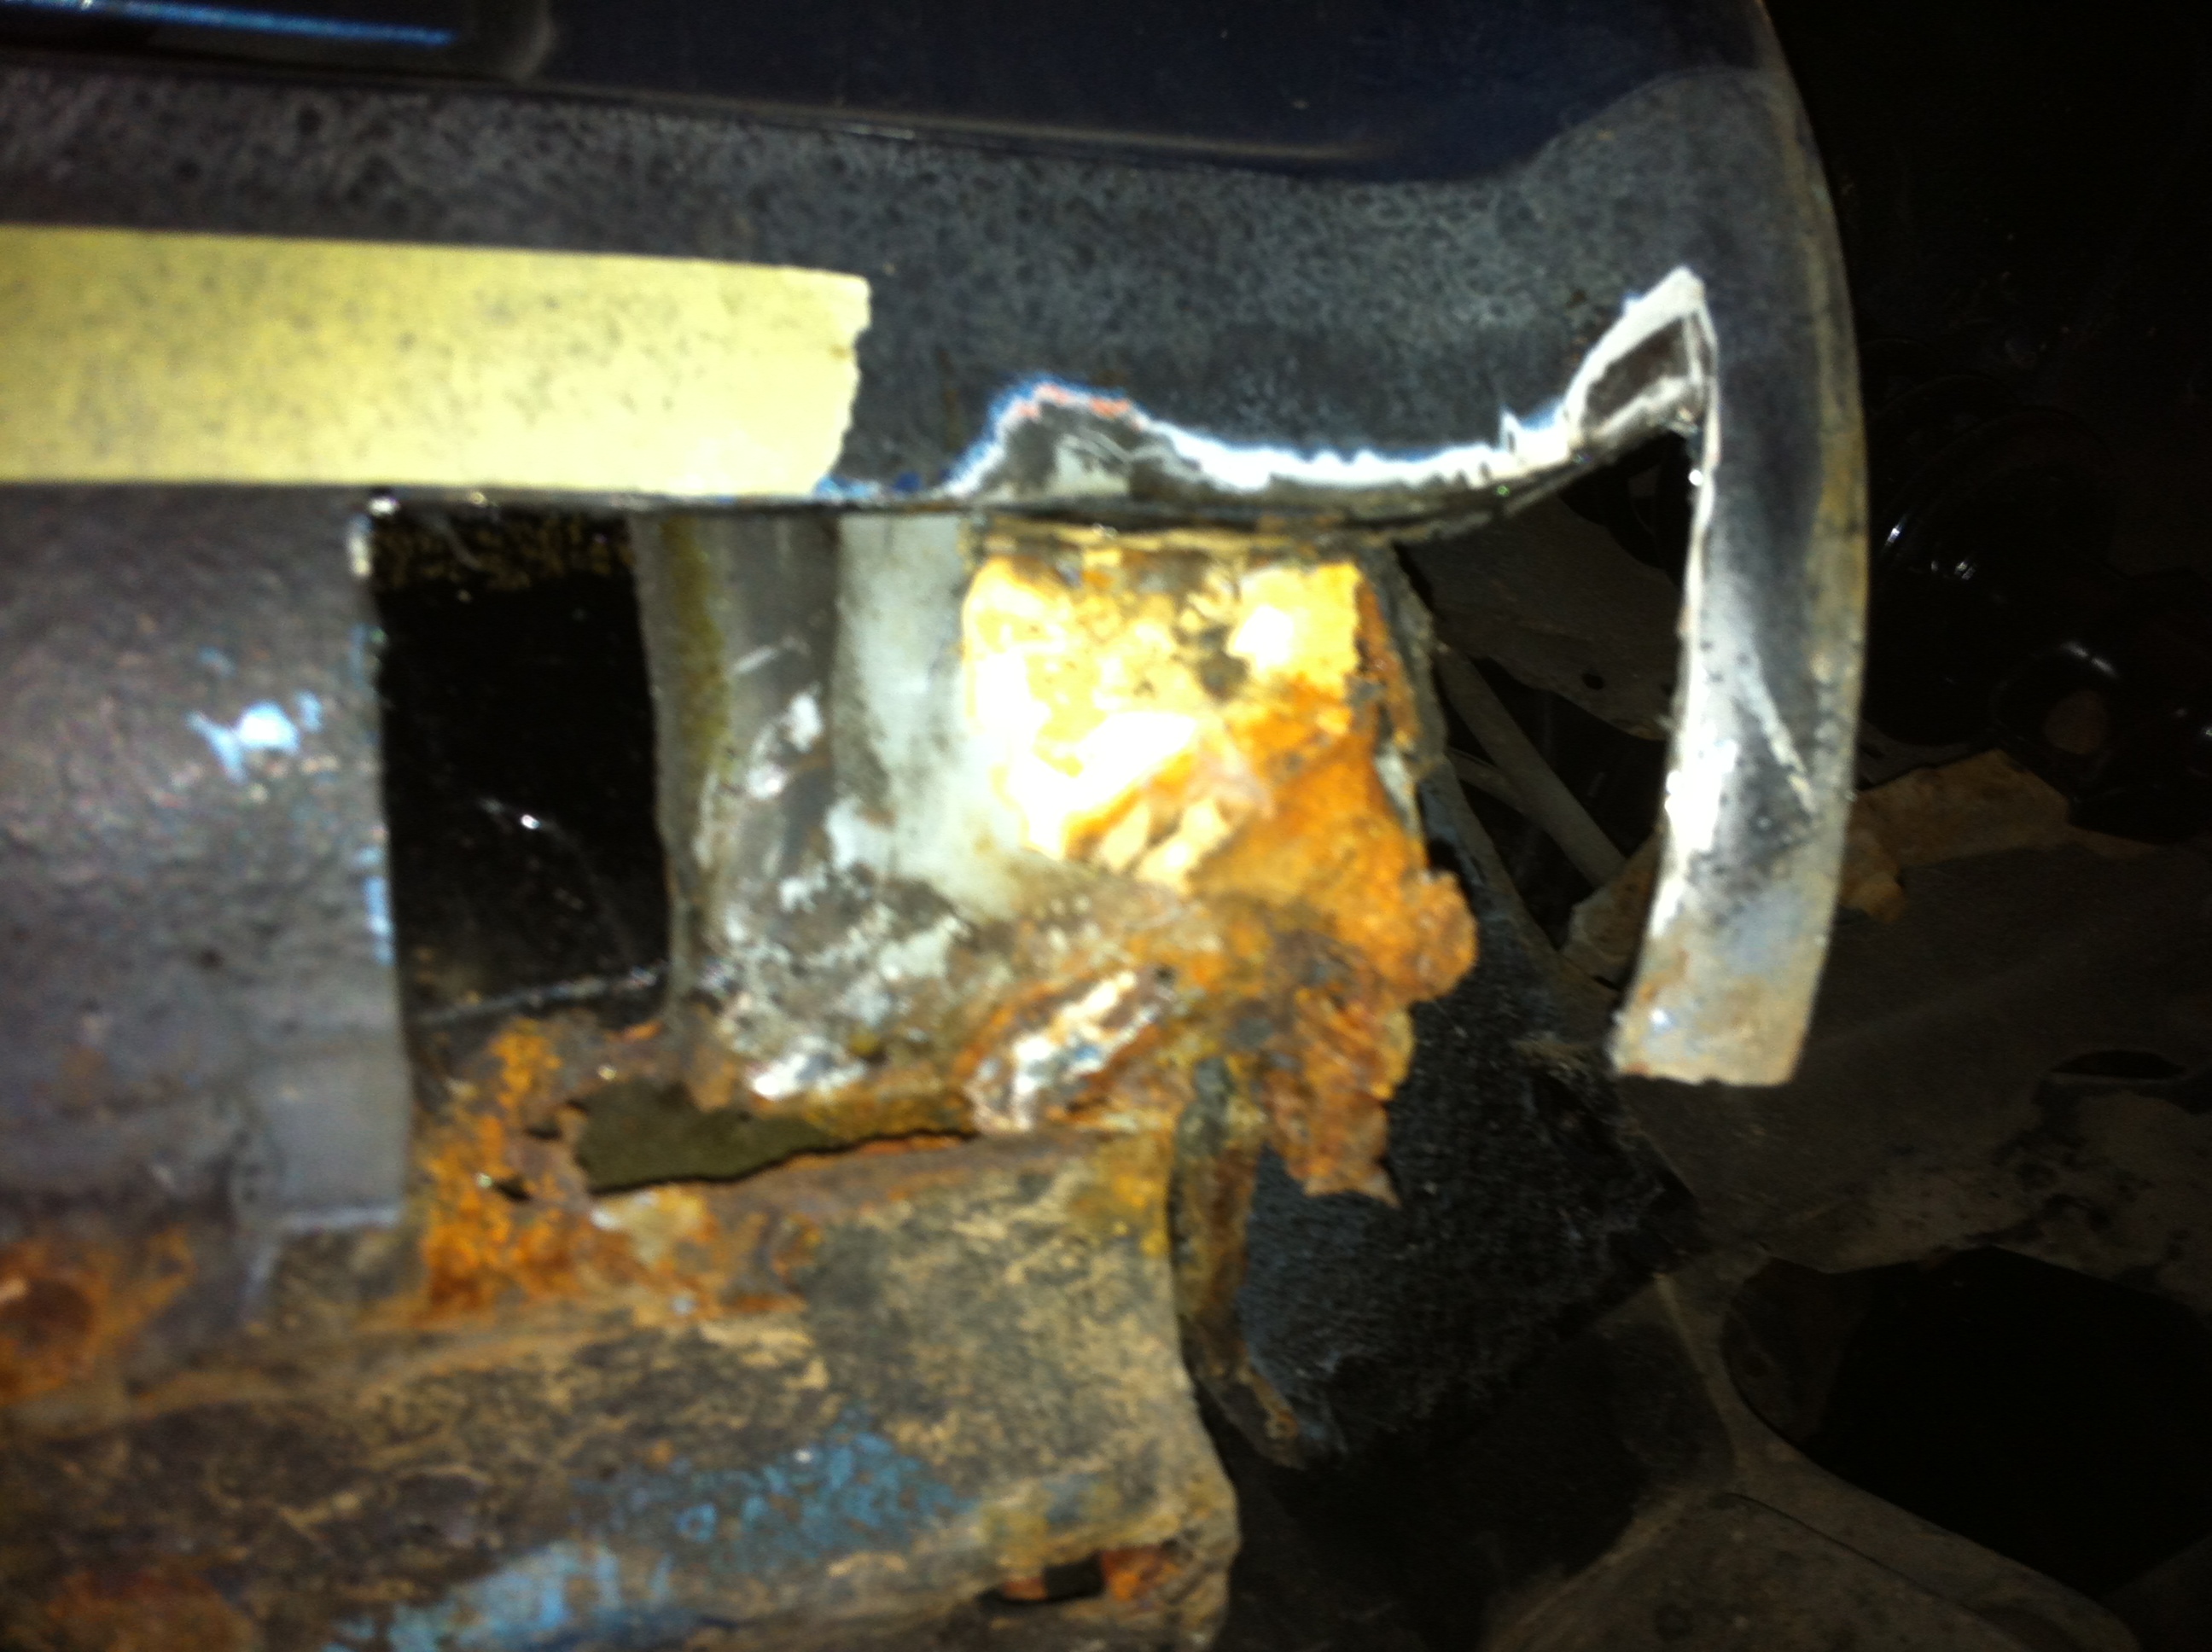
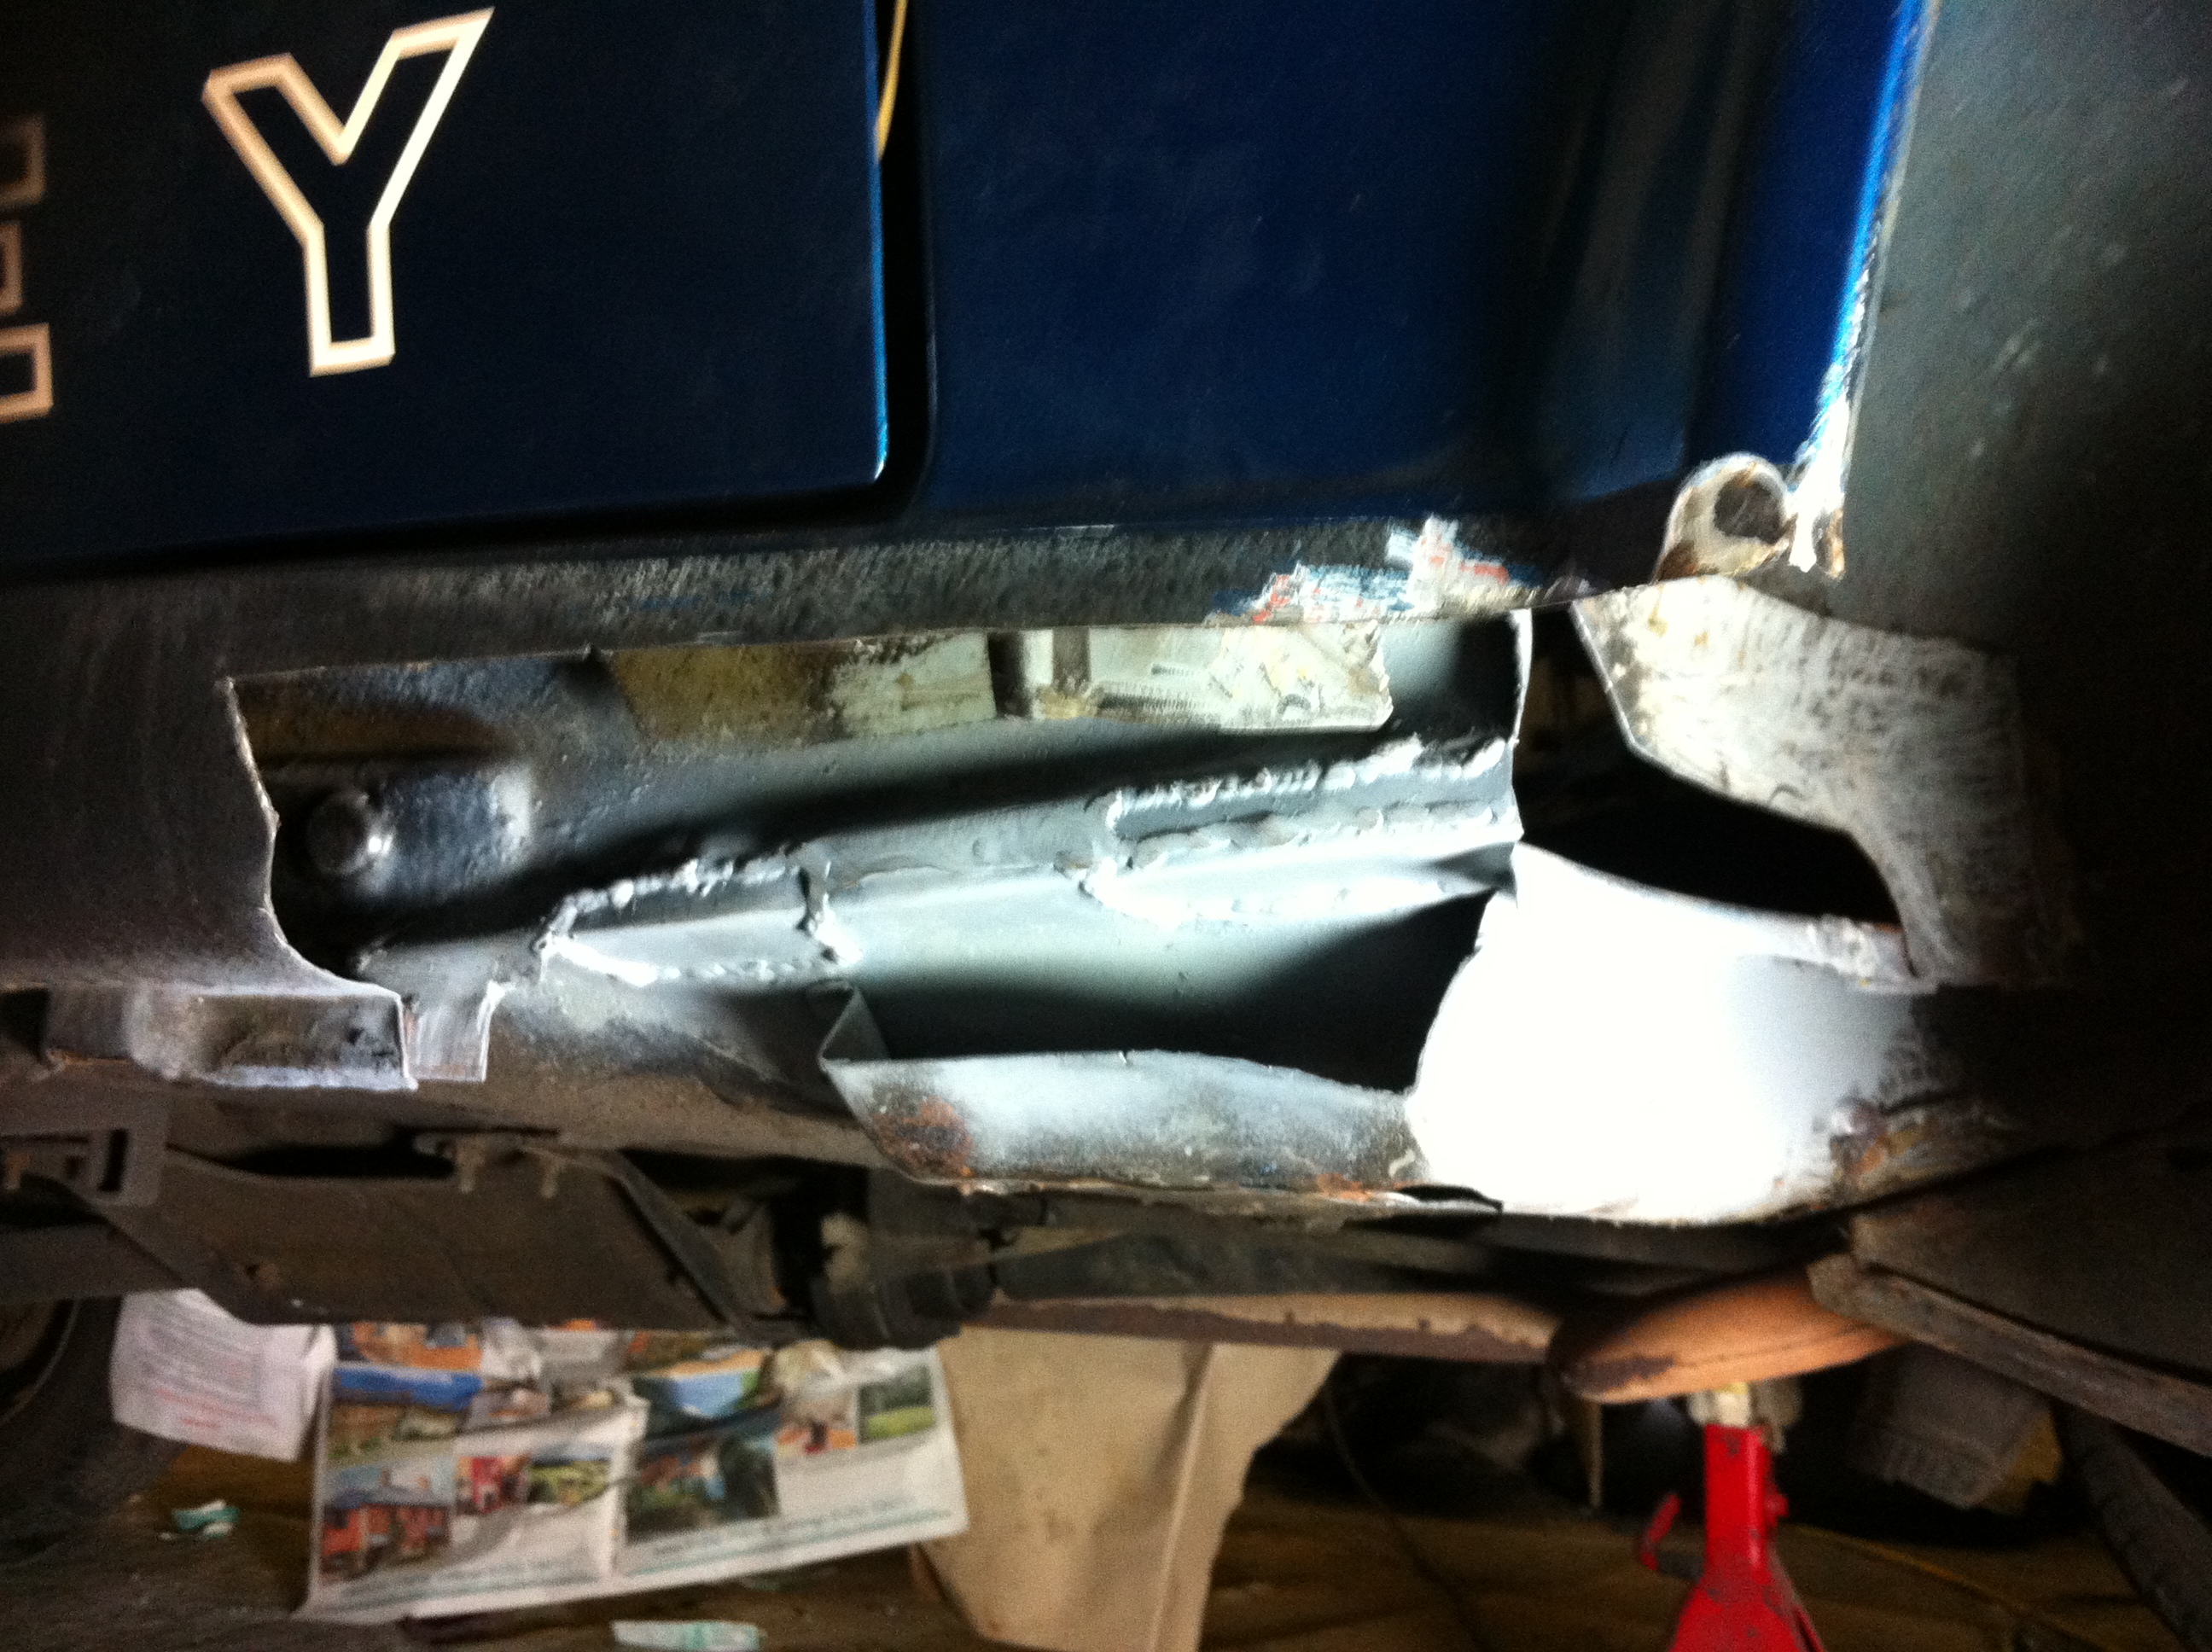
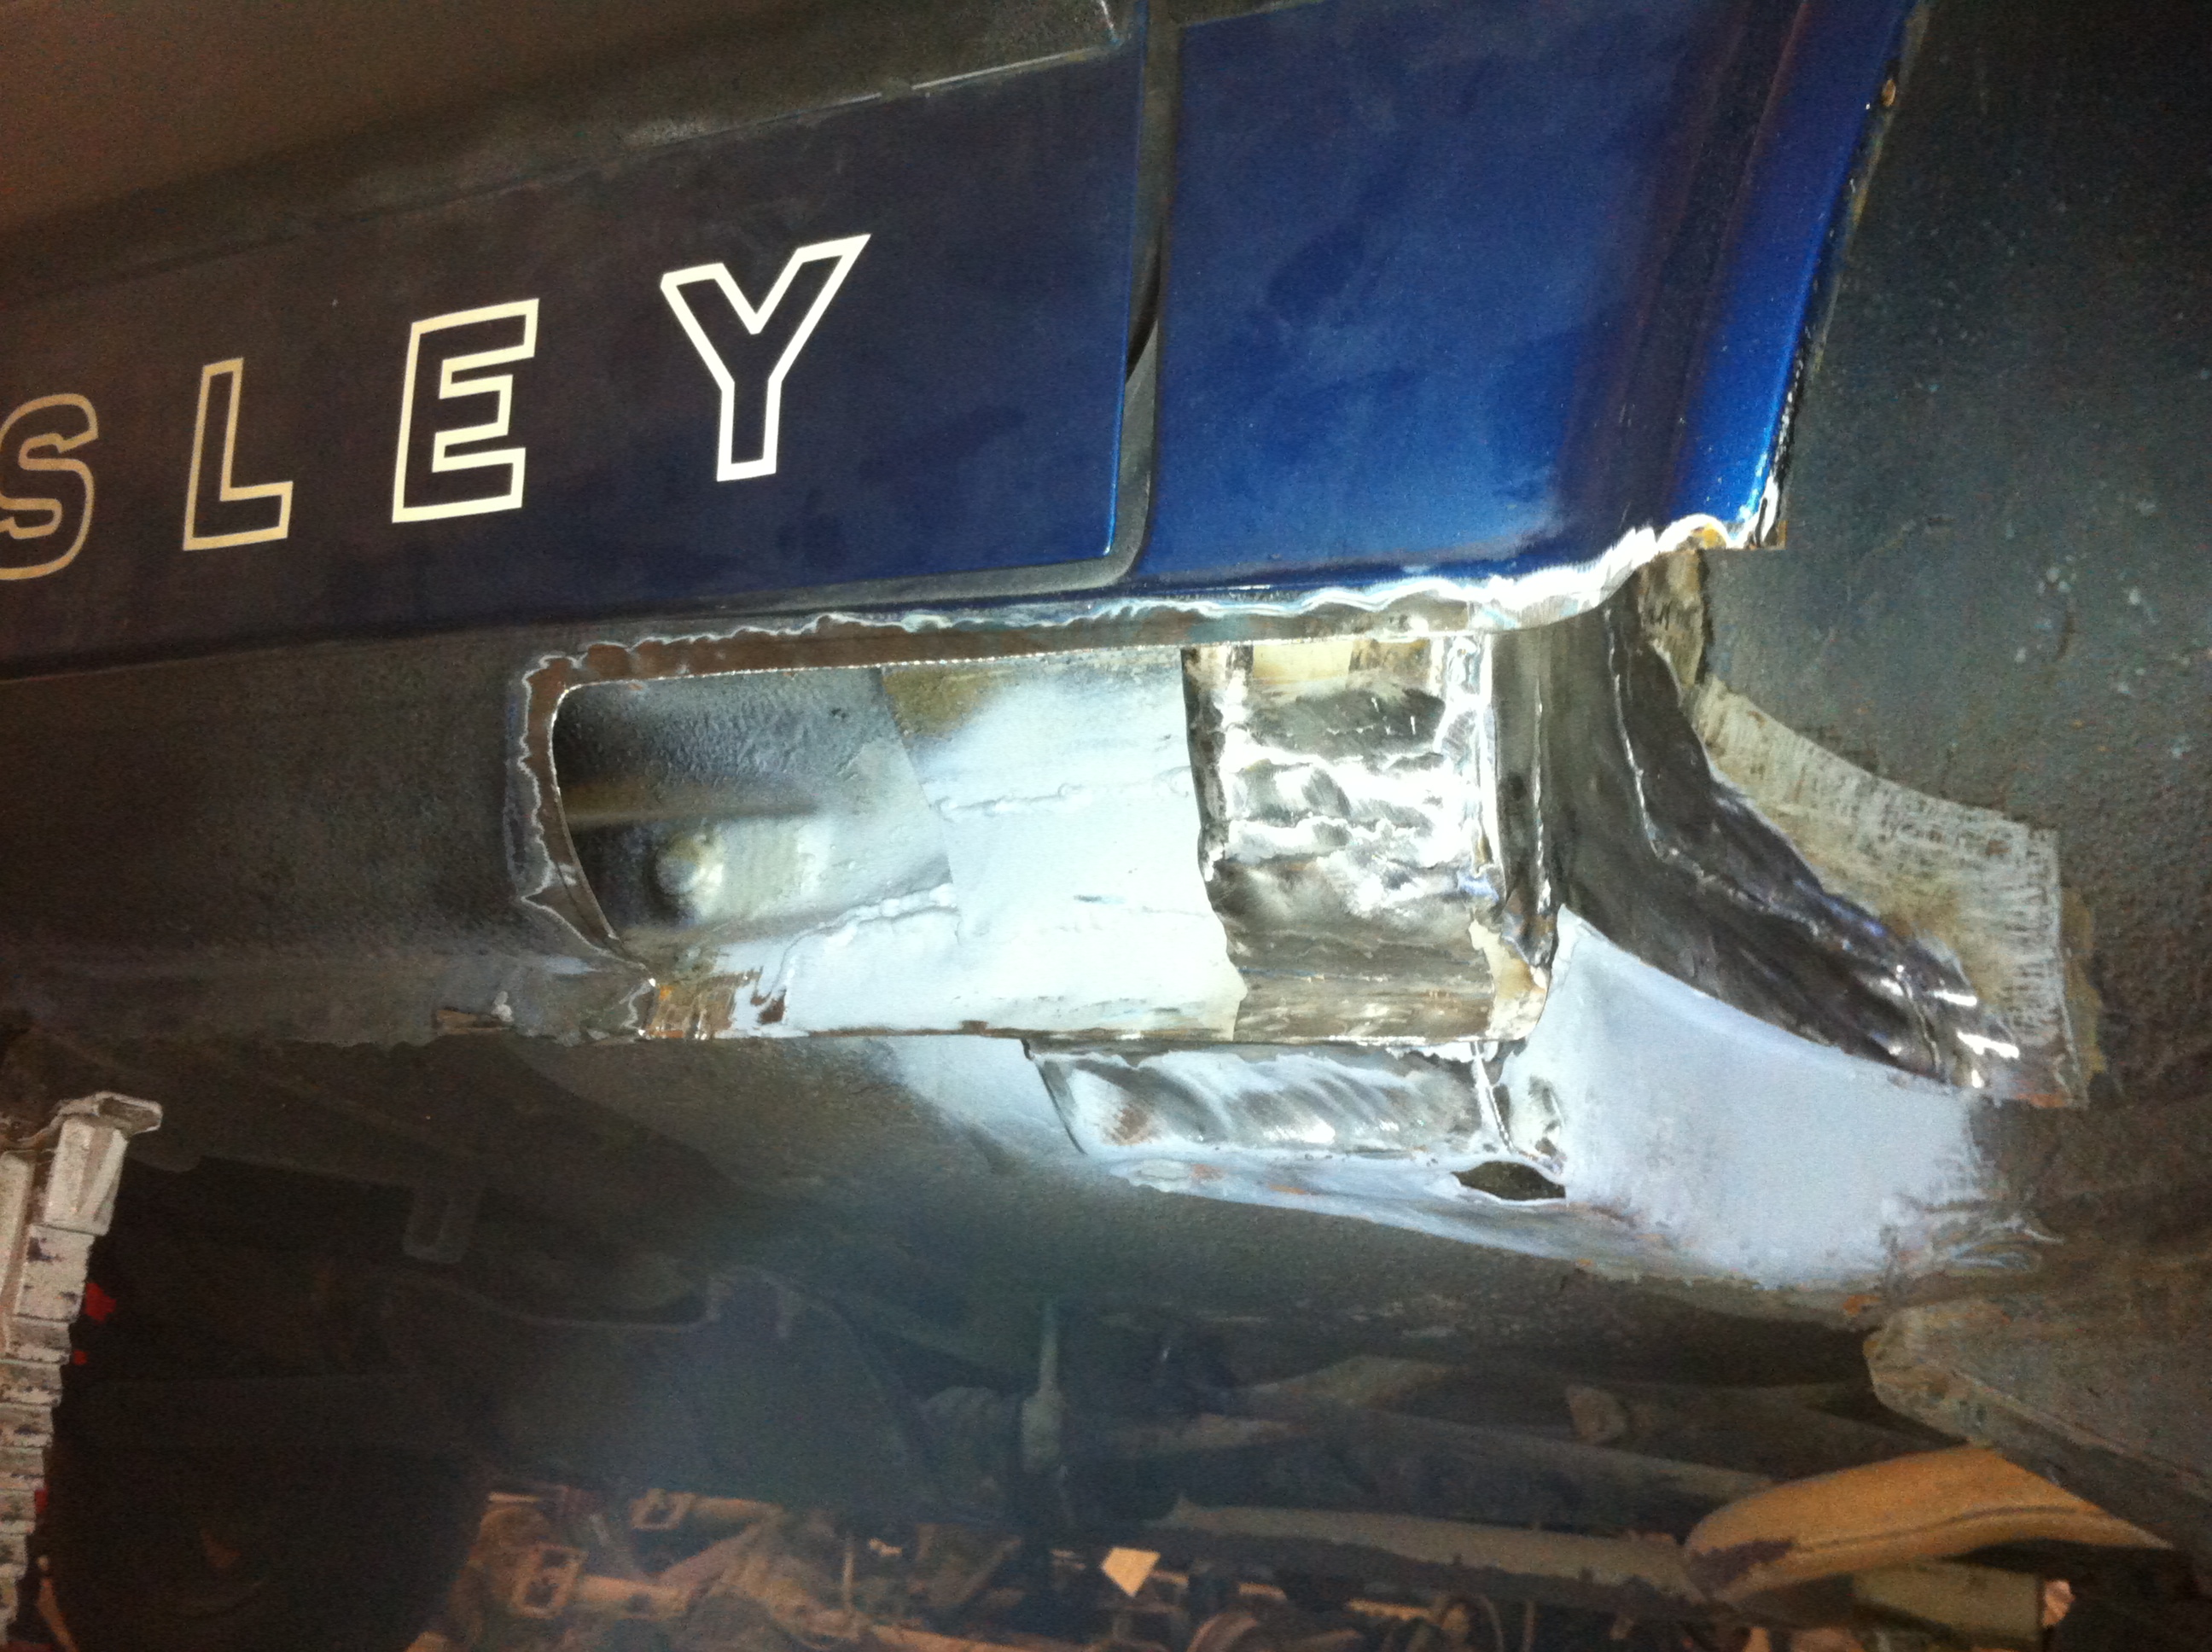
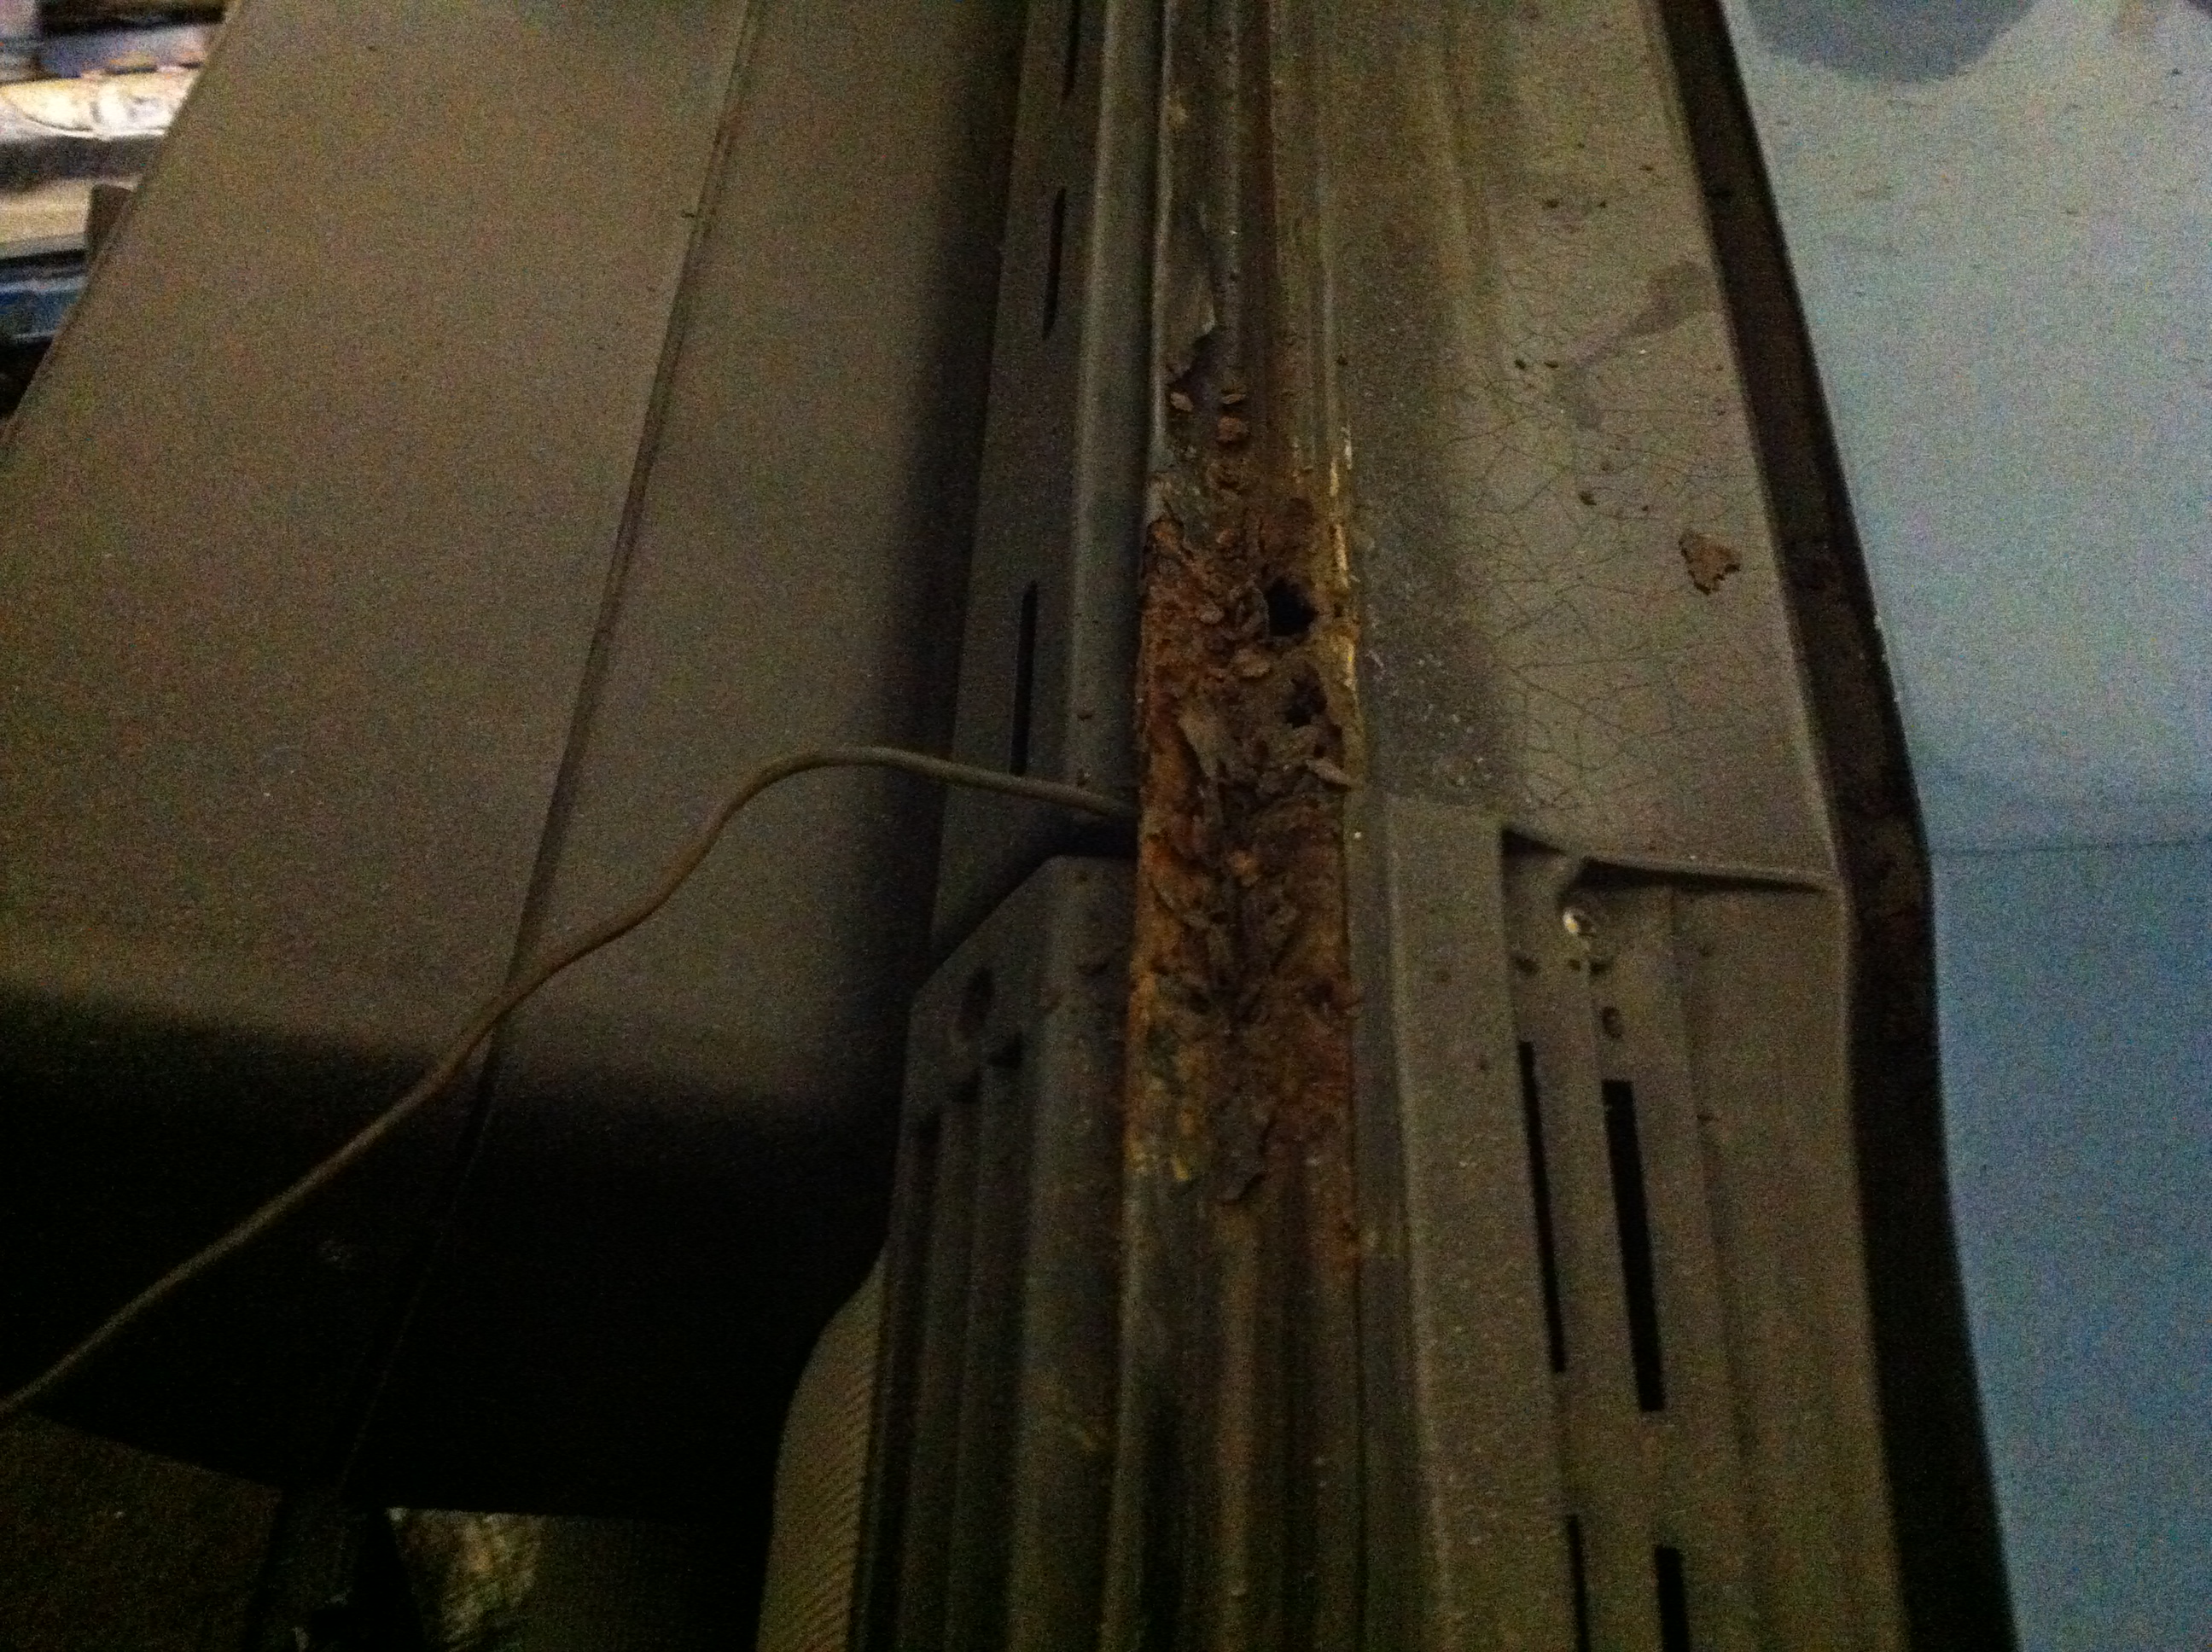
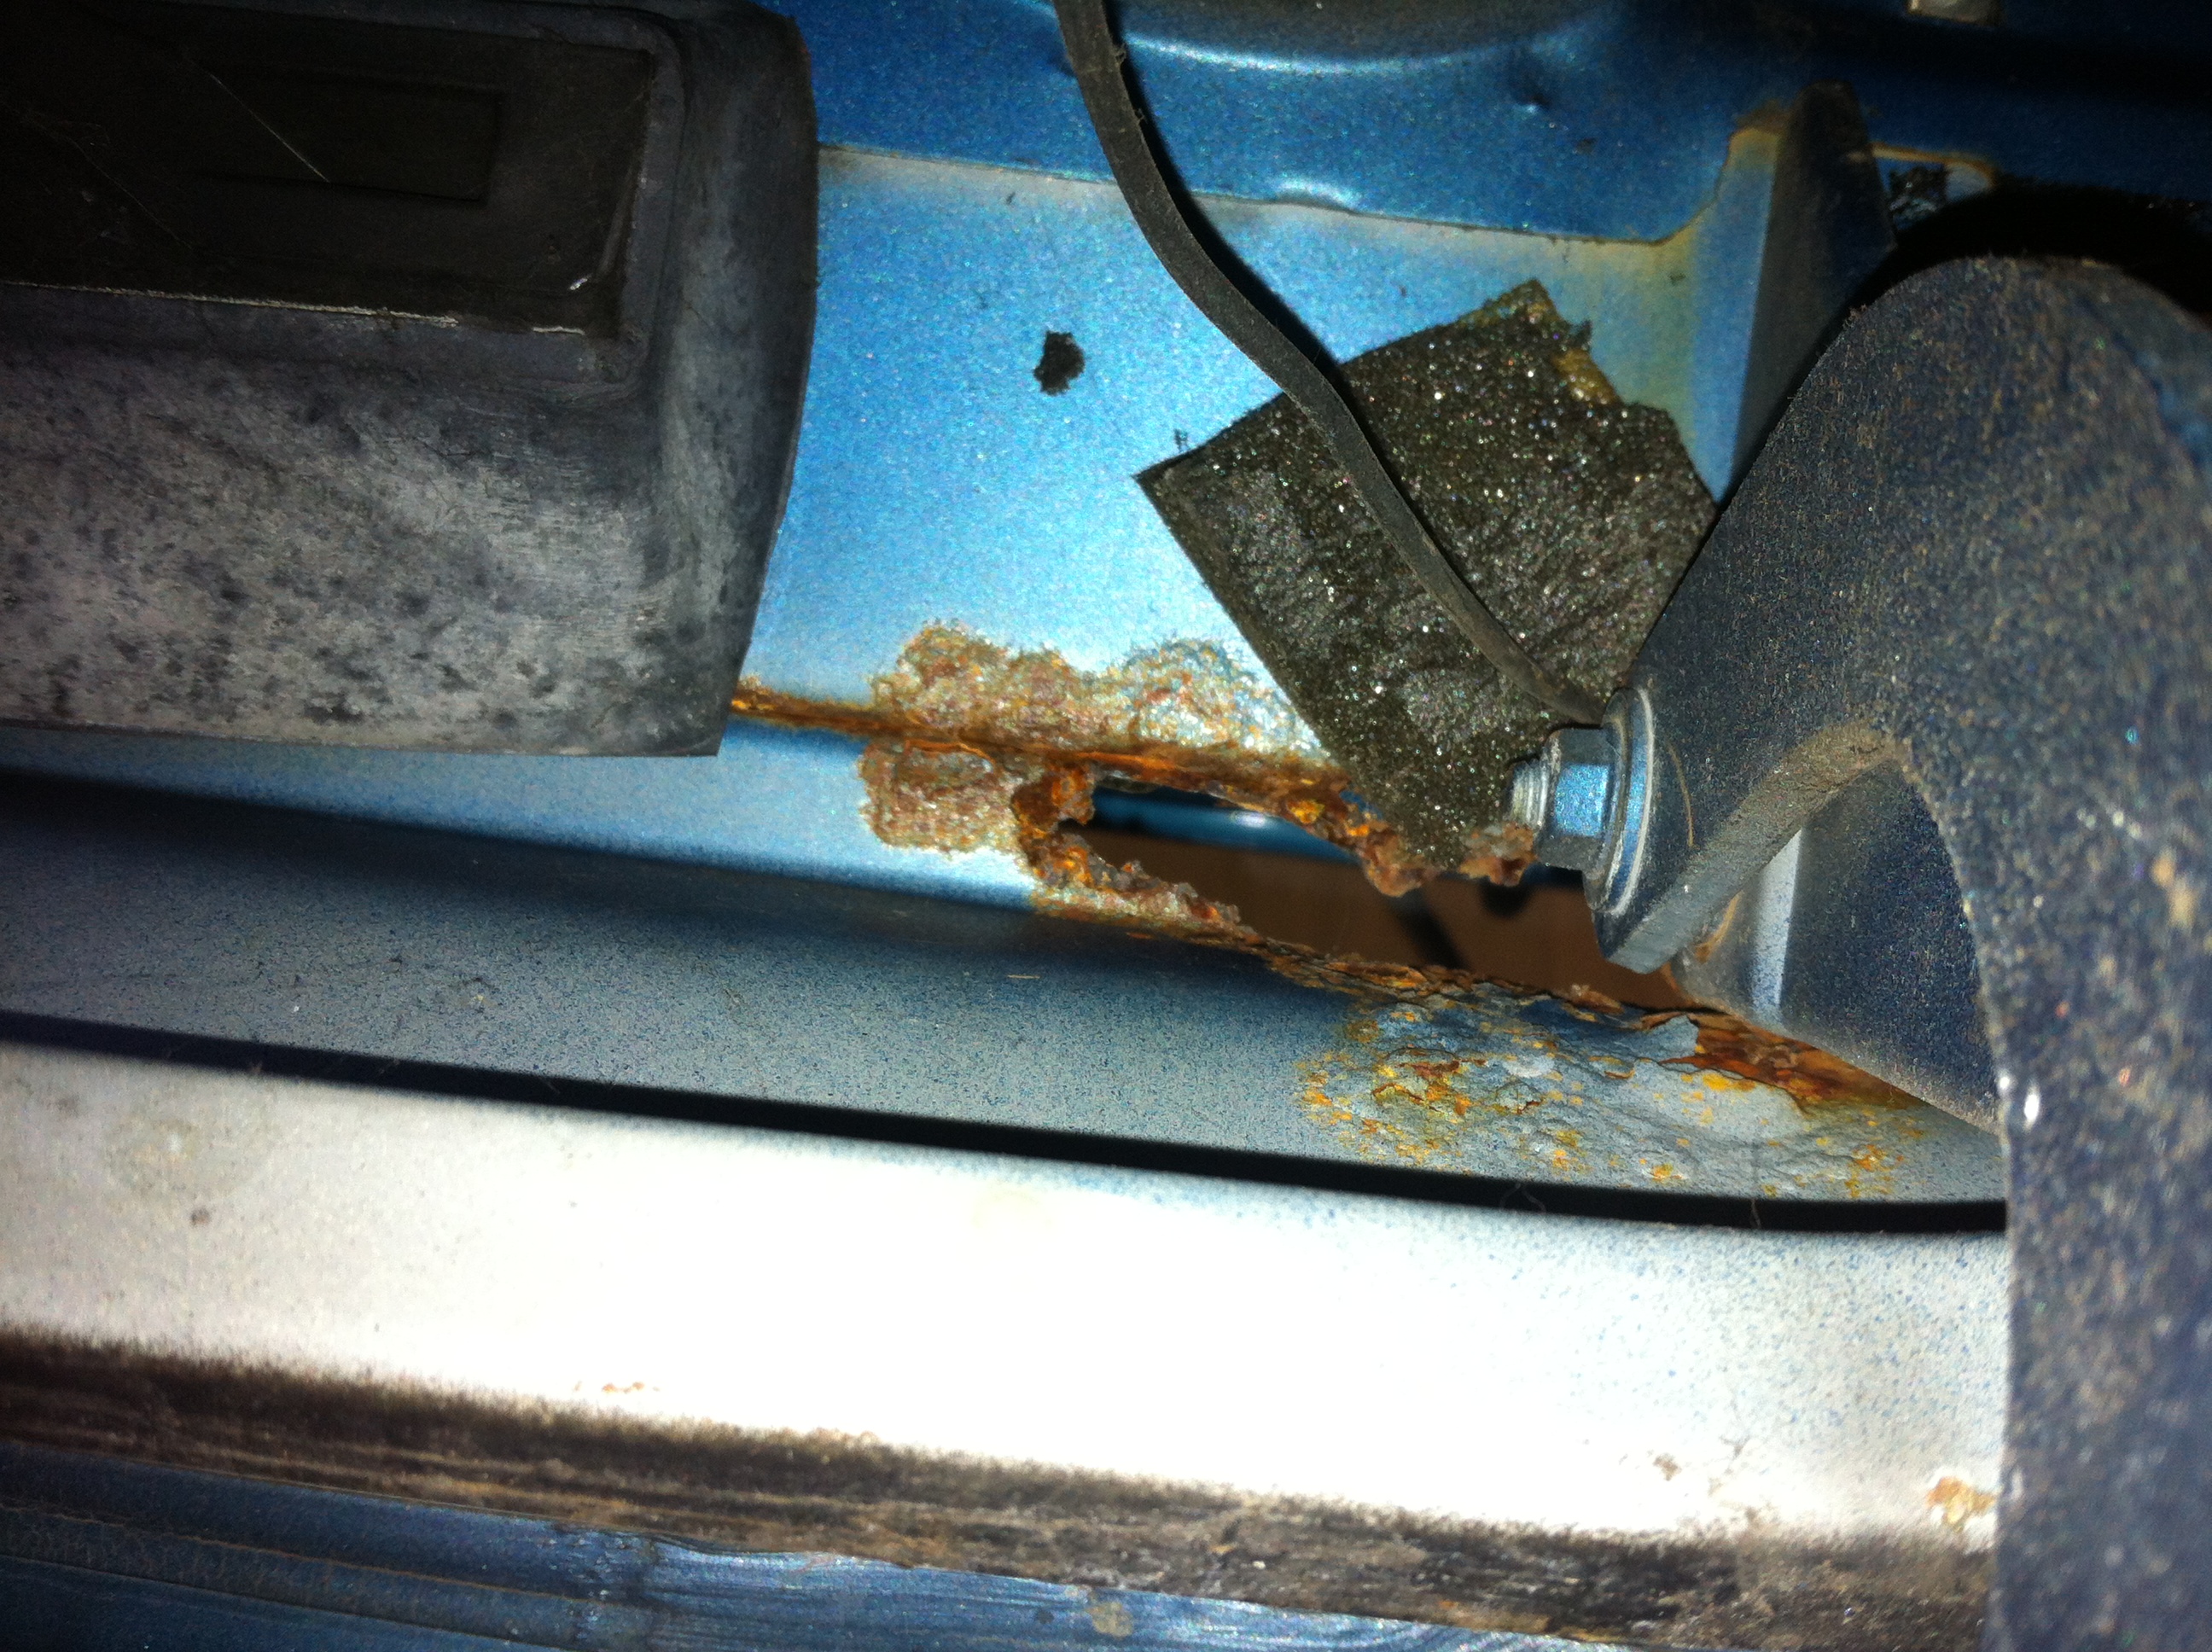
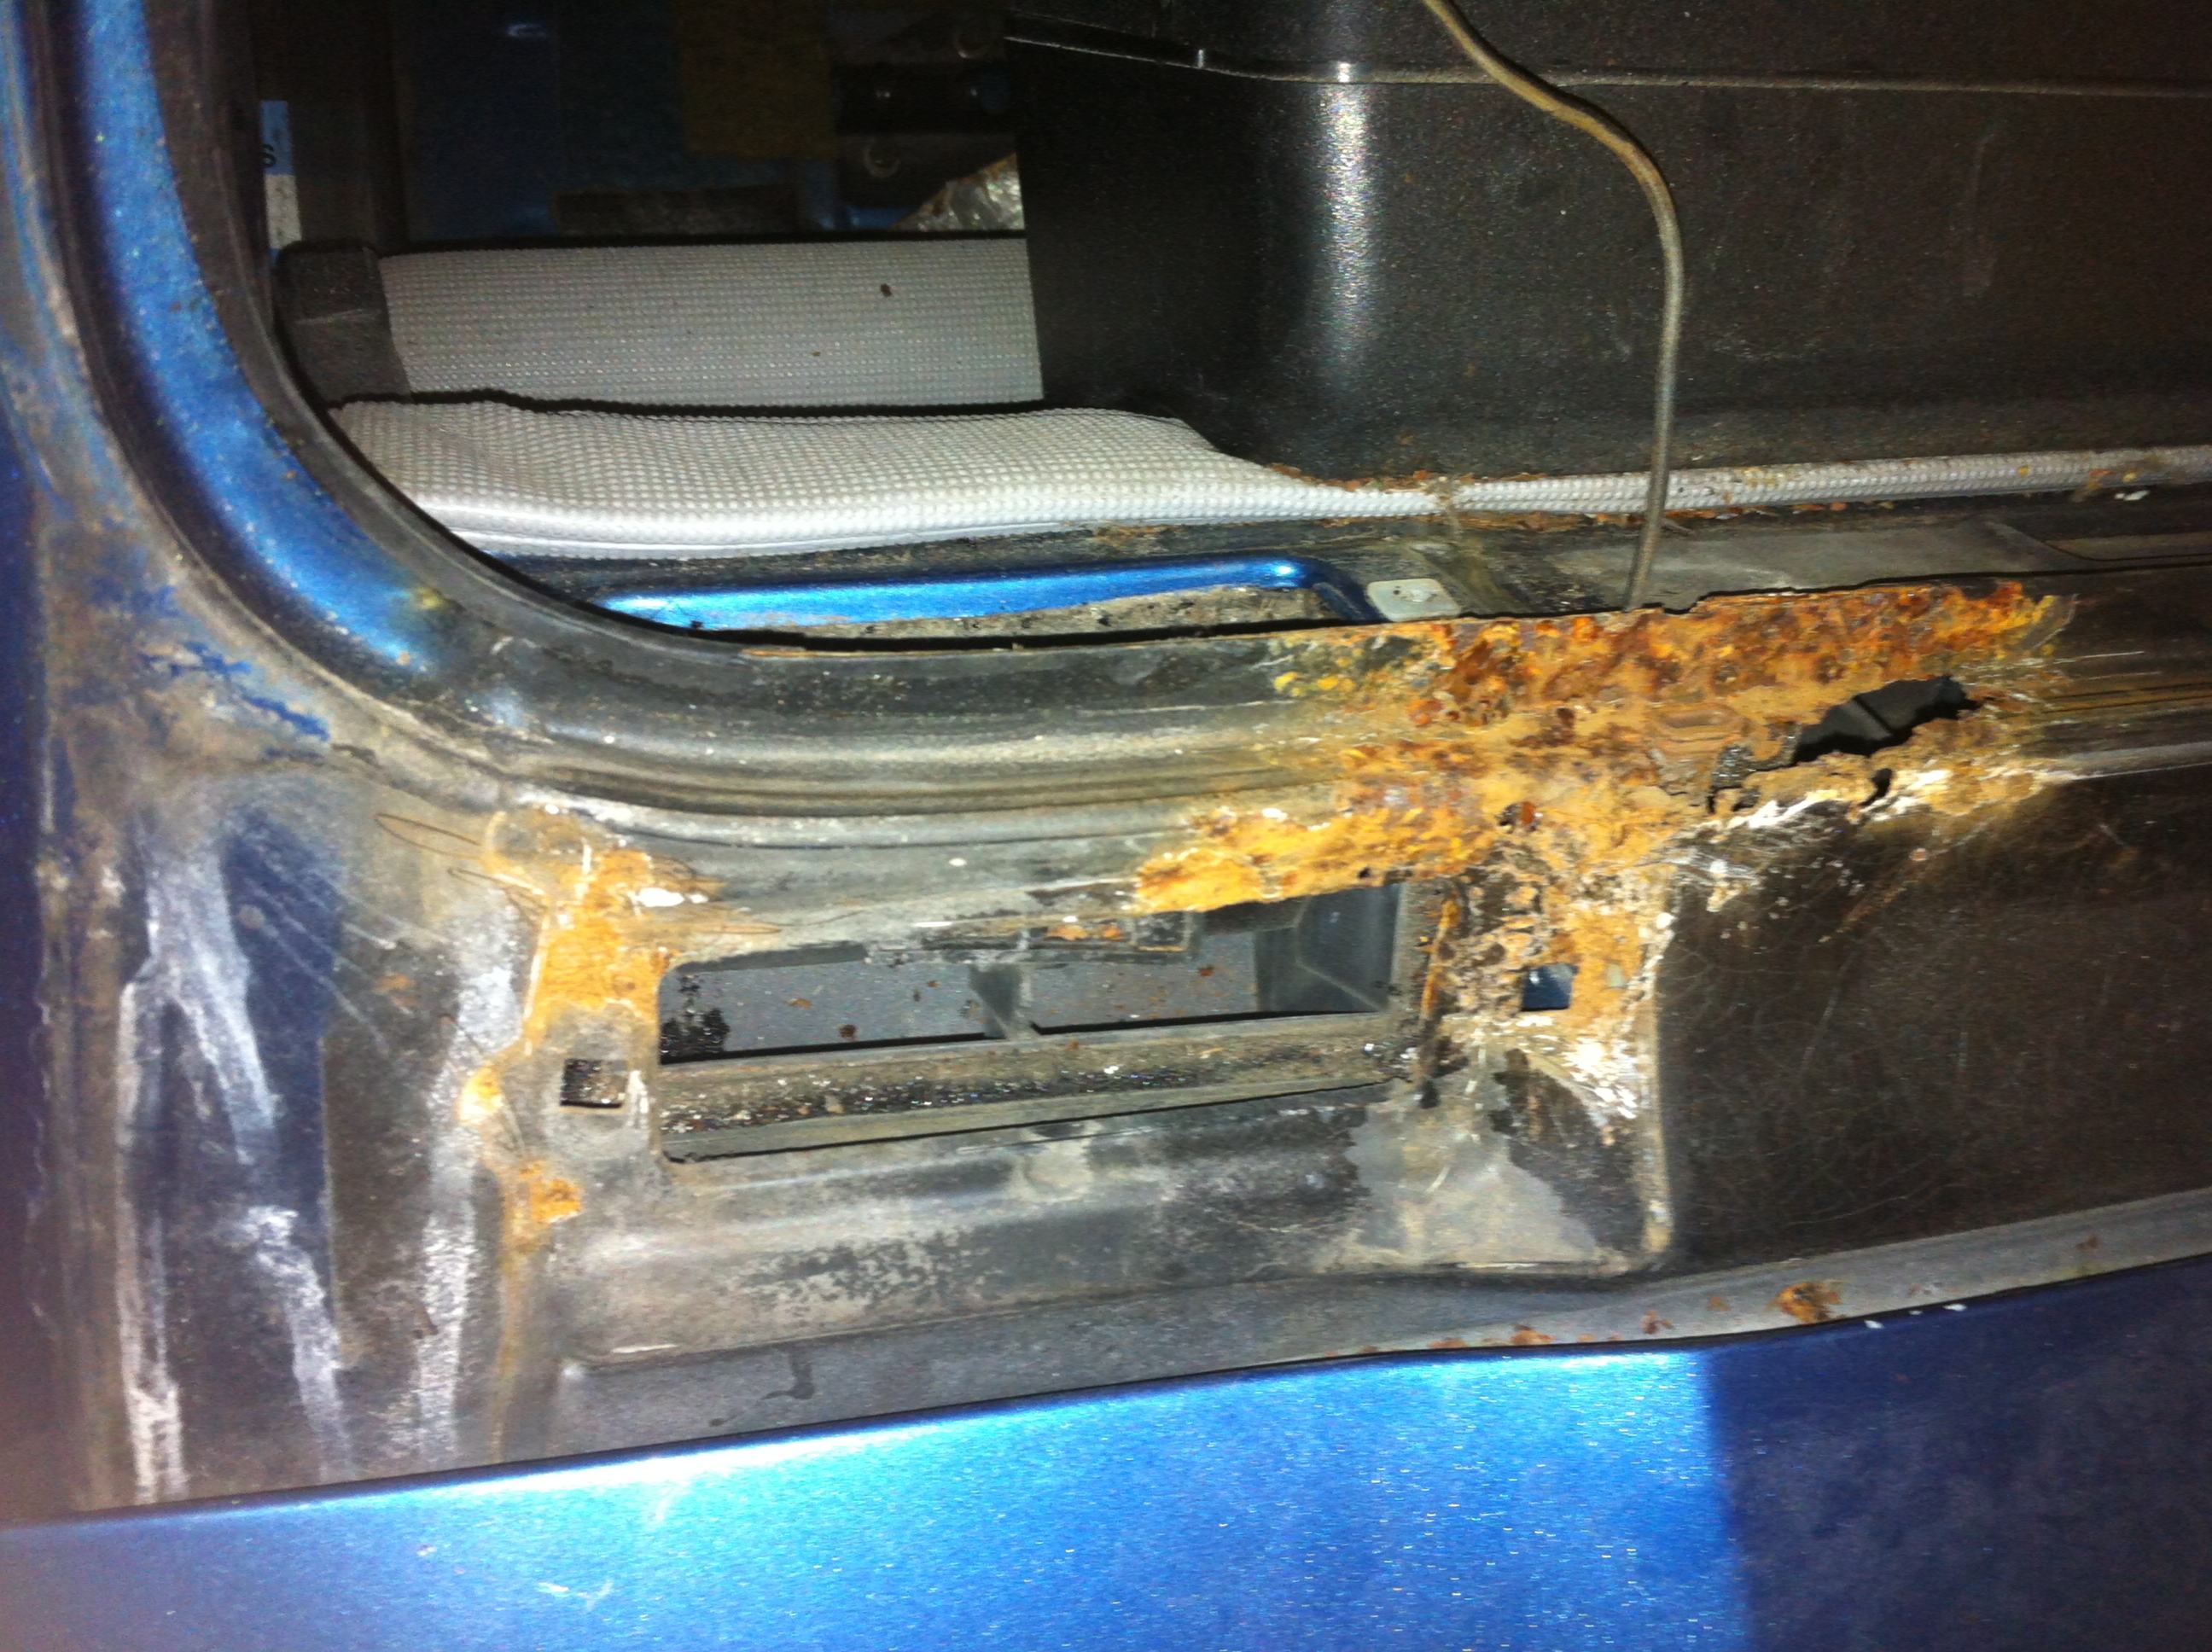
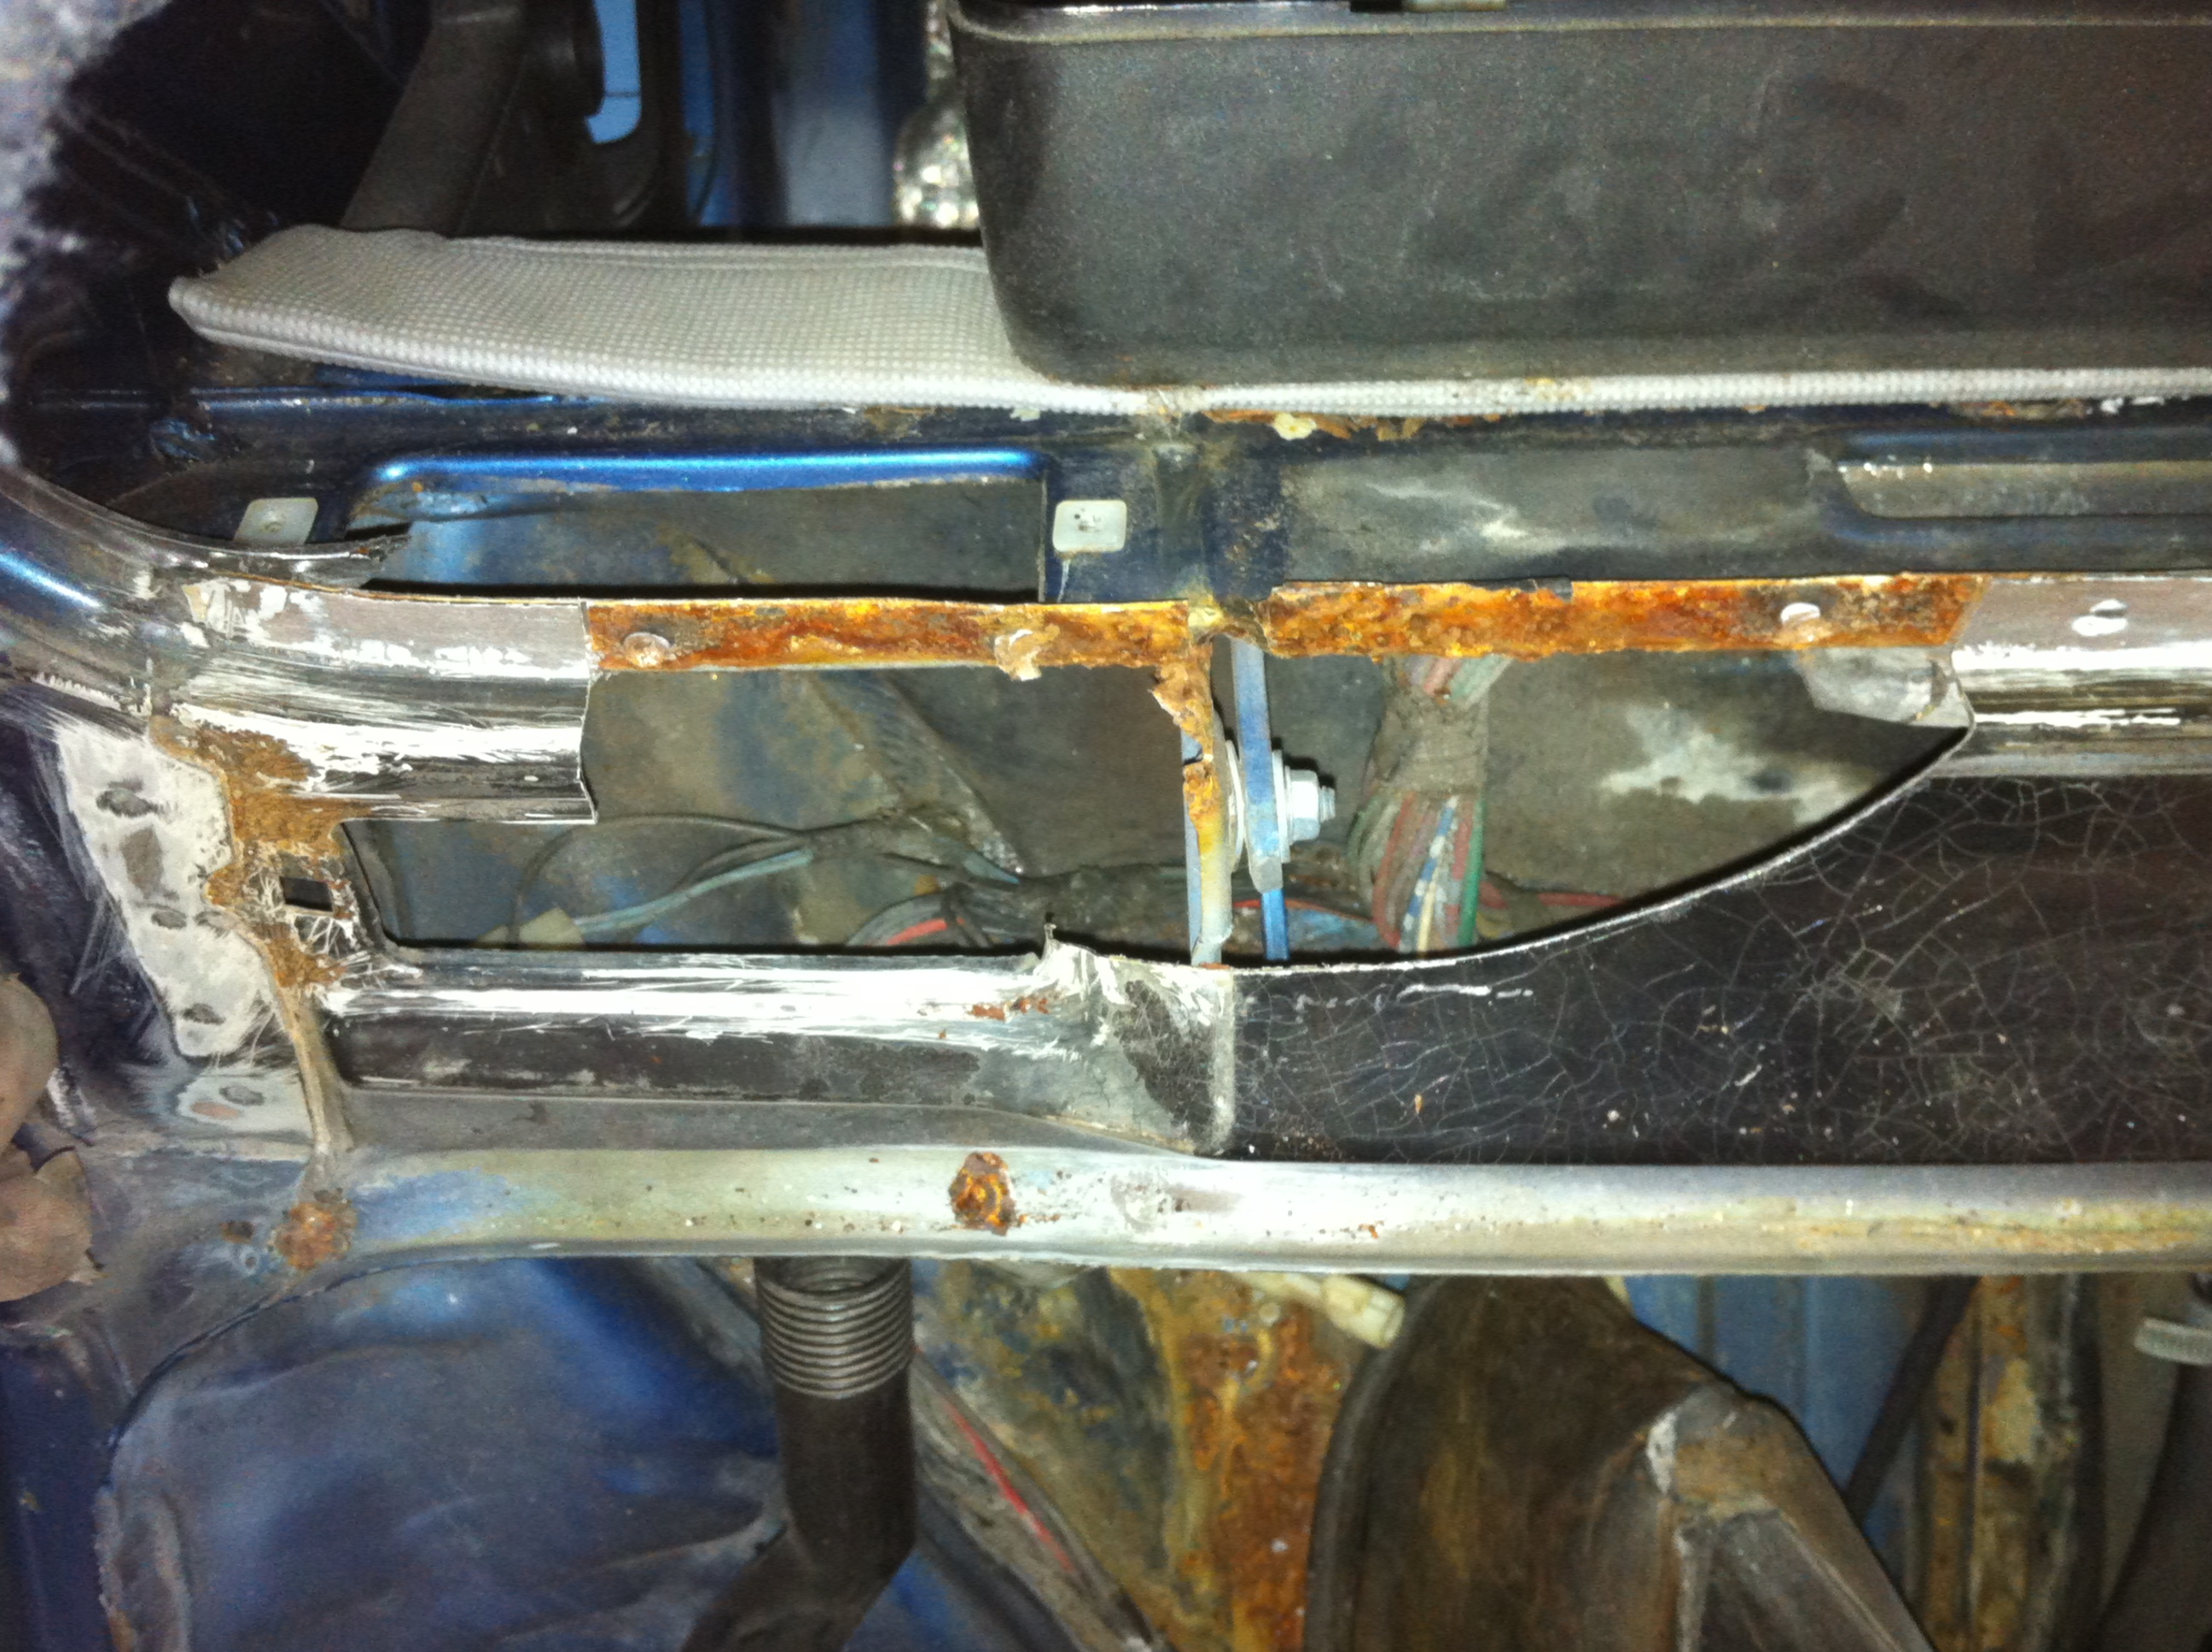
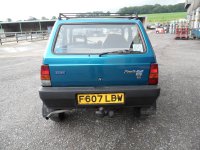
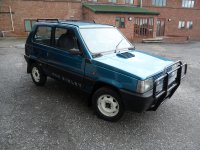
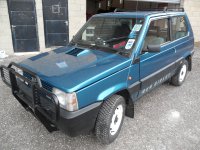
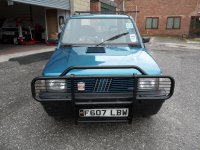
It's a very nice example, especially considering it's 120,000 miles. It's with me primarily for bodywork. The roof has been resprayed, tailgate was rusty in the corners so has been replaced with a good used one I had, and the offside front wing was rusty so has been renewed.

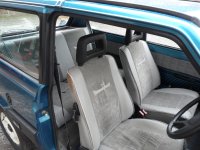
I've also sorted the rear brakes which had seized wheel cyls. It turned out that the rear brake hose was blocked, when I tried to bleed the brakes the pedal was solid even with both rear nipples removed! It's not surprising the cyls. were seized, they probably hadn't moved in ages.

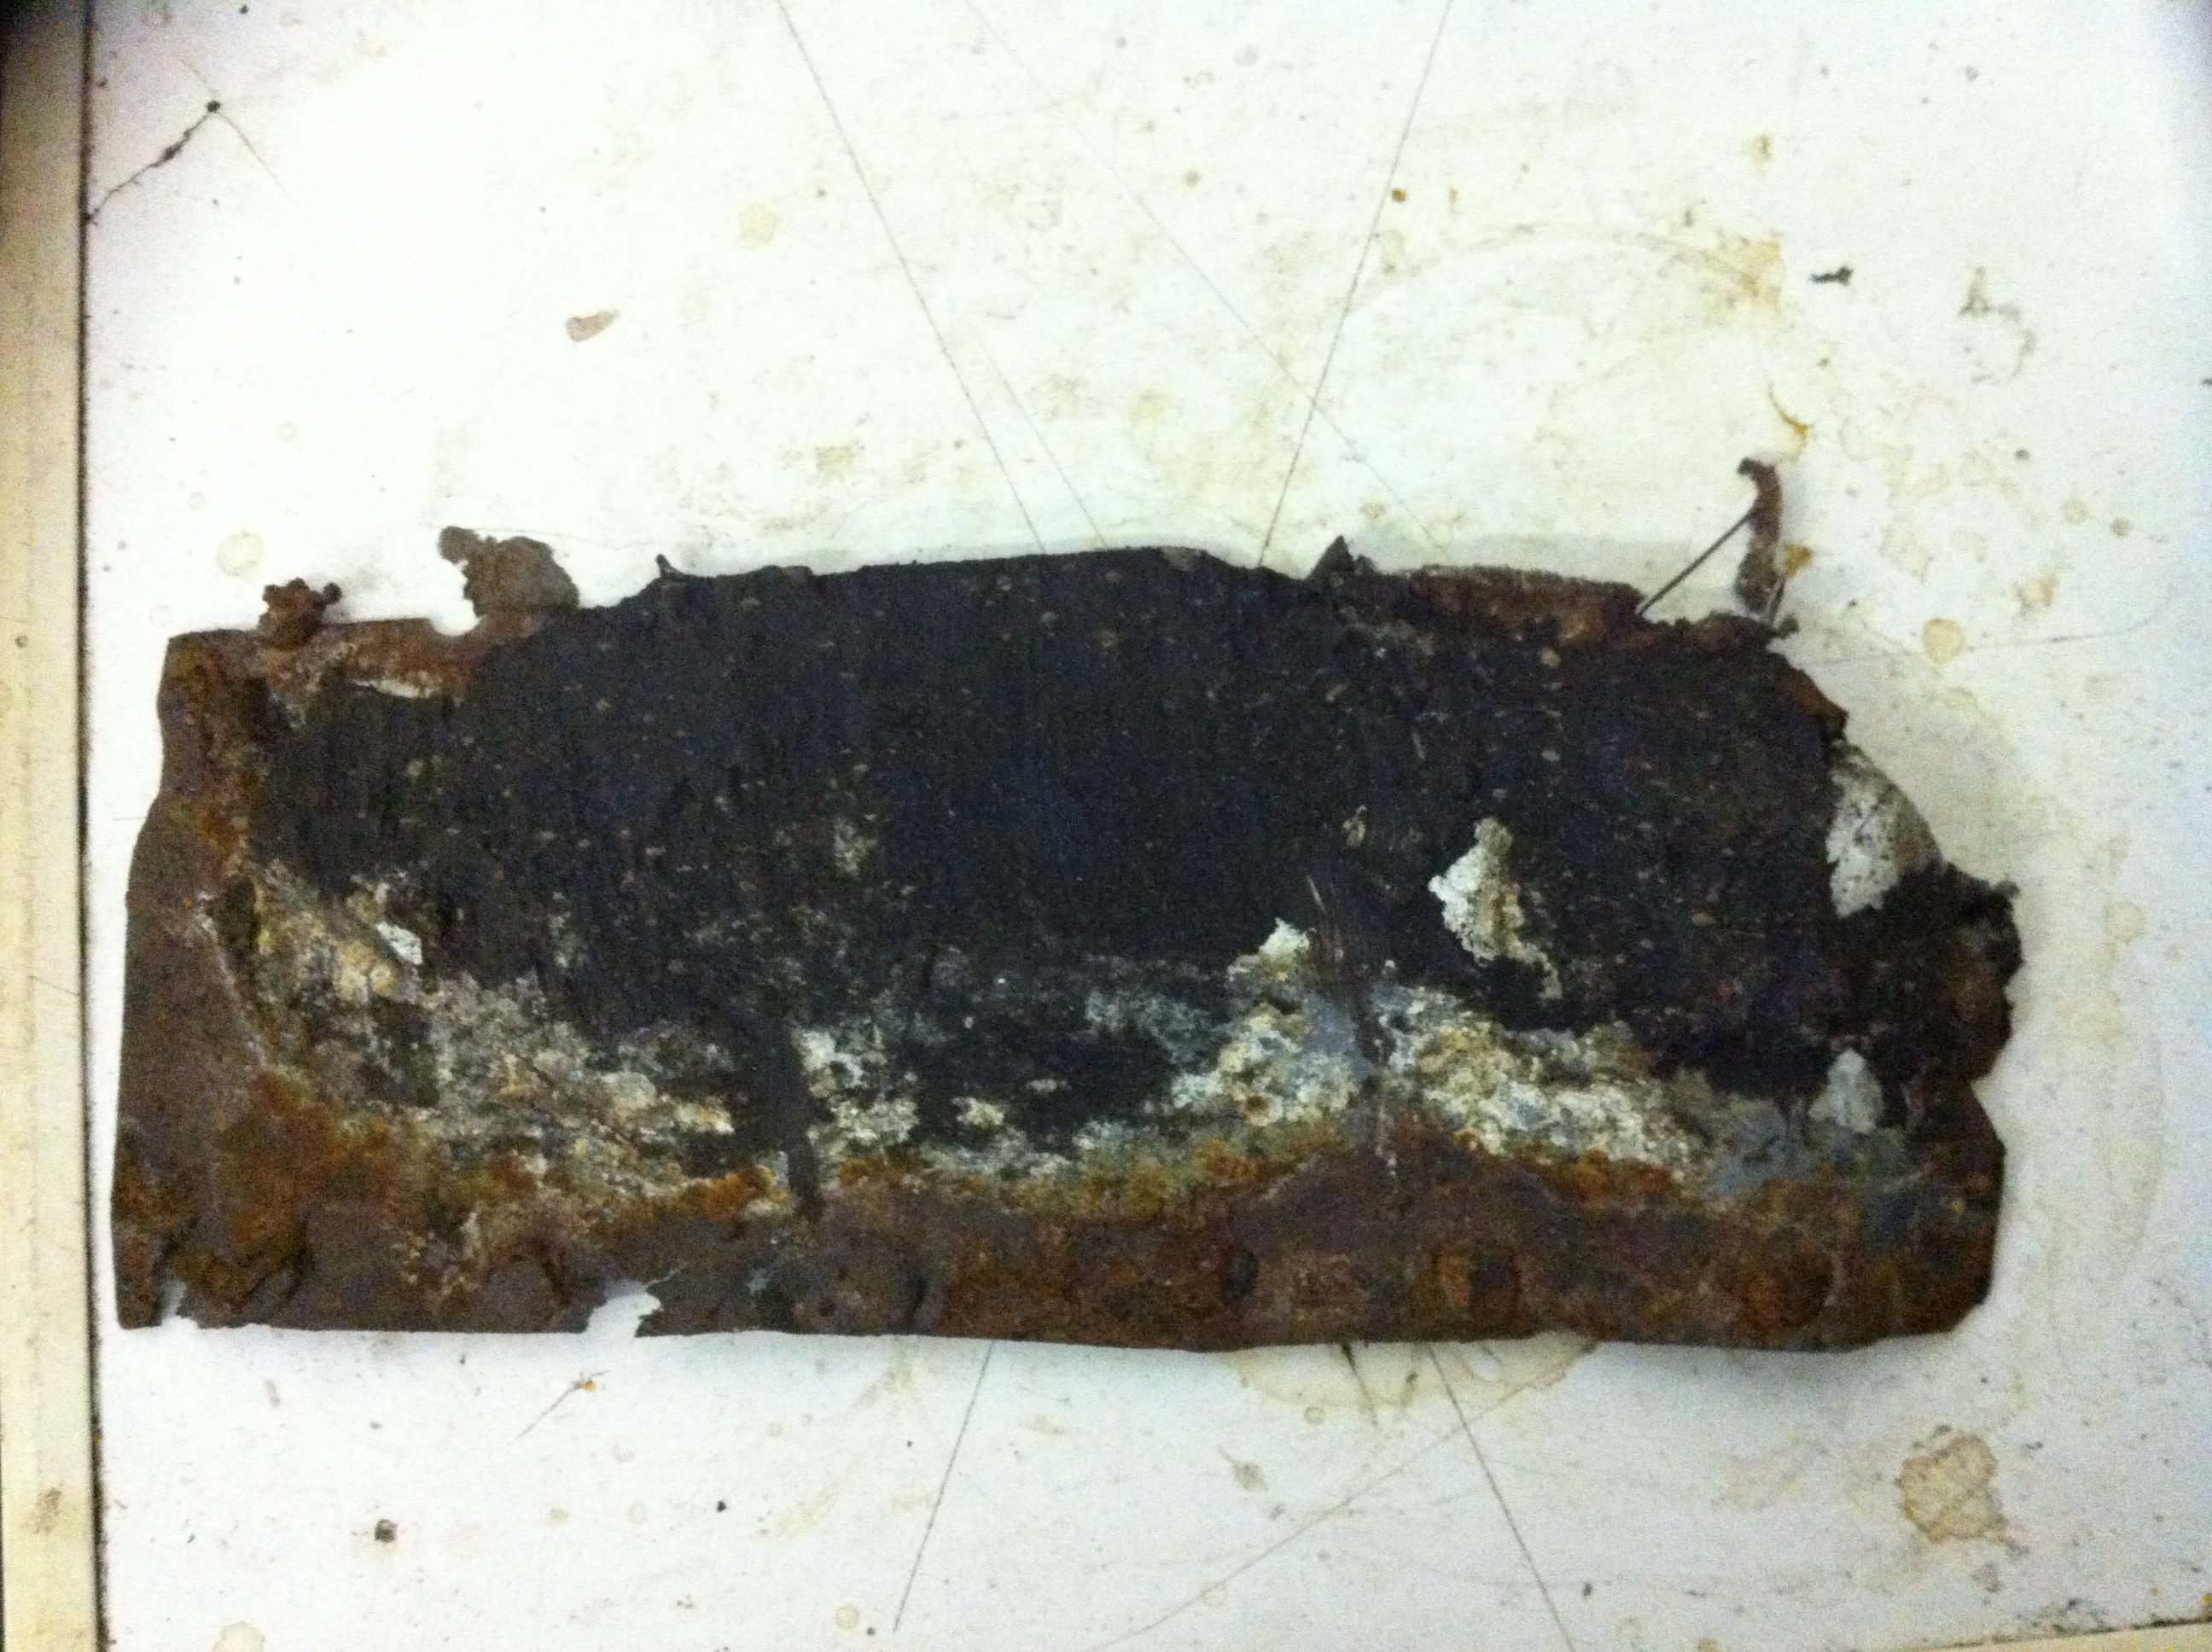
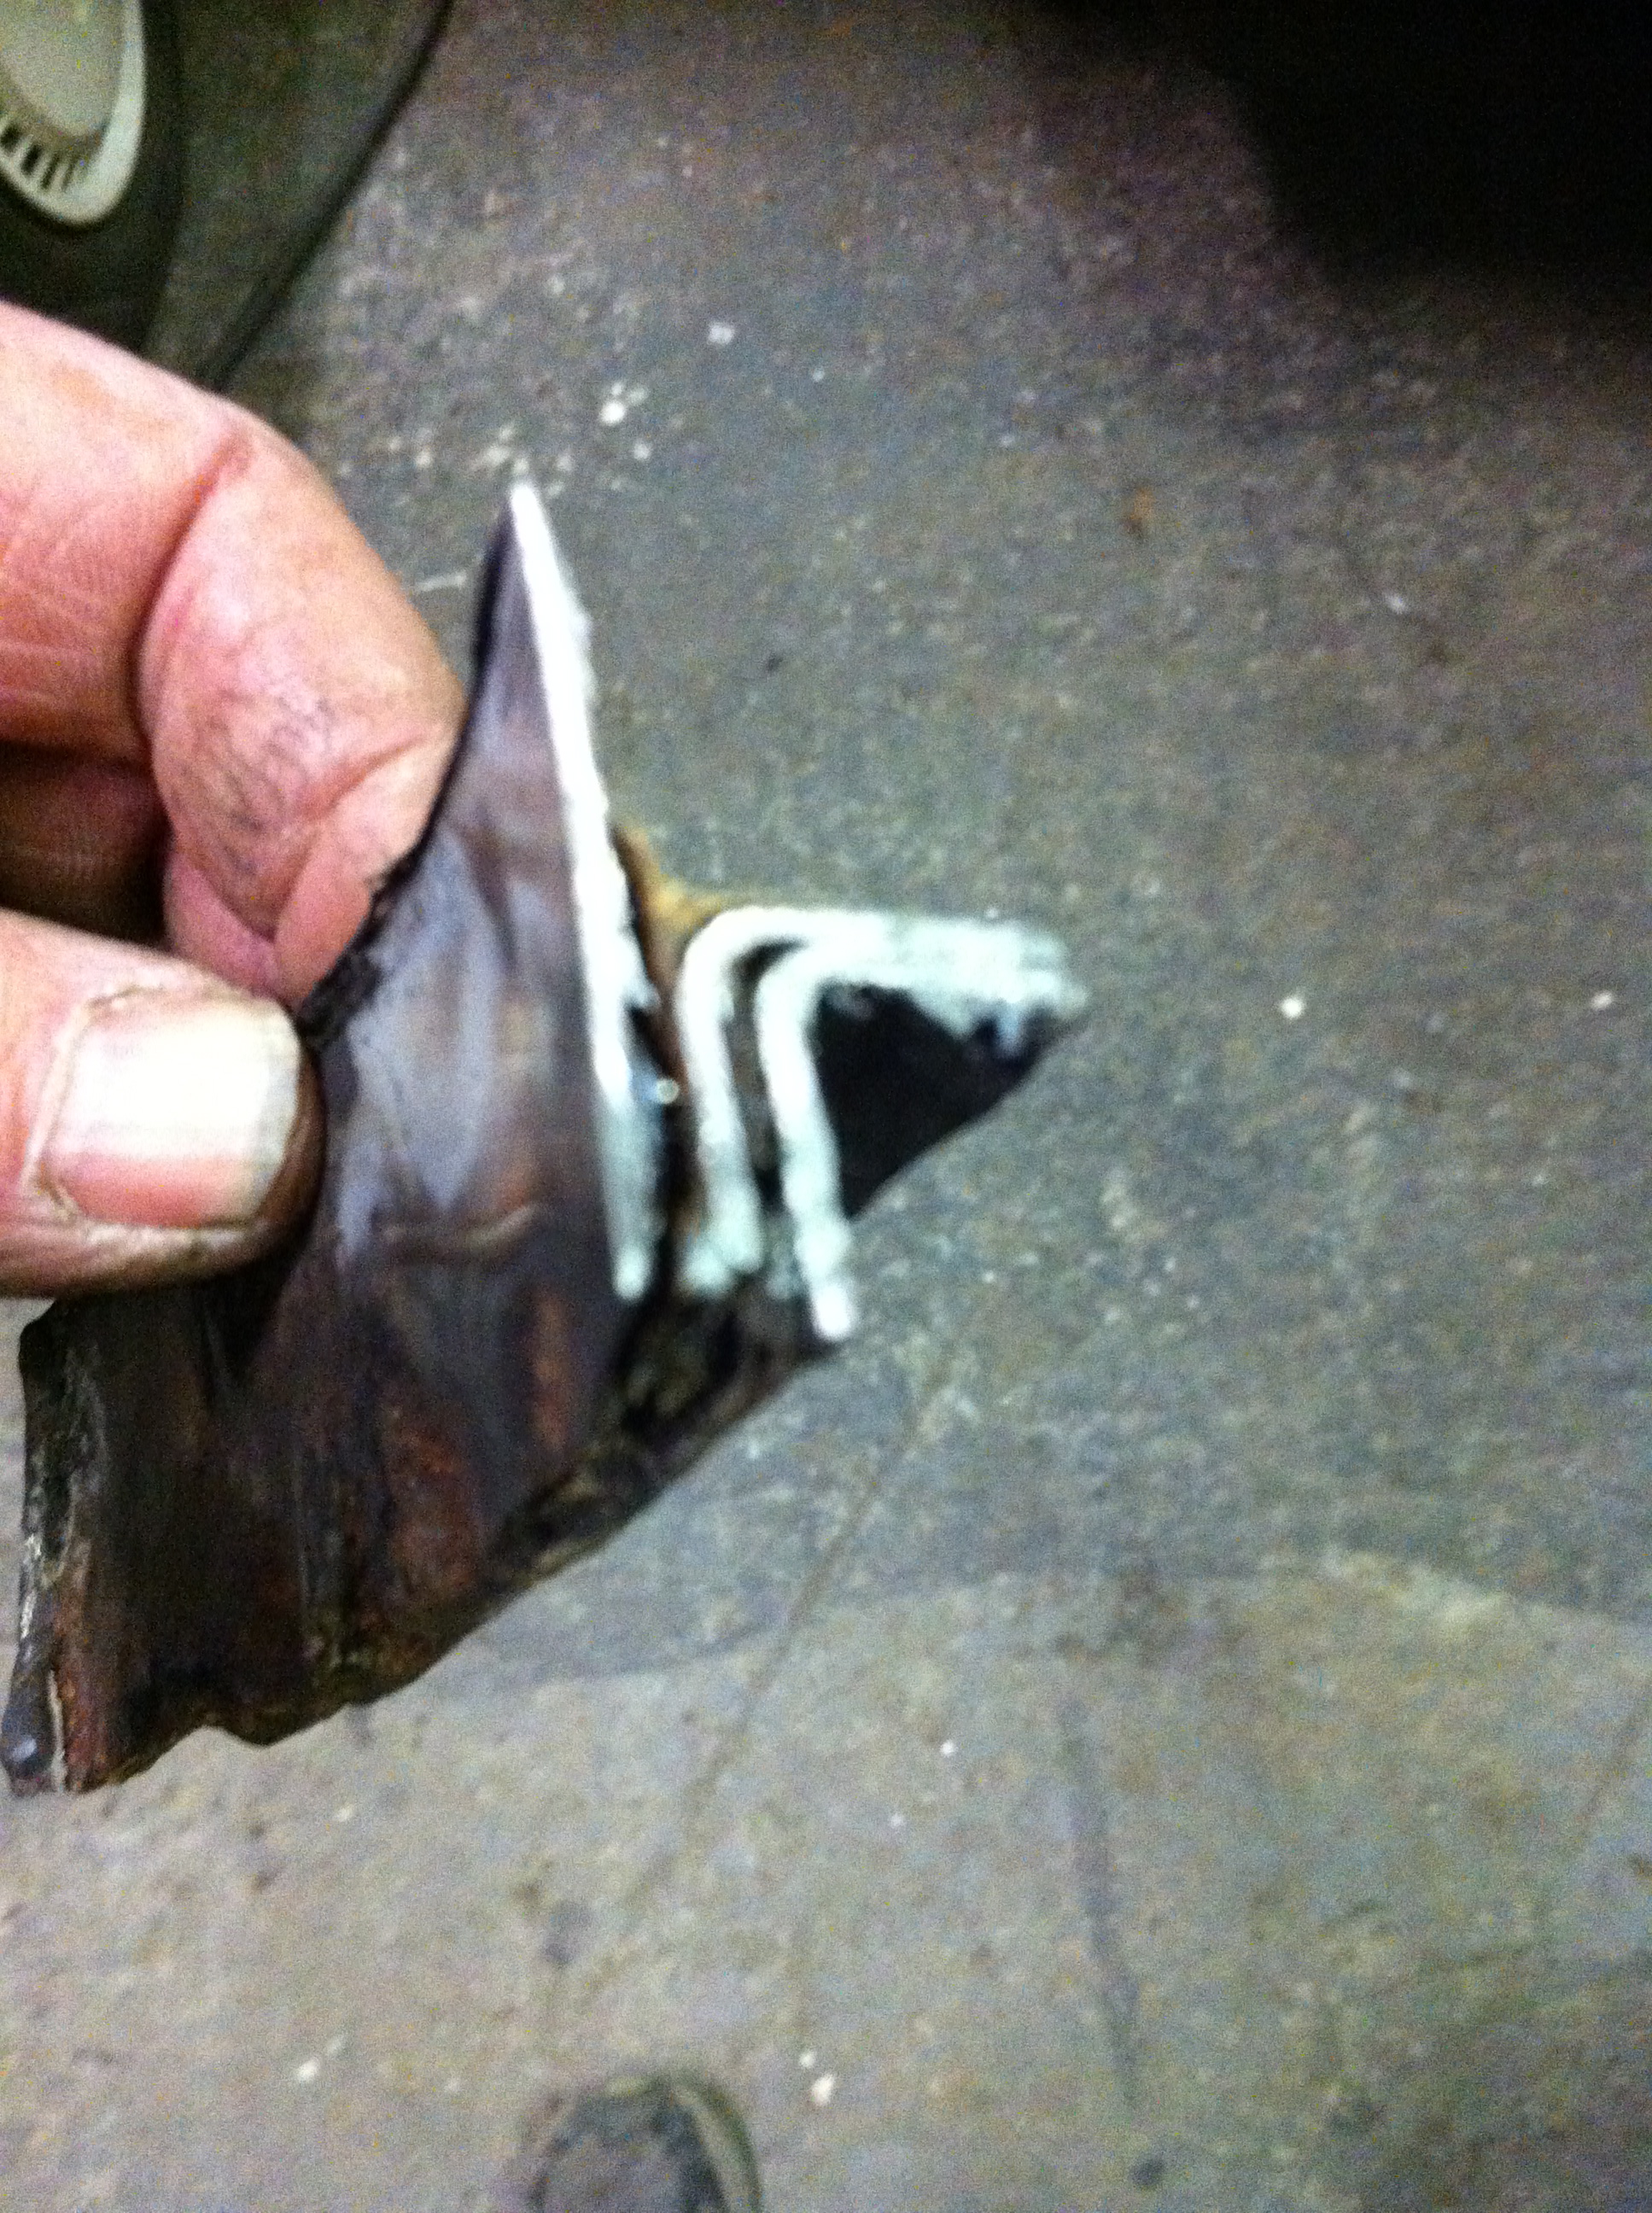
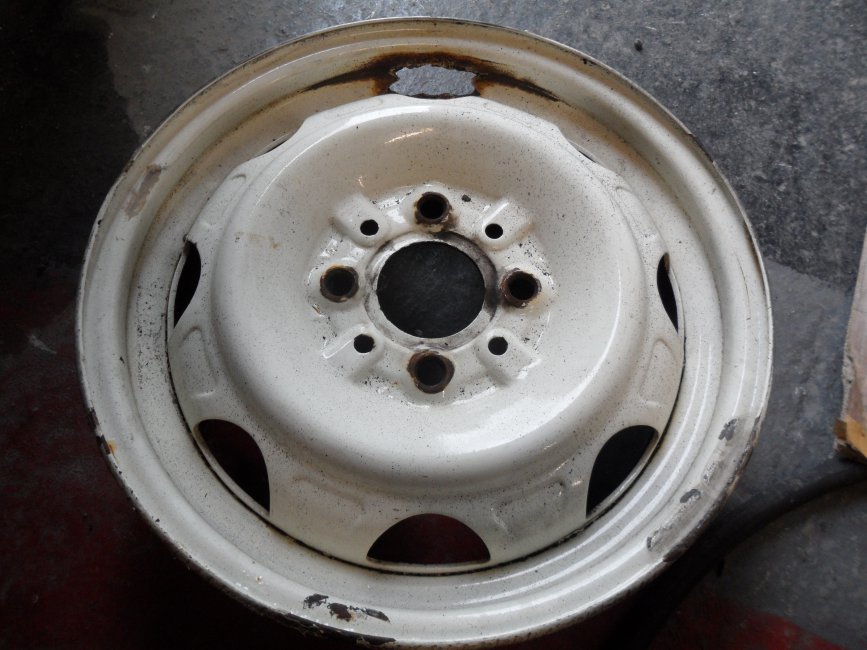
Another surprise was when I changed the tyres. :eek:

It came to me fitted with 165/80/13's, how they didn't foul anything I don't know. The tread was great but the side walls were badly cracked so they all had to be renewed. Gavin went for the same Nankang M&S's I used for Barbara's 4x4 (165/70/13's) as I found they were great around Scotland. The surprise came when I removed one of the old tyres. All wheels had tubes in bye the way......


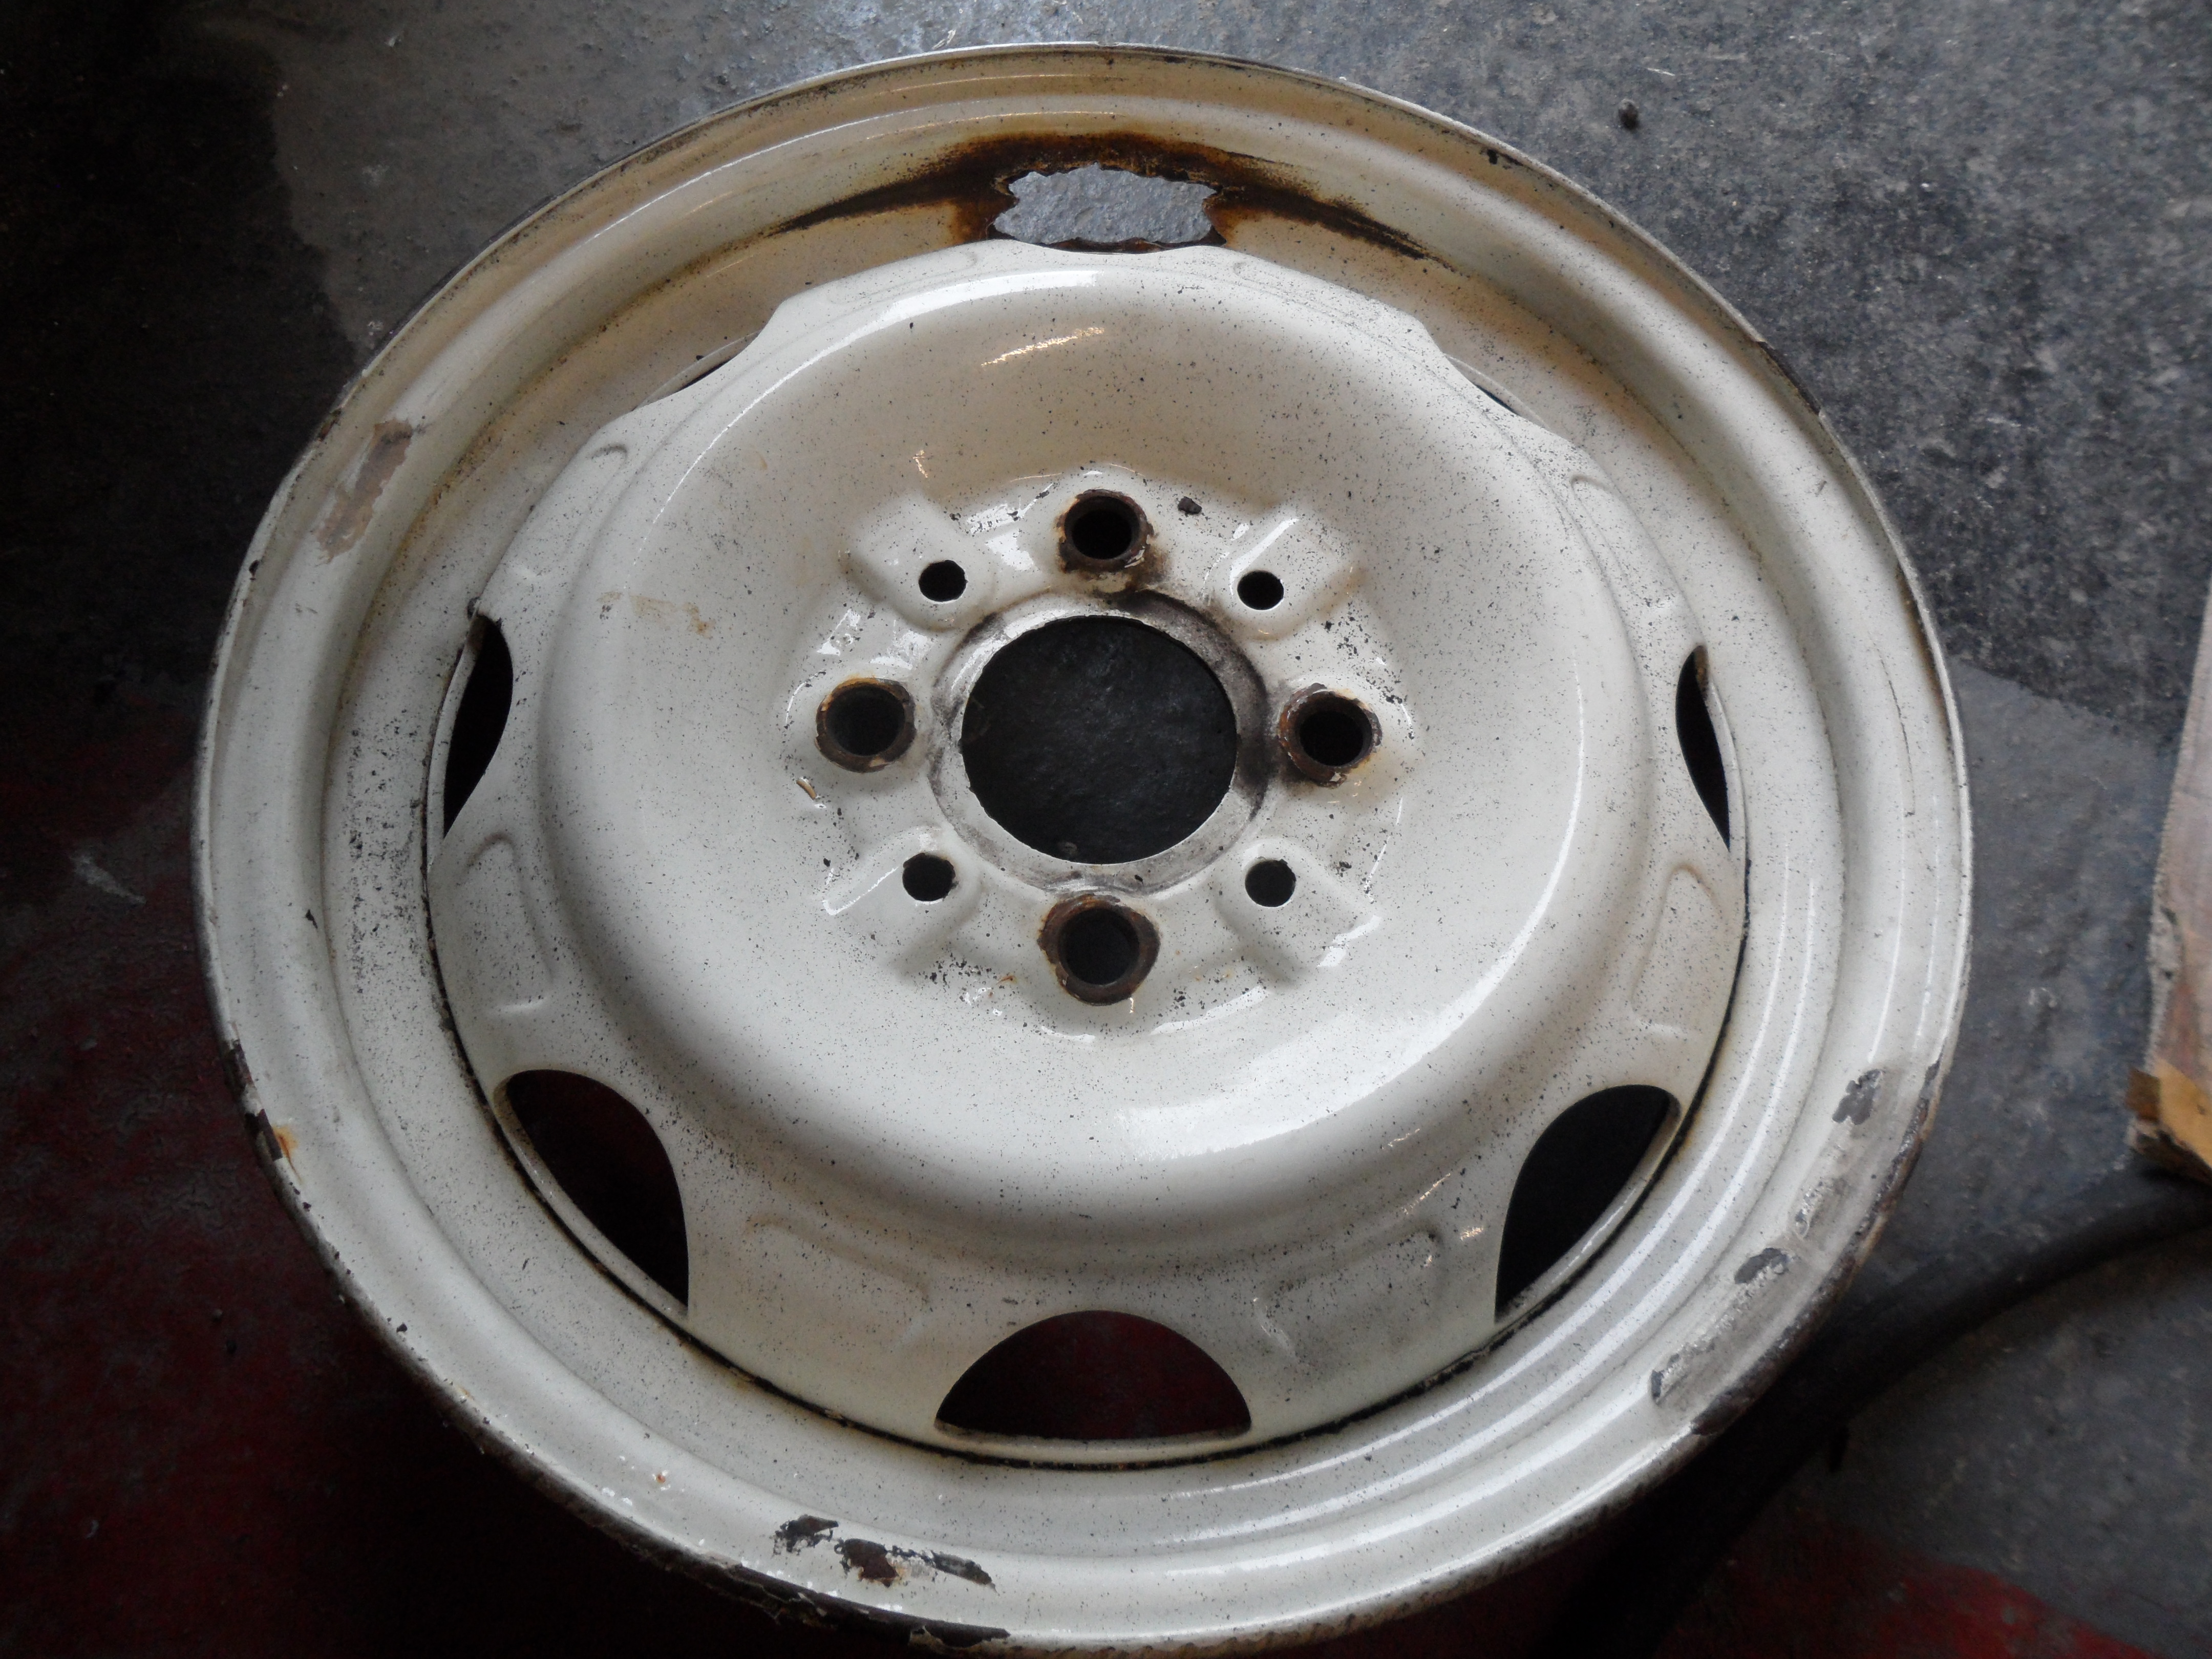
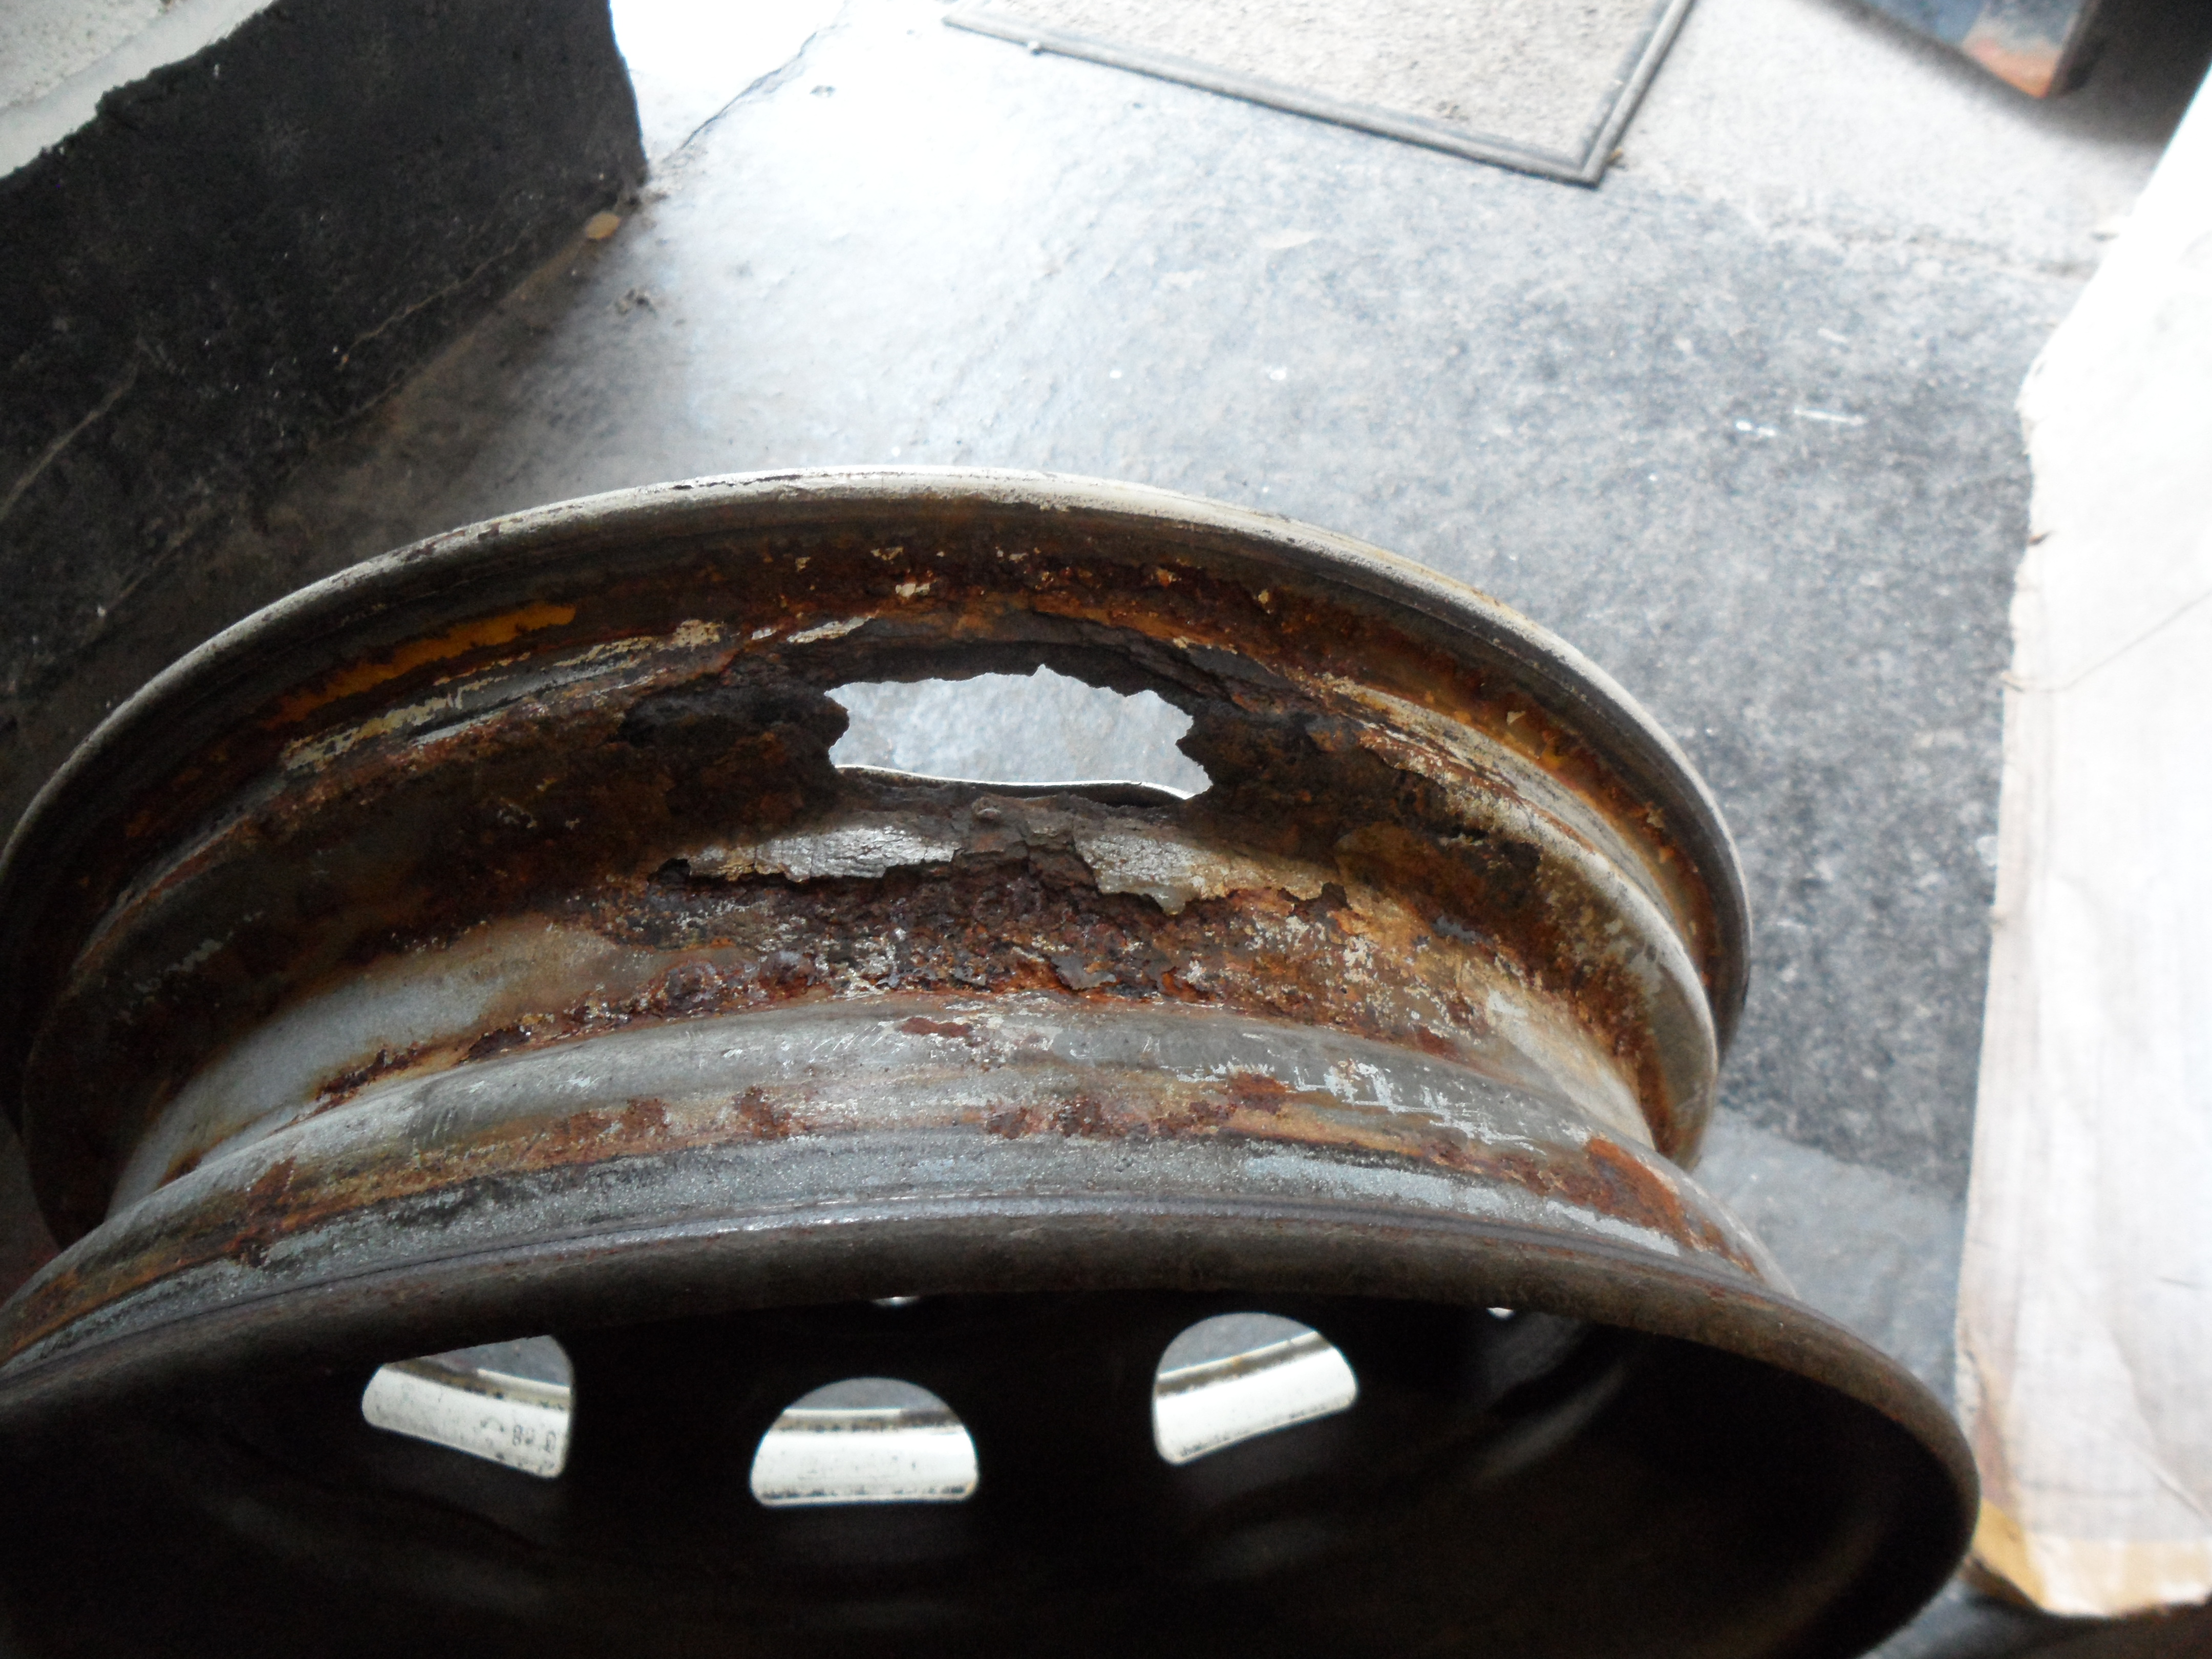
As the valve pulled out of it's hole the wheel just crumbled!!!

The spare had the same problem but on a much much smaller scale. I was able to weld up and remake the hole on that one.

I won't bore you all with the other stuff I've been doing so, Gavin, it's over to you............
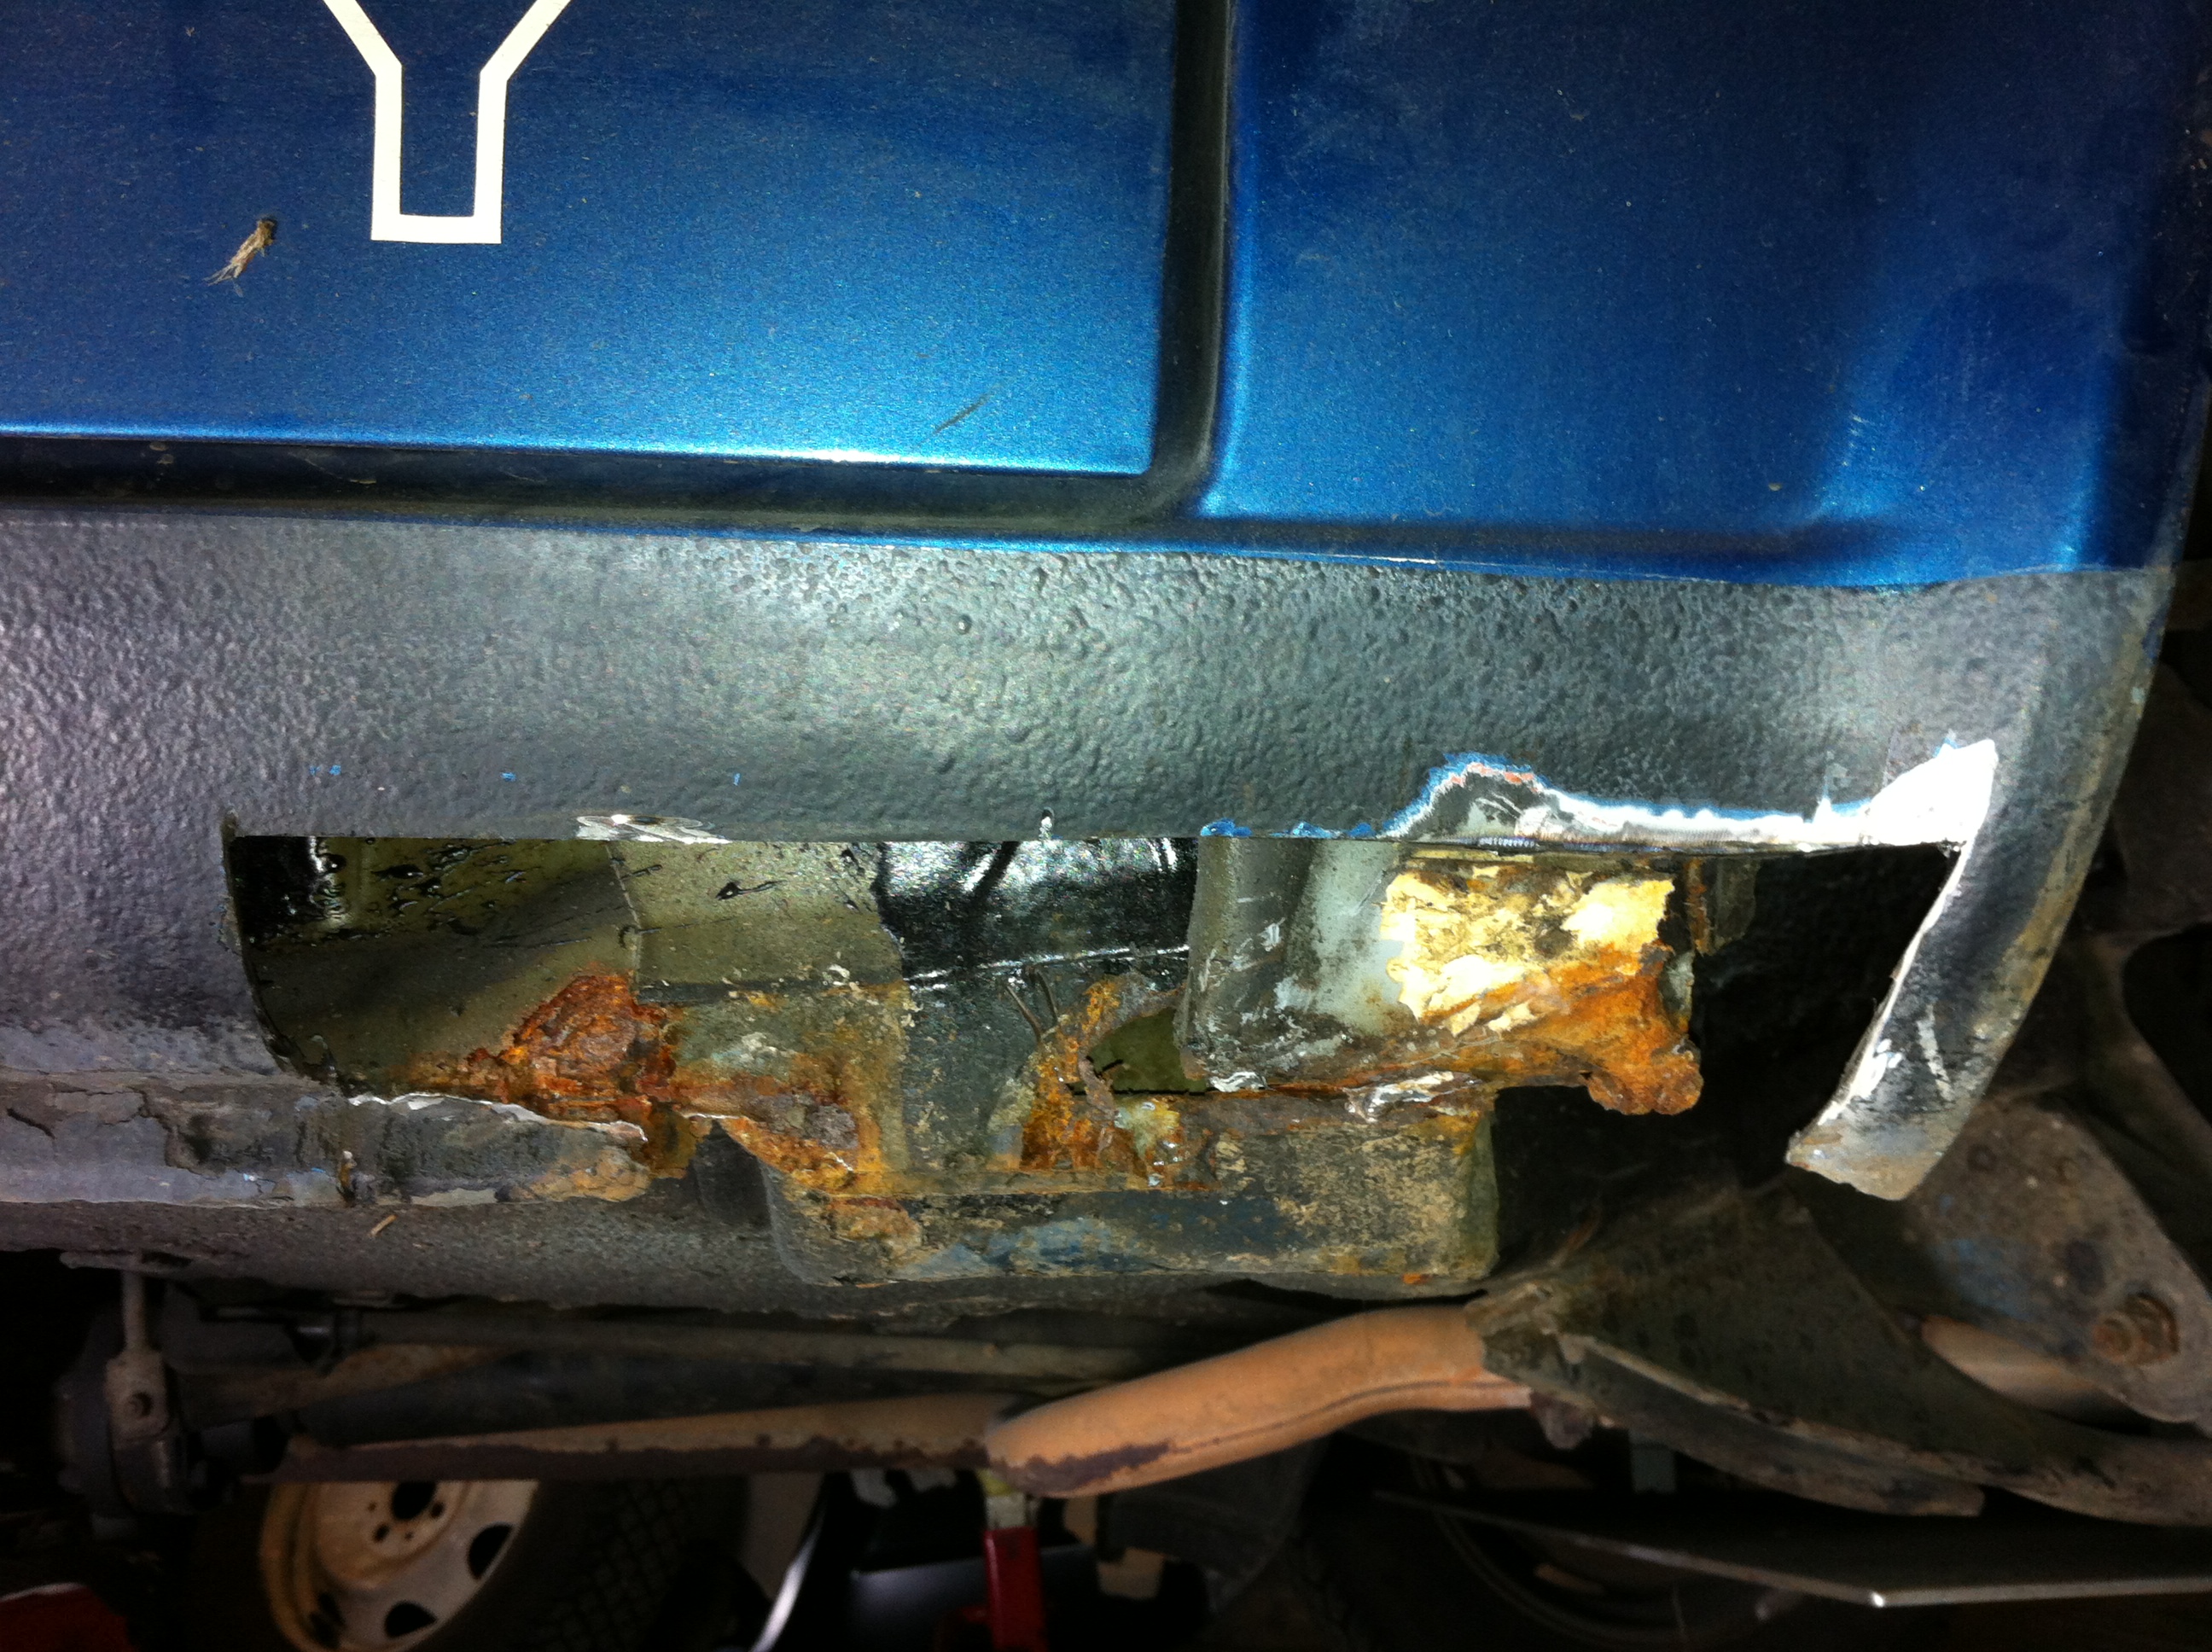
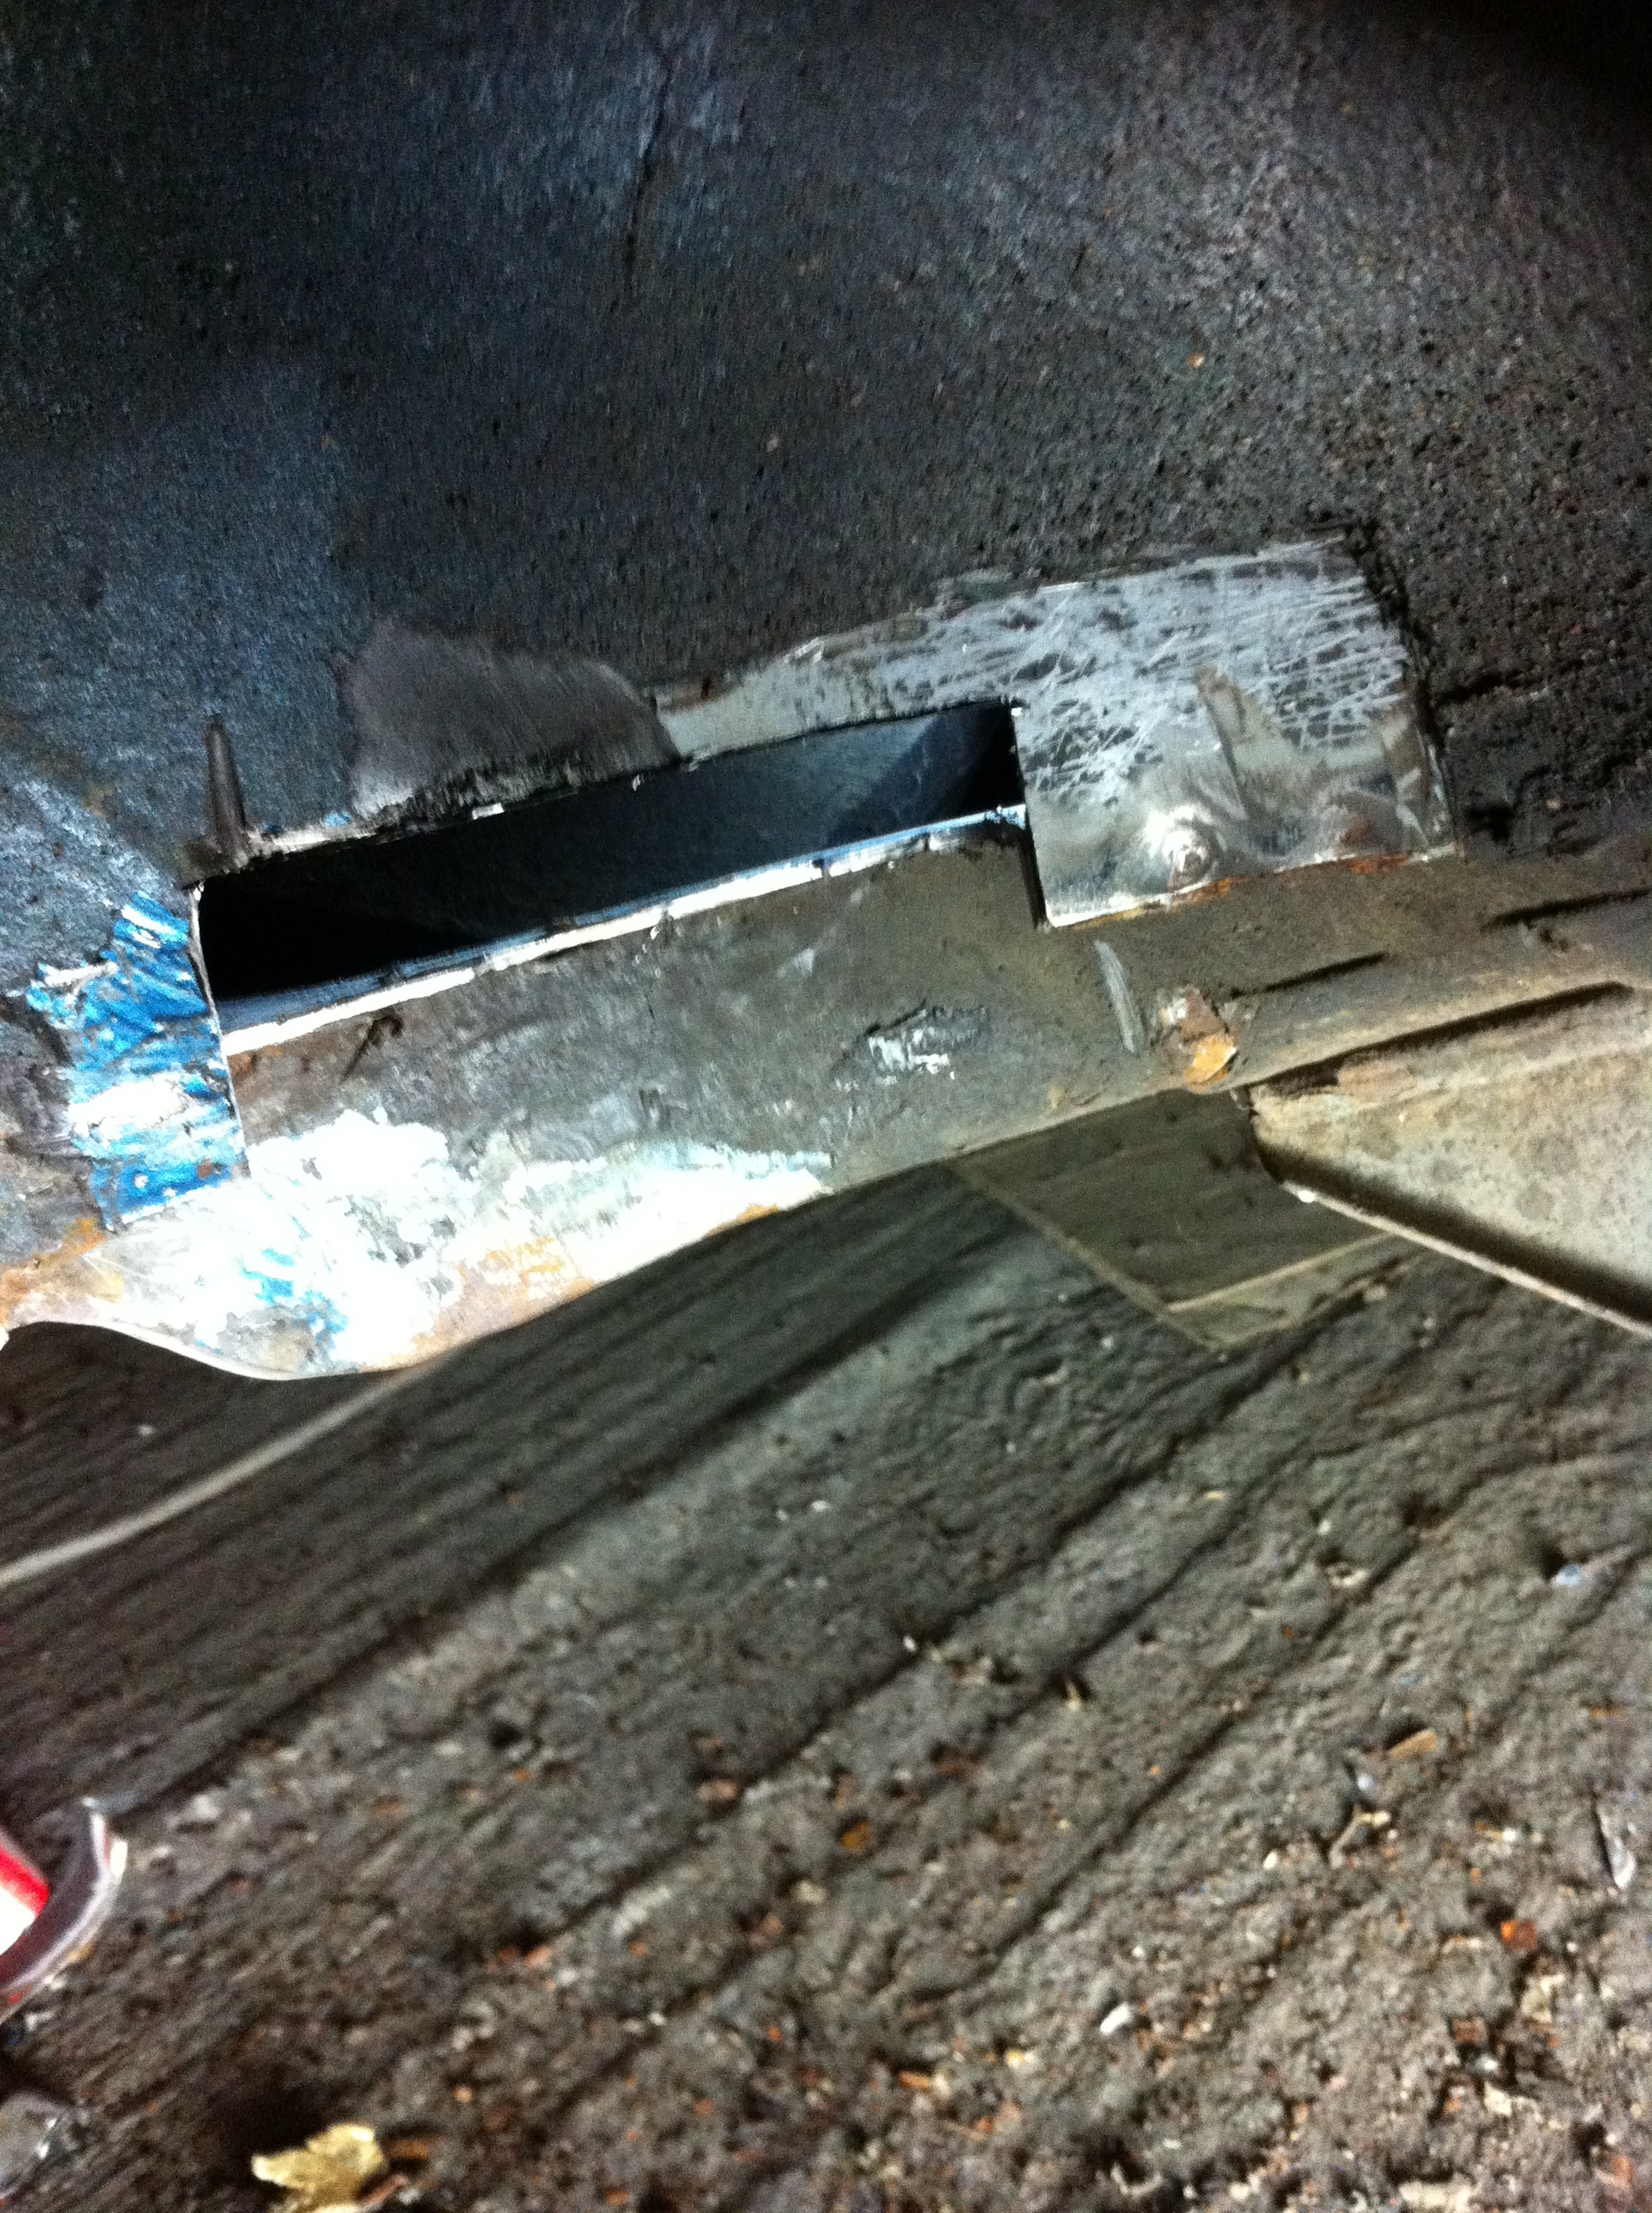
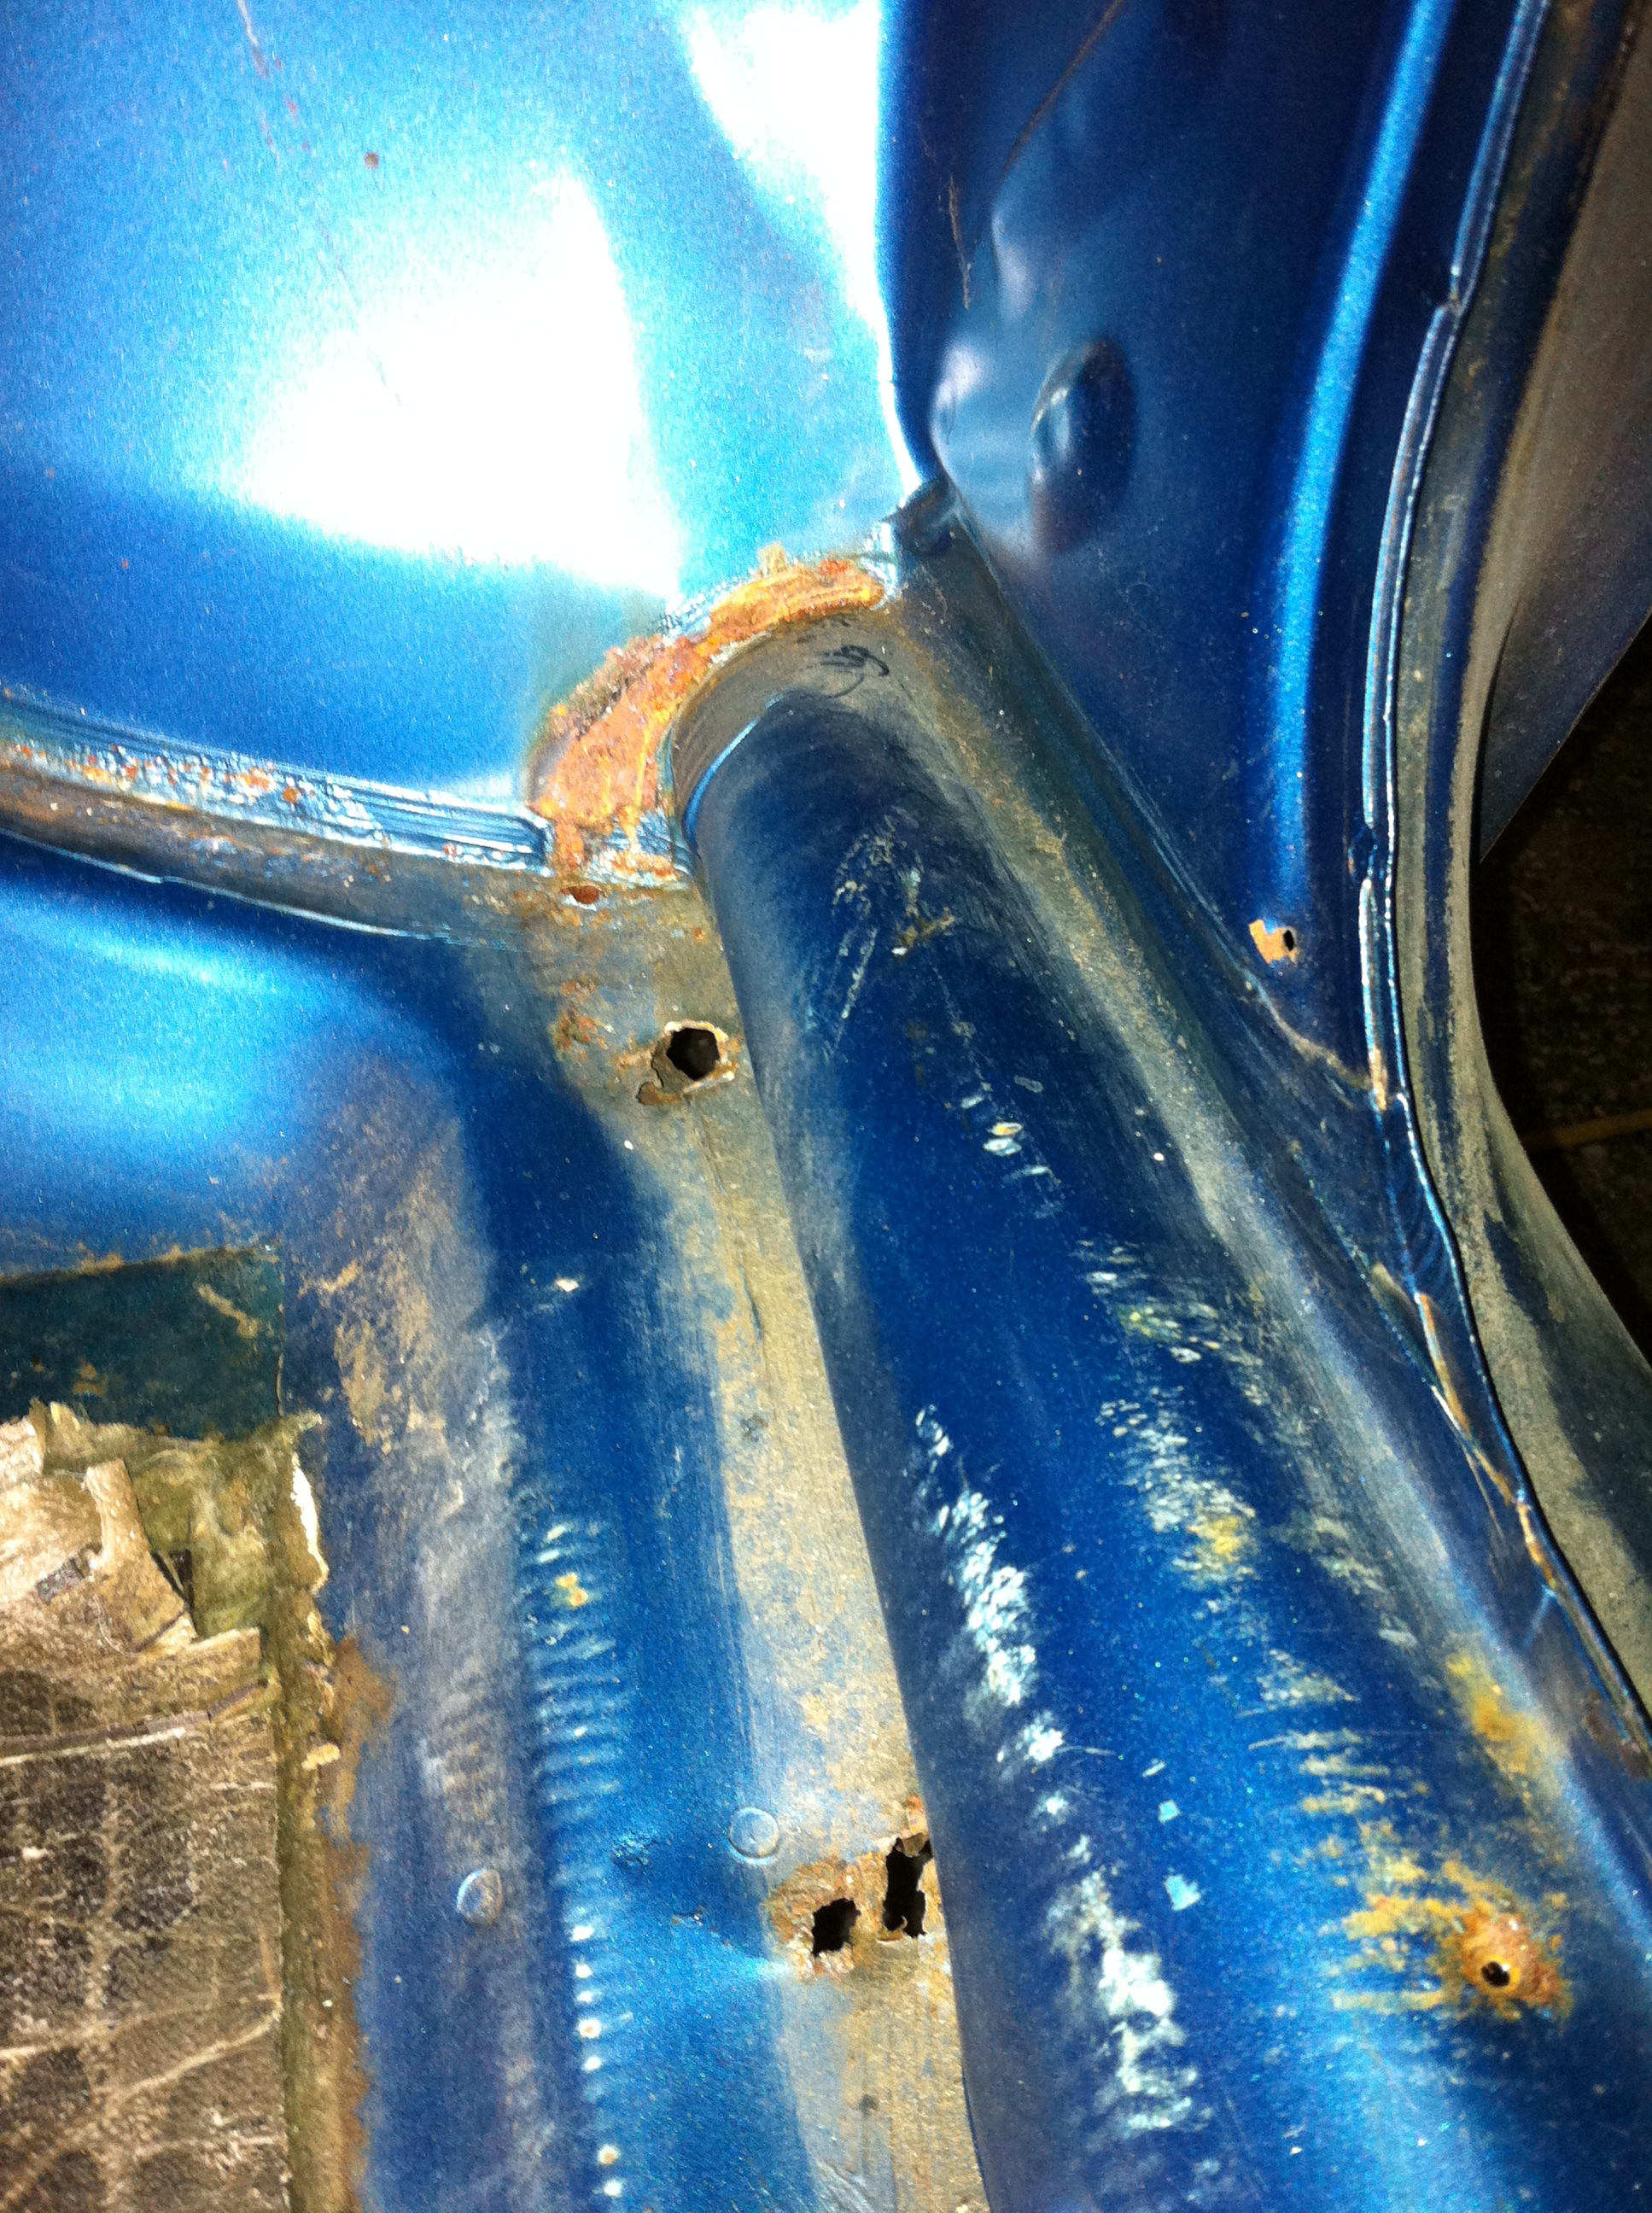
  • Like
Reactions: Palio
Well Howie served us well as a taxi at the NEC, even managed to tow Panto there and back without incident. (y)

Since our return we have now managed to weld up the hole in the exhaust and make a start on the rust issues that will ruin his chances of getting an mot.

The areas we're having to concentrate on are the usual ones at the back of the sills. So far we've managed to repair the n/s sill, not a small job as the extent of the rust was far greater than what was visible. In Howie's defense I must say that there are probably quite a few Pandas running around that are just as bad if not worse.


This is most definitely a keeper for Gavin so we're doing a thorough job which should last a few years. This means cutting away the outer sill to gain access to the rust behind, then cutting away that rust until you're only left with good metal.


There was evidence of a previous repair, a piece of metal that was barely tacked in to place, I guess it must have fooled at least a couple of mot testers though.......


Next we started to put good metal back in, all the time trying to copy the shapes of the original panels. These sections were sprayed with weld through primer before fitting, then zinc primer once in place.


A new outer sill panel was then cut up to finish things off. We used a joddled joint where possible as this is much stronger. in fact the whole area should be much stonger compared to the few spot welds that Fiat try to get away with.


This took up most of last week so this week we'll be doing the same to the other side.

:cry: Poor old Howie :cry:

I know he's in good hands, but we weren't expecting all that - looked pretty good on the outside............ :eek:

That looks worse than the Sisley you sold me Gavin :eek: Want to do a swop :p
As always Vernon and Co. A wonderful job (y)

Not really, but thanks for the offer. Didn't look like that until Vernon started poking holes in him - I can't really say inventing work though, as the dreaded brown stuff is clearly munching away unseen under the "rustproofing"!! :rolleyes:
 
Didn't look like that until Vernon started poking holes in him - I can't really say inventing work though, as the dreaded brown stuff is clearly munching away unseen under the "rustproofing"!! :rolleyes:


Like I need to invent work! :p Mind you if I ever do it will be a little more enjoyable than this, you'll be able to tell coz it will be me doing it, not Alan. ;)
 
Well last week was more of the same but on the other side. There have been a couple of patch repairs here in the past which did the job at the time but they were in the way of the rust behind so had to go along with the rest of the rear section of the outer sill, just as before.........


As you can see in the last pic the central strengthener is rusty at the bottom but the inner sill behind it has rust extending further up, the only way to deal with this thoroughly is to cut away the front panels and do all rectification work from the front, there just isn't the accessability to do it properly from behind.


The outer sill is now in place too but no pics yet. I was able to use a genuine Fiat outer sill panel for this side and it was much better quality than the pattern one on the other side, slightly thicker metal and a more accurate pressing. Unfortunately it's probably the last one I will ever see.

Alan is off for a month now so I'm having to drag myself out of my sick bed, AGAIN! :bang:, to finish this one off (can anyone hear violins? :p).

Today I'm starting on a small rust area at the o/s front of the sill.......


Hopefully I can keep this repair below the stone chip line.
 
Last edited:
Keep well Vern!
When you cut away a sill and find that so much behind it has rotted away to nothing it must be difficult to know what it should look like, unless (knowing you I suppose anything is possible!) that you have another Panda there minus its sills to refer to. How do you do it? Have you got a library of reference pics?


Thanks for the votes of confidence, much appreciated (y).

Yes I do take lots of pictures of what is there, it's usually enough to work out how it should be. In this case Alan and I also have the benefit of working on Bucket which had similar problems.


That's a very thorough job there gents, very impressed indeed :thumbup:

Well both Gavin and myself are of the mind that if this is a keeper, which it is, we should hit the rust hard and get rid of it all in one go so that he can forget about it for a few years rather than having to revisit the areas every year to put on another patch.

There is evidence of the latter approach in the area I have been working on today. When I removed the mudflap and arch liner on the front o/s I saw this............


The bottom corner had been previously repaired. The patch was still solid but behind it was this...........


All three layers of the sill were rotten, the outer two bonded together with expanding foam. I think a small corner of the floor is suspect too.


This is a complicated area where three or four panels meet giving plenty of seams for rust to take hold and grow. You have to take all of it out if you want a lasting job.
There was a little rust further along the sill to so this is the area I have ended up dealing with.........

 
Wow just read this tread and am so impressed by all the work. the wheels are so like mine were when i took them to have new tyres ! ...only proberly mine much worse. i am sure ive got the same delights in rust to sills ect all waiting to be exposed .. to scared to look ! i think theres a fortune to be made for who ever has the ability to turn our 4x4 back into solid cars like this . fantastic work guys !
 
Well progress has been made on this one.

First job after Christmas was to finish the o/s/f sill area..........


Rust was evident in the floor pan where it attached to the aforementioned sill area and wheel arch. It doesn't look like much but once you cut into the affected areas you can see that it hides in body seams.........


It all has to be removed to stop it coming through in the near future so this is what we did.


Then build it all back up before fitting another section of the new outer sill panel to cover it all........


Gavin was complaining of a wet right foot whenever it rained, I think I 've found the cause :rolleyes:.


We knew in advance that this would be the problem so Gavin was able to supply a new scuttle repair panel when he dropped off the car. It's quite an involved area to repair properly (ie weld in new metal not just fill it) as the windscreen and dash assemby have to be moved out of the way.

This is where my pics stop as Alan continued with most of the rest of the work in my absence.

We are now at a stage where all the welding is done and the bodywork in those areas have now been treated and painted. When I get back I will be re fitting the dash, windscreen, wheel arch linings and trims etc. Also the stone chip and cavity wax has to be applied to the sills.
 
:eek:
Well progress has been made on this one.

First job after Christmas was to finish the o/s/f sill area..........


Rust was evident in the floor pan where it attached to the aforementioned sill area and wheel arch. It doesn't look like much but once you cut into the affected areas you can see that it hides in body seams.........


It all has to be removed to stop it coming through in the near future so this is what we did.


Then build it all back up before fitting another section of the new outer sill panel to cover it all........


Gavin was complaining of a wet right foot whenever it rained, I think I 've found the cause :rolleyes:.


We knew in advance that this would be the problem so Gavin was able to supply a new scuttle repair panel when he dropped off the car. It's quite an involved area to repair properly (ie weld in new metal not just fill it) as the windscreen and dash assemby have to be moved out of the way.

This is where my pics stop as Alan continued with most of the rest of the work in my absence.

We are now at a stage where all the welding is done and the bodywork in those areas have now been treated and painted. When I get back I will be re fitting the dash, windscreen, wheel arch linings and trims etc. Also the stone chip and cavity wax has to be applied to the sills.

I can't bring myself to hit the "like" button for this!!! I want a proper " :eek: " button instead, though it would be worn out by now............

:eek: :eek: :eek: :eek: :eek: :eek: :eek: :eek: :eek: :eek: :eek: :eek: :eek: :eek: :eek: :eek: :eek: :eek: :eek: :eek: :eek: :eek: :eek: :eek: :eek: :eek:

Poor old Howie - he looked so good from the outside - I kept telling people that there were bits I was concerned about (they didn't really believe me!), but no-one had imagined it would have so much work underneath - makes you wonder how many other Panda's are like this under decent looking paint/underseal........

Anyway he's in good hands I know, so thanks for the work & the update Vernon. I'm glad we agreed £200 for all the work - or did I dream that? :devil:
 
Last edited:
I'm glad we agreed £200 for all the work - or did I dream that? :devil:

:D Nice try!

Howie is in fact a very good example of a Panda, most others would be worse, some much worse. The reason Howie looks bad is because we've exposed all his rust, this is down to you not wanting half measures for him, all credit to you :worship:.

Should have saved that comment for the day before you get my invoice. :p

I think the sequence was that you decided I didn't want half measures, and I agreed after he was disembowelled? Anyway, it had to be done, so it looks like I'll be cleaning the house for you for a while!! (y)
 
Back
Top