General Franko the 1971 500L

Currently reading:
General Franko the 1971 500L

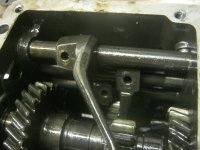
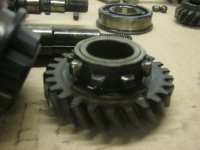
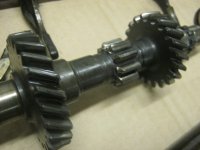
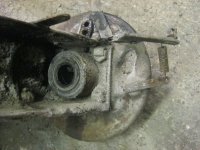
Good explanation on that first motion shaft seal Sean. My memory failed me when trying to help Tony. There is only one way and that's it.
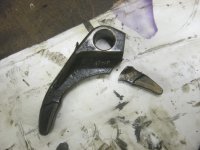
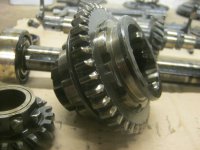
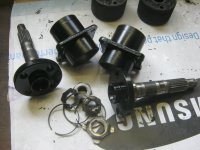
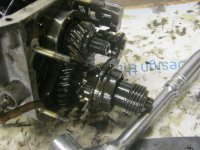
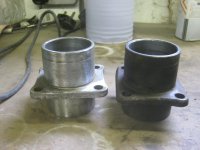
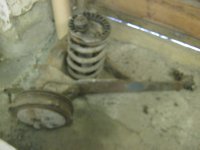
As I said to him, if you replace the bush, check first that it is actually a better fit; the one i got was rubbish.
 
I am just about to bolt mine back together. It is in the utility room on a table at the moment. I think I made the right decision to leave that oil seal alone, judging from both yours and Peter's experience.

I don't know if you have noticed but just in case you haven't. When reassembling you need to make sure the little lines on the diff housing match up. I found it best to reassemble the driveshafts and diff inside a cardboard tube like you find a carpet rolled around. Then cut the tube to just longer than the driveshaft so then you can place the driveshaft inside the tube with the outer bearing housing sitting on top of the tube. So first you assemble the driveshaft with the bevel gear on it and put the side gear and idle pinions in place. This prevents the side gear dropping out. Then on the other driveshaft drop the side gear and thrust rings in whilst the driveshaft is sat on the tube on the vertical and the lower the other drive shaft on to the one in the tube and line up the diff casings and bolt together. If you do it on the horizontal the side gear and bush keeps dropping out.

Tony
 
I must admit Tony, I thought "What the F@C#?", then I got it!
That all makes sense, maybe If I find a cardboard tube I will take a photo to clearly demonstrate your amazing technique.
smile.gif
 
Gearbox continued.
So I removed the front cover, and then the primary shaft fell out of position and the bearings went loose & I couldn't get them back in.
So I decided I will pull it apart
thumb.gif

Unfortunately I have discovered some problems with the box, so I am glad I dismantled it otherwise I would have found these problems after it was all back together
thumb_down.gif

On dismantling the box, one of the selector forks broke!
eek.gif

On close inspection you can see it has been cracked along time and was just waiting to break completely.
Also once removed everything & cleaned off the 40 year old oil which was like treacle, it was clear there is damage to the first gear teeth, primary shaft gears and also the meshing teeth on the 3rd & 4th gears are also heavily worn.


Was this the reason franko was laid to rest?


So now what to do? another gearbox, or replace the damaged gears and selector fork?
confused.gif
 

Attachments

  • IMG_9360.JPG
    IMG_9360.JPG
    1.2 MB · Views: 25
  • IMG_9361.JPG
    IMG_9361.JPG
    982 KB · Views: 24
  • IMG_9364.JPG
    IMG_9364.JPG
    1.3 MB · Views: 29
  • IMG_9365.JPG
    IMG_9365.JPG
    1.3 MB · Views: 23
  • IMG_9366.JPG
    IMG_9366.JPG
    1.2 MB · Views: 28
  • IMG_9349.JPG
    IMG_9349.JPG
    1.3 MB · Views: 31
  • IMG_9368.JPG
    IMG_9368.JPG
    1.4 MB · Views: 24
  • IMG_9367.JPG
    IMG_9367.JPG
    1.3 MB · Views: 28
Hi this is exactly the same problem as I found in my scrap 126 box.
The fork is very difficult to find a spare for........hours hunting around the tinternet.....its the fork for 1/2 and must be a weakness.
Ordered mine but has yet to arrive.
The do repair kits with main shaft and gear sprockets but that selector fork was only found on a French site.
I will forward the site address tomorrow....?
 
After my depressing news with the gearbox, I thought I would cheer myself up with dome good stuff.
Remember the rear swinging arms? they have now been stripped, & blasted, all ready for painting. Hubs have been stripped & painted ready for the new bearings.
Also the front leaf spring has also been sandblasted.
I have also rebuilt the starter motor that was actually in very good condition internally and just needed some cosmetic attention.
 

Attachments

  • IMG_9312.JPG
    IMG_9312.JPG
    1.4 MB · Views: 25
  • IMG_9311.JPG
    IMG_9311.JPG
    414 KB · Views: 27
  • IMG_9309.JPG
    IMG_9309.JPG
    267.2 KB · Views: 24
  • IMG_9301.JPG
    IMG_9301.JPG
    599 KB · Views: 26
  • IMG_6598.JPG
    IMG_6598.JPG
    442.9 KB · Views: 31
  • IMG_9334.JPG
    IMG_9334.JPG
    1.1 MB · Views: 27
  • IMG_9335.JPG
    IMG_9335.JPG
    1.1 MB · Views: 29
  • IMG_9337.JPG
    IMG_9337.JPG
    1.1 MB · Views: 25
  • IMG_9340.JPG
    IMG_9340.JPG
    1 MB · Views: 30
  • IMG_9341.JPG
    IMG_9341.JPG
    945.8 KB · Views: 35
I doubt whether you will find any 500 gearboxes without a degree of wear on the teeth on the centre gear on the main shaft. From what I could work out that it the gear that is used on reverse and 1st gear, so it is always going to pretty worn. I have seen much worse than yours.

Tony
 
I did consider just sharpening the teeth on the 1st gear because as you said Tony, that is just for the reverse where previous owner has slammed it into reverse before it's stationary. Just leaves me to get 3rd & 4th gear. They are available but not cheap. Then it's finding a selector. Might have to put gearbox on hold for a while to see what comes up on eBay before I spend a fortune.
 
It's that centre gear on the main shaft that seems to get the most wear when it engages with reverse as Sean says. Yours looks fine Peter but you have relatively low mileage on your car and was it one elderly gent who owned it before it was put in "storage"? Why does it look like there is a hole in the casing above the reverse selector shaft?
 
You're right Tony. I was just being smug because it's the one of the very few parts of my car that didn't have to dismantle.
The hole:eek:
Is it not normal?
I didn't really clock that. I would have thought it is to equalise pressures, let things swish about. It's not likely to see the light of day again for a fair amount of time now.:)
You will be glad to know that hole is normal. Its just your one looks a rough casting hole where as mine is a bit cleaner shape.
 

Attachments

  • IMG_9345.JPG
    IMG_9345.JPG
    1.4 MB · Views: 29
It's that centre gear on the main shaft that seems to get the most wear when it engages with reverse as Sean says. Yours looks fine Peter but you have relatively low mileage on your car and was it one elderly gent who owned it before it was put in "storage"? Why does it look like there is a hole in the casing above the reverse selector shaft?

The hole is normal- it is necessary to insert the 'slugs' in between the selector shafts to prevent the selection of more than one gear at a time.
On the side there is also another 3 holes under the metal plate which have ball bearings and springs (specifically designed to fly out and hide in the most inaccessible part of your workshop) that are the detents which control gear selection positions.
They really are quite simple to rebuild although generally it is only necessary to replace the first gear and cluster.
 
Back
Top