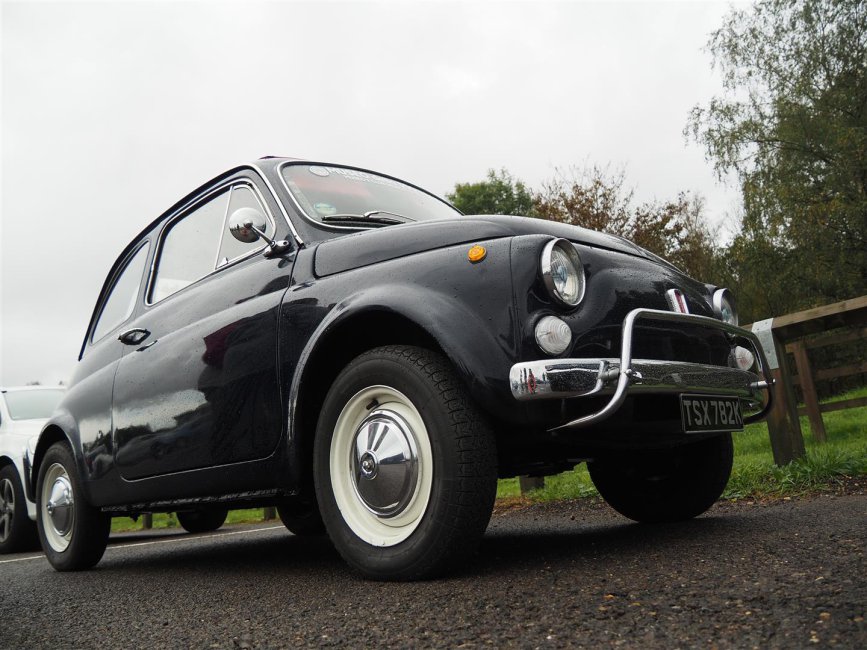
2023-10-29 01 Classic car meeting, Blackbushe Airport (Large).JPG

500 (Classic) Noah's "Ark"ive

LHD 1971 Fiat 500L

Introduction

My 500 arrived with me at the end of August. Summary:

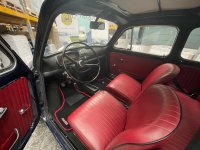
  • LHD 1971 500L in blu scuro with bordeaux upholstery
  • Originally registered in Viterbo, then from 1975 in Rome.
  • Imported to the UK in June 2021
  • Registered by DVLA in the UK as a 1975 on a P plate
The Italian reg document had a date in 1975 based on the Rome reg. Date. VIN, features (e.g. type of badging, instrument cluster) point to a 1971 car. I also have a copy of an ACI inspection giving 01.01.1971 as date of "immatricolazione" and 20.10.1971 as date of first registration.

Based on this info and a letter from the Fiat 500 Enthusiasts Club and details of a list of VIN ranges and manufacture dates, DVLA updated the V5C and issued a 1971 reg :)

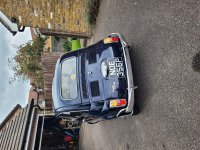
Here's how it looked with the Rome plates, and then with the first UK ones.

Named Noah since Noè is Italian for Noah (original UK reg was NOE)

And with current (1971) plates ;)
  • Like
Reactions: porta and ben
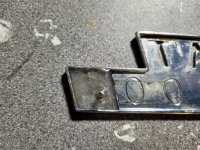
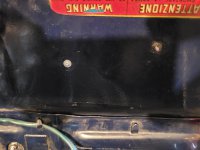
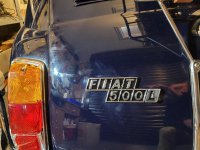
Another small but satisfying job completed. At the Basingstoke Festival of Transport I was showing someone my slightly tatty, oily engine bay and I noticed that the rear FIAT 500L badge only had one peg coming through to the inside of the engine lid. Yesterday I took it off and it had obviously broken ages ago with a previous owner, as there was a strip of double-side foam tape on it. I could have got a brand new plastic replacement, or even a metal copy part, but the old metal badge wasn't in bad shape generally and I prefer to keep what was there before if at all possible.

At the same time, when I had removed the badge I noticed that the recessed black background had rubbed or flaked off in many places, so it looked a bit more like grey than black. I repainted the recesses with 3 generous coats of Humbrol black enamel (been in my garage cupboard for at least 25 years, I would guess...) and immediately after each coat wiped the excess paint off the chrome facing. Once that was dry, I turned it over. The old peg/post had snapped off right at the badge end, so I found a small set screw of the right diameter, cut it to length and set it in place with a pool of epoxy adhesive. Final job - refit it and put the springy clip on the remaining original peg and a nut and washer on the 'new' peg. As belt and braces I also put some double-side foam tape on the back of the badge in case the new peg gives way at some point. Job done!

Here are some pics of the finished item (I forgot to take any 'before' pics - sorry)
 

Attachments

  • 2023-05-17 01 FIAT 500L badge (Large).jpg
    2023-05-17 01 FIAT 500L badge (Large).jpg
    497.6 KB · Views: 56
  • 2023-05-17 02 FIAT 500L badge (Large).jpg
    2023-05-17 02 FIAT 500L badge (Large).jpg
    375.5 KB · Views: 55
  • 2023-05-17 03 FIAT 500L badge (Large).jpg
    2023-05-17 03 FIAT 500L badge (Large).jpg
    163.8 KB · Views: 54
  • 2023-05-17 04 FIAT 500L badge (Large).jpg
    2023-05-17 04 FIAT 500L badge (Large).jpg
    273.4 KB · Views: 59
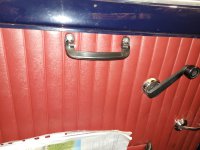
Another thing I've done recently was to fit interior door pulls, as my car had none and the door cards had no holes, although the threaded holes for them were in the door metal.

I went for standard plastic ones, fitted with M5 stainless crosshead countersunk set screws off eBay
 

Attachments

  • door pulls.jpg
    door pulls.jpg
    1.4 MB · Views: 50
I went to the Haslemere Classic Car show, preceded by a 55 mile tour round the nearby countryside. 120 miles or so in total and Noah behaved himself. A nice show with a wide variety of classic vehicles, including 5 500s.

Here's Noah ready to leave home, and at the show.

More photos of the show here: https://photos.app.goo.gl/eEwnuuWMydLgPikX6
 

Attachments

  • 2023-05-28 03 Haslemere Classic Car Show.JPG
    2023-05-28 03 Haslemere Classic Car Show.JPG
    2.4 MB · Views: 52
  • 2023-05-28 02 Fiat 500.JPG
    2023-05-28 02 Fiat 500.JPG
    3.2 MB · Views: 54
  • 2023-05-28 01 Fiat 500.JPG
    2023-05-28 01 Fiat 500.JPG
    3.6 MB · Views: 49
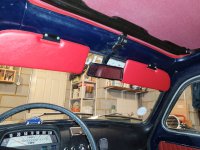
... and new sun visors in red to replace the old black ones which were all rattly - seemed like the foam inside had all perished

Oh so they're not meant to rattle wildly all the time... I might have to invite in some replacements for mine then! haha.

Car's looking great. 120 mile round trip with no issues is the kind of bank holiday weekend we all like!
 
Last Sunday I went to the Classics at the Clubhouse Aircooled Edition in Kingsclere, Hampshire. Great show with, as you might expect, mostly VW Beetles and campers, and Porsches, but also 1 Citroen Dyane and 1 Chevrolet Corvair... and 6 classic Fiat 500s :).

The bad news is that when I went to restart the car, the cable snapped. I had a push up the hill so I could roll down to bump start it :(

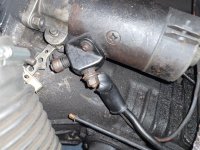
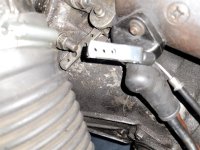
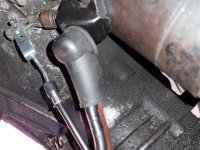
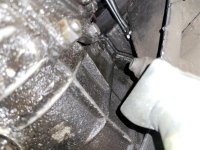
I got a new cable and fitted it yesterday/today but it was a pain in the ar*e - the bolt holding the centre P-clip just inside the tunnel by the engine bay would only come out when I jammed an 8mm ratchet spanner into a metal tube to get a but of leverage. The front bit of the cable wasn't too bad - I poked a bit of wire coat hanger down from the front, bent it round the starter cable and pulled it through. Fixing the rear end of the cable to the trigger lever took ages, because it is no in a place where you can easily see it from above or underneath and to get the split pin into the holes and then split it was 'challenging'. Still, all done now and the pull lever inside the car now only moves a small distance before the starter engages, whereas before it came up almost as much as the choke lever.

I also took the opportunity to renew the rubber starter motor terminal cover - the old one had hardened to almost bakelite consistency and had almost all broken away.
 

Attachments

  • 2023-06-18 07 Classics at the Clubhouse Air-cooled Edition (Large).JPG
    2023-06-18 07 Classics at the Clubhouse Air-cooled Edition (Large).JPG
    353.5 KB · Views: 66
  • 2023-06-18 01 Broken starter cable (Large).jpg
    2023-06-18 01 Broken starter cable (Large).jpg
    351.4 KB · Views: 63
  • 2023-06-22 02 New starter cable (Large).jpg
    2023-06-22 02 New starter cable (Large).jpg
    263.9 KB · Views: 61
  • 2023-06-23 04 New starter cable (Large).jpg
    2023-06-23 04 New starter cable (Large).jpg
    345.5 KB · Views: 62
  • 2023-06-23 05 New starter cable (Large).jpg
    2023-06-23 05 New starter cable (Large).jpg
    264.5 KB · Views: 64
Finally finished the process of refreshing my starter motor. It stopped working - turning but not engaging - a couple of weeks ago. Turned out to be the fork of the actuation lever which had broken off inside the starter body! I took the opportunity to clean it thoroughly and it now works nor smoothly and quietly than before. Details of my trials and tribulations here
 
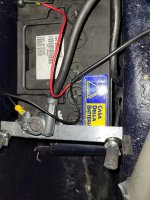
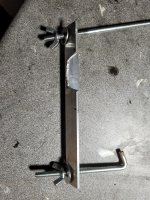
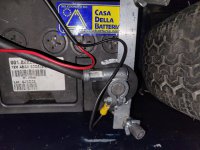
When reattaching the battery leads I noticed that the original0spec battery clamp had slipped off - again! - so I made a new clamp part from angle Ali, cut out to clear the negative terminal and refixed it. The angle profile fits nicely round the top edge of the battery to hold it in place. Ideally I would like it to have been further away from the terminal but I figured that if it does happen to touch the terminal it would just be like an additional earthing point...
 

Attachments

  • 20230806_091108.jpg
    20230806_091108.jpg
    2.8 MB · Views: 42
  • 20230806_085338.jpg
    20230806_085338.jpg
    2.9 MB · Views: 45
When reattaching the battery leads I noticed that the original0spec battery clamp had slipped off - again! - so I made a new clamp part from angle Ali, cut out to clear the negative terminal and refixed it. The angle profile fits nicely round the top edge of the battery to hold it in place. Ideally I would like it to have been further away from the terminal but I figured that if it does happen to touch the terminal it would just be like an additional earthing point...
Try putting a rubber washer over the teminal that will cover the aluminium bar and go under the lead
 
After sorting out the starter motor, I went for a short drive to take advantage of the sunshine! Much quieter starting, and much quieter running since I resealed the exhaust to manifold joints
Try putting a rubber washer over the teminal that will cover the aluminium bar and go under the lead
Good idea! Bathroom plumbing washer put to good alternative use :)
 

Attachments

  • 20230807_083400.jpg
    20230807_083400.jpg
    4.1 MB · Views: 39
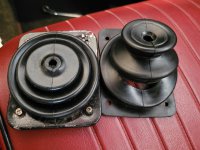
On Thursday I completed the replacement of my gear lever - the old one was bent, meaning that gear changes were a bit sticky because the stick turned as you push it. Unbelievable how much better it is now!

Lots of trouble getting the old gear lever assembly out but I eventually managed it. I also replaced the bellows-type seal at the point where the gear connecting rod exist the rear of the tunnel, and greased up all the moving parts. More info here - as usual, the forum helped out answering questions and making suggestions!
 
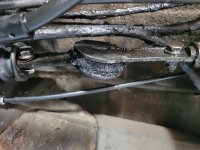
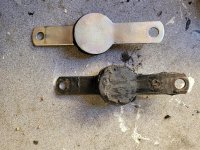
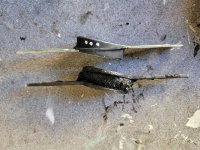
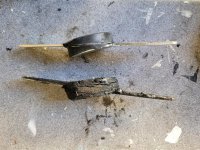
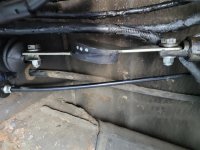
After my other recent work on the gear lever system I thought it was time to change the gear linkage coupling joining the rod that comes out the back of the tunnel and the gear box. Fairly easy task. The rubber on the old one was very soft, cracked in places and perished away. It was easy to twist with two hands to about 25 degrees off centre. The new one can barely be twisted at all. After replacing the bolts I did a quick test at the gear lever end and it feels a lot more positive, though I still need to do a road test to see if any forward/backward adjustment is needed to make sure that all gears can be engaged smoothly.
 

Attachments

  • 2023-08-23 10 Fiat 500 gear linkage coupling (Large).jpg
    2023-08-23 10 Fiat 500 gear linkage coupling (Large).jpg
    226.4 KB · Views: 40
  • 2023-08-23 11 Fiat 500 gear linkage coupling (Large).jpg
    2023-08-23 11 Fiat 500 gear linkage coupling (Large).jpg
    557.4 KB · Views: 40
  • 2023-08-23 12 Fiat 500 gear linkage coupling (Large).jpg
    2023-08-23 12 Fiat 500 gear linkage coupling (Large).jpg
    368.6 KB · Views: 40
  • 2023-08-23 13 Fiat 500 gear linkage coupling (Large).jpg
    2023-08-23 13 Fiat 500 gear linkage coupling (Large).jpg
    407 KB · Views: 39
  • 2023-08-23 14 Fiat 500 gear linkage coupling (Large).jpg
    2023-08-23 14 Fiat 500 gear linkage coupling (Large).jpg
    216.5 KB · Views: 42
After my other recent work on the gear lever system I thought it was time to change the gear linkage coupling joining the rod that comes out the back of the tunnel and the gear box. Fairly easy task. The rubber on the old one was very soft, cracked in places and perished away. It was easy to twist with two hands to about 25 degrees off centre. The new one can barely be twisted at all. After replacing the bolts I did a quick test at the gear lever end and it feels a lot more positive, though I still need to do a road test to see if any forward/backward adjustment is needed to make sure that all gears can be engaged smoothly.

OK, I just came back from a quick drive out and... wow! Before, changing gear meant using a gear lever that was a) a bit vague and b) slightly 'bounced' in resistance to being pushed into any given gear before it went in. Now, the gear lever is nice and firm and it slots into gear much more accurately, though with a slight metallic click which happens on up changes to 2nd, 3rd and 4th... doesn't happen on down changes with double declutching.
 
OK, I just came back from a quick drive out and... wow! Before, changing gear meant using a gear lever that was a) a bit vague and b) slightly 'bounced' in resistance to being pushed into any given gear before it went in. Now, the gear lever is nice and firm and it slots into gear much more accurately, though with a slight metallic click which happens on up changes to 2nd, 3rd and 4th... doesn't happen on down changes with double declutching.
... and today I had the centre tunnel cover off so I tweaked the position of the gear lever cradle thingy (2x13mm bolts on the tunnel side). From a quick run back and forward on the drive, that seems to have 'centred' the gear selection a bit better.
 
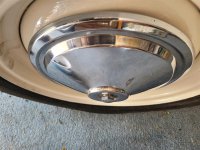
As part of my late summer task to tidy up a few niggles, I replaced the chrome hub cap bolts - the original ones were a bit rounded off and had flaky chrome, so I temporarily (about a year and a half ago...) replaced them with some random brown-coloured bolts. Now looking nice with new bolts (new one from Auto Bella) and spring washers.
 

Attachments

  • 2023-08-25 01 Fiat 500 new hub cap bolt (Large).jpg
    2023-08-25 01 Fiat 500 new hub cap bolt (Large).jpg
    243.8 KB · Views: 38
Last edited:
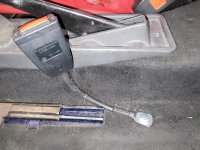
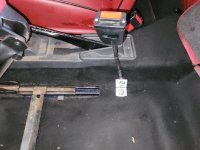
... and finally got round to adding angle brackets (from Belt-Up Safety Products) for the seat belt receivers. Soon after buying the car (August 2021) I fitted some Securon 300/20 inertia reel belts (intended for Land Rover Series models) but the received have straight mounting cables and they never came up properly to buckle up, to the extent that tilting a seat or moving it back and forth would result in the receiver getting stuck between the seat and the tunnel.

The receivers now sit nicely above the sides of the seats and tilting/moving the seats is no longer a pain (all bolts, etc. including the new ones for the angles are the proper 8.8 high tensile ones).
 

Attachments

  • 2023-08-25 02 Fiat 500 old seat belt receiver (Large).jpg
    2023-08-25 02 Fiat 500 old seat belt receiver (Large).jpg
    316.4 KB · Views: 38
  • 2023-08-25 03 Fiat 500 seat belt receiver with angle bracket (Large).jpg
    2023-08-25 03 Fiat 500 seat belt receiver with angle bracket (Large).jpg
    235.5 KB · Views: 38
After thinking my starter was fixed, I found that the car wouldn't start again - see here :(

To copy the last post from that thread:

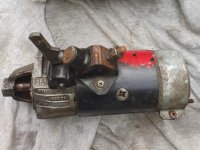
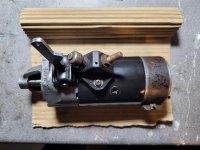
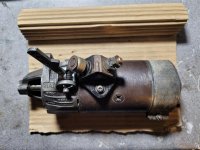
OK, touch wood it now seems to be OK. I got the new brushes and also picked up the secondhand starter from my friend Vittorio which had the same model number (though some parts wee slightly different). Looking again at the problem with the old one, I think it may be something to do with the commutator end getting stuck in position, thus causing the very worn brushes to stick in one place and not turn... maybe not enough washers on the shaft at that end? In any case, I decided to make a new start from the best bits of my old one and the secondhand one donated by Vittorio. I ended up with:

From my original starter:
  • flywheel end piece (which I had already put a new bush in) including brand new Bendix and lever
  • switch which was in much better condition generally, though with the cable post from the donated one
  • commutator end closing ring - better condition
From the donated one:
  • central body - sanded and repainted in black
  • shaft with washers
  • switch cable post
  • actuation lever rubber boot
  • commutator end with brush holders and bush
  • long bolts with insulation - mine had cracked insulation on one bolt
+ some new stainless nylocs and washers.

The secondhand one, the Frankenstein new one and the remaining parts put back together for future spares, etc.:
 

Attachments

  • 2023-09-01 05 Fiat 500 secondhand starter motor (Large).jpg
    2023-09-01 05 Fiat 500 secondhand starter motor (Large).jpg
    235 KB · Views: 33
  • 2023-09-02 01 Fiat 500 refurbished starter motor (Large).jpg
    2023-09-02 01 Fiat 500 refurbished starter motor (Large).jpg
    246.4 KB · Views: 37
  • 2023-09-02 02 Fiat 500 old spare parts starter motor (Large).jpg
    2023-09-02 02 Fiat 500 old spare parts starter motor (Large).jpg
    265.4 KB · Views: 34
Back
Top