Progress Today...
- Removed and cleaned clutch lever and fork
- Welded worn areas of clutch fork
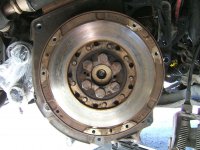
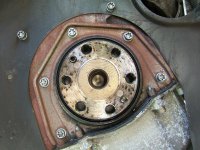
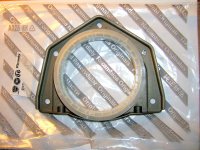
- Installed rear crankshaft oil seal - disaster!
- Rear crankshaft oil seal - disaster averted
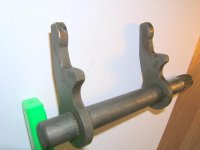
Removed and cleaned clutch lever and fork: I began the day by removing the clutch lever and fork from the bellhousing. They are held in place by a single circlip holding the clutch lever onto the top of the clutch fork shaft. Lacking circlip pliers I removed the circlip using one screwdriver to hold one end of the circlip in place, and another smaller screwdriver to prize off the other end of the circlip. Before detaching the clutch lever from the shaft, I marked their positions relative to each other with a marker pen, but discovered on disassembly that this was unnecessary as a deliberate missing spline on the shaft and clutch lever guarantees correct fitting of the lever relative to the shaft.
After removing the gunk on the lever, shaft, fork arms and bearings I examined these components for wear:
Lever: Shows no noticable signs of wear.
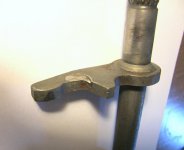
Shaft: Half of the circumference of the top and bottom of the fork shaft, obviously the areas receiving the most force, have been worn smooth.
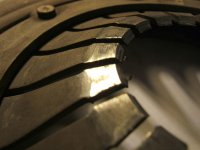
Fork arms: The projections on the end of the two arms which contact and push the release bearing have worn unevenly. On the top surface of the top arm in the elbow nearest the projection on the end, the metal has worn away leaving a pronounced hollow maybe 0.5mm deep.
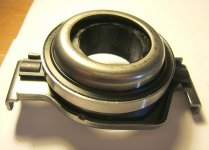
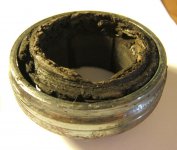
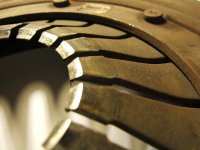
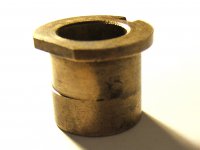
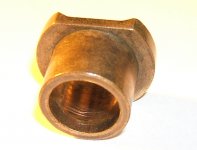
Bearings: Both top and bottom clutch fork bearings appear to be made of a bronze coloured metal. Top bearing: the top half of the outer surface is quite worn with metal worn away around nearly the full circumference of the bearing, to a maximum depth of about 0.5mm (there is a clear 'step' between the worn and unworn areas). Bottom bearing: one half of the outer surface is worn smooth, and one half of the inner surface is worn away to a maximum depth of about 0.25mm. (The replacement bearings, by the way, are made of plastic).
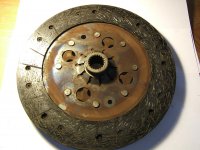
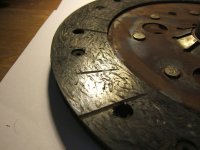
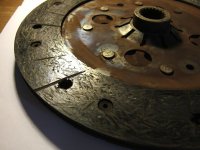
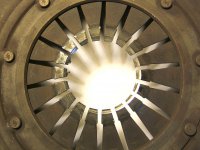
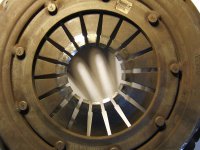
To throw my hat in the ring, I would bet a pound to a penny that uneven wear of the clutch fingers is caused by wear in some or all of the clutch fork components.
Welded worn areas of clutch fork: Because a new clutch fork costs £80 I had the bright idea to get a welder in my local town to weld up/replace the missing metal in the worn areas of the clutch fork. Left the fork with him to pick up later and went home.
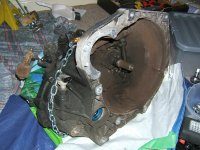
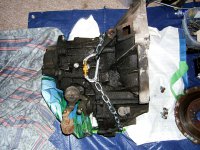
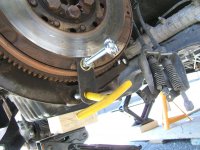
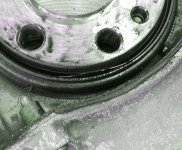
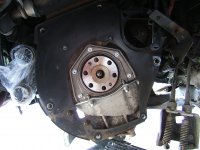
Installed rear crankshaft oil seal - disaster!: After spending a long time yesterday cleaning up the area on the engine that would receive the rear crankshaft oil seal, Today I set about installing the oil seal. First I cleaned the 7 x T40 bolts (2 long, 5 short), then applied thread sealant. The instructions said to leave to cure for 5 mins. I was expecting the compound to solidify, but nothing happened. Thinking that the cold day might be preventing curing I placed the bolts on a radiator for a while, to no effect. I then rang Granville Industries who informed me that the sealant cures in the absence of air, ie. when the parts have been installed. The opposite to my understanding of the confusing instructions. So, I squirted some black RTV on the area of the engine block which receives the base of the oil seal metal plate, installed the oil seal, and began installing and tightening the T40 bolts. Here's where things came unstuck... Because the bolt heads were T40's I assumed that they needed the same torque setting as the clutch cover bolts which are also T40. What I forgot was that the clutch cover bolts are M8 and the oil seal bolts are M6 - much smaller diameter bolts... So I set my torque wrench to 28Nm (the correct setting for the clutch cover bolts) and began tightening. After the bolts were quite tight I couldn't understand why I wasn't getting a click from my wrench. So I dialed the torque setting down to 20Nm and continued. The first bolt I tried produced a healthy click. When I started on the second bolt... the head snapped off leaving the remainder of the bolt fully embedded below the surface of the engine block. OH NOOOOOO! ****** $$$$$$ @@@@@ etc. My heart sank.
I had a quick scan on YouTube for techniques to remove a bolt without a head. Not a chance of me doing any of them. Feeling like a deflated balloon - or should that be baffoon - I travelled into my local town to pick up my welded clutch fork.
I asked several partstealers how to remove a broken bolt and they all said "screw extractors" - but the extractors were all too big, and I had no chance of drilling a large enough hole in the stuck bolt with my low powered battery drill.
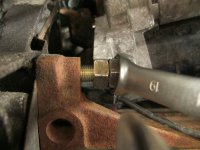
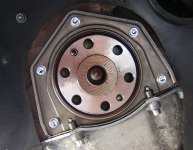
Rear crankshaft oil seal - disaster averted: I picked up my welded clutch fork, and asked the welder if he knew how to extract the bolt. This is what he suggested: get hold of a centre punch and punch a small indentation on one side of the top of the stuck bolt. Place the tip of the centre punch in the indentation, and gently tap in an anticlockwise direction to turn the bolt. So I bought a punch (£4) and went home feeling very sceptical. I tried what he said, deepening the indentation with a tiny 0.5mm HSS drill. Then I began to tap the bolt... unbelievably it worked. The bolt turned very slowly, after a while there was enough of the bolt exposed above the surface for me to grab it with my fingers and undo it the rest of the way by hand. I could not believe it ! I thought I was sunk, then I was back afloat again.
I have bought replacements (M6 5mm Allen key heads) for the M6 T40 bolts in case the original bolts are stretched/weakened (£1 for 5 plus washers).
Regarding the clutch fork - I see no reason why, if the wear is similar to my fork, the fork couldn't be welded up good as new instead of buying a replacement. Unfortunately, after welding, the elbow of the top clutch fork arm is still short of metal offering a jerky ride for the release bearing. What to do? Should I file away more metal, smoothing the indentation, or wait until next Tuesday (it's Easter Weekend) to get the job done properly? Or bite the bullet and spend another £80 on a new clutch fork?
Mark