T3wsndo.jpg

Panda (Classic) Engelbert the H reg Dark Green Sisley Progress Log

Introduction

https://www.fiatforum.com/panda-cla...ng-h-reg-sisley-needs-home-5.html#post3514984

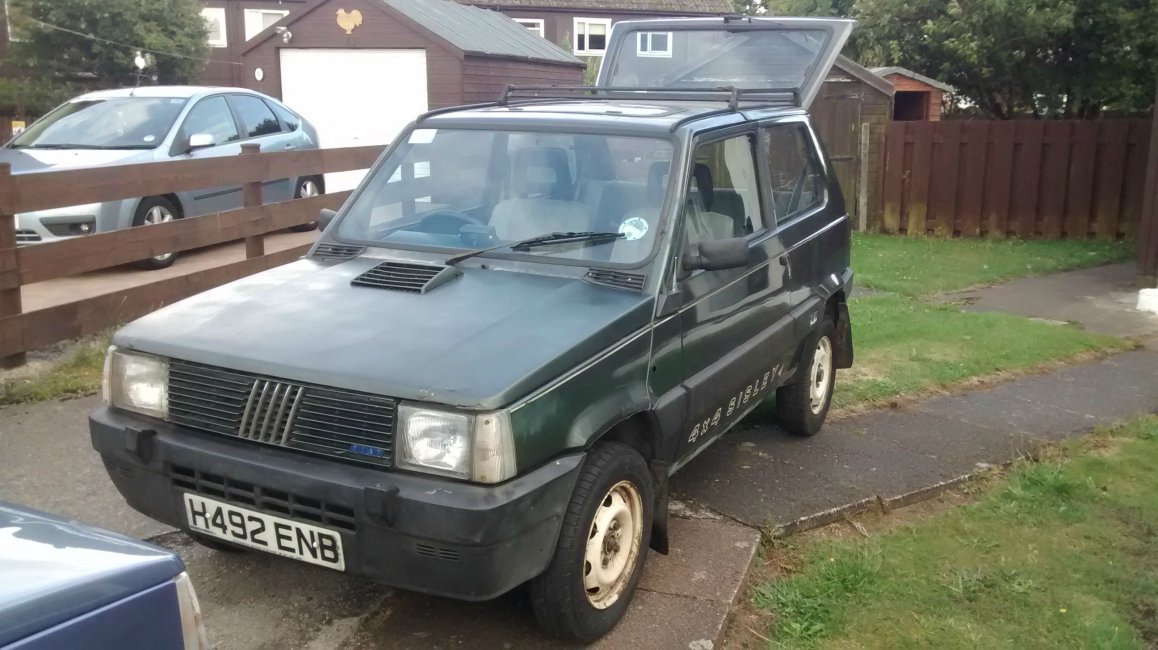
So today I took delivery of the above mentioned Sisley, who I have decided to name Engelbert after the last 3 letters of his numberplate (I always name my cars in this way). All is explained as to how he came to be in my possession from the above thread so I wont touch on that too much here but will say the seller is a very kind lady. She was understanding about the transport frustrations I had and was very honest about the condition of the car.

This first post is going to be very pic heavy by the way!! I got it and did a quick assessment (I will do a more in depth assessment tomorrow) but I am extremely pleased with the condition generally, it obviously will need work but I am prepared for this (hence the project log). It has every sisley extra apart from the grille badge and is missing two centrecaps and the horn push (I am not counting the compass in this), though I wasnt expecting there to be as much of the sisley trim etc as there is! I am in the process of compiling a list of required items too.

Required Items/work required

Side repeater indicator
Front part of Airbox assembly (or new clips)
two sisley centrecaps
Front grille sisley badge
Instrument surround (See photo)
possibly bonnet vent (there is a small crack in this but I actually dont think it matters too much)
Possibly new bonnet or just work to the bonnet
Rubber headlamp rear cover
Rubber boot seal
Refurbish wheels and new tyres
Sisley Horn Push
New Battery
Aerial
Wiring repairs (wiring next to battery at least)
Repair front seat fabric
Under bonnet screwdriver
wirebrushing and undersealing, possible welding at points
Front bullbars
rear bullbars Palio I havent forgotten about this, but will wait till funds are more available if thats cool?
Obviously a stripdown and recommissioning generally of the engine is required as it hasnt run in 4-5 years


The general condition is pretty good indeed, though some rust curing and prevention will obviously have to be done. But I gave it a quick clean and it has come up very nicely, I am struggling for things to say about it as I have so much swimming in my head at the moment with it, im overwhelmed, need to sleep to digest it all! I will let the pictures and videos do the talking (still need to upload videos)
you'd have some job trying to kill a panda starter. with fallouts engine not running, all i have been using to move the thing is starter motor power >_<

i 110% guarantee that you doing that has not even took a shaving of the life expectancy of the starter..
and if it is broken, ill just send you one up :D
 
Last edited:
you'd have some job trying to kill a panda starter. with fallouts engine not running, all i have been using to move the thing is starter motor power >_<

i 110% guarantee that you doing that has not even took a shaving of the life expectancy of the starter..
and if it is broken, ill just send you one up :D

Thanks, I may well hold you to that John :ROFLMAO:

So tomorrows plan is to clean the connectors and try the whole thing again
 
it will be fine man.

im just going to paste what i replied to your pm here for others to see.. they can also tell me if i did anything wrong :)

starter is simple easy stuff.. it has a big fat wire going to it that is a constant live, if you make a small loop cable and touch one end on a live and the other on the small spade the starter will engage and spin the engine over.

with getting the engine to run, now it can be a little tricky on these. my advice is to look down the carb and quickly put it to full throttle.. you should see a little jet of fuel shoot down into it when you do that..
it is below the choke flap so you have to look down it.

so seeing that, you know you have fuel going in. next up is the white wire that goes into the front on the carb. disconnect this from the carb (making sure it wont ground onto the engine as this is an ignition live) and put the ignition on.. then tap the wire back on the connector. if you hear it ticking as you tap the wire on it, it means the fuel cut off valve is working. ( this can fail, in which case all you do is unbolt it from the carb and snip the end of it off using some strong pliers. its only use is to stop over run if you get high carbon deposits in the cylinders)

ok now its onto the sparking system. joy.
this can be a pain in the arse but stay with it..
first thing to check will be that all the leads and cables are connected making a good connection. so start off on the low voltage side first on the primary coil input. you should have 2 plugs one has 2 female spade connectors in it with blue wires (these are ignition lives, though one just feeds an ignition live to the ignition module) and the other plug has a brown wire with female spade connector which is an earth, the coil earths through the ignition module.
make sure that these connectors are clean and fit on the spade terminals tightly.

inspect the ignition module that sits on the side of the distributor. check its plug is all fine and not corroded.

now have a look at the high voltage side of things.

the secondary coil on the ignition coil is the high voltage side of it. this exits the coil through the main HT lead, going to the distributor cap.

while we are there, check the distributor cap out.. see if it has any cracks, pop the thing off and check the rotor arm. if its worn then it could do with replacing, same goes for the little pick up points in the distributor cap.

theres no "points" on this distributor.. the ignition module takes care of that.

right, stick all that back together and inspect the HT leads going to the spark plugs. make sure that they are in the correct firing order (1342). there will be a number on the distributor telling you what cylinder each output goes to.

one thing you might want to do is check for a spark.. you can do this by undoing the Coil HT lead from the distributor and sticking your finger in it while someone cranks the car over:devil:.. no dont do that,, its not nice.. what i would do is stick a screw driver in it, wedge it near something that is a good earth like the cam shaft cover and then while cranking the engine over look for a spark between the cam shaft cover and screw driver. you need to get it close so it can arc over, if the distance is too much you will get no spark.

after all that has been done.. give it a little wd-40 down the carb and turn the key.. see if it runs :D

good luck!
 
So after this evenings work its a mixed bag of results.

Good bits of my work tonight:

Took apart the connections for the starter motor, scraped, wire brushed and copper greased each component (including the threads etc on the starter motor)

Got consistent bulb staying on on the tester.

Bad points:

Still wouldn't crank again

Tapped the casing with a hammer (on what I am now thinking must be the wrong end to hit it as I hit it on the end at the passenger side) and on the second tap (wasn't a hard hit) got a blast of orange sparks and a puff of smoke.

So I am thinking that the starter motor must have the solonoid well and truely stuck and I can't shift it/am not doing the correct thing to shift it. So do we think that a new motor is the key here?

And does anyone have instructions for removing the starter motor? The Haynes manual simply says "remove the starter motor" honest to christ I have never had an issue with Haynes manuals till I got this one. Wish I had just got the porter manual.

Someone will come along with a more technical answer, but it's pretty simple as even I managed it. From memory there are 3 bolts holding it, but you can only see the top 2! Once you've managed to undo all 3 the starter will come out (with difficulty as everything gets in the way). The replacement went in easily (so I couldn't work out why it was so difficult to get the old out), bolted in ok & was fine when connected up.

For safety you should probably disconnect the battery, er I think I forgot..... :eek:

If John's sending a spare I'd advise you to wait until you have it, then you can see the bolt layout. :idea:

P.S. It's not only you, I remember spending ages trying to work out where the starter was and where the bolts are - I nearly torched the Haynes manual as it was so useless. It assumes you know what you're looking at & how it fits!!!
 
Last edited:
Someone will come along with a more technical answer, but it's pretty simple as even I managed it. From memory there are 3 bolts holding it, but you can only see the top 2! Once you've managed to undo all 3 the starter will come out (with difficulty as everything gets in the way). The replacement went in easily (so I couldn't work out why it was so difficult to get the old out), bolted in ok & was fine when connected up.

For safety you should probably disconnect the battery, er I think I forgot..... :eek:

If John's sending a spare I'd advise you to wait until you have it, then you can see the bolt layout. :idea:

P.S. It's not only you, I remember spending ages trying to work out where the starter was and where the bolts are - I nearly torched the Haynes manual as it was so useless. It assumes you know what you're looking at & how it fits!!!

Cracking advice Palio thanks!

In another point I hope that people arent getting annoyed with me asking all these questions!!
 
Yep, 3 bolts, two unbolt through the motor itself, one unbolts through from the gearbox side. Once unbolted you thread the motor across from underneath and out the bottom near the alternator if memory serves. (a lot easier last time I did it but there was no inlet manifold/ head etc in the way!!) When whacking it with the hammer the bit you clout is the smaller cylinder on the side of the main body, that's the solenoid. If it has been turning then it may still give you some joy but if it is sticking replacement is probably a good idea anyway. (also if it is making small explosions and showers of sparks, that's not entirely functioning within factory specs either!)
 
When you got the sparks did you hit the connections at all? If you did you probably shorted them to the engine or starter casing. Try giving the solenoid itself a tap as Andrew said, that might get it working enough to get the engine started at least once.

If you do end up removing it, Andrew is right it does have to come out of the bottom, the sump guard can make it tricky if its still fitted, but doable, best with two people, especially when refitting.

Cheers for the advice :) not sure if I hit the connections, I don't think so as it wasn't at the connections end
 
ok ive stripped and cleaned (inside) that one up for you, all fresh grease in it.

i have just bench tested it. the solenoid and starter all work fine.

ill send it you up tomorrow.

Thanks John, I didn't try putting a screwdriver across them both, but after the miniature fireworks show I am loath to try it, as soon as you know what the postage is let me know and I will paypal it to you, really appreciate it :)
 
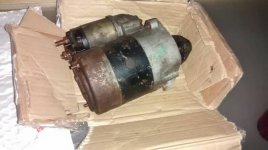
So I just received the starter motor from Dragon Man, it looks great and I can't wait to fit it :)

Think the front 2 bolts should be relatively easy to undo, but the one that's behind (closer to the engine casing) may be a little harder, but having a visual guide will help, reckon socket with an extension bar on it will be the way to go :)
 

Attachments

  • 1411085209500.jpg
    1411085209500.jpg
    52.1 KB · Views: 27
So I fitted the new starter motor and fuel filter today, and the motor didn't work straight away, but when I tried to engage it there was a clicking sound which there hadn't been with the old one. I knew that the motor was good as Dragonman had bench tested it before sending it to me. Really frustrated, having spent hours removing and replacing the starter motor (first time doing it and I took frequent breaks) I asked my neighbour friend (and mechanic) to come and look at it for me. He quickly diagnosed that I hadn't properly tightened (to my great embarrassment) the nut on the lower supporting bracket. I honestly thought I had and in my defence I was not able to apply all my force to the spanner/socket there as there is not a lot of room. Not really an excuse as I should have tugged the cable to see if the connector would move, and I will bear this in mind for the future. It turned out that the cable was sparking against other things so wasn't earthing properly. Now it is sorted the starter turns the engine over, though no fuel has been drawn up into the fuel filter so it didnt make an attempt at starting. Didn't try putting any fuel in the carb as I am calling it a day for today, and that aspect of things does not worry me greatly as I still have to remove the tank for cleaning and repair anyways. but want to thank Dragonman for sending me the starter and I have of course kept the old one for him.

I will be uploading the video once edited :)

VWfsiyb.jpg

prbxkxl.jpg

lbLDYR6.jpg
 
Back
Top