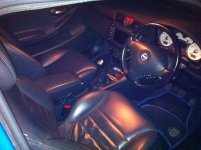
First of all please disconnect your car battery!
Take photos for later on!
Remove your old interior starting with the front seats;
There are four bolts holding the each seat to the chassis and they are located by two bolts at the front within the seat rail and two at the back, one located within the seat rail and the other at the rear side of the centre console, these bolts are six mm hex screw bolts that are all the same width and length.
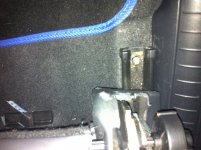
Once these bolts are removed, tilt the seat up at the front and disconnect the three cables for the airbag etc this is the same for both of the seats.
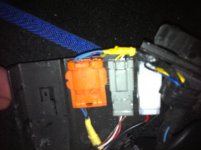
Then remove the seats.
Take photos for later on!
Remove your old interior starting with the front seats;
There are four bolts holding the each seat to the chassis and they are located by two bolts at the front within the seat rail and two at the back, one located within the seat rail and the other at the rear side of the centre console, these bolts are six mm hex screw bolts that are all the same width and length.

Once these bolts are removed, tilt the seat up at the front and disconnect the three cables for the airbag etc this is the same for both of the seats.

Then remove the seats.
Removal of old seats and interior - Part Two
Removal of the rear seats is pretty straight forward;
Start by removing the four bolts located under the front of the rear seats in the footwell, these are also six mm hex screw bolts.
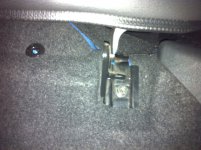
Then the seat base's can be removed, now the backrest part of the seat, there are another four six mm bolts at the base of the backrest and in the boot underneath the carpet four nuts (12mm) These all need to be removed.
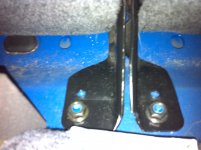
And now all the seats are removed.
Removal of Door Cards
There is another guide on here about this procedure under the title:
How to fit rear speakers! by 1.8stilo so please follow this - please note you have to remove the rear seatbelt which holds the door card in place and this is a 17mm bolt and it is tight especialy the older your car is
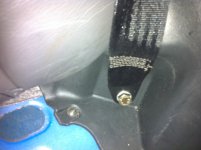
If you find the bolt reluctant to unscrew don't force it because it will snap as i found out :bang:, spray some WD40 or other suitable lub on the bolt thread, screw it back in leave it a few moments then unscrew again, repeat procedure until bolt is removed.
Electrical Wiring
If you obtained your seats from a friend/online etc please make sure the front seats come with the relevant wiring from the original car, if not the rest of the procedure will become a pain in the neck!
To get the correct wiring you need to locate the relevant wires in the passenger side footwell trim next to the door.
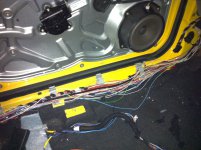
Please note the following is what was relevant to me, yours may differ.
Locate colours; Red/Black - Red/Yellow - Grey/Black - Grey - two x Black - Green/Black - Light Blue/Yellow
These are all pretty thick cables and are the only ones in that loom so you will not become confused.
Unbind the whole wiring loom, cut the relevant wires from under the glovebox and seperate from the wiring loom that runs to the rear fuse box in the boot (behind carpet passenger side of the boot, pot-revited to the chassis and next to an earthing point)
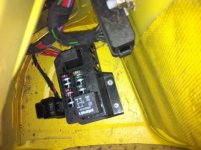
Drill the top of the pot rivit's with a 6mm drill bit that hold the rear fuse box to the chassis, turn over and remove the wire crimps with a mini flat blade screwdriver, this was done by removing the fuses and relay and popping out the female crimp from the top.
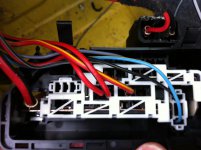
Next to the rear fuse box is a black earthing block, unbolt and unclip to reveal your two black earth wires for the seats, removal of these wires is the same as before.
Cut the seat connector's from the footwell's - keep safe for later (best to lift the carpet if you can and follow cables all the way to the front of the centre console and cut)
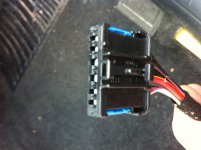
Now all relevant wires are removed.
Disconnect your car battery!
These wires need to be placed into the same fusebox within the boot of your car in the exact same location and place the relevant fuses and relay for these wires, if you need help for look within the Fiat Stilo handbook in the Fuse Box section.
Install Seat Wiring
Layout your new wiring as you desire, i layed the cables with the current looms within the car on both the driver's and passengers side and secured within the retaining clips.
Have a seat ready next to the drivers door and reconnect the cut blue/black connector to the wires you have placed within your fuse box either via soldering or joining blocks.
Next from your connector there is a pink/white wire, this needs to be connected to a CAN line within the car, the best place to find this CAN line is the fuse box under the steering wheel, there is a bunched up loom on a connector to the right of this fuse box, splice the Pink/White wire and attach via your preffered method
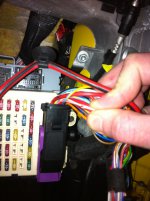
Now its the moment of truth, plug the blue/black connector into the under side of the seat blue/black connector
Reconnect your car battery
Turn on the ignition and test, hopefully the electric seats move forwards etc...
If so test the passenger side seat with the passenger side wires and connector
Hopefully you have working electric seats.
Heated Element Wiring
Heated Element section to be complted;
Place light Blue/Yellow and Green/Black wires along driverside speaker loom with electric seats wiring
Need time to investigate black/green wire location within front fuse box.
Replace Interior
Replace your interior in the same way you removed it, starting with the back seats first, then the door cards, the 17mm bolt's for the seatbelts and finally your electric seats
