General Broom Yellow HLX

Currently reading:
General Broom Yellow HLX

The Bangle Grinder Coupe wheels weigh...

XRXeGsjP.jpg


...half a Stone more than the OZ's.

So from this...

HmKubxqH.jpg


...to this...

fIi3zES2.jpg


...is almost a quarter of a Lady Gaga.

Also the suspension debate is a non-issue. I have standard shocks so the most I can drop the car is 35-40mm. :devil:
 
So I've done fifty wet miles with the OZ's and have noticed a few things.

Good...
Lighter steering at slow speeds, more feedback through the wheel and seat, quieter, more responsive acceleration and the flat spot has all but gone. I can go from 15 mph to 70 in fifth without bogging at all. :D

...not so good.
Quieter tyres but the spokes whistle and sound like a wheel bearing has gone.
More feedback will come in handy on the track but every single pothole is now an issue rather than just the bigger ones.
 
Interesting to follow the progress, but personally I wouldn't go much further with this just to improve the occasional trackday performance. I'd suggest the minimum spring drop - say 30mm - and just leave things "optimised" e.g. no aircon etc. Keep your chunky wheels for the road and the spindly lightweights for the track, and maybe take the back seats out for trackdays if you're really serious.

I suppose I get the Abarth theme but kind of preferred it all yellow, I suppose if you have painted your panels then you could extend the red to the lower door / wing panels.

I think you should just get it to a sensible moderate street / track configuration and then just enjoy / maintain it...
 
I had some box section delivered to work a day early.

l9fulSYU.jpg


So my Bravo was a van again. :)

Don't you just hate it when you have a series of prepared lines...

"I'm fed up of all the road rage round here so I'm going medieval".

"I have to hit a power line at 88.8 mph after the enchantment of the sea dance".

"Don't you just hate it when you get knocked off the dodgems?"

"The forecast was for lightning so I'm just being cautious".

"Have you like seen my Go-Pro it was like totes on the end of my selfie stick".

...and you don't get stopped by the Police? :slayer:
 
Interesting to follow the progress, but personally I wouldn't go much further with this just to improve the occasional trackday performance. I'd suggest the minimum spring drop - say 30mm - and just leave things "optimised" e.g. no aircon etc. Keep your chunky wheels for the road and the spindly lightweights for the track, and maybe take the back seats out for trackdays if you're really serious.

I suppose I get the Abarth theme but kind of preferred it all yellow, I suppose if you have painted your panels then you could extend the red to the lower door / wing panels.

I think you should just get it to a sensible moderate street / track configuration and then just enjoy / maintain it...

I had no way of making the supercharger fit and work by June so the car will basically be at the stage you suggested for then.

I might be able to do the rear disc conversion and I haven't given up on the four branch manifold yet.

On the more bonkers front. I have been offered another Fiat Punto GT with a Coupe 16V turbo engine for reasonable money. Either finish the Punto or Bravo transplant. :)
 
I think you've found the correct niche for the Bravo, so maybe just do the springs for now and quit while you're ahead. Keep enjoying / using iot and flying the flag.

Better to put your creative efforts into the Punto 16V Turbo - that really does sound like it belongs on the track. (Assuming it can stay on the track!! :D )
 
If I can afford the Punto I was thinking of getting it up and running and keeping it as a stand by in case the Bravo engine gives up. I have always thought the 16V turbo engine was too much for the Punto and the 20V engine too much for the Bravo so a 16V turbo Bravo should be a happy place.

:devil:
 
So I have to do my weekly shopping.

Yep I've been in my shed instead. :)

Bought a couple plates. One for the bracket and one for the outlet. Well that was the plan at least.

nh5HqFOn.jpg


NJD6nUgY.jpg


oFV3rgeP.jpg


CcM17R4N.jpg


e1dbj397.jpg


YMjCA9ZW.jpg


uo36CvEp.jpg


spyLOROc.jpg


cgsJAdVt.jpg


yfRAHS1M.jpg


I started by drilling the base plate and finding some bolts that fit the Fiat bracket (from the Skoda bumper and slam panel).

I cut a curve out of the top of the vertical plate for the charger to sit. Cut the edges away so it will be easier to get to the bolts later and used the off cuts to reinforce the two plates when I tacked them together.

Finally dress welded and I'm off shopping while it cools down. :)
 
zLvq5s12.jpg


B78NLJ7J.jpg


5ldm5IYq.jpg


ZiayZ3QH.jpg


So as proof of concept goes I made the bracket too big. Basically forgot to account for the thickness of the Fiat bracket when I measured up. Once trimmed to fit the inside of the charger is millimeters away from the exhaust manifold to down pipe join. I might have a go at the four branch one again but doubt it will make much difference. I need a turbo manifold so all the pipe goes off to one side and down away from the charger.

Also the inlet fouls the back of the radiator fan. I could get a slim one or as there are holes and space move the radiator across.

Not a bad day even though I did my shopping.
 
Remember Apollo 13 (the film obviously) and the troubled astronauts were beyond the point of no return?

Well....

7Hsk64VR.jpg


...I've cut the end off the supercharger to help make it fit. :)

Also as I discovered with my GSXR250 project if you need a part you haven't seen since 2002 the best place to look is Halfords.

FZX4fWpl.jpg


That filter will be going on the maf fairly soon as I have eight days to get the car ready, no budget so the next few posts will be all about weight reduction with a side bar if I get time to do anything else with the charger. :)

Come to think of it. "The point of no return" was part of a sinister phone call in Falling Down. That would have been a better reference point. ;)
 
That looks like a Lotus Evora set up. :)

The plan here was to "simply" replace the AC pump with the charger.

Simply + me = :bang:

:devil:

Anyway the Ounce Method isn't happening just yet as I was waiting for the Postman to deliver the final part I need.

Back to the charger. The bit I cut off yesterday has been trimmed and held in place with a pollycarbonate plate...

t7SIDgby.jpg


...so now the filter is free from the where the outlet plate will go.

TvCrx3Z0.jpg


I realise there won't be enough room for the filter to go there unless I relocate the radiator but I'm working out the small details first. I'll have a bit of ducting from the inlet side to the filter located away from harm and heat. :)
 
The occasional misfire and general lumpiness I though was due to old tired plugs turned out to be whoever fitted the plugs last time stripping the threads from the number of coil pack and did not replace the "O" ring around the oil filler neck so number one spark plug chamber was full of clean but spark sapping oil. Drilled studs replaced, new plugs and as a little tribute to a former friend I now have a ropy car with a clean top engine cover. ;)

Because the oil from the spark plug chamber went into the number one cylinder when I took the plug out my Fiat's exhaust smoked like a Ford for a couple of miles.

2LTopdan.jpg


UP5HwUYR.jpg


eInv06Ui.jpg


You can't call it "Ounce Method".

"Why not?"

It sound like you're dealing crystal. :D

"Just keeping hope alive".

Wut!?!

Millennials. :bang:

So my Bravo's diet started properly today. The rest of the AC stuff I can get to is now gone, fog lights, loom, cold air intake and various pipes, brackets and the air box.

v8wnt4Yz.jpg


Why the fog lights?

Well they weigh a bit and it all adds up. Also I was planning to have ducting from the fog light holes in the bumper to the front brakes. As Blyton is pretty hard on the brakes I thought it could be useful. Then I did the maths and for the brake cooling to be effective It would need to be a colder day than the forecast suggests for next Friday.

So and even though I know it has been mythbusted to Hell and back...

u76vN8uc.jpg


rlZOpHOI.jpg


WiMVMqwY.jpg


...I have an air feed to the filter. :)

The filter itself will be located behind the fog light recess on the other side of the bumper when I get the charger fitted. ;)
 
ok, cheers, now i have vegas, the perfect soundtrack to the end of the 90's, playing through the car stereo while i set for tomorrows work. (y)
Left hand side drive shaft, suspension arms on both sides, and just for good measure, seeing as i have it all apart and will need the tracking done anyway, new steering arm ball joints.
 

Attachments

  • IMG_20170602_203334.jpg
    IMG_20170602_203334.jpg
    1.7 MB · Views: 28
This was not supposed to have happened today.

F8ssaysy.jpg


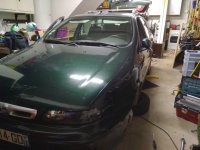
My outlet mounting plate arrived so as it was a chose between working in my shed or getting the bloody lawn mower working.

Rksd2rcH.jpg


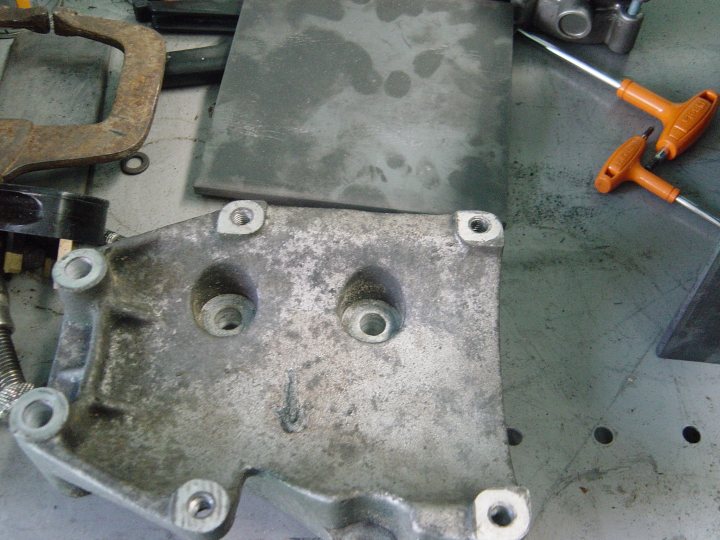
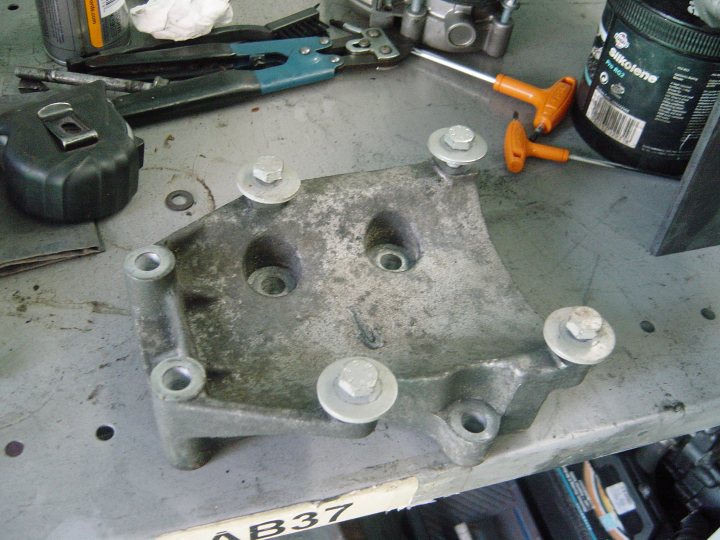
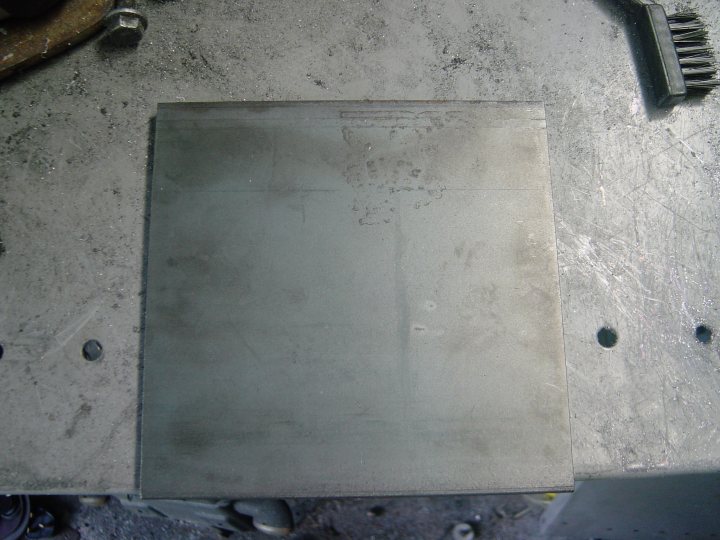
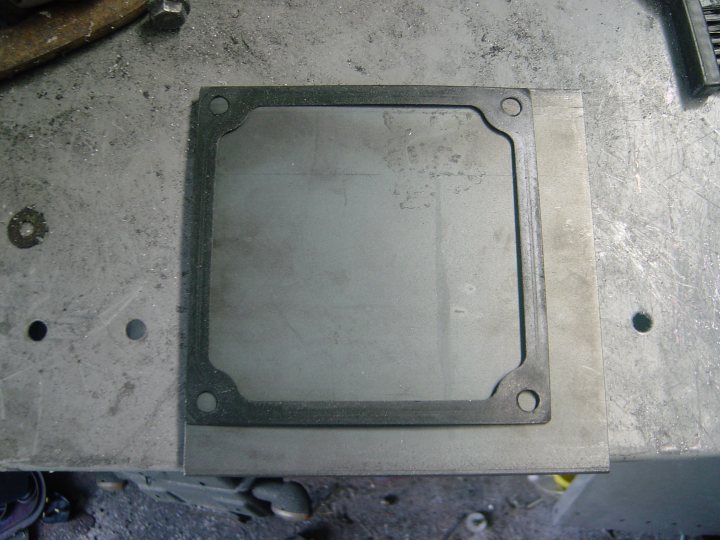
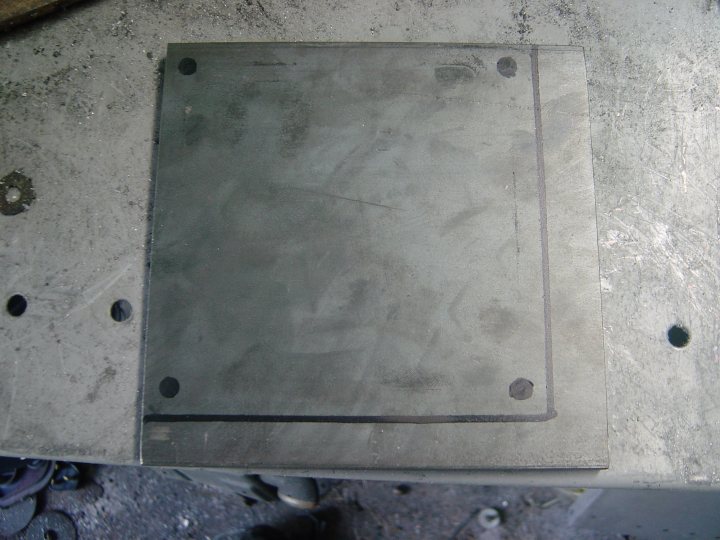
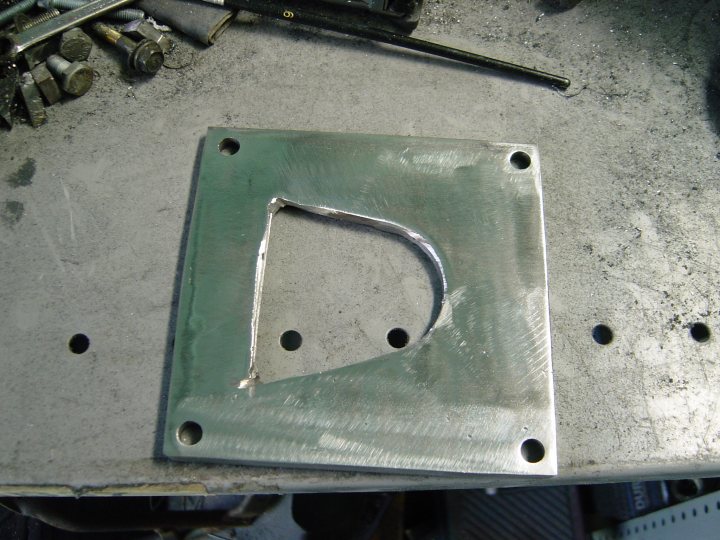
1/ Place the gasket on the plate.

pqhvgrQo.jpg


2/ Mark the sides and hole locations.
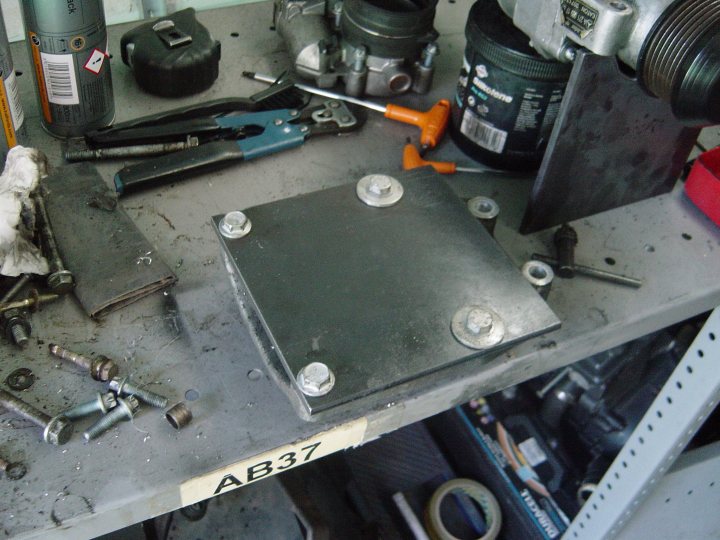
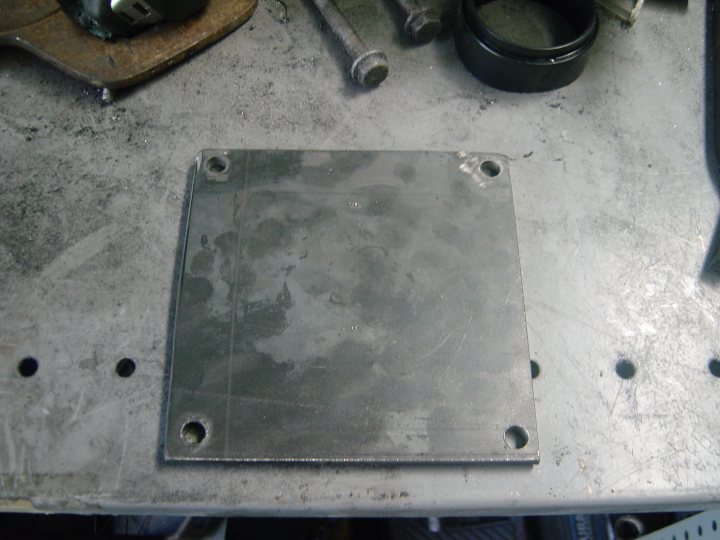
sVmnyDIw.jpg


3/ Drill and cut. :)

BISRJ33g.jpg


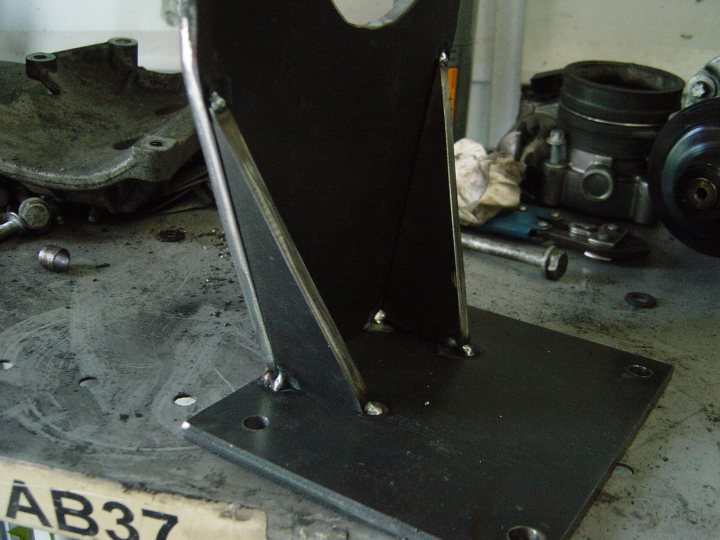
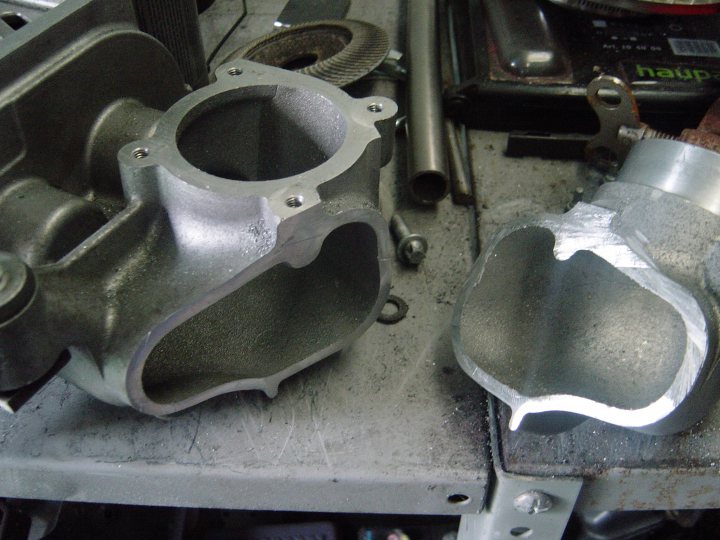
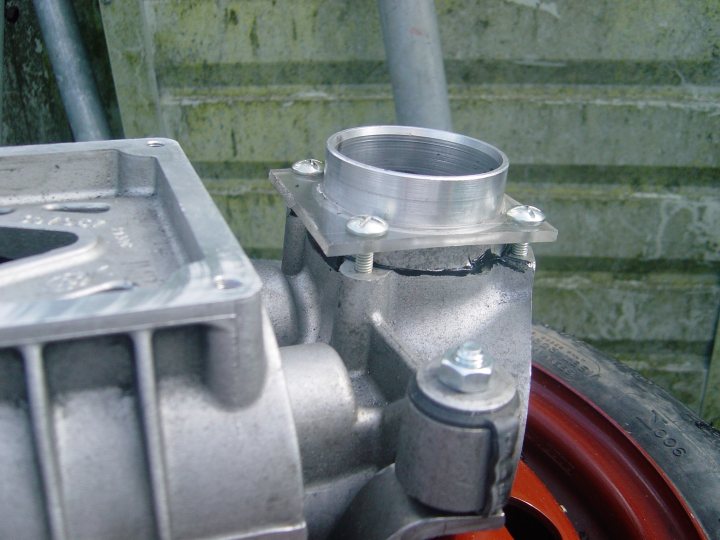
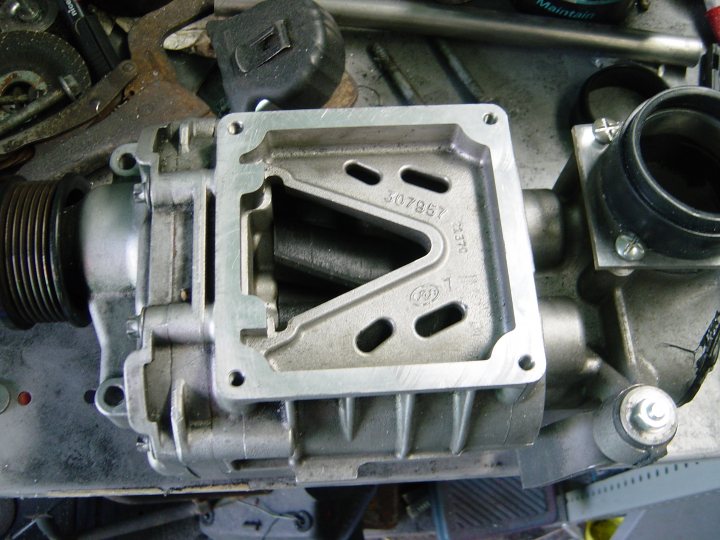
4/ Make sure the plate fits and mark where the big hole in the middle needs to be.

IzKTILNP.jpg


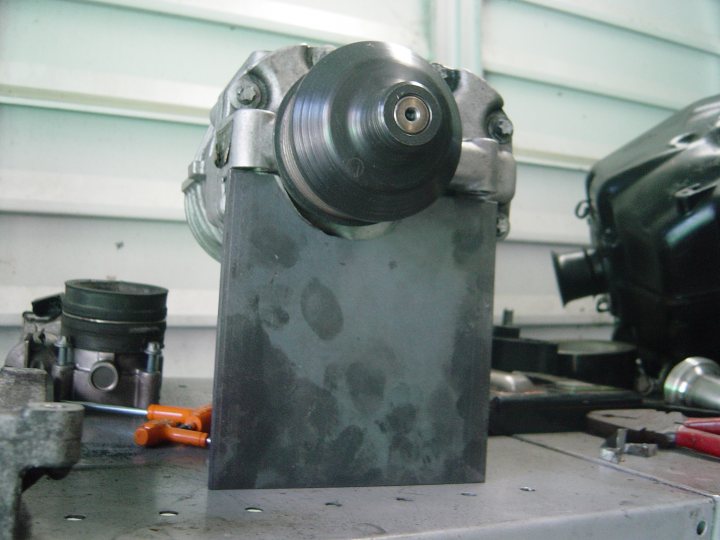
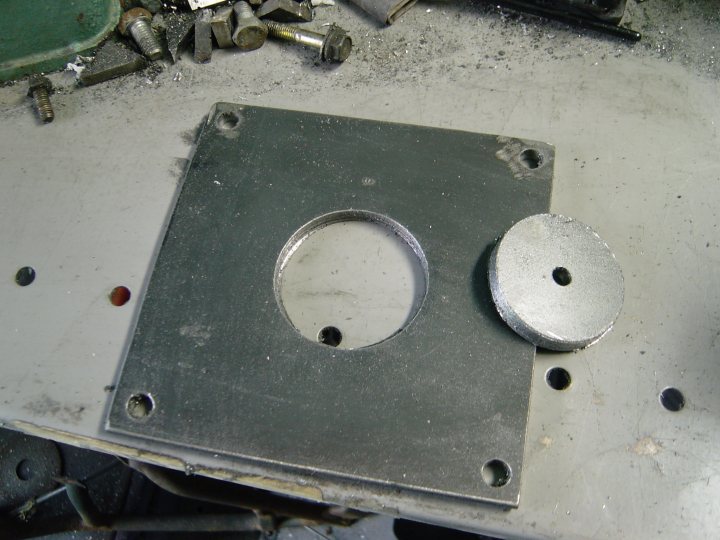
5/ Use a hole saw to cut a washer the same size as the pipe you'll be using. 6mm took about twenty minutes. Not bad for a shed effort and the average speed on the A52 Brian Clough way this time of year.

sOiLSiYh.jpg


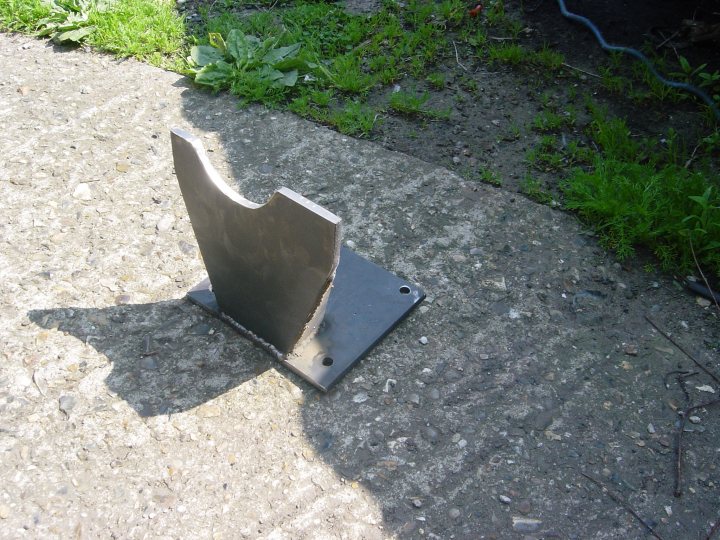
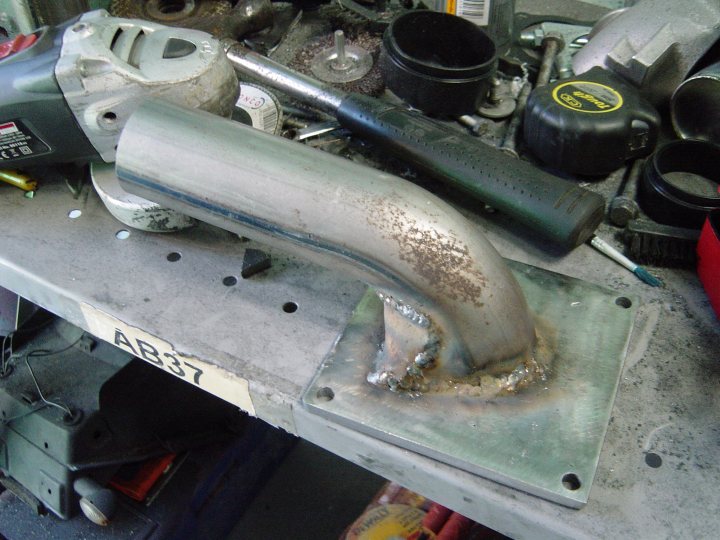
6/ Cut the rest of the hole out.

R3v2RrBd.jpg


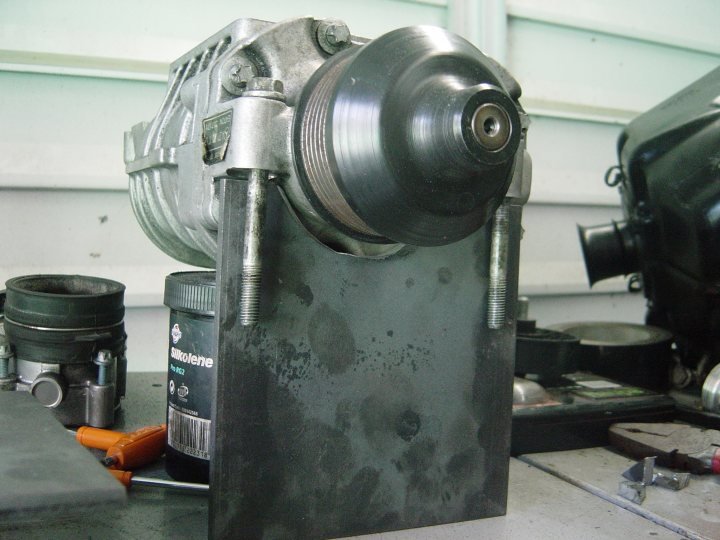
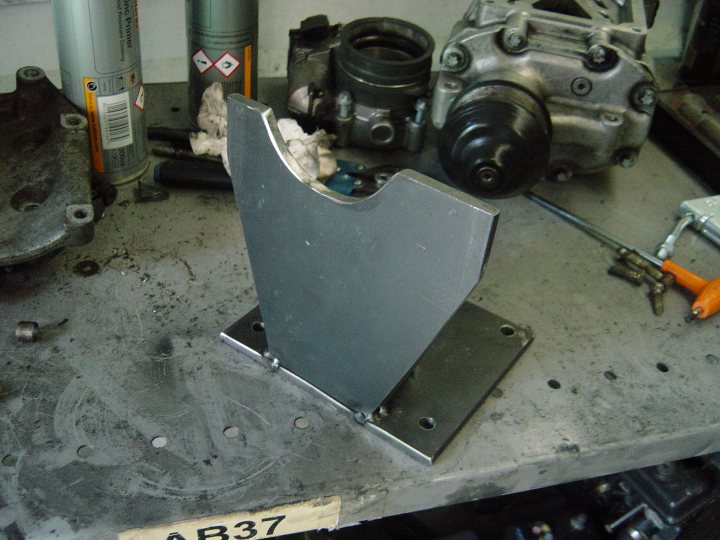
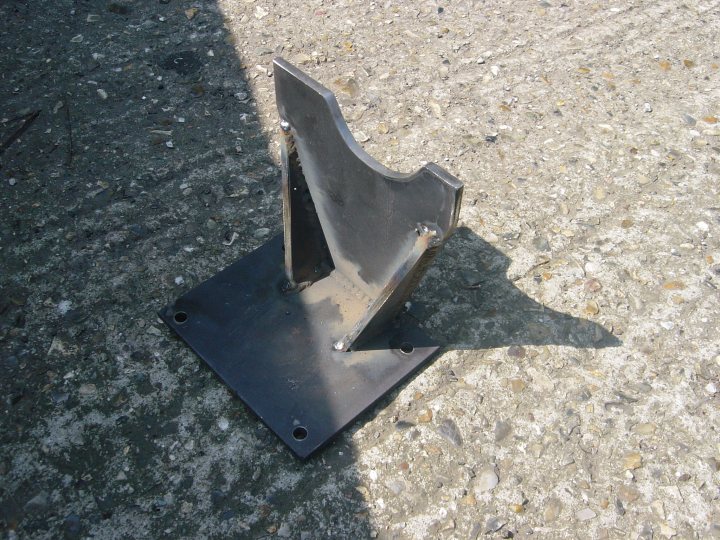
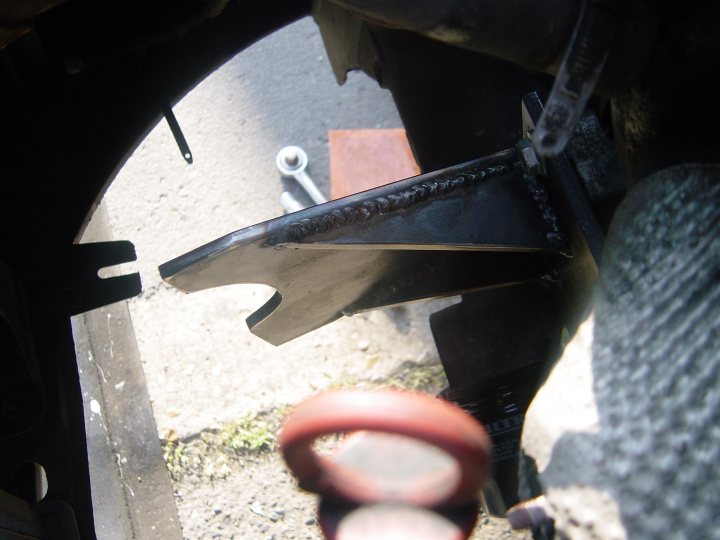
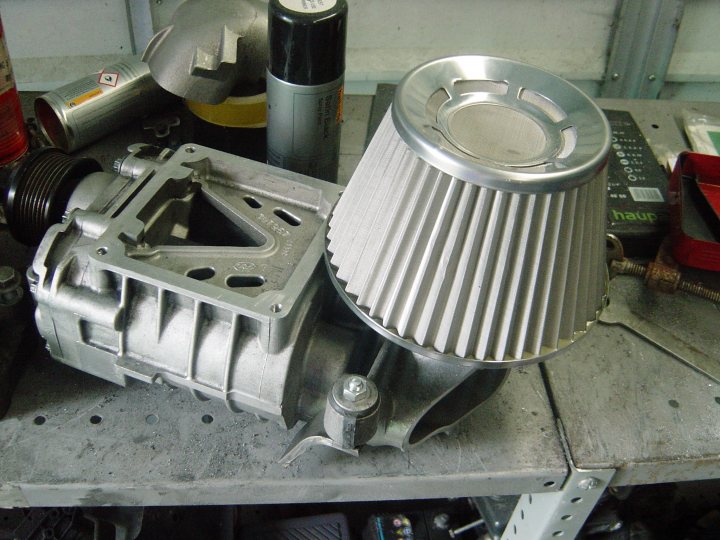
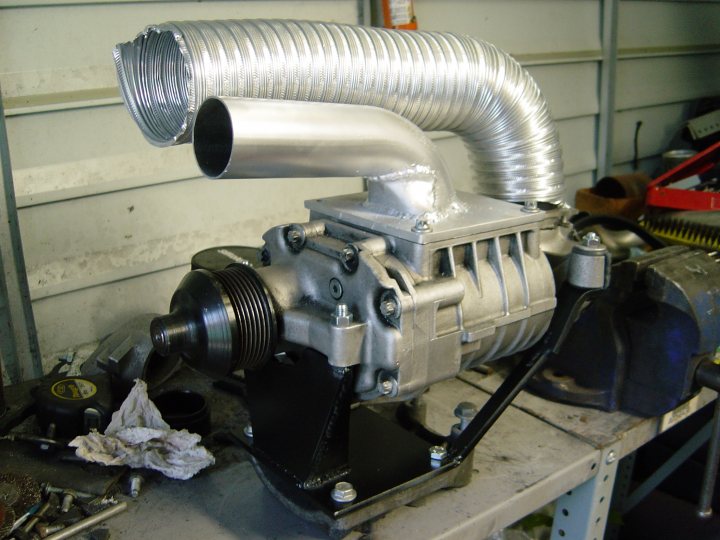
7/ Weld on the pipe and end piece.

QlFws5qQ.jpg


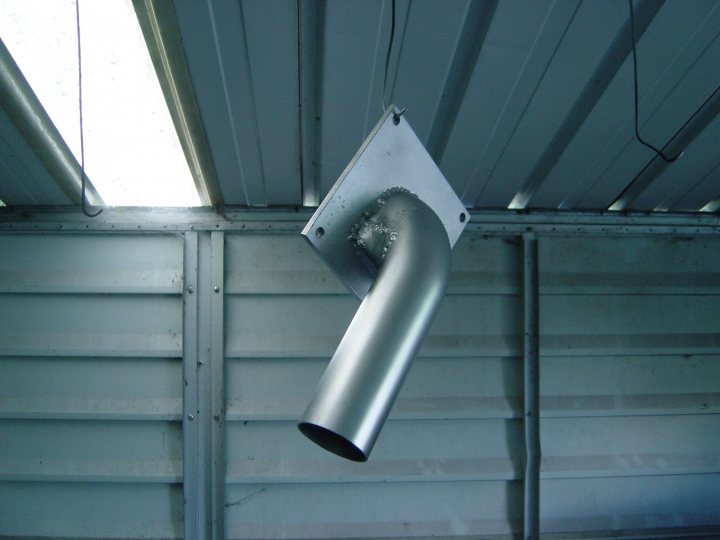
8/ Apply a coat of Zinc primer and paint (I've use Aluminium wheel paint as it was the can I grabbed).

WpDuXr5i.jpg


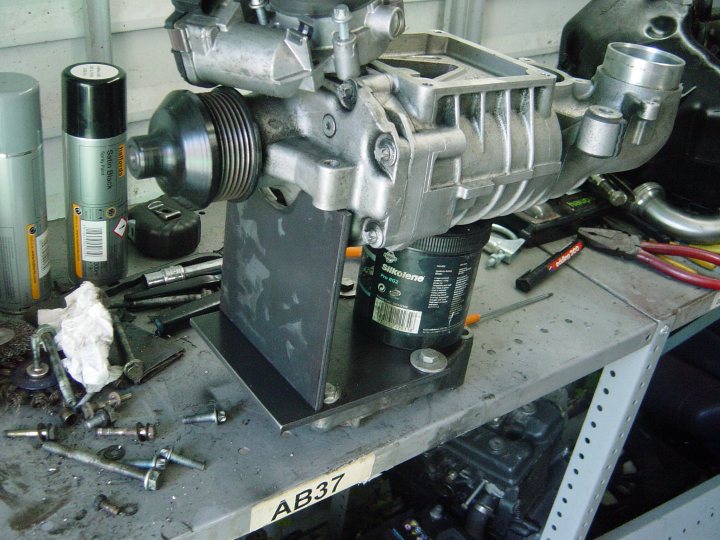
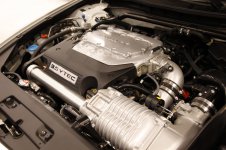
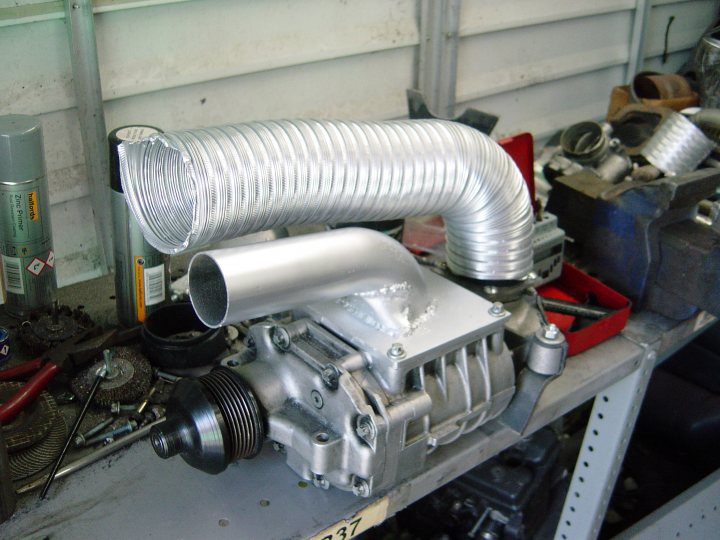
My supers are now ready to be charged. :)

I'm out of budget this month (seriously I'm cycling to work so I have enough petrol for the track Friday).

Shopping list.

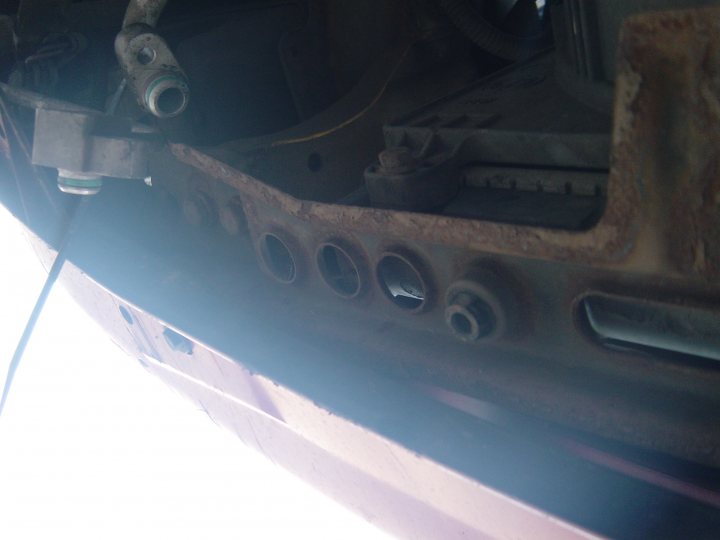
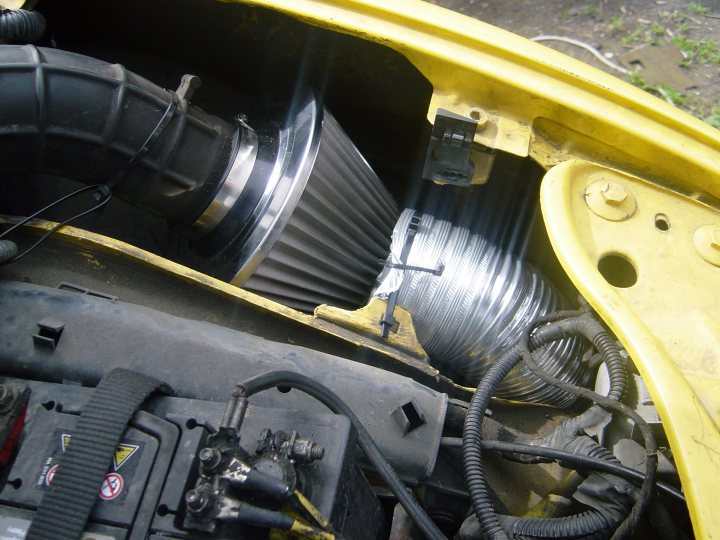
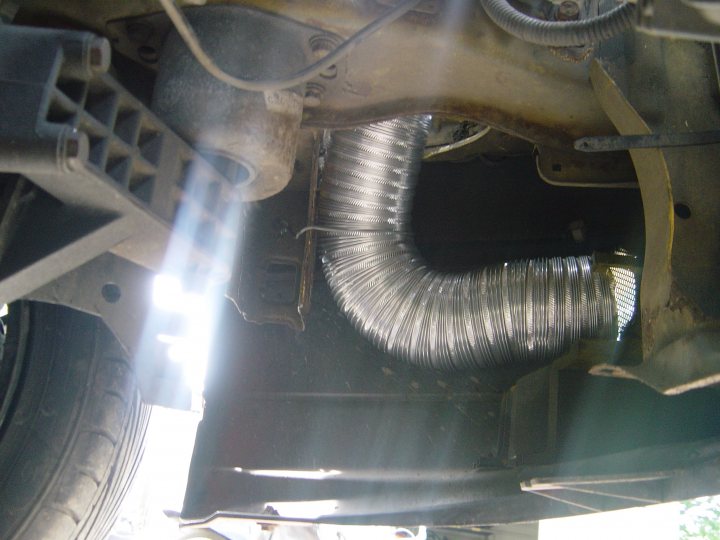
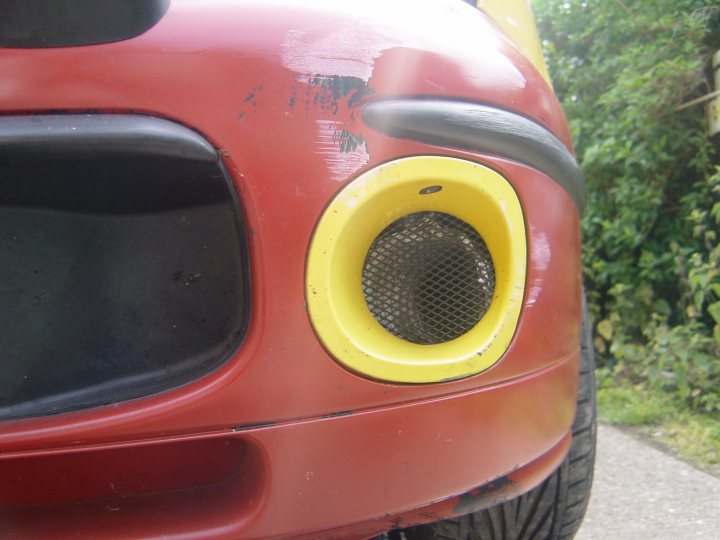
1/ Enough ducting to reach the air filter in the bumper.
2/ Front mounted intercooler kit (this will make more sense when it happens).
3/ Exhaust heat wrap for the down pipe and the charger.
4/ Finish the mounting bracket off.
5/ Custom made to length serpentine (auxiliary) belt.

6/ Maybe some bigger injectors if the charger makes more boost than predicted taking my standard ones are over their duty cycle.
 
I have no idea. With 5-8 psi boost from a turbo the same engine makes 180-200 ish bhp. Taking mechanical drag from the charger into account 160 would be good.
 
Back
Top