tn (3).jpg

850T 850t restoration

Introduction

thought id start my own thread on my van restoration, lots to do and only a few hours in the evening to do work on the van so might take a while to finish...
tn (3).jpg

tn (2).jpg

tn.jpg

850t 017.JPG

850t 014.JPG

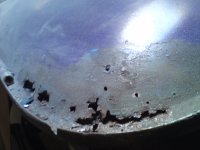
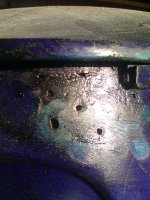
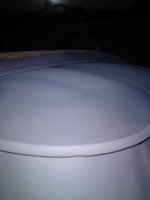
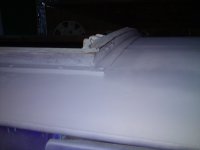
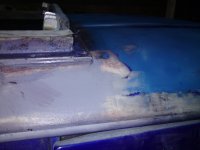
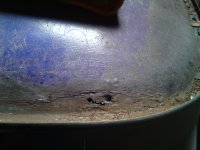
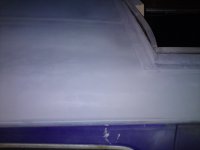
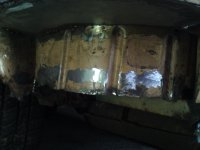
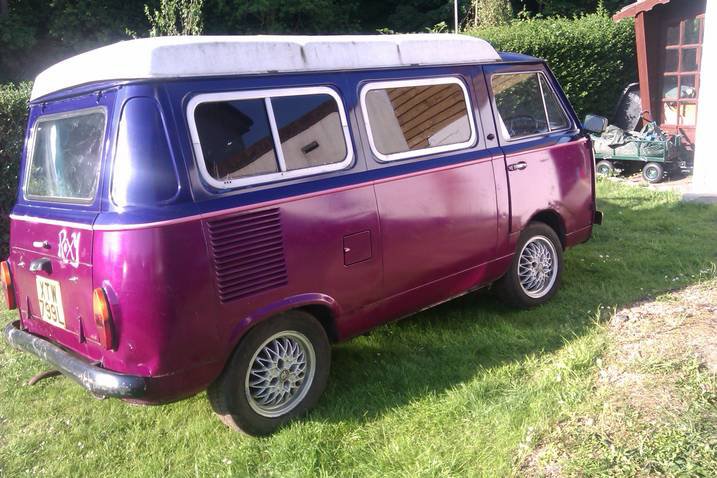
these were taken about two weeks ago when i first got her home.
  • Like
Reactions: diluppo
ive had a good poke around the van now and there are some nasty areas to address, but nothing that i wasn't expecting.
850t 015.JPG

850t 030.JPG

850t 034.JPG

850t 038.JPG

850t 058.JPG
absolutely love this van and cant wait to take the kids camping in her(y) going to be worth the effort and money once finished.
 
work so far consists of, fitting a new water pump, full service, and replacing the old fuel pump with an electric one, also welded the front chassis cross member and the cab floor, also there was a rusted area below the roof at the back that i cut and welded new metal in :D.
850t 012.JPG

850t 003.JPG

850t 015.JPG
still a little more to do but at least its solid now!
850t 020.JPG
not the neatest welding in the word but better than before
850t 017.JPG
much better to cut the rust out and weld new metal in, quite happy with how this repair came out.
 
Really like these. Last time I saw one it was a 'static' living space in Faslanes anti-nuclear camp. Its gone now sadly. Whats your plans for it? Are the Vauxhall alloys staying :eek:
 
hi, was going to do some mild modding, ditch the poptop for a rag top sunroof and change the colour to something more modern. but the more i think about it the more i want it back stock, the interior is still the original blue which i think will look cool when finished. i have just sold my vw camper van because it wasn't really useable due to being too low and big engine which did stupidly low mpg, also these vans are so rare i dont want to mess it about too much. oh and the wheels... defo going lol.
 
right while im still waiting for panels to arrive from italy i thought id make a start on the roof,
850t 021.JPG
you can see that alot of this section of roof was rusted
850 2 002.JPG
1mm steel was used with a 1cm lip formed for the gutter then spot welded every couple of inches
850 2 007.JPG

850 2 011.JPG

850 2 015.JPG

850 2 010.JPG

850 2 014.JPG

850 2 020.JPG

850 2 005.JPG
this side is much worse, but now i now how the panel is made should be easy
850 2 018.JPG
then its just this area at the front of the roof and the roof is ready for prep(y)
 
Love seeing the van coming back to health. Suggest wire brushing and painting the inside of the repaired panels wherever possible (if you have not done so). I missed doing this in a couple of places and I have some rust reappearing :(
 
Man I wish we got those here on this side of the pond! A couple were brought over by individuals but no official imports.

thats a surprise, i didnt know that america never had these officially. but they are very thin on the ground here in the uk, ive only seen one other at a show about ten years ago!!!
 
Love seeing the van coming back to health. Suggest wire brushing and painting the inside of the repaired panels wherever possible (if you have not done so). I missed doing this in a couple of places and I have some rust reappearing :(

thanks for the advise, but yes i have also missed areas in the past and rust is like cancer once its there you will have a job getting rid of it completely, so i will be treating and protecting as much of any repair as i can(y)
 
right more work on the roof today, only a fine fill left to do and then i can move onto the front wheel arches(y)
 

Attachments

  • 850 2 018.JPG
    850 2 018.JPG
    2.4 MB · Views: 74
  • 850t3 021.JPG
    850t3 021.JPG
    2.1 MB · Views: 83
  • 850t 032.JPG
    850t 032.JPG
    2.3 MB · Views: 67
  • 850t3 025.JPG
    850t3 025.JPG
    2.3 MB · Views: 75
  • 850t3 001.JPG
    850t3 001.JPG
    2.1 MB · Views: 78
  • 850t3 023.JPG
    850t3 023.JPG
    2.2 MB · Views: 71
  • 850t3 020.JPG
    850t3 020.JPG
    2.2 MB · Views: 66
  • 850t3 027.JPG
    850t3 027.JPG
    2.3 MB · Views: 72
  • 850t3 006.JPG
    850t3 006.JPG
    2.4 MB · Views: 67
  • 850t3 028.JPG
    850t3 028.JPG
    2.1 MB · Views: 77
hey fella did you buy roxy recently or have you owned it for a while, i remember seeing her up for sale about 2 years ago for £1500 buy now on ebay , as the owner was going abroad for a year, i offered i think £1100 for it and the owner never got back to me, lookin at the rust im a little glad i didnt in ht eend , as out lil 900t was enough of a task to get on the road

if any one is after 850 parts or engines atm rory in st.leonards has 3 rebuild engines and some 850 sport coupe body shells as well, im trying to negotiate an 850 coupe gearbos at the mo but hes slow on the response via email

hi, no ive only had the van about 6 weeks, payed £1350 for her, that was about the max i was going to pay, but i viewed her a couple of days before the auction ended and was determined to buy her. yeah there are some hidden nastys but i enjoy doing the work so all is good.
i dont live too far from rory stumbled across him on ebay, and have spoke to him about parts that i might need, didnt know he had the holy grail of gearboxes:eek: bet that wont be cheap!
 
quick update, been busy with the welder again and im starting to see the light at the end of the tunnel :worship:.
850 001.JPG
my new rear panel arrived so thought id put it on, thought it would only take 5 minutes because its only a case of 6 bolts and the engine mount, but....
850 008.JPG

850 003.JPG
as you can see the position of the engine mount is different :bang:
850 006.JPG
so after a bit of head scratching i thought the best way around it would be to simple cut the old mount off and weld it on the new panel.
850 007.JPG
like this,
850 011.JPG

850 012.JPG
i trail fitted to make sure the engine located ok, which it did(y)
850 026.JPG
then prepped and sprayed, result job done.
850 023.JPG
ive also welded a new front lower arch.
850 024.JPG

850 025.JPG
and wheel arch ready for prep,
850 021.JPG
new engine hatch:cool:
850 027.JPG
and then the lower rear corners.
850 028.JPG
nice oil filter box holding lots of filer and chicken wire in place :eek:
850 032.JPG

850 035.JPG

850 036.JPG

850 037.JPG

850 020.JPG

850 022.JPG
sprayed the roof too so that i can put the pop top back on.
 
Quick update.
850t 030.JPG
850t 028.JPG

850 025.JPG

850 024.JPG

850 026.JPG

850 027.JPG
Been dreading this corner, its the side where the battery is and was very rotten, been some quality repairs done on the area in the past :rolleyes: hate it when people just weld over old rusty metal, as you can see the was 3 layers of **** all doing nothing :bang:,
850 006.JPG
the van is not ready for prep yet but i wanted to find out what was lurking under the paint (and filler!). but to my surprise its looking much better than i thought (y)
850 008.JPG

850 012.JPG

850 021.JPG

850 022.JPG
just one sill to replace, drivers side arch and lower front panel, finish the rear corner that ive started and then repair both door bottoms/skins, then i can start prepping for paint :slayer:.
 

Attachments

  • 850 001.JPG
    850 001.JPG
    2 MB · Views: 61
Quick update, had a good look at the n/s sill (with the help of a flap disc) and decided that the best option was to remove the whole panel and weld in a new one. The o/s sill is all solid apart from an old repair section at the rear, but its all good so no need to replace it.
The rear corner is now ready for when i prep for paint, so with the help of my flap disc again i had a closer look at both rear arches and both front doors, the rear arches are made up of a combination of fiber glass, filler, and new/old metal, so im going to see if i can find arches with a similar profile (poss vw bay or t25) and see if i can make them fit. :D
8503 003.JPG

8503 004.JPG

8503 007.JPG

8503 012.JPG

8503 013.JPG

8503 016.JPG

8503 017.JPG

8503 018.JPG

8503 023.JPG

8503 024.JPG

8503 025.JPG

8503 026.JPG

8503 028.JPG

8503 029.JPG

8503 030.JPG

8503 031.JPG
 
Good work - hope it is as successful as your last restoration! Impressive...
 
WOW! Same colour as mine! :cool:
Great job Mate.
Really looking forward to seeing how this Baby comes along
Hope to see you scooting around Brighton in her soon.
Keep up the good work. (y)
 
Back
Top