Technical Project Paolo

Currently reading:
Technical Project Paolo

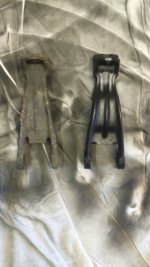
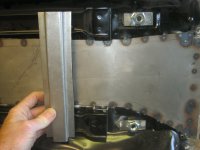
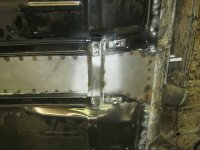
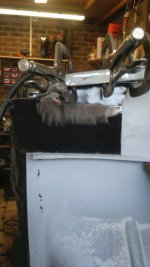
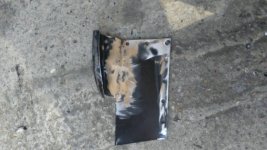
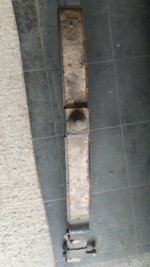
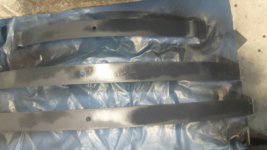
I made 2 new ones. The front one over laps the ones on the floor.
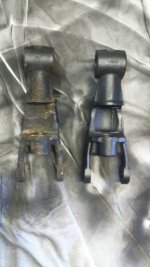
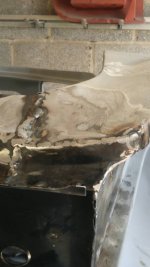
The rear one, I removed the small parts on the floor panels and then inserted a new one.
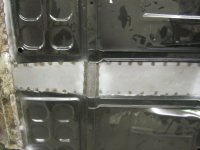
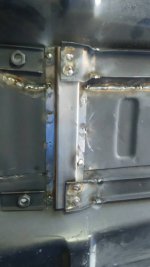
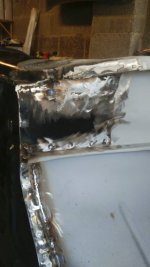
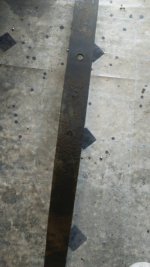
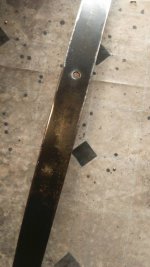
With regard to floor panels being different height to the tunnel floor section, I wouldn't worry. Mine are a lapped joint & all I will do is brush some seam sealer over the joints and then stone chip the underneath. Its different if you are trying to achieve a concourse finish and therefore disguise any repairs. But lets face it, if you are fitting a 650 engine then its not going to be original. No one will worry about the floor seams if the floor is new, no rust and appears to have been replaced properly.
smile.gif
 

Attachments

  • IMG_6763.JPG
    IMG_6763.JPG
    441.9 KB · Views: 30
  • IMG_6764.JPG
    IMG_6764.JPG
    481.1 KB · Views: 38
  • IMG_6765.JPG
    IMG_6765.JPG
    513.6 KB · Views: 32
Bit more welding today. New floor beams in to join up the two new floors. Rotten front wheel arch repaired using the bits of new sills we cut off. It's actually 4 bits welded together to make 1 new repair panel and I think it looks fab. Not dressed yet so will look even better
 

Attachments

  • 1439048055940.jpg
    1439048055940.jpg
    39.8 KB · Views: 30
  • 1439048071834.jpg
    1439048071834.jpg
    50 KB · Views: 35
  • 1439048088794.jpg
    1439048088794.jpg
    45.7 KB · Views: 32
  • 1439048107733.jpg
    1439048107733.jpg
    48.3 KB · Views: 34
  • 1439048130223.jpg
    1439048130223.jpg
    71.4 KB · Views: 27
  • 1439048144926.jpg
    1439048144926.jpg
    49.1 KB · Views: 30
  • 1439048165833.jpg
    1439048165833.jpg
    50.6 KB · Views: 30
Just managed to squeeze in dismantling and cleaning the front leaf spring today. Just got to remove the bushes, spray it black and reassemble it. Couldn't fit it in my shot blasting cabinet so just used a 60 grit flap wheel on my grinder
 

Attachments

  • 1439221276334.jpg
    1439221276334.jpg
    57.2 KB · Views: 24
  • 1439221308476.jpg
    1439221308476.jpg
    59.2 KB · Views: 23
  • 1439221325626.jpg
    1439221325626.jpg
    59.8 KB · Views: 21
  • 1439221338186.jpg
    1439221338186.jpg
    41.4 KB · Views: 29
Sorry Tony it's my OCD. Be warned, you ain't seen nothing yet!:D
 
Just say no..................... to Patina!!!!!!!:D

"I am the Genie of the encrusted mirror. Did someone just try to rub off my patina?":D

Say no to OCD(n)

Nice work on the springs, I am fully in favour of a shine like that, which makes mechanical sense. Although I think that in the case of the 500, as the leaves are separated by the plastic interleaves, it's not strictly essential.
Personally I think it's right to have the original-style spring as it works quite hard doing more than just making the ride "comfortable".
 
The first rule of OCD Club is that there has to be a second rule, because then there is an even number of rules.

Oh yes. My car stereo volume always has to be on an even number as does the tv!
 
I'm an ex-mower-mechanic; maybe that explains something. :)
I'm not sure if the Fiat 500 is more like a mower than an aeroplane but I have a pretty good hunch it's the former.
....OK, I know Dante Giacosa had some early experience in aero-engines.
 
Not had much time lately so just been plodding on with cleaning up suspension parts
Have used Simoniz tough black satin which is good stuff
 

Attachments

  • 1440432355722.jpg
    1440432355722.jpg
    52.6 KB · Views: 32
  • 1440432370283.jpg
    1440432370283.jpg
    52.8 KB · Views: 33
  • 1440432386136.jpg
    1440432386136.jpg
    55.1 KB · Views: 29
  • 1440432396773.jpg
    1440432396773.jpg
    50.3 KB · Views: 28
page31.jpg

I've done the front leaf spring now, well almost I just have to put that funny clip on each end. When it's complete I'll post some pictures, it looks better than brand new! I used Molyslip AS40 grease between the plastic strips and the leafs, probably a bit of an over kill but it will aid friction and prevent rust.
Anyway I digress, the real reason I came on here was my next job is to tackle the rear wheel bearing housings. I've got them cleaned up and I've got my bearing kits but looking at the picture attached I'm an item missing. This item was also not in the housings originally when I stripped them down. The item number is 890292 and looking at the parts suppliers is a spacer of sorts. According to the attached it goes between the clip and the seal? Is this right?
 
I think that the spacer acts as the bearing surface for lip of the inner seal and is also integral to the torque transfer when tightening the bearing nut. Are you sure it wasn't there when you dismantled because I can't see how the setup would have worked without it. :confused:
Good luck with the tightening; I found it quite a challenge when doing it "by the book".:bang::bang::bang:

https://www.fiatforum.com/500-classic/359424-tightening-rear-hub-bearings.html
 
I think that the spacer acts as the bearing surface for lip of the inner seal and is also integral to the torque transfer when tightening the bearing nut. Are you sure it wasn't there when you dismantled because I can't see how the setup would have worked without it. :confused:

It definately wasn't there Peter. I've still got the other side untouched and that hasn't got one either. I find it hard to believe that the kits you buy don't have the spacer in them.
 
Heres the finished leaf spring in all its glory. Could have bought a new one but prefer the challenge of restoring the old
 

Attachments

  • 1441796105275.jpg
    1441796105275.jpg
    47.8 KB · Views: 37
  • 1441796115459.jpg
    1441796115459.jpg
    39.7 KB · Views: 35
  • 1441796131758.jpg
    1441796131758.jpg
    34.5 KB · Views: 38
  • 1441796148365.jpg
    1441796148365.jpg
    36.8 KB · Views: 34
I've solved the mystery of the missing wheel bearing housing spacer. When I first looked at the exploded parts diagram because the seal is labelled after the spacer I thought it went in the housing. Looked in my rear suspension parts box and found 2 spacers. Looking at everything together on the bench the spacer sits inside the inner diameter of the seal and sits against the bearing and coupling. It seems slightly longer than the seal so it must hold the coupling away from the seal face. Just got the complicated tightening procedure to look forward to now
 
Old rear bearing housing cleaned up with new bearings fitted
 

Attachments

  • 1442214807155.jpg
    1442214807155.jpg
    49 KB · Views: 25
  • 1442214818925.jpg
    1442214818925.jpg
    53.1 KB · Views: 25
  • 1442214828804.jpg
    1442214828804.jpg
    55 KB · Views: 26
  • 1442214838244.jpg
    1442214838244.jpg
    55.8 KB · Views: 29
Back
Top