I wish I could make things like that.
Will you still get the anti-rattle washers in?
Will you still get the anti-rattle washers in?


I wish I could make things like that.
Will you still get the anti-rattle washers in?


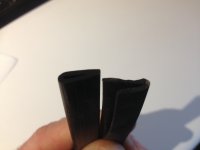
What anti rattle washers? Mine didn't have any!


Probably not strictly needed, but one spring washer each side of the stretcher bar pivot hole and one plain washer under the hex head pressing on the outer spring washer.
Quick work on the seats, again looking like new.:thumbup:


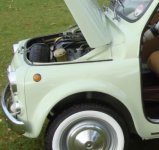
time is ticking though so not sure if I will be able to get it finished, MOT'd and sort the registration out on time for the Italian car show at Brooklands.
I'm planning on going this year with or without 500. It looked good last year.
.....was talking sh*te as usual.:nutter:
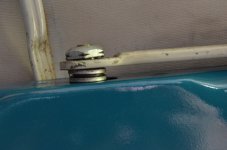
...well, talking from memory at least. Looking today, there's actually no washer under the hex head, but a spring washer touching the stretcher bar on the other side, with a plain washer after that and in contact with the bodywork of the roof.
You might manage without any of them, although you can see how that setup clamps the sliding captive nut in the roof, but I wanted to clear up the inaccuracy.
 hoorah!


![IMG_6429[1].JPG](https://cdn.fiatforum.com/data/attachments/147/147261-6385db30d627f3a94138d8fade7a5a14.jpg)
![IMG_6430[1].JPG](https://cdn.fiatforum.com/data/attachments/147/147226-83393b6077ec2077af828b0cb4a7c55a.jpg)
![IMG_6434[1].JPG](https://cdn.fiatforum.com/data/attachments/147/147197-de0bf191001d00bc32cc5d51d3522fd3.jpg)
![IMG_6433[1].JPG](https://cdn.fiatforum.com/data/attachments/147/147164-0ba5a7933b2151b4697f5fccb95e5795.jpg)
![IMG_6435[1].JPG](https://cdn.fiatforum.com/data/attachments/147/147143-5062f7a2a629278e9f73bf65efb7bd86.jpg)