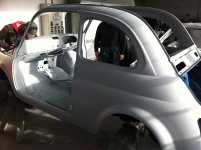
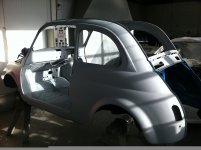
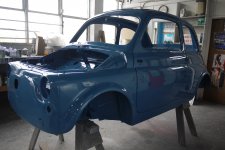
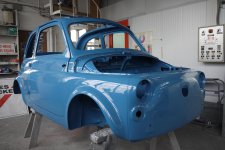
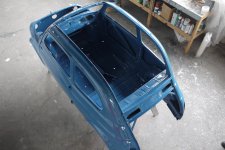
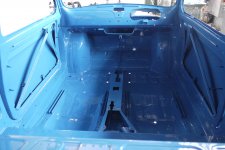
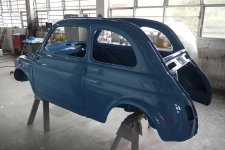
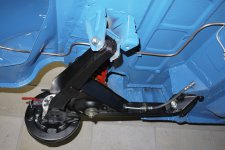
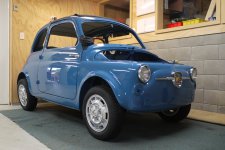
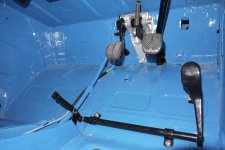
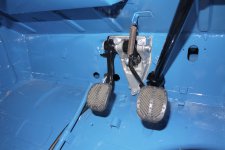
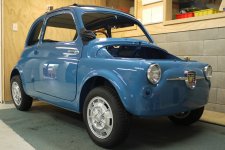
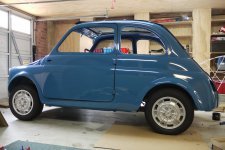
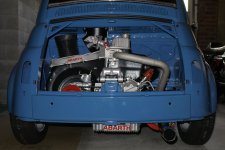
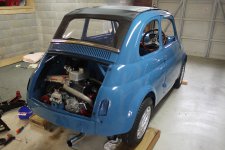
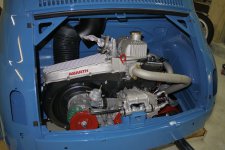
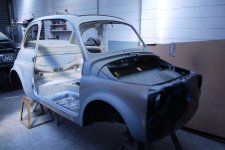
fiat before 1.jpg

500 (Classic) 1963 'D' resto with 126

Introduction

Hi all, I have learned a huge amount from threads on this site, so now my own resto is underway I thought I should start my own thread. I don't guarantee I can add an insight, but hopefully I can offer some inspiration!

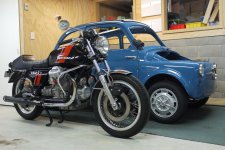
I've never restored a car before, but have done a few old vespas and recently completed a nut and bolt restoration on an old moto guzzi, so am pretty confident I can have fun with this car and hopefully do a good job.

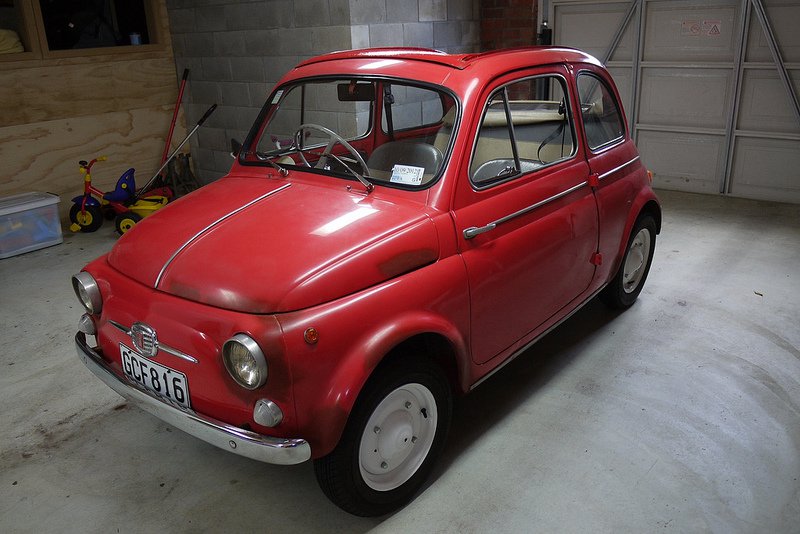
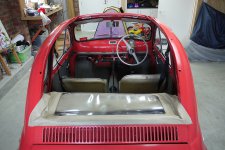
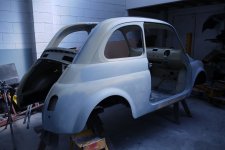
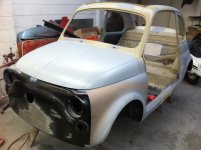
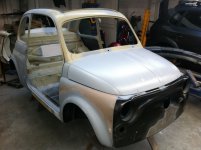
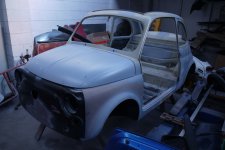
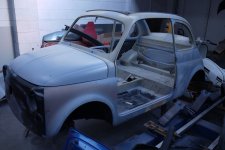
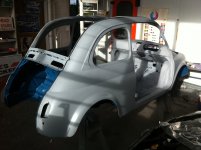
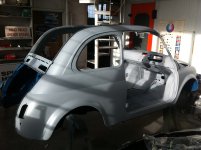
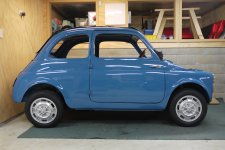
I bought the car in about October last year through an online auction. It was in a different city so I didn't view it first. A friend had a quick look and I took a bit of a leap of faith. I's a 1963 D model, which has had the rear roof unbolted to make it a "Transformable" of sorts. The existing roof just used the standard roof frame and some extra cross bars. You had to fold it back by hand but it worked well enough. The car ran well and I had a blast driving around for 3 months of summer.

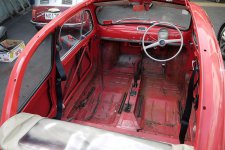
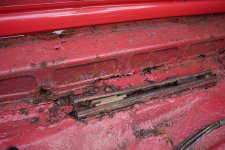
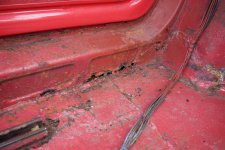
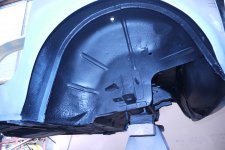
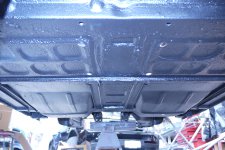
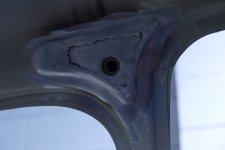
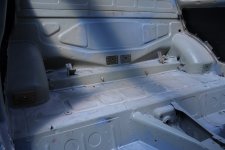
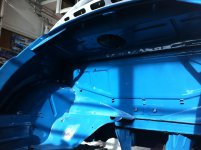
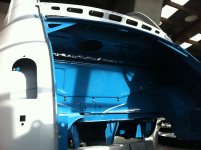
It was pretty obvious the car had rust but I ignored this while I had fun. Earlier this year the car failed its warrant of fitness test so it was time to go and see my mate Dan, who's a panel beater, and figure how bad the rust really was. The pics here show some of what was in the sills and floor. The car had a "makeover" in about 1990, and was probably quite god then, but 22 more years on the road and the rust had slowly done its job. Front panel, battery ray, drivers door, floor, inner and outer sills all needed replacing...

Faced with either a full resto or a trip to the dump I decided to save the car. And so the learning curve stated! I'll post up soon with some pics on whee the panel work has got to so far, some details of the fiat 126 donor I found and some of the work I've done on the rest of the car while the panel gets done.

Cheers Roger
Looks brilliant! Great progress and thanks for the pics of the steering conversion. If your are interested in selling your 'hybrid' column once it has been copied please let me know...
 
Hi all, I realised the other day that it has been ages since I’ve posted an update on my project, so here goes:
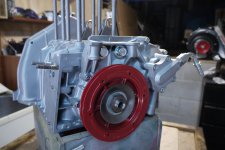
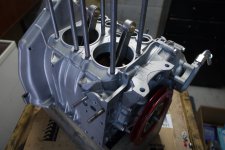
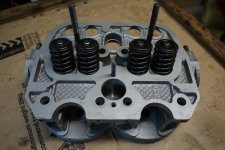
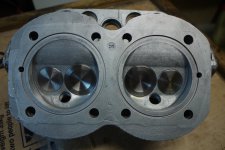
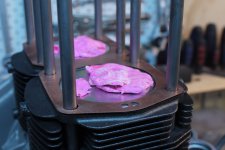
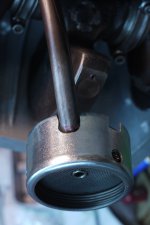
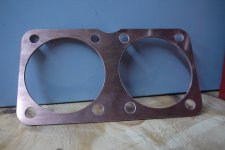
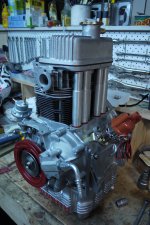
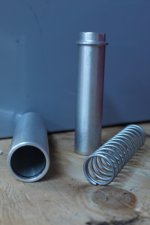
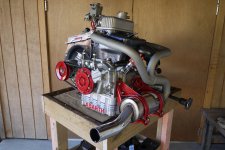
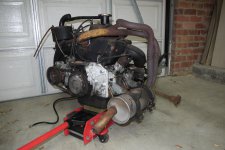
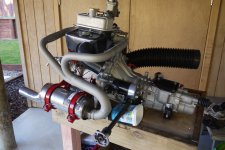
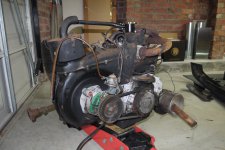
Engine: All back together, except for assembling the external shrouds, bolting up the carb and the exhaust. The build was very straightforward, but for an issue with the pistons crowning approx 2.5mm above the tops of the cylinder. This was interesting, and as I measured all the components it can only be due to a lower engine block “deck height” than is more commonly found on 126 engines. The deck height in this case is the distance between the surface where the crankcase meets the lower base of the barrels and the centreline of the crank itself. The kit came with two base plates to account for factory differences in this height, but neither was enough, so I had to have one made from 2.5mm thick copper. Once fitted I had a second problem, while a dummy assembly with some kids play dough inside the combustion chambers showed good valve clearance from the pistons, the change in overall cylinder height cased by the 2.5mm base plate meant the geometry of the rocker arms was wrong . The only solution was to press the pedestals off the rocker arms, mill them down 2.5mm and reassemble, thus “lowering” the rocker gear by the same amount the barrel had been raised. The knock-on effect of this change in barrel height then continued when I added the abarth alloy rocker cover, which then needed to have a little milled out around the retaining bolt holes so that there was sufficient thread available to torque it down. Oh yes, and because the head height changes I had to use the “concertina” type pushrod tubes. I bought a version from fiat500126.com that have the springs on the inside. They also have a good seal and are made of quite thick alloy. They seem very well made and I very much doubt they’ll ever leak (famous last words?....) The 4 litre alloy sump bolted up fine, but the oil pickup extension needed to be modified slightly so that it sat neatly on the bottom of the sump. There is a thread on this elsewhere on the forum.

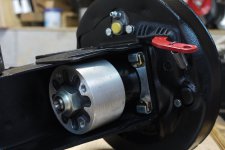
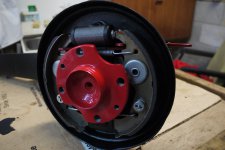
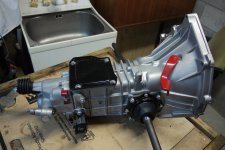
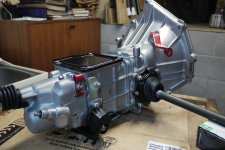
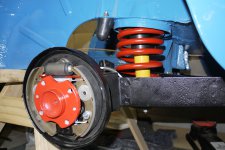
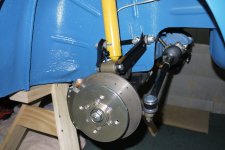
Gearbox: Fully rebuilt at last and looking great! I’ve also reassembled the rear swing arms and brakes all set to mount back in the car.

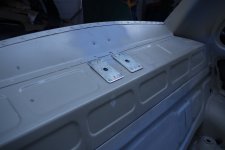
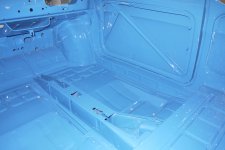
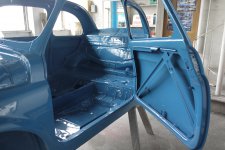
Bodyshell: The bodywork has progressed really well, with only a few small jobs now left before it heads to the painters. We have sprayed stone chip paint right under the car and through the wheel wells, as well as inside the rear panels next to the rear passenger seat and inside the doors. This will then be oversprayed in blue when the rest of the car is painted. We added seat belt mounts for the rear passengers. The engineering certifier did not require any reinforcement of the rear panel, but insisted the top mounts were in the middle, not to either side. This means the belts (which are the static type) will effectively be “reversed”, but I’m not bothered. For the front belts, we had to add top mounting points at the top of the ‘A’ pillars because standard shoulder-height mounts more commonly found in these cars are no longer legal in NZ. My panel beater did a great job of this and they’ll look just fine once the welding is properly ground back and dressed.

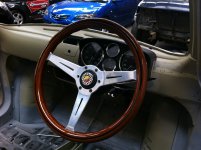
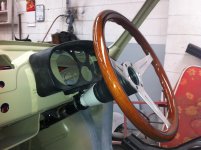
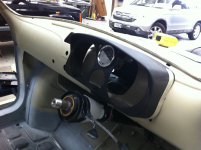
Dashboard: I bought a very expensive abarth replica instrument cluster. It’s very sexy, but the housing is made for a left-hand drive car, so there was some careful pruning required with the finger sander to reshape it to hug the dash well. Then I had to cut the dash to allow for the larger instruments.

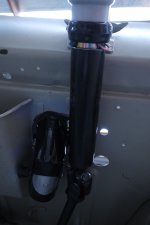
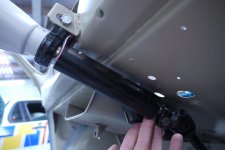
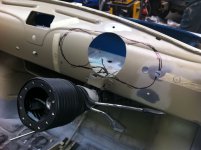
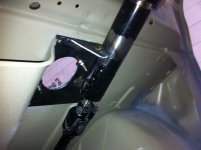
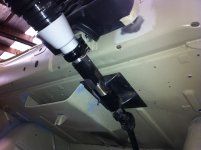
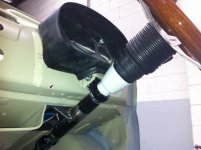
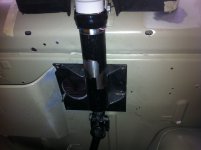
Steering: Probably the trickiest bit so far, but really just required a lot of thought and double-checking of measurements etc. Once the original 126 steering tube had its brackets cut off and was cut down to length we had to decide how to mount it to the firewall. The certifier wanted a strong mount, so we went for a plate made from 3mm steel. This was complicated by the need to cut a hole for the hot air vent. Once that was made a friend welded some brackets to hold the whole thing together and while it needs to have the welds dressed etc it works very well. I could have made it a lot “flasher” I guess, but I like to think it’s simplicity of construction is in keeping with the straightforward engineering and overall construction of the original factory parts on the car. There is still some very slight movement in the steering as the bulkhead is made of very light gauge steel and tends to flex a little. This will be sorted with a larger plate fixed to the bulkhead on the other side inside the bonnet. I couldn’t resist fitting the steering wheel and dash board for a “test drive”!

I hope the pics come out OK, quite a few were taken on my iPhone, which is never as good in poor light as a proper camera.

Cheers Roger
 

Attachments

  • Fiat 500 695cc engine build 1.JPG
    Fiat 500 695cc engine build 1.JPG
    1.3 MB · Views: 152
  • Fiat 500 695cc engine build 2.JPG
    Fiat 500 695cc engine build 2.JPG
    1.3 MB · Views: 138
  • Fiat 500 695cc engine build 3.JPG
    Fiat 500 695cc engine build 3.JPG
    1.4 MB · Views: 131
  • Fiat 500 695cc engine build 4.JPG
    Fiat 500 695cc engine build 4.JPG
    1.7 MB · Views: 122
  • Fiat 500 695cc engine build 5.JPG
    Fiat 500 695cc engine build 5.JPG
    1.2 MB · Views: 117
  • Fiat 500 extended oil pickup modified.JPG
    Fiat 500 extended oil pickup modified.JPG
    689.7 KB · Views: 114
  • Fiat 695 copper base gasket 2.5mm.JPG
    Fiat 695 copper base gasket 2.5mm.JPG
    1.2 MB · Views: 115
  • Fiat 500 695cc engine build  6.JPG
    Fiat 500 695cc engine build 6.JPG
    1 MB · Views: 127
  • Fiat 500 swingarms with 126 brakes 2.JPG
    Fiat 500 swingarms with 126 brakes 2.JPG
    1.3 MB · Views: 131
  • Fiat 500 swingarms with 126 brakes 1.JPG
    Fiat 500 swingarms with 126 brakes 1.JPG
    1.2 MB · Views: 127
  • Fiat 126 gearbox 2.JPG
    Fiat 126 gearbox 2.JPG
    1.4 MB · Views: 119
  • Fiat 126 gearbox 1.JPG
    Fiat 126 gearbox 1.JPG
    1.4 MB · Views: 133
  • Fiat 126 spingloaded pushrod tubes.JPG
    Fiat 126 spingloaded pushrod tubes.JPG
    678.6 KB · Views: 107
  • Fiat panel 52.JPG
    Fiat panel 52.JPG
    1.2 MB · Views: 121
  • Fiat panel 53.JPG
    Fiat panel 53.JPG
    1 MB · Views: 113
  • fiat panel 54.JPG
    fiat panel 54.JPG
    1.7 MB · Views: 106
  • fiat panel 55.JPG
    fiat panel 55.JPG
    1.8 MB · Views: 117
  • fiat panel 56.JPG
    fiat panel 56.JPG
    1.4 MB · Views: 111
  • fiat dash 1.JPG
    fiat dash 1.JPG
    1.5 MB · Views: 112
  • fiat panel 60.JPG
    fiat panel 60.JPG
    1.7 MB · Views: 93
  • fiat panel 59.JPG
    fiat panel 59.JPG
    1.5 MB · Views: 98
  • Fiat panel 58.JPG
    Fiat panel 58.JPG
    1 MB · Views: 95
  • Fiat panel 57.JPG
    Fiat panel 57.JPG
    1.1 MB · Views: 98
  • Fiat 500 126 steering conversion 2.JPG
    Fiat 500 126 steering conversion 2.JPG
    646.8 KB · Views: 123
  • Fiat 500 126 steering conversion 1.JPG
    Fiat 500 126 steering conversion 1.JPG
    1.1 MB · Views: 128
  • fiat dash 4.JPG
    fiat dash 4.JPG
    1.4 MB · Views: 118
  • fiat dash 3.JPG
    fiat dash 3.JPG
    1.7 MB · Views: 116
  • fiat dash 2.JPG
    fiat dash 2.JPG
    1.7 MB · Views: 120
  • fiat 500 126 steering conversion 3.JPG
    fiat 500 126 steering conversion 3.JPG
    1.2 MB · Views: 118
  • fiat 500 126 steering conversion 4.JPG
    fiat 500 126 steering conversion 4.JPG
    1.3 MB · Views: 122
  • fiat 500 126 steering conversion 5.JPG
    fiat 500 126 steering conversion 5.JPG
    1.4 MB · Views: 114
  • fiat 500 126 steering conversion 6.JPG
    fiat 500 126 steering conversion 6.JPG
    1.4 MB · Views: 117
  • Fiat 500 seat belt mounts 3.JPG
    Fiat 500 seat belt mounts 3.JPG
    835.4 KB · Views: 106
  • Fiat 500 seat belt mounts 2.JPG
    Fiat 500 seat belt mounts 2.JPG
    833.8 KB · Views: 107
  • Fiat 500 seat belt mounts 1.JPG
    Fiat 500 seat belt mounts 1.JPG
    1.1 MB · Views: 131
Hi RogerNZ,
I've just started on a rolling tart-up of my "69 Bambina. Hopefully wont find as much rust as you did. Where abouts are you based? I'm in New Plymouth.
 
Hi Roger,

I notice you have fabricated a mounts for three point seat belts. Got any suggestions for doing the same? Are you planning on fitting inertia reel belts and if so, from what?

Denzil
 
Hi, I'm in Auckland. I'm fitting standard static belts front and rear. There are a few threads on here about fitting inertia belts, it seems easy enough. I didn't go that route because the certifier who is Keeping an eye on my build warned that there were much more stringent rules about their use, particularly when retro fitted.
Cheers Roger
 
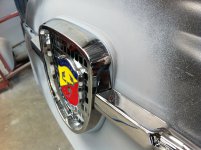
My car finally went off for paint this week! It'll be fitted in with other jobs in the paintshop so I expect I still have to wait another 4-6 weeks. Before it went there was just time for one last job on the body shell - setting up the arbath badge for the front.

Early photos of 500D abarth cars show them with a large badge like that used on the 600 cars. I really like the look of these big badges, so forked out for one. They cost a lot, and there are two types, some better quality then others. The badge I got is very high quality, heavy, with great chrome.

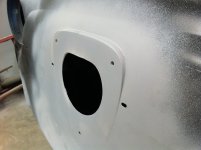
Because the front of a 600 is flat, while the 500 is not, I had to figure how to mount the badge. I had three options: Cut the badge to suit the contours of the 500 front panel, Use a rubber gasket to fill in around the badge where the gaps were, or create a flat surface on the front of the 500. I went for the last option, which my panel beater was able to do pretty quickly with a high quality auto body filler. Im satisfied that once painted you'd never know that the badge area was not stamped into the steel from factory.

Cheers Roger
 

Attachments

  • Fiat 600 abarth badge  on 500D 2.JPG
    Fiat 600 abarth badge on 500D 2.JPG
    1.7 MB · Views: 79
  • Fiat 600 abarth badge  on 500D 3.JPG
    Fiat 600 abarth badge on 500D 3.JPG
    1.9 MB · Views: 75
  • Fiat 600 abarth badge  on 500D 4.JPG
    Fiat 600 abarth badge on 500D 4.JPG
    1.8 MB · Views: 78
Hi, Roger!

I'm new to the forum, but have been reading your thread with great interest - top job, sir... great attention to detail. I can't wait to see the result of all your investment and hard work when the D gets back from the paintshop!

Thanks for the great thread - I'm sure it's proving to be a useful source of information for many followers, as well as an inspiring and entertaining read!

;)
 
Thanks jbl, I'm just getting to the best bit - reassembly!

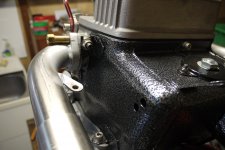
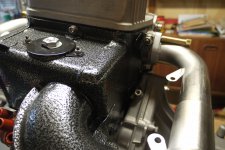
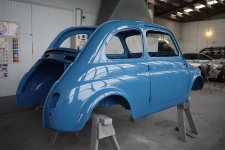
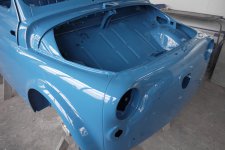
After waiting weeks for the car to make it to the front of the que at the painters workshop, work has now started. The car has been primed and double sanded. The stone chip in the wheel wells and under the car has been painted, and so has the engine bay. Tomorrow seam sealer will be applied throughout the car and the painter has told me the whole car could easily be painted by the end of the week. I've attachd some pics, sorry, not the best, just quick shots with the iphone at this stage.

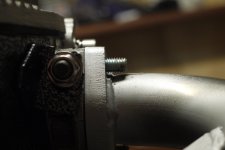
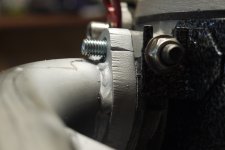
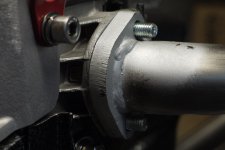
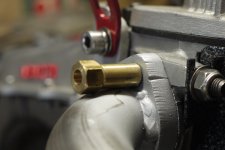
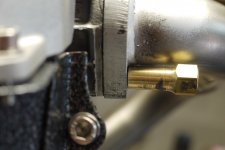
Meanwhile the battle with poorly designed aftermarket parts continues, this time the exhaust. It is a VERY nice stainless steel part - and cost a lot of money - but it has been let down by a small but frustrating detail. The angle of the manifold in relation to the flange that bolts to the head means it is impossible to get a nut over the exhaust port studs. Crazy!

Perhaps they expect people to remove the studs and instead use hex head cap screws? (even they would probably need their heads turned down in a lathe to fit I expect) I thought better of that option, since the alloy threads in the head are fragile and have already needed to be helicoiled. Using cap screws would mean taking them in and out of the head whenever the exhaust needed removing for any reason - risking further thread damage.

The only option was to get some brass hex bar and have a friend turn it on a lathe, then drill and tap it to create four bespoke tube nuts. Lucky for me I have some very capable friends - something anyone rebuilding a car from scratch will appreciate is a huge asset!

With that sorted the next job was to cut and reshape the exhaust brackets - the standard angle did'nt work with the new muffler....

Now the manifold and brackets are off to be high temperature coated.

Over a year after starting to rebuild this engine I'm almost there....!!!!

Cheers Roger
 

Attachments

  • Fiat Paint 5.JPG
    Fiat Paint 5.JPG
    1.4 MB · Views: 77
  • Fiat Paint 4.JPG
    Fiat Paint 4.JPG
    1.5 MB · Views: 73
  • Fiat Paint 3.JPG
    Fiat Paint 3.JPG
    1.4 MB · Views: 92
  • Fiat Paint 2.JPG
    Fiat Paint 2.JPG
    1.6 MB · Views: 75
  • Fiat Paint 1.JPG
    Fiat Paint 1.JPG
    1.3 MB · Views: 80
  • Fiat 126 no clearance on studs with csc exhaust 3.JPG
    Fiat 126 no clearance on studs with csc exhaust 3.JPG
    1.2 MB · Views: 67
  • Fiat 126 no clearance on studs with csc exhaust 2.JPG
    Fiat 126 no clearance on studs with csc exhaust 2.JPG
    1.2 MB · Views: 70
  • Fiat 126 no clearance on studs with csc exhaust 1.JPG
    Fiat 126 no clearance on studs with csc exhaust 1.JPG
    1.3 MB · Views: 69
  • Fiat Paint 7.JPG
    Fiat Paint 7.JPG
    1.4 MB · Views: 59
  • Fiat Paint 6.JPG
    Fiat Paint 6.JPG
    1.4 MB · Views: 77
  • Fiat 126 New bolt to fit csc exhaust 1.JPG
    Fiat 126 New bolt to fit csc exhaust 1.JPG
    1.3 MB · Views: 76
  • Fiat 126 New bolt to fit csc exhaust 2.JPG
    Fiat 126 New bolt to fit csc exhaust 2.JPG
    1.2 MB · Views: 71
  • Fiat 126 New bolt to fit csc exhaust 3.JPG
    Fiat 126 New bolt to fit csc exhaust 3.JPG
    1.6 MB · Views: 71
  • Fiat 126 New bolt to fit csc exhaust 4.JPG
    Fiat 126 New bolt to fit csc exhaust 4.JPG
    1.8 MB · Views: 75
Paint at last! Yeehaa! Let the fun begin!
 

Attachments

  • Fiat 500D repainted 5.JPG
    Fiat 500D repainted 5.JPG
    2.3 MB · Views: 60
  • Fiat 500D repainted 4.JPG
    Fiat 500D repainted 4.JPG
    2.2 MB · Views: 58
  • Fiat 500D repainted 3.JPG
    Fiat 500D repainted 3.JPG
    2.4 MB · Views: 62
  • Fiat 500D repainted 2.JPG
    Fiat 500D repainted 2.JPG
    2.3 MB · Views: 66
  • Fiat 500D repainted 1.JPG
    Fiat 500D repainted 1.JPG
    2.3 MB · Views: 78
  • Fiat 500D repainted 10.JPG
    Fiat 500D repainted 10.JPG
    2.5 MB · Views: 81
  • Fiat 500D repainted 9.JPG
    Fiat 500D repainted 9.JPG
    2.6 MB · Views: 66
  • Fiat 500D repainted 8.JPG
    Fiat 500D repainted 8.JPG
    2.7 MB · Views: 66
  • Fiat 500D repainted 7.JPG
    Fiat 500D repainted 7.JPG
    2.3 MB · Views: 62
  • Fiat 500D repainted 6.JPG
    Fiat 500D repainted 6.JPG
    2.6 MB · Views: 56
Thanks guys. The painter has done a superb job and I'm VERY happy with the result. I went for a base coat - clear coat finish so there is no reason why she won't stay looking just as shiny for many years to come. Yes Chris, she will be driven! I like things to be perfect once, and after that I'm happy to see them put to good use. Mind you, I'm not likely to head out in all weathers for a while, or down any gravel roads, but she'll be expected to earn her keep and perform the kind of duty she was designed for all those years ago.
She comes home tomorrow, but I have too much work on to start the reassembly for a couple of weeks at least. I'll be sure to post lots of pics.
Cheers Roger
 
Hi all, reassembly is well underway, although taking ages as I have a lot on at work and, as expected, there are countless small jobs that take a lot longer than seems possible. Some of you may have seen my question on another thread about springs - I am now something of an expert on the different mounting systems used by fiat for rear springs!

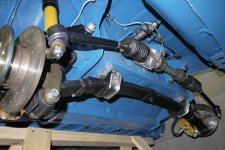
The steering rack, front suspension and discs are all in the car. As are the new brake lines and most of the cables. The rear swing arms, shocks and springs are in place also. I've done a few small things as well such as fit the front badge, headlights and horn.

Today I fitted the wheels for the first time to check for clearances etc. All looks good. I'm a bit puzzled that the ride height seems about standard, as the suspension kit was supposed to lower the car 30mm, but with no weight yet in the car and all the main bolts yet to be tightened etc I'm not too worried.

I've mounted the steering column and steering wheel loosely to double check everything fits well as it did on the dry build before painting. No surprises there so I'll fit it properly and permanently over the next few days.

The auto electrician will be visiting tomorrow to look over the car - I'm asking him to build a custom loom from scratch, with a few extras such as a discreet power socket for mobile phones etc and switches for spot lamps.

I also fitted the new convertible roof as a test, it seems a little loose, so I'm going to have it shortened by 10mm to make sure it pulls down tight and straight against the car.

I couldn't resist a picture of the car with my other italian air cooled twin.

Cheers
Roger
 

Attachments

  • P1070925.JPG
    P1070925.JPG
    1.5 MB · Views: 115
  • P1070926.JPG
    P1070926.JPG
    1.8 MB · Views: 98
  • P1070927.JPG
    P1070927.JPG
    1.5 MB · Views: 111
  • P1070929.JPG
    P1070929.JPG
    1.6 MB · Views: 137
  • P1070944.JPG
    P1070944.JPG
    1.7 MB · Views: 94
  • P1070943.JPG
    P1070943.JPG
    1.8 MB · Views: 93
  • P1070932.JPG
    P1070932.JPG
    1.4 MB · Views: 101
  • P1070931.JPG
    P1070931.JPG
    1.4 MB · Views: 106
  • P1070945.JPG
    P1070945.JPG
    1.4 MB · Views: 87
  • P1070947.JPG
    P1070947.JPG
    1.7 MB · Views: 96
  • P1070952.JPG
    P1070952.JPG
    1.8 MB · Views: 102
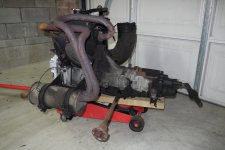
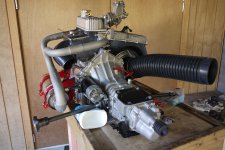
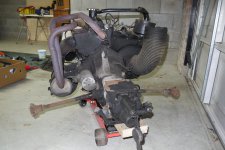
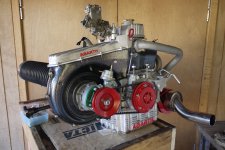
I love a good before and after pic! Still a few small jobs to do like mount the carb properly, but I can't wait to get this baby into the car!

Merry Christmas everyone.

Cheers
Roger
 

Attachments

  • Fiat 126 engine after 2.JPG
    Fiat 126 engine after 2.JPG
    1.7 MB · Views: 149
  • Fiat 126 engine before 2.JPG
    Fiat 126 engine before 2.JPG
    6.3 MB · Views: 120
  • Fiat 126 engine after 1.JPG
    Fiat 126 engine after 1.JPG
    1.7 MB · Views: 143
  • Fiat 126 engine before 1.JPG
    Fiat 126 engine before 1.JPG
    6.2 MB · Views: 104
  • Fiat 126 engine after 4.JPG
    Fiat 126 engine after 4.JPG
    1.8 MB · Views: 118
  • Fiat 126 engine before 4.JPG
    Fiat 126 engine before 4.JPG
    6.1 MB · Views: 91
  • Fiat 126 engine after 3.JPG
    Fiat 126 engine after 3.JPG
    1.8 MB · Views: 162
  • Fiat 126 engine before 3.JPG
    Fiat 126 engine before 3.JPG
    6.1 MB · Views: 103
Superb piece of work Roger, a real shame that you are going to have to get it dirty by running it---won't 'er indoors let you mount it in the lounge as a piece of art? On a more serious note, it's difficult to realise that the 'before' and 'after' picture are of the same engine. I know how you must feel because I took 5 1/2 years to restore a Kelvin marine engine from a rusty heap to an engine that I was asked to show and now propels my canal narrow-boat (the other pocket-emptier in my life--which makes me a pretty well balanced guy--both pockets are empty!).
All the best for Christmas and the New Year---keep us advised how the beastie goes when you get it on the road--travel well.
 
Christmas wrapping takes on a whole new meaning...
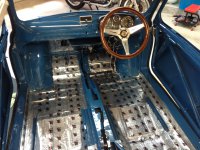
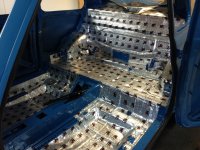
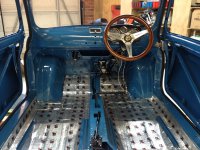
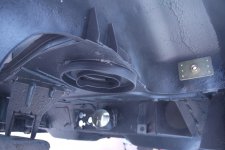
I've just finished layering the inside of the car with sound insulation to cut down on road noise and general resonance in the steel floor pan. It took ages and has added at least 3 kilograms to the car's overall weight, so I hope it achieves the desired effect!
Cheers Roger
 

Attachments

  • Fiat 500D sound insulation 2.JPG
    Fiat 500D sound insulation 2.JPG
    2.6 MB · Views: 113
  • Fiat 500D sound insulation 1.JPG
    Fiat 500D sound insulation 1.JPG
    3 MB · Views: 103
  • Fiat 500D sound insulation 3.JPG
    Fiat 500D sound insulation 3.JPG
    2.8 MB · Views: 87
Finaly got the engine in today. Glad to see that the extra weight sorted the issue I had with the rear end of the car sitting too high. Now just the front is too high! Given that I have a lowered front leaf spring that's a bit of a worry, but I expect it will sort itself out once some weight gets on it. Watch this space on that one.

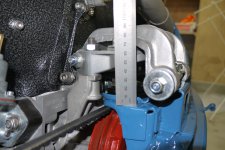
Meanwhile, another spring is causing problems, this time the rear engine mount spring. I have a "reinforced" version, which I figured was a good idea as these engines bounce around a little too much for my liking. However as you can see from the picture below it is not compressing enough, leaving me with no gap between the mount and the fan belt. Not a big problem, I'll just get another spring, but out of curiosity I wondered if someone could have a quick measure and tell me what amount of clearance a good condition spring should provide? The ruler on my pic shows that I currently have about 63mm clearance from the top of the rear panel mount and the upper surface of the lower portion of the bolt on engine mount. What is this as standard? Has anyone else had problems with this type of "reinforced" spring?

Cheers
Roger
 

Attachments

  • fiat shocks.JPG
    fiat shocks.JPG
    1.6 MB · Views: 109
  • Fiat 695 abarth engine in 500d 3.JPG
    Fiat 695 abarth engine in 500d 3.JPG
    1.5 MB · Views: 112
  • Fiat 695 abarth engine in 500d 2.JPG
    Fiat 695 abarth engine in 500d 2.JPG
    1.8 MB · Views: 97
  • Fiat 695 abarth engine in 500d 1.JPG
    Fiat 695 abarth engine in 500d 1.JPG
    1.7 MB · Views: 130
  • Fiat rear engine mount spring.JPG
    Fiat rear engine mount spring.JPG
    1.8 MB · Views: 126
Back
Top