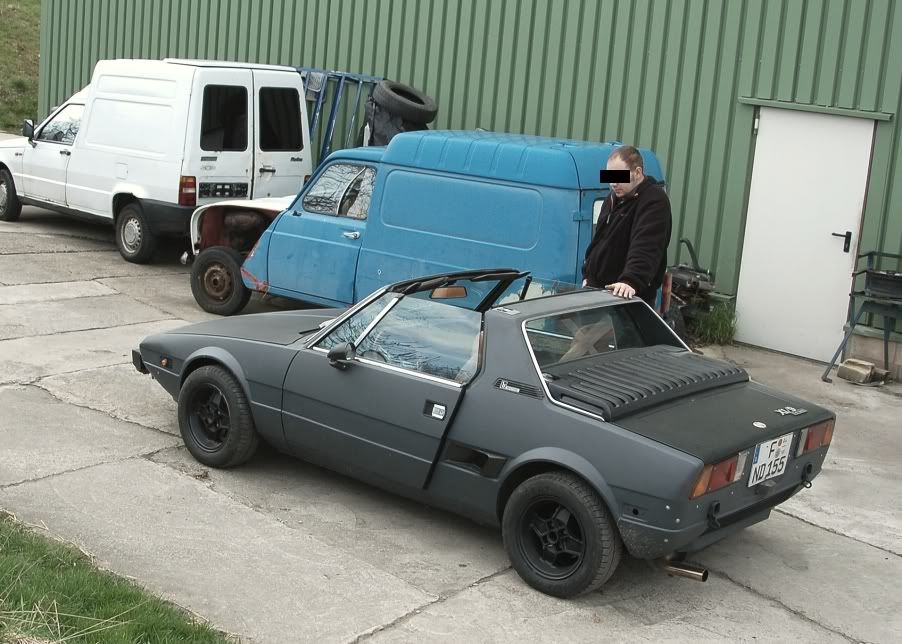
General X in NZ

Currently reading:
General X in NZ

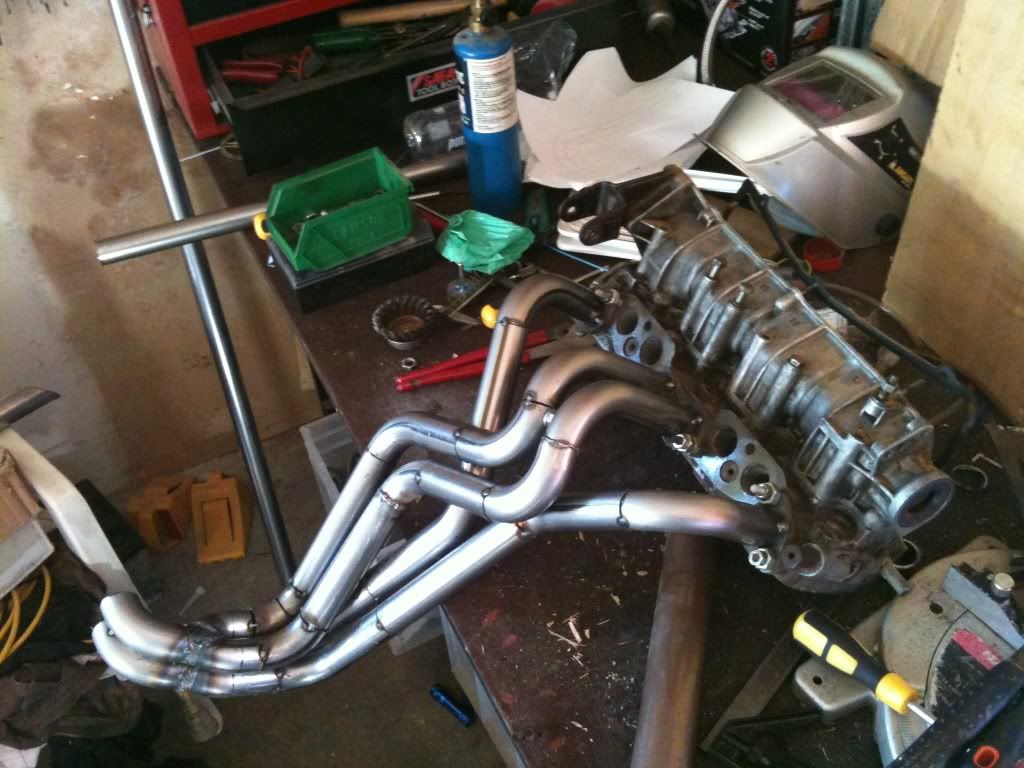
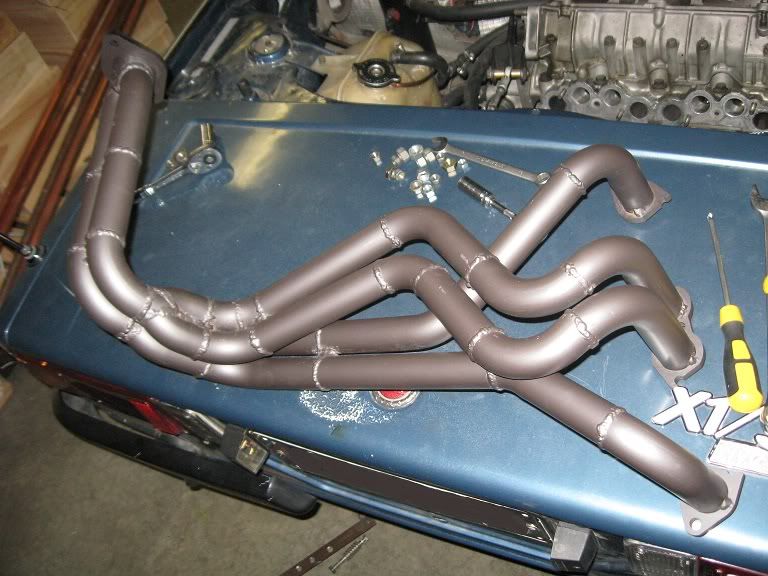
In my efforts to track down the cause of the flat spot issue I thought I would fit an o2 sensor to vizzle the stoichiometricizzle.
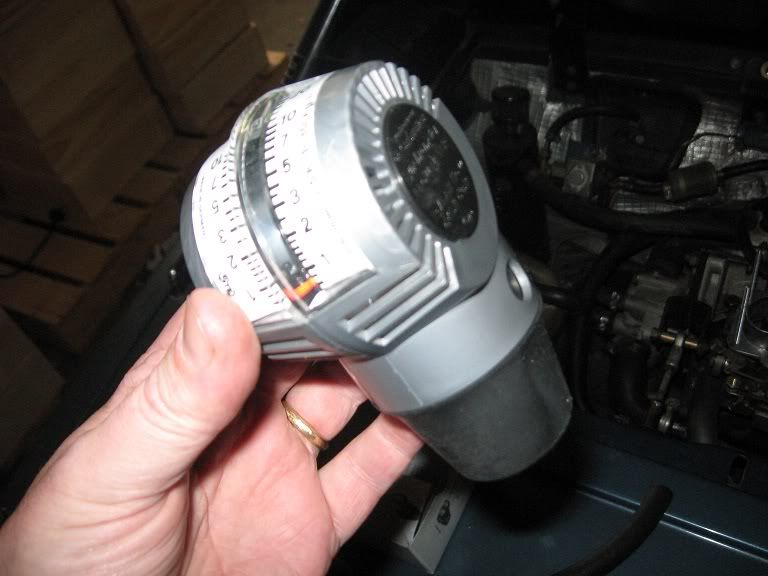
17 μlarge got me a jaycar kit which even someone as deeply electrically retarded as me could slap together in a trice as there are only 4 things on it. It took longer to figure out the values of the resistors than the entire length of the rest of the project.
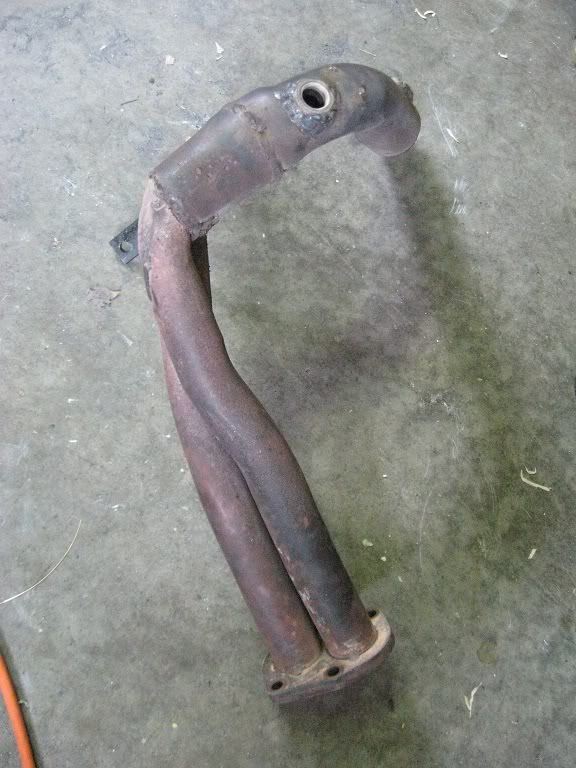
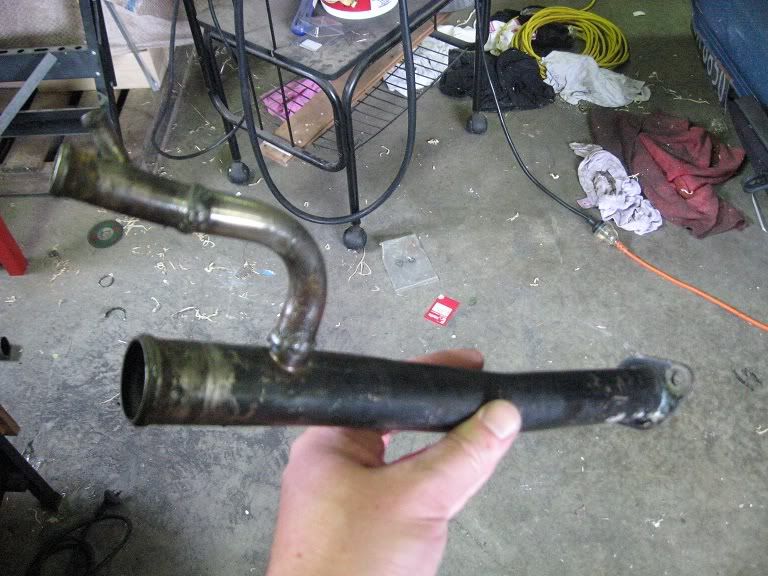
A Toyota Vitz o2 sensor and a friendly supplier who gave me two M18 metric fine half nuts sealed the deal;

O2%201.JPG


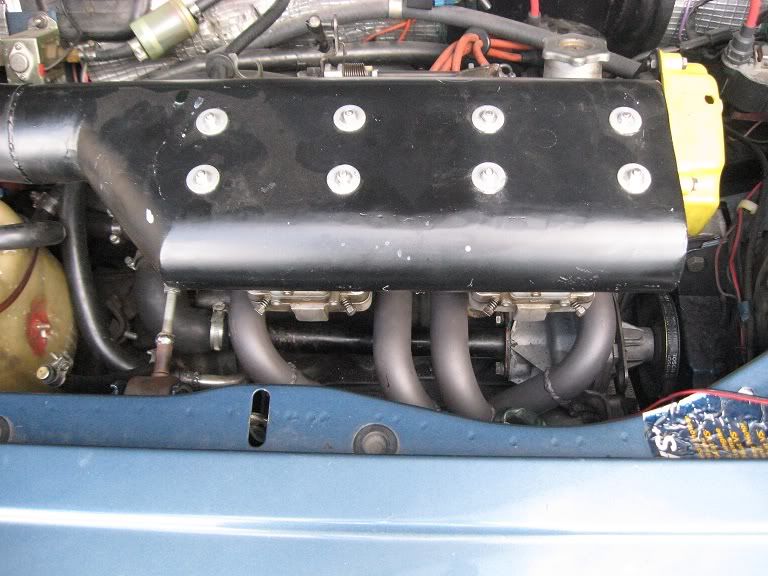
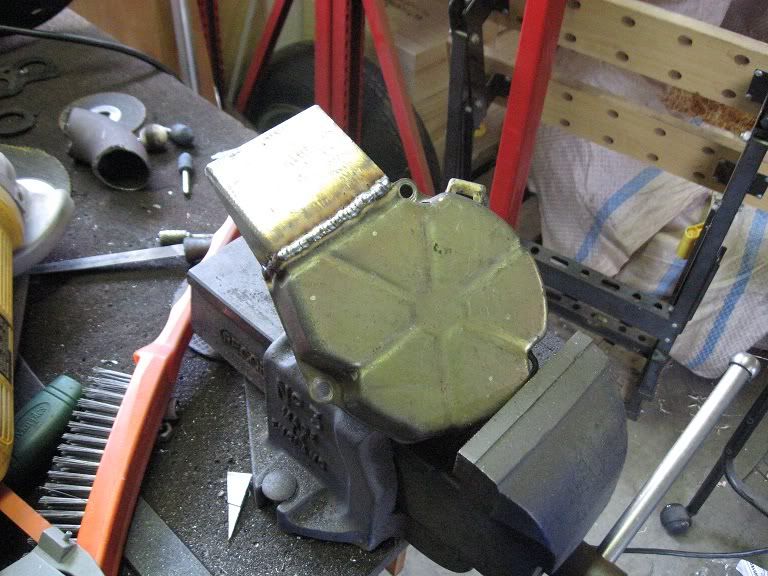
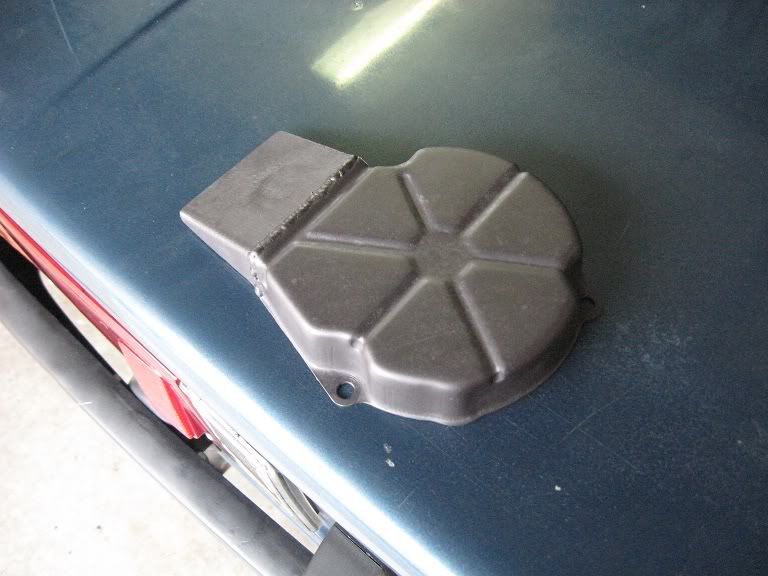
And the prize for the roughest ever fuel air indicator mounting goes to;

O2%202.JPG


Well that would be me then.

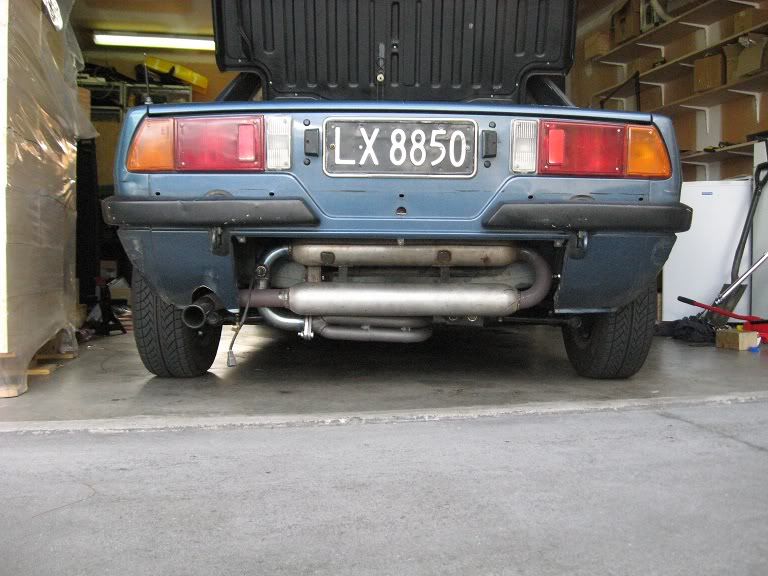
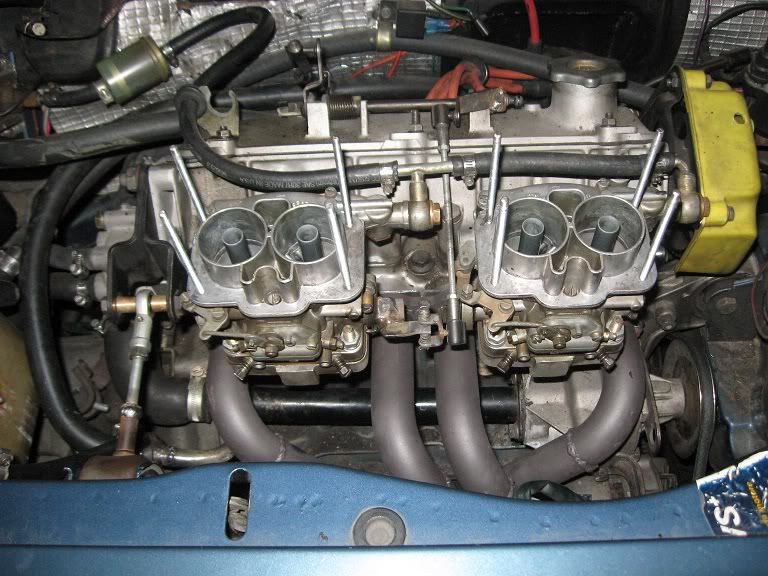
Result? - I had no real baseline to judge it from, other than the pot was wound fully anticlockwise to get it out of the yellow and into the green, so it is probably running rich on average. However, it is remarkably consistent under all load conditions, and making it do it's flat spot dying/coughing/farting thing didn't really affect the ratio, so it is hard to say it it is caused by leaning out or getting too rich.

As this was the point of the episode, it is probably been a waste of time...

mmmm pretty lights though.
 
Does anyone have an ignition advance curve for SOHC motors?

I am trying to solve some issues with the dcnf's I have put on the X, and I want to be as methodical about it as possible....

There are three issues;

1. It is running quite rich - a. it chews the petrol, b. the narrow band o2 sensor I have put on is *indicating* it is rich.

2. It has a flat spot at around 2.5k if you are careless with the throttle - not that bad really but it would be nice to smooth it out.

3. It idles quite high, 1500 - 1800rpm when warm, and this is with the butterflies fully closed (no contact with the stop adjustment).

Apart from that it starts and goes extremely well, today I took it for a long blast around the port hills - awesome.

But before I get into swapping jets etc I want to make sure that the timing is correct - but this is hard to do with the high idle... so this is the first thing I want to sort out.

If I had an ignition map, at worst I would know what the timing should be at (say) 2k revs and can set it accordingly, at best I could set up the distributor to have the correct advance curve. either way I would have a much better idea that the timing is ok and not causing issues.

I talked to a chap today who does has done a lot of carburetted racing car setups, apart from the fascinating discussion we had about how all the various jets and settings in the carbs affect different aspects of the performance, we also discussed the timing. He suggested that I set up the distributor to have 35 deg max advance and that it should hit that at around 3500rpm. he also reckoned that at that top end setting it would want to be idling at around 10 deg static advance.

So that is all very well, but it would be nice to compare that with the standard X1/9 curves to see if they correspond.

So I guess the question should be 'what would be an appropriate advance curve for my setup?'

TIA
 
So I have been fiddling around trying to sort out the carb issues;

On the basis of informations I gleaned from various sources, I thought I would first make sure that the timing was correct, as up until now I couldn't check it to spec as it has never idled at 900 revs...

First I pulled apart the dizzy and checked how much advance it would allow, which was 25deg. I then marked 30 and 35 degrees on the front engine pulley and checked the timing against that, as at 35deg max advance this would make it 10 deg static timing. Doing this was timely as I discovered that the blocked off vacuum unit had lost its screws and was flapping around the side of the dizzy :confused:

After setting the timing this way, the idle dropped a couple of hundred revs, not much but it made the car run much smoother although that could be attributed to the vac unit..

Then I bled the clutch, which meant taking off the airbox, so while I was at it I had another look at the throttle setup. It looked like it was binding slightly and preventing the butterflies fully closing. I gave a judicious tweak to the interconnect (with vise grips :rolleyes: ) to align things a bit better. After this I started it up and balanced the carbs and - voila! A smooth idle at 1250 revs.

I took it for a quick test drive and it feels really lively now :D:D:D

I will now look at changing the idle jets from 50's to 45's to see if that affects the richness - after that my knowledge and capabilities are fully extended so I will find someone else to look at it if it is still not right.


There was also a Fiat/Lancia track day this weekend gone, and I took the X along for a bit of a thrash, however things got a bit more exciting than I expected....

Turned up bright and early having borrowed lots of kit from a mate who races in the V8's;

Trackday%20001.JPG


Unfortunately on the 4th lap of driver training the car managed to set itself on fire! The extra charging circuit wire I had put in had shorted on the back of the alternator and set fire to mostly everything between the alternator and the battery - there was a truly exciting 30 seconds while we jumped out and put it all out + tore the main supply wire off the battery!

I have no pics of the aftermath as I got someone to tow me home (behind a Delta Integrale, this was not the perfect tow car as it is a bit laggy below 3000 revs... :devil: )

Things looked pretty bad mostly as everything was coated with fire extinguisher. After I got it home I had a better look;

Trackday%20003.JPG


This is the remains of the power wire and the main supply junction

Trackday%20006.JPG


This is the near new and now decidedly second hand battery

These photos are after the fact as I ripped everything out, vacuumed all the extinguisher powder, whipped down to Repco for a new battery/terminal/wire/etc, rewired it all from the battery to the fusebox and created a new junction. I then checked everything still worked, which fortunately it did, and drove back out to Ruapuna. :slayer:

There were a few disbelieving looks from some of the boys who had inspected the damage when I had towed it back off the track

From that point on things went pretty well - I explored the outer limits of road tyre adhesion (and beyond those limits at the hairpin - but we won't discuss that any further), and tried to crack the ton on the main straight - which I did manage after a good run round the last bend, but I nearly had brown trousers before I made it around the bend at the end of the straight!

Trackday%20005.JPG


Bit hard to tell, but this was once a warrantable tyre that probably isn't anymore (y)

The only real problem was the brake pedal going very soft after pulling into pit lane to wait the next turn, but out on the track it felt pretty bulletproof.

I will need to go over the car to check nothing has broken, but I was pretty happy with the days result.

Trackday%20007.JPG


This is my man Nick and I about to head home - Nick managed to not blow his engine up this time, which he did last year :rolleyes:

He has a croma 2 litre turbo in it, so breaking it is an expensive option....
 
Wonderful post there!

But that wiring! :eek:

I feel a bit guilty for recommending that alternator direct feed in the first place. I suppose, as you now know, I should have made it clearer that the wiring needs to be well-sheathed (I use that corrugated 'loom tube' you can buy from auto electricians or Jaycar) and well-secured. Also, I used a 60A glass fuse at the battery, of the type used to install amplifiers.

Top marks for getting it fixed up and out on the track. There are people that say that the X1/9 isn't allowed at MotorSportNZ-sanctioned events, because it is classed as an 'open' car and requires a full rollcage, not just a rollbar. At least, that's the case in the club I belong to.

Anyway, top work, especially with the carbs synchronisation (I think your interconnect should be a bit more precisely-adjustable?) and the ignition timing checks.

I've bought a FIAT 124 Spider, which is even more madness than buying an X1/9 :rolleyes: I don't have a proper thread for my Spider yet, but I described it in Let's Talk FIAT.

Cheers,
-Alex
 
Have no fear as it really was my fault :D

Being a bit boneheaded about electrickery I did not fuse the wire, and anyway sheathing it wasn't the problem - I think that the additional movement of the engine when the car was being thrown around the track somehow pulled the ring terminal around to contact the heat/water shield on the back of the alternator...

Anyway, no real harm done, and i will take more care next time...:eek:

The carbs do have a synchronisation adjustment screw, but I needed to add an extra tab to the interconnect - and it was this that needed tweaking to align to the adjustment screw a bit nicer.

Thanks for the comments, and I hope you have fun with the 124. I had a 124 Sport CC once upon a time - such great fun.

Doesn't it rain a lot in Hamilton.......? ;)
 
Been a wee while since the last update, mostly because I don't really like taking it out in the rain and there has been enough of that recently to seriously consider building an ark...the 'puddles' the streets around here are about as deep as the doorsills on the X and I dont fancy a musty smell to go with the burnt electrical wiring smell :yuck:

Things done/to do;

1. After the track day I bled the brakes which made them better than they were before, so it obviously needed it, and it probably should have been done before the trackday....
2. I have been meaning to spin the carbs around so the bowls are facing the front as I have found the car flooding itself coming to a stop on steep downward inclines. I knowledgeable man told me so, but I didn't think it would matter but it does.
3. I have also noticed that one of the carbs has been seeping petrol out of a wee ding on the float bowl - I knew the ding was there when I installed them, but it is obviously more cracked than I expected. The best option to fix it seems to be a metal filled 2pot epoxy, as I wasn't that keen to break out the gas axe and have a go at soldering it up :D

So time to crack on, going to have to hack up my stylish airbox to make it fit when the carbs are moved unfortunately.

A customary position now.....
090513%20Carb%20Mods%201.JPG


A crap shot of the ding, damn these point and shoot cameras...
090513%20Carb%20Mods%202.JPG


metal filled 2 pot epoxy applied;
090513%20Carb%20Mods%203.JPG


What with it being a balmy 4 degrees in my garage, the epoxy wasn't looking like setting anytime this century, so the carb is now sitting in a high place in the kitchen with a woodburner going full tilt, should be sweet by tomorrow.

Might give it a cleanup to knock off the bigger lumps then do a pressure test - will be interesting...
 
One minor issue during the swap around - pretty close to the cambelt cover etc, solved in 5 mins with a file...

090520%20Carb%20Mods%201.JPG


Spent a lot of time fiddling with the linkage - I had to dick around cutting and welding the interconnect to make sure the actuator rod was clear of the accelerator pump. I also wanted a little more pedal travel, but this made it hard to get it past the fuel line, which made the fuel line too close to the frigging airbox etc etc, but I got there in the end;

090520%20Carb%20Mods%202.JPG

090520%20Carb%20Mods%203.JPG


Also needed to mod the airbox cutouts;

090520%20Carb%20Mods%204.JPG


A lick of paint on the fixed box + some better box to carb gaskets and all was good;

090520%20Carb%20Mods%205.JPG

I might be able to take it for a drive around Ruapuna next weekend hopefully as the CCC is having a fun day...

And I really REALLY want to do this;

DSC_0252b.jpg


http://retrorides.proboards.com/index.cgi?board=readersrides&action=display&thread=60739
 
So the old girl has been running sweet as a nut for a good wee while with no problems, although I have been fiddling with a few things...

I discovered the clutch slave cylinder was leaking like a bastard after we had bled it but later on there was still obviously air in the system. I went to bleed it again but didn't bother as you could see the fluid all over the gearbox casing. Fortunately you can still get bits for these pretty easily in NZ and I bought a brand spanking new one for around $80, which I slapped in this week;

090627ClutchSlave.JPG


Unfortunately you need to remove the header tank and drain the cooling system to get access, so I took the opportunity to replace all the small hose clamps with better quality items - I have been getting a few wee drops of coolant on the floor after it has been out, so I thought I had better. I have also got some T bolt clamps for the main pipes on order, so will replace those as well.

In other news I will be getting some exhaust flanges profiled, and I can now get trade prices at the local exhaust shop, so the headers shouldn't be too far off.

I have also redone the extra power/charging wire mod again, this time with a fuse up near the battery so I don't get a repeat of the Ruapuna excitement I had. I also cut away the alternator shield a wee bit so that the wires are completely clear of anything even remotely earthlike.

I scored a weber carburettor manual off trademe (ebay) for $20, it covers DCNF's so I am pretty happy as I now know how to tweak the idle circuit so it is not running so rich. I know it is rich as I can use 1/8th of a tank of gas in one trip in the traffic to work and back.... :eek: 98 octane aint cheap neither. I got some smaller idle jets from the UK as well just in case.

That is all.
 
Finally got around to starting my headers.....

IMG_0077.jpg


Measurements are from a lengthy discussion of SOHC tuning on Guy Crofts site. I have made the pipe diameters slightly less than he suggested, although still larger than the ports....otherwise there would not have been enough room for the nuts to bolt them down. There are no secondaries yet..
 
Finished sorting the rest of the system today has been a mission fitting it around the unreasonable demands of family life over the last few days.

002.jpg


Headers mostly done, might have to actually grind back the welds to tidy them up :(

Headers.jpg


This is the bit of ugly that has prompted all this, I imagine that this would have done nothing for the zorst flow, there was another very acute bend between the two boxes that has gone now too;

007.jpg


Also modified the water pipe so that the rubbery bits were away from the hot bits. I like hot rubbery bits as well as any man but only in the right context.

004.jpg
 
Great work - thanks for continuing to update this thread. (y)

You like the matt black paint on that X1/9?


Also modified the water pipe so that the rubbery bits were away from the hot bits. I like hot rubbery bits as well as any man but only in the right context.

LOL :D
Hot bits should be wet, too. But only on the inside.

-Alex
 
Last edited:
The paint works for me pretty well...

Scarily one of the boys we have just employed was a custom car panel beater in a previous life, and he owes me a favour as I lent him my welder to sort out his Humber Super Snipe..... the path of least resistance is becoming clear.
 
I might just do that as I was using the standard heatshield before, now there will be nothing, and I am a bit worried about how hot it will all get.

It is a pain to do though, and the stuff can be expensive.
 
Stuck it all back together today and went for a drive, seems all good. Noise is no more or less that what it was before, maybe a little more raspy , but it feels a lot smoother and much livelier. Didn't really give it the big one as will wait until things have settled down a bit/made sure no leaks etc.

Need to extend the heat shield on the back of the alternator as the exposed wires are about 30mm from one of the pipes - also need to extend the wires for the O2 sensor as I have repositioned it to the other side of the system to make sure it was close to the exit of the headers....

001Headers.jpg


002Headers.jpg


003Headers.jpg


The pessimist in me will not be happy for another week or two, but basically I am pleased....

Yesterday I took the pipes back to Autobend where I got the prebent sections from, they have scanned them so I can make sure the CAD lines up with the reality, and they are quoting me a price to build some sets....
 
wrap it all in heat wrap then no one will see the welds, said to give more power too if you keep gases warm till they come out the end

Heat wrap is a dark art - all it does is move the heat problem, the pipes themselves tend to get hotter than before which can cause problems in itself. If the car is exposed to damp air the wrap also massively accelerates oxidation so unless you've got decent steel you can expect the exhaust system to last roughly a year (in a typical UK climate at least). It is typically the welds that go first...

If you need to wrap just a section to shield delicate components then it is a real solution. If you're going to wrap the entire system make sure it is painted in a proper heat proof, rust inhibiting paint first. The manifold will glow visibly red (like a turbo) and the exhaust tip will be likewise hotter which can cause a lot of pain if you let you leg touch it when loading/unloading the boot.
 
Yes, I have decided not to bother with the wrap, I will put in metal shields where needed and maybe modify my bonnet for more flow, or make a new one with extra venting.....
 
All together again after doing this to the alternator heatshield so that the electrickery stays within its little pipes;

100114Fiat001.jpg


100114Fiat002.jpg


So I took it for a reasonable run to make sure things didn't fall off/break/burn/explode/etc which it did not, but it was obvious the carbs still need some work, there was mega backfiring on the overrun and while it doesn't have the flat spot of death it does have the flat spot of painful flesh wound. Also for giggles I put a pipe to my ear and listed to each choke, it was perfectly obvious that each choke was sucking significantly different volumes, glad I paid money to achieve that right there.

As it is now obvious that the only way to get satisfaction is to do it yourself, I wrangled myself this wee beasty;

100114Fiat003.jpg


Which is going to be inserted into these;

100114Fiat004.jpg


And awesome will ensue.
 
I have had fun - after I synchronised the carbs it has been going like a bat out of hell - 7000 rpm was about all it was happy to go to prior to the new exhaust, now 8000 rpm is no problem.....

Still a flat spot though, but i suspect that the chokes are contributing to this as they are 28mm that have been very roughly machined out to 33ish.

Plus i need to recheck the float levels as fuel consumption is still high....
 
Back
Top