General Work Begins... Finally. 94 Panda CLX
Currently reading:
General Work Begins... Finally. 94 Panda CLX

i had a noisy alternator for a while on the parade. long story short i did nothing about it and it broke down a few weeks later. my advice is to get a new one off ebay which matches your car, BUT MESSAGE THEM TO MAKE SURE ITS THE RIGHT TYPE PULLEY FOR YOUR BELT

Yeah otherwise there might be an alternator going your way! I had an alternator refurbed a few years back for a fairly reasonable price, not sure if this is something that can be done/is worth while for a Panda alternator? Interested to hear if just the bearings can be replaced. Got a bit of a list of things to look at so will do some research. Any thoughts on gear selector bushes? Done nearly 90k miles, might well be worth an upgrade:).
 
Yeah otherwise there might be an alternator going your way! I had an alternator refurbed a few years back for a fairly reasonable price, not sure if this is something that can be done/is worth while for a Panda alternator? Interested to hear if just the bearings can be replaced. Got a bit of a list of things to look at so will do some research. Any thoughts on gear selector bushes? Done nearly 90k miles, might well be worth an upgrade:).
the alternator i bought on ebay was great and had been refurbed
 
I was wondering about a refurb. I don't really want my car off the road too long so refurbing myself might not be the best option!
some places give you a good deal if you trade in ur old alternator too. plenty options and they are easy to remove and replace. this one is the cheapest i could find on ebay, refurbed and has the correct pulley. also has best offer, be cheeky as it is old stock as per the ad, you could grab a bargain!


Look at this on eBay http://www.ebay.co.uk/itm/382055683422
 
This post contains affiliate links which may earn a commission at no additional cost to you.
some places give you a good deal if you trade in ur old alternator too. plenty options and they are easy to remove and replace. this one is the cheapest i could find on ebay, refurbed and has the correct pulley. also has best offer, be cheeky as it is old stock as per the ad, you could grab a bargain!


Look at this on eBay http://www.ebay.co.uk/itm/382055683422

Cheers for the tip, best price I've seen so far though I'm not sure it's right for my car? Takes the right belt and says 1000cc but think mine might be a 65amp as a late model spi cat. car? Will need to check, might start a new thread just to seek advice on this.
 
This post contains affiliate links which may earn a commission at no additional cost to you.
And half way through a 60 mile round trip today the noise just stopped! Will monitor this for a while and see how things are looking. I guess it's been laid up for quite a while now, might just need to stretch it's legs a little:). Fingers firmly crossed and research into alternators being done just in case!
 
So got a few hours this afternoon to play with the Panda, top of my list today was the alternator:D.

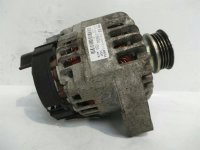
Sadly I forgot to take both my camera and my drill to work, both greatly missed. Still got a couple of pics off the ebay listing for the new alternator which hopefully will make some sense of my report.

At this stage the old alternator had been working faultlessly for at least the last 100 miles but I didn't really trust it (certainly not for Russia trip) so figured for what it's worth I should get it delt with. Having had some great advice on my other alternator specific post on here and dragon mans report from when he did the swap on Talon to a Punto alternator I was fairly well prepared for what I needed to do, cheers guys(y).

So I spent a bit of time watching what was coming up on Ebay, quite a few options came up but I was looking for as new an alternator as possible. The more I looked at different Fiat alternators the more I figured I could get most of them to fit so I basically looked for an increase in amps and as new as possible. The alternator I found was 105amp and taken off a 2013 Fiat 500 with 24k miles on the clock. A little more expensive than the older alternators kicking about but practically factory fresh. It also took the same size multi-v belt as mine already had and appeared to connect much the same as my original one.

So first off I removed the old alternator so I could compare both alternators on the bench. At this stage the old alternator had been working faultlessly for at least the last 100 miles but I didn't really trust it (certainly not for Russia trip) so figured for what it's worth I should get it delt with. I removed the air box and a couple of cable clamps to get access from the top and removed the drivers side front wheel and plastic cover to access the bottom. Pretty easy shifting the old alternator really.

Centre to centre the mounting bolts were about 115mm apart and the same size so all good there, though the offset of the pulley wheel from the mounting was quite different. For whatever reason the 500 pulley extends out from the alternator, picture below taken from the Ebay listing shows this, sadly no photo of the original one.
new alternator 1.jpg
Swapping the pulley wheels over was not too much trouble, though a better selection of tools would not have done any harm! Initially the original pulley wheel rubbed against the casing of the new alternator but it had a handy washer under the original fan, which once transferred across seemed to line things up quite nicely. Once fitted I recon I'm actually out by 1mm or so, though it does not seem to be causing any trouble, belt still looks good after a decent run at speed. I think if I ever need to take this off in future I'd be tempted to swap the washer out for one slightly thinner.

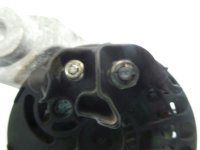
So the other difference between alternators were the different cable connectors on the back. The larger, main positive cable to the battery on the old alternator was attached by way of a ring connector over an 5mm bolt, the new one went on to a 7mm bolt (or there abouts). This is where my drill would have been handy as there was plenty of meat on the connector to just drill it out... took quite a while with a rats tail file getting them to size (2 connectors on this terminal!). Cable wise my mate Martin checked a guide as to amps which different diameter cables can cope with and concluded we're all good, confirmed after a decent test drive and no warm wires! On to the smaller terminal, also positive, I guess to signal charge etc? No idea but cable was tiny and on the old alternator connected by way of a fancy spade connector. I did not really want to cut this off, in part as I'd like to be able to return everything to spec. where possible and in part as I did not yet know if the new alternator was going to work. So I cut a 2" length of cable, fitted a ring connector to one end and a male spade connector to the other and used this to link the two, with a load of insulation tape for good measure.

I've attached an image of the connectors on the new alternator, in part to help make sense of the above and in part as I like it when faces appear inanimate objects and this is a classic.
new alternator 2.jpg
I'll admit this little distressed face helped seal the deal that this was the alternator for me:).

I realise the above ramble probably does not make the most entertaining read but hopefully will help others out in the future, along with the other excellent posts on here, looking to upgrade their alternator (or even just replace a broken one with as new a used replacement as possible). If you are reading this for that reason check out Dragon Mans write up and photo's below:
https://www.fiatforum.com/members-mot...sisley-53.html

So there you have it, you can get alternators of fiats made right up to 2015 which bolts on to a Panda without too much trouble.

In other news I also got my passenger door pocket on, cheers Onemanmade for doing the leg work on getting screws and pegs and Vernon for having a stockpile of the latter(y).

Oh and got a decent Pioneer head unit in, sounding better but I'm a bit spoilt by the sound quality in my Volvo, will research into hiding decent speakers in a Panda next! Well I say next, sorting the roof rack takes next priority I recon.
 
I Spoke too soon!!!


'Once fitted I recon I'm actually out by 1mm or so, though it does not seem to be causing any trouble, belt still looks good after a decent run at speed. I think if I ever need to take this off in future I'd be tempted to swap the washer out for one slightly thinner.'
Well turns out it was causing some trouble!

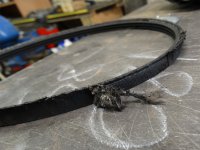
Dimitry (Panda) hit a major milestone tonight, with 90,000 miles under his belt, though at 89,999 miles while 'enthusiastically' pulling away from the lights there was a sudden thrashing sound, no real question as to where it was coming from, obvious from the sound the belt was gone. When I got the bonnet open I could see the belt was still there but the edge furthest from the engine had shredded, my multi-v belt had one less v. More concerningly what was left of the missing one was still hanging on and was at risk of potentially damaging the crank position sensor if it got caught on it. It had also started to peel away the outer layer of the rest of the belt. So I was only about 12 miles from home so I cut off all the loose stuff and drove like a granny all the way back to the workshop and made it!

When we finished the alternator swap it was agreed I'd be best carrying a spare belt to be safe, so I've already ordered one last night:D. Looking at the positives at least as the alternator will have to come back off I can get some pictures to show the differences and what I've done, hopefully in this case to get the pulley wheels aligned properly!

Also I kept track on the fuel consumption based on the last tank full, I got 288 miles out of 28.7l of fuel, this is on mostly short runs too so reasonably happy with that. Comparing it to what we get out of the volvo on similar runs (330ish miles out of a 60l tank) the Panda costs 10p per mile less to run than the volvo (pretty well half the cost!). So once I've done 2700 miles the insurance is covered and the tax started getting paid for!
Sounds like just fine tuning required washer wise :) will be worth it man

i logged into my old fuelly account the other day to start tracking my 750L fuel economy. my parade was still there, I was averaging 38 miles per gallon! Am going to try and beat that figure with my 750 though might prove difficult as they are very different (but similar) machines. all in good fun though and i am EXTREMELY happy with my wee motor

I actually took it out a run yesterday around the country roads (I was taking my wife and son out for a day out which was lovely) and I had a great time driving the wee car quite hard (for me, i was never over the speed limit). It corners like a champ and was so much fun. recovering from Generalised anxiety disorder I havent had fun driving in a very long time, but i can honestly say i had a huge grin on my face yesterday and am so impressed by the wee machine

Glad to hear the little car is serving you so well :D. I'm really enjoying driving mine, I guess in part it's the simplicity of it, you properly drive them. I'm suprised you were only getting 38 to the gallon, looks like we're getting about 45 and that is mostly shorter runs and quite a bit of running in the workshop while fettling!

Wil definitely be worth it on the alternator front, we're damn close so hopefully not too difficult a fix, will properly measure the offset this time, don't want to kill another alternator belt!
 
So on Saturday I had another go at sorting the alternator, the positive being I remembered my camera, the negative being I could have been working on sorting the roof rack!

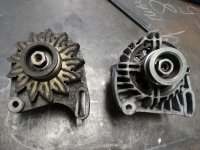
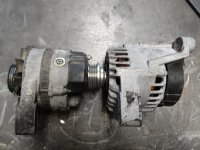
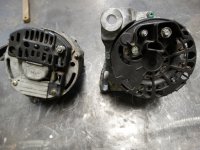
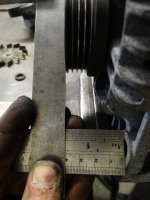
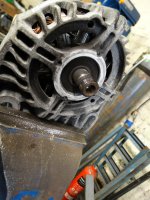
So the alternators next to each other on the bench, you can see the difference in size but there is plenty of space back there, you can also see the different pulley wheels, for whatever reason the 500 one sticks out loads further and tapers towards the alternator itself, a point which became an issue later!

L4- Alternators new and old.jpg
L5- Alternator side on.jpg
L6- Alternator connections.jpg
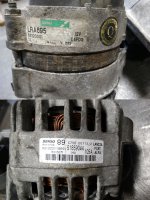
L7- Alternator labels.jpg

The actual fixing points are the same thickness and the bolts are the same spacing so no issue there. The other thing which is slightly different is the connectors on the back, the smaller cable (signal or something?) on the old alternator was a spade connector, I didn't want to mess with the wiring on the car so I cut a short length of cable with a male spade connector on one end and a loop on the other which I just added in. The proper main connector (to the positive battery terminal) was a larger size, so as I'd forgotten my drill I spent ages with a rats tail file until the original ring connectors fitted!

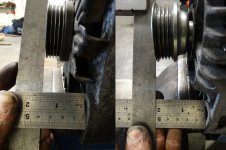
So on to the main issue, the offset of the pulley wheels.
L8- Pulley offset.jpg
So clearly you can see there is a a vast difference here. On my previous attempt I just swapped the pulleys over, with a washer behind the old pulley on the new alternator to stop it rubbing on the casing. It looked close so I ran with it...
M8- Shreaded Belt.jpg
bad idea!

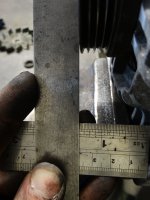
This time I figured I'd be a bit more thorough (hence measuring offset in pics above), apologies for inaccurate looking measuring style, rest assured when not doing it one handed while taking a photo I made sure everything was nice and square!
L9- Old Pulley new alternator.jpg
So as you can see, with the old pulley on the new alternator and no washer (so the pulley is resting on the casing and would rub badly/not work) the offset to the outer edge from the mounting plate is 40mm so I had to work out a way to bring this down to 37mm. On my last attempt with the washer I guess it would have been about 42mm, so 5mm out, you could see this by eye!
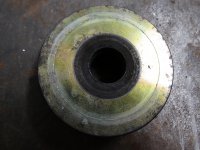
Initially as I could still return the new alternator at this stage (or so I thought, turned out I'd already damaged it a little in terms of it's original purpose) I was thinking I'd try and alter the old pulley wheel instead. To do this I'd need to grind some material off the back, but only around the edge where the alternator casing sticks out as if the back was not flat it would not sit right. I rubbed chalk on the alternator casing to see where it was making contact.
M1-Alternator chalked.jpg
M2-Pulley wheel chalked.jpg
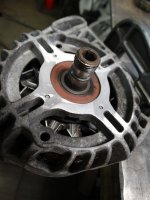
It was at this point I reconsidered, I was concerned that as the pulley wheel would be spinning at speed if I crudely ground material off the back of it then it might go off balance and vibrate/cause issues. So the new alternator was going to have to be altered :D. First option was to take the casing back a little where the pulley wheel was making contact.
M4- Ground down.jpg
This did bring the difference right down, I put the old pulley on (still with no spacer or washer so still resting on the aluminium casing) and this is the result.
M5- Getting there alternator.jpg
This is pretty well there but I needed a washer to prevent the pulley resting on the casing.
M6- Damaged thread washer.jpg
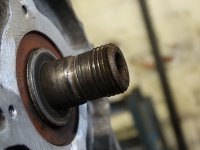
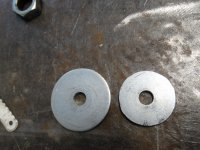
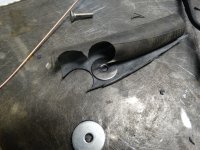
In this photo you can see that some of the thread took damage on my previous attempt, possibly by the pulley wheel working loose? I didn't check but it could have been like that from the original 'new' pulley wheel as this did sit much further out, either way it meant in order for the bolt to sit on good thread the old pulley needed some washers. All the ones I had were way too small, apart from some massive ones from an old washing machine, so I drilled them out to 17mm on my pillar drill and ground them down to size with the angle grinder(y)
M7- improvised washer.jpg
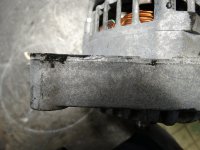
Now I'm getting there, I got the old pulley on nice and tight, checked the offset and I was only about 2mm out from the original set up. On to option 2 of altering the alternator. I took about 2mm material off the back of the mounting shoulders on the new alternator so the whole thing sat 2mm further back. I left this alteration as a last resort as I figured this surface needed to be pretty flat in order to be easy to adjust to tighten the belt and also to make sure the alternator itself sat straight and true. Fortunately Fiat for whatever reason had made these surfaces stick out by about 2mm so I just ground it flat.
M3- Alternator shoulder.jpg

Once fitted the belt looks straight as far as the eye can tell and with a steel rule on the back of the crank sensor ring looks spot on. I've driven about 80 miles today and the belt still looks and feels like new and the alternator is all shiny (all the dirt on it is because I've touched it:)) and ampy!

So on to the roof rack at last, time is running out!! Took the headlining out, really easy job, I put a large plastic shim under the central plastic plug so as not to damage it. Will hopefully report back soon with some progress, or more likely questions... anyone know anything about roof rack locks??
 
Last edited:
So finally got started on the roof rack (with about a week and a half to go before it needs to be capable of transporting the boats up to the Cairngorms:(). And at pretty well bang on 5pm on Friday we ran out of welding gas... supplier shut until Monday morning:mad:. On with the bits I can do then!

Initially I was just going to fit the rack from Northernchap with a few little modifications to take the boats, then at a much later date make a whole new one. However, it was brought to my attention (by Jenny) that it would be much more practical if the roof rack could be easily removed, so when we do not need to transport things we can get better mpg (and potentially do something cool and vinyl on the roof!).

The solution seems to be to fit mounting points permanently to the car that the rack then bolts on to, so removal of the roof lining would not be required. The other advantage of this is as long as this bit is well made, the rest can be sorted at a later date, given how little time I've got it means I can just get welding and hammeriting the rack itself:D.

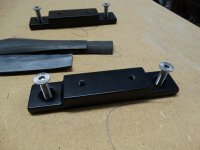
Priority one then was to make the mountings, I measured the spacing on the access holes to get into the top section of the roof and made these...

M9- Roof rack mounting plates.jpg

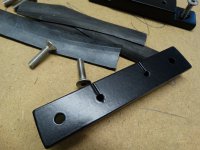
So 2 lengths of 25x8mm flat bar welded together! each one has 2 countersunk M6 holes to take the bolts on to the car itself and then 2 holes threaded to take M6 bolts. I carefully measured and drilled each one so they were all exactly the same, this means if in the future I make different roof bars it will be much easier to make feet that fit. I drilled the threaded holes all the way through for 2 reasons, one it's much harder to tap a decent thread in a blind hole and two it means any rain water that makes it's way in can go out the bottom, so I cut little drain channels in the underside. As they will be mounted right on the edge of the roof (outside of the seam), it is on a slope so should drain quite well. Got them all zinc electro plated and powder coated ready during the week.

N1- Drain Runs.jpg

As you can see in the first picture I also cut strips of rubber out of an old bicycle inner tube, hopefully this should restrict any water getting to the holes (which I did paint up but I would guess will be much more vulnerable to rust as the bolts could chip the paint), it should also stop metal on metal wear between the bracket and the roof and hopefully help spread the load a little on the roof.

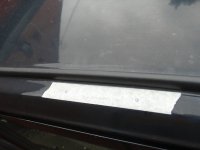
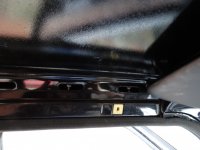
I worked out the positioning by measuring in from the end of the covered roof seam. I'd put bits of tape down the inside to the windows so I could see where the cut outs were to get the nuts in. I then used the mountings as a template and marked where the holes needed to be.

N2- Positioning tape.jpg

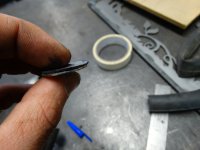
Bit worrying drilling into it but all the mountings went on no problem (well I do wish I'd put the front ones about 10mm further back would have made it a little easier!). On the inside I used stainless penny washers to prevent any risk of the bolts pulling out, again I did not want the washers rubbing on the metal of the car roof so I used more old inner tube to back the washers with rubber. I used spray adhesive to glue the rubber on to the washers, which in hindsight I should have done with the rubber under the mountings too (they stick out a little as were hard to keep in position when tightening the bolts).

N3- Rubber back washer.jpg
N5- Another use for old inner tube.jpg

The other advantage of backing the washers in rubber was by making the hole a little tight the washers held themselves on the bottom of the bolt so I was able to leave them there and get the nuts on without them falling into the abyss(y).

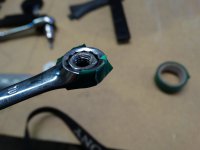
I used stainless Nylock nuts for these as I really do not want them working loose and in the future I may even make the rack lockable to the car, so anything locked to the rack is secure, though might be overkill! This way the only way these feet are removable is by getting in the car and the headlining out. I used a ring spanner with some insulation tape on to get the nuts into position, the once I could feel the resistance of the nylon I removed it and continued with the open end of the spanner. Something I learnt the hard way is if you try and use the ring spanner too long then in this case (with 25mm long bolts) you soon get to a position where the spanner cannot be removed!

N4- M6 Nylock in ring spanner.jpg

The insulation tape worked a treat, though I should have refreshed it half way through and I did eventually lose one nut into the frame of the car, though I recon that's pretty good going considering I was working on my own:slayer:.

N8- Bolts from inside.jpg

So job one on the roof rack front finally completed!
N6- Mountings fitted.jpg
N7- Mountings close up.jpg

I've covered the mounting holes with insulation tape for the minute, I'm going to get some rubber washers and then leave short bolts in when not in use to keep the rain out.

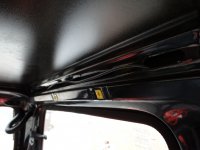
While the headlining is out (as is the welding gas:bang:) I figured I might as well run the speaker cables into the planned location for the speakers. I've run them under the carpet to the little access panels behind the doors, then up inside the bodywork, they will then run across under the headlining and out where the rubber blanking plates are either side of the tailgate. Got a mate coming to help me box the speakers in tomorrow, another priority for the trip!

N9- Speaker cables while I'm there.jpg

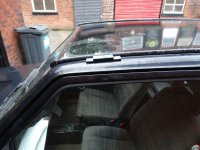
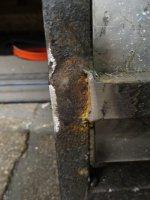
So once I've got more welding gas I need to fabricate new legs and feet to connect to my new mounting points. When I cut the old one off I did find that quite a few of the welds had no penetration at all, picture below shows where I cut one of the legs off, this was welded on all four sides, but only 2 had welded to both the leg and the rack itself, another good reason for making a new one myself.

O1- Legs removed.jpg

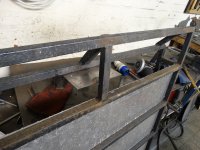
Having said the above, I've stood on the rack and everything feels good and solid so quite happy in terms of the Scotland trip. Before I ran out of gas I welded an offcut of 3mm sheet to the front with holes drilled to mount a vertical length of 20x20x2.5mm box section.

O2- Offcut welded on.jpg

It was a little tricky getting a decent weld as the steel was fairly pitted and rusty. I've made the uprights for front and back and once I've got welding gas will attach the one at the back too.

O3- Kayak uprights.jpg

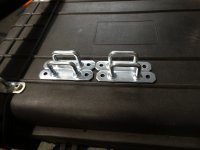
Then I've got some D-ring type fixings for attaching webbing straps for the front and back which I will bol on. They are only zinc plated but I've bought some before and had them on my bike top box (you can actually see them in the photo below) and they are lasting pretty well.

O4- Tie down points.jpg

I've also got some anchor points (like the ones onemanmade mentioned in the roof rack thread) to attach to the tops of the uprights too, they are ordered in so as soon as I get them I can bolt them on and with a bit of the grey pipe insulation from screwfix we'll be good to go! Well once I've lined up the feet with the fixing points:confused:

So stereo hopefully sorted tomorrow then on from there. I'm going to recover the headlining too, though not got the fabric in yet. I know this breaks my rule about important stuff before cosmetic but while it's out it makes sense, don't want to risk damaging it and also I can cover the speaker boxes in the same fabric so should look pretty smart:).
 
Last edited:
So finally got started on the roof rack (with about a week and a half to go before it needs to be capable of transporting the boats up to the Cairngorms:(). And at pretty well bang on 5pm on Friday we ran out of welding gas... supplier shut until Monday morning:mad:. On with the bits I can do then!

Initially I was just going to fit the rack from Northernchap with a few little modifications to take the boats, then at a much later date make a whole new one. However, it was brought to my attention (by Jenny) that it would be much more practical if the roof rack could be easily removed, so when we do not need to transport things we can get better mpg (and potentially do something cool and vinyl on the roof!).

The solution seems to be to fit mounting points permanently to the car that the rack then bolts on to, so removal of the roof lining would not be required. The other advantage of this is as long as this bit is well made, the rest can be sorted at a later date, given how little time I've got it means I can just get welding and hammeriting the rack itself:D.

Priority one then was to make the mountings, I measured the spacing on the access holes to get into the top section of the roof and made these...

View attachment 181317

So 2 lengths of 25x8mm flat bar welded together! each one has 2 countersunk M6 holes to take the bolts on to the car itself and then 2 holes threaded to take M6 bolts. I carefully measured and drilled each one so they were all exactly the same, this means if in the future I make different roof bars it will be much easier to make feet that fit. I drilled the threaded holes all the way through for 2 reasons, one it's much harder to tap a decent thread in a blind hole and two it means any rain water that makes it's way in can go out the bottom, so I cut little drain channels in the underside. As they will be mounted right on the edge of the roof (outside of the seam), it is on a slope so should drain quite well. Got them all zinc electro plated and powder coated ready during the week.

View attachment 181318

As you can see in the first picture I also cut strips of rubber out of an old bicycle inner tube, hopefully this should restrict any water getting to the holes (which I did paint up but I would guess will be much more vulnerable to rust as the bolts could chip the paint), it should also stop metal on metal wear between the bracket and the roof and hopefully help spread the load a little on the roof.

I worked out the positioning by measuring in from the end of the covered roof seam. I'd put bits of tape down the inside to the windows so I could see where the cut outs were to get the nuts in. I then used the mountings as a template and marked where the holes needed to be.

View attachment 181319

Bit worrying drilling into it but all the mountings went on no problem (well I do wish I'd put the front ones about 10mm further back would have made it a little easier!). On the inside I used stainless penny washers to prevent any risk of the bolts pulling out, again I did not want the washers rubbing on the metal of the car roof so I used more old inner tube to back the washers with rubber. I used spray adhesive to glue the rubber on to the washers, which in hindsight I should have done with the rubber under the mountings too (they stick out a little as were hard to keep in position when tightening the bolts).

View attachment 181320
View attachment 181325

The other advantage of backing the washers in rubber was by making the hole a little tight the washers held themselves on the bottom of the bolt so I was able to leave them there and get the nuts on without them falling into the abyss(y).

I used stainless Nylock nuts for these as I really do not want them working loose and in the future I may even make the rack lockable to the car, so anything locked to the rack is secure, though might be overkill! This way the only way these feet are removable is by getting in the car and the headlining out. I used a ring spanner with some insulation tape on to get the nuts into position, the once I could feel the resistance of the nylon I removed it and continued with the open end of the spanner. Something I learnt the hard way is if you try and use the ring spanner too long then in this case (with 25mm long bolts) you soon get to a position where the spanner cannot be removed!

View attachment 181321

The insulation tape worked a treat, though I should have refreshed it half way through and I did eventually lose one nut into the frame of the car, though I recon that's pretty good going considering I was working on my own:slayer:.

View attachment 181328

So job one on the roof rack front finally completed!
View attachment 181326
View attachment 181327

I've covered the mounting holes with insulation tape for the minute, I'm going to get some rubber washers and then leave short bolts in when not in use to keep the rain out.

While the headlining is out (as is the welding gas:bang:) I figured I might as well run the speaker cables into the planned location for the speakers. I've run them under the carpet to the little access panels behind the doors, then up inside the bodywork, they will then run across under the headlining and out where the rubber blanking plates are either side of the tailgate. Got a mate coming to help me box the speakers in tomorrow, another priority for the trip!

View attachment 181329

So once I've got more welding gas I need to fabricate new legs and feet to connect to my new mounting points. When I cut the old one off I did find that quite a few of the welds had no penetration at all, picture below shows where I cut one of the legs off, this was welded on all four sides, but only 2 had welded to both the leg and the rack itself, another good reason for making a new one myself.

View attachment 181330

Having said the above, I've stood on the rack and everything feels good and solid so quite happy in terms of the Scotland trip. Before I ran out of gas I welded an offcut of 3mm sheet to the front with holes drilled to mount a vertical length of 20x20x2.5mm box section.

View attachment 181331

It was a little tricky getting a decent weld as the steel was fairly pitted and rusty. I've made the uprights for front and back and once I've got welding gas will attach the one at the back too.

View attachment 181332

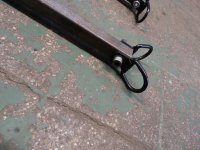
Then I've got some D-ring type fixings for attaching webbing straps for the front and back which I will bol on. They are only zinc plated but I've bought some before and had them on my bike top box (you can actually see them in the photo below) and they are lasting pretty well.

View attachment 181333

I've also got some anchor points (like the ones onemanmade mentioned in the roof rack thread) to attach to the tops of the uprights too, they are ordered in so as soon as I get them I can bolt them on and with a bit of the grey pipe insulation from screwfix we'll be good to go! Well once I've lined up the feet with the fixing points:confused:

So stereo hopefully sorted tomorrow then on from there. I'm going to recover the headlining too, though not got the fabric in yet. I know this breaks my rule about important stuff before cosmetic but while it's out it makes sense, don't want to risk damaging it and also I can cover the speaker boxes in the same fabric so should look pretty smart:).
Very well thought out and executed. Well done! :)
 
Nice project there all you need now is a couple of those on the back door for that retro look suitcase rack !!
 
Nice project there all you need now is a couple of those on the back door for that retro look suitcase rack !!

A little rack on the tailgate could look class, though it'd look best chromed and would not really fit with the rest of the car... will have to think on that one! Now you're giving me ideas(y).
 
My original plan for the sisley was to have a spare wheel mounted on the boot somehow (presumably with some kind of frame) but i abandoned the idea

My old landrover originally had the spare on the back door but once the corrosion got in it basically started peeling the door skin off! So generally it was in the middle of the floor in the back, getting airborne whenever I went over a bump! Spare on the boot would be very heavy on both the hinges and the damper rod thing. From what I've seen Panda wise they normally hinge out of the way to one side? No matter for me, I think eventually I plan to have a couple of spares on the roof on long adventures:D.
 
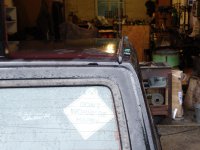
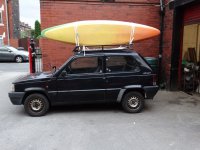
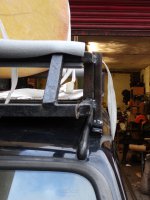
So as some of you may have seen I got the rack on and even the Kayaks on the roof!! Getting a little frantic in terms of sorting the car out so not many photos but here is a bit of an update on progress.

O5- Kayaks on Roof.jpg
O6- small roof rack.jpg

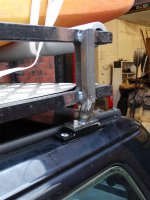
So the above pictures really do not show a lot. In order to fit the rack I have as a temporary solution, after cutting off the old legs I decided the best way to make new legs for the mounting points I made would be to make feet and uprights which sit on each mounting point vertically, as the rack is slightly narrower, so I could then weld the rack to the sides of those lengths of 20x20x2.5mm box section. I decided this was my best option as I am rapidly running out of time in terms of getting the car ready for the Scotland trip and also as the rack had quite a bit of paint and rust on it so I wanted as many weld points from old to new as possible, so the uprights would weld on to the top and bottom rails of the roof rack!

I got the rack on the roof of the car supported by pieces of 2" thick timber to give me the clearance I wanted over the roof and then bolted the uprights to the car and clamped the two together to tack up to make sure it all fitted. The roof rack is not entirely square, in fact as I discovered at this stage not even close to square... so one of my vertical uprights had to have quite a bit of alteration, I welded them on to the plates at about 80 degrees to allow for the slope of the roof, on one corner I ended up putting it on backwards, cutting the box section and then spinning that around so the mounting went outwards and cleared the rack!

O7- Uprights welded on.jpg
O7- Wonky upright.jpg

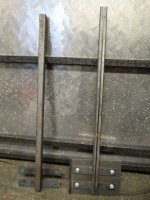
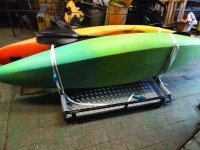
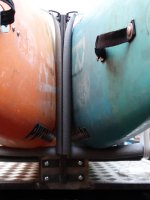
So once properly welded up and the top of all the upright bits of tube capped that was the rack on the car. Next thing was the Kayaks. I normally have the two boats face down side by side but the rack was never going to be wide enough for that (as the car isn't) so the best option was to have them on their side with poles in between. The poles and mounting plates were in a previous post but here is the solution in practice.
O8- Kayak fittings on rack.jpg
O9- Kayak lashing points.jpg

Nothing pretty but does the job which is what I need right now. After these photo's were taken I took the rack back off the car and the kayak fittings off the rack and got a coat of primer on all the new bits and then black hammerite over the new bits and any areas that looked particularly rusty. This was all earlier in the week and generally with Martins help (a lot of lifting the roof rack on and off the car generally!).

Today I fitted the rack back on the car ready for the trip and then go on with my next job. Given the blistering heat we have had this weekend I did notice a great advantage of the chequer plate roof rack. On Saturday we drove about 100 miles to Lancaster and back and the inside of the black roof with no headlining was too hot to hold your hand against! On Sunday the car was parked out in the sun again all day and it was only mildly warm due to the shade of the roof rack(y).

In order to fit the roof rack I had to take out the headlining. Though it was a very simple task I decided I would not refit it until I had recovered it as the cardboard it was on could get damaged if repeatedly taken out. I found a shop online to buy the new fabric from, it is relatively inexpensive and easy to use as it is 'scrim backed' so the glue does not run through and has a decent amount of stretch to it. The online shop I bought it from said 7-14 days delivery so if we had the headlining in in time for the trip really depended on that... it arrived in 2 days!

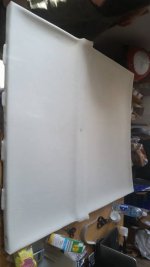
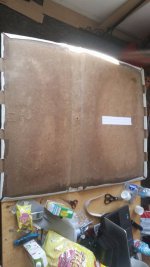
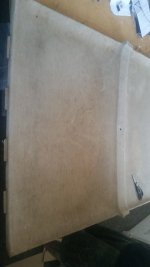
The old headlining did look really bad, the photo below gives an idea but in the flesh it looked worse. There was brown staining which i guess was from condensation (in a ring on the front and back panel) made up of lots of spots and there were quite a few divots and tears which my mate put down to stilettos and naughty behavior but I suspect was more likely to be the car being used to carry garden waste!

P2- Old headlining.jpg

I'd watched a few youtube videos on it and it really is a very easy process, especially in the Panda as all the fittings are around the roof lining and mounted on to the body so the shape could not be simpler:). A cheap, easy and satisfying job I would strongly recommend, now it's done the interior seems so much fresher.
I decided not to pull the old fabric off, it seemed quite thin and not spongy like the new stuff and was very well stuck down. I figured removing it might cause damage so left it. I put the whole thing on a large enough table, laid the fabric over the top of it and cut it down so it overhung all sides by a few inches. We then folded it in half and used a load of spray adhesive on both the board and the new fabric to join it. Once it was well stuck down (we left it for a while and tried to get our head around the next task) we flipped it over and trimmed it down. At the front and back there are tabs which slot in to the bodywork so we trimmed around those but otherwise we folded the fabric over so there would be no visible edges.

P3- New headlining.jpg
P4- New headlining back.jpg

Also as you can see in the second photo I stuck a load of self adhesive velcro down in the middle of the larger back section. Got the idea off here somewhere (Panda classic section) to deal with a slight sagging in the headlining. marked a position about 8 1/2" back from the centre mounting hole and dead centre left to right so that it would line up with the other half stuck to the roof of the car. Worked a treat and cost maybe £3 from wilko's for the 1m length I used.

Next challenge is fitting the speakers which is still not finished!
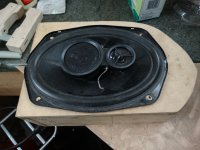
P1- Speaker in MDF.jpg

The plan is to mount the speakers up in the top rear corners of the car, basically where the tailgate mounts are. This is the only spot I can find where they would not get in the way in terms of folding the rear seats forward or loosing storage space (door pockets/dash). I was initially aiming to mount them without drilling any holes in the car, my idea being I could clamp one end to the existing openings in the top corners (above the one the cables run to the tailgate from) and then use high adhesive sign tape on all the edges to stick the rest on... in conclusion the tape is not strong enough, certainly in terms of sticking to MDF. So I've so far made one speaker case and covered it in left over headlining material, I'm still planning on clamping one end of each case to the opening in the top corner but think I'll have to screw the other end to the car. Using the tape to make it more stable and prevent it vibrating or rattling. I'm less phased about drilling the holes now as having had the box up in position I'm happy that it does not severely impact rear visability and it does not interfere with the cables for the tailgate or the rear window latch. I think once it's in it will look good but more importantly be out of the way and not affect the practicailty of the car... should sound pretty sweet too.:slayer:

Bit of a long late ramble after a long hot day so apologies if I've repeated bits or generally not made sense. Any questions please ask.
 
If you're just mounting one pair of big speakers at the back it's worth mounting a pair of tweeters either end of the dash roll just to stop it sounding like it's all behind you. Takes up very little space but does make a surprising difference to the sound - did it with my very first Panda as the speakers were mounted in the side panels by the back seat. Bass frequencies are not very directional (why you can mount a sub wherever) but the high frequencies you can pick out clearly where they are coming from.

This sort of thing:
http://www.ebay.co.uk/itm/33609-Ova...e39b006&pid=100005&rk=5&rkt=6&sd=352088195906
 
Last edited:
This post contains affiliate links which may earn a commission at no additional cost to you.
Back
Top