General New Old Scudo Van Blog

Currently reading:
General New Old Scudo Van Blog

Crewie

New member
Joined
Apr 30, 2016
Messages
71
Points
12
Location
Stourbridge
Hi Fellow Scudonuts,
I thought I might share my Scudo related trials and tribulations here, partly to catalogue my efforts and partly because perhaps as I go on I may help someone or even Myself.


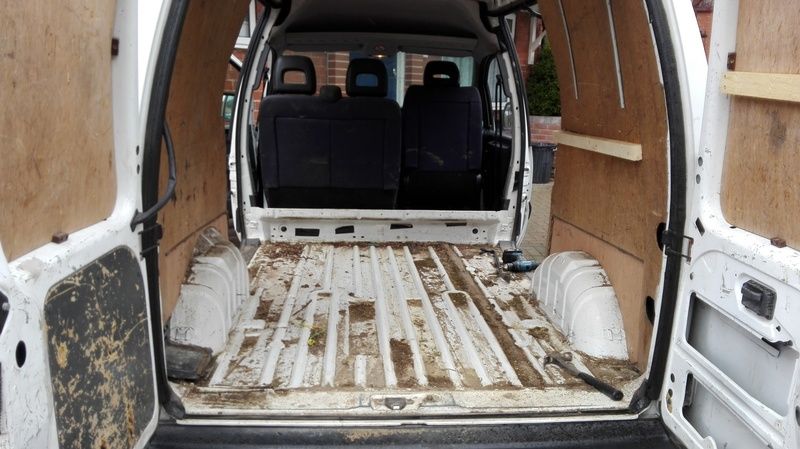
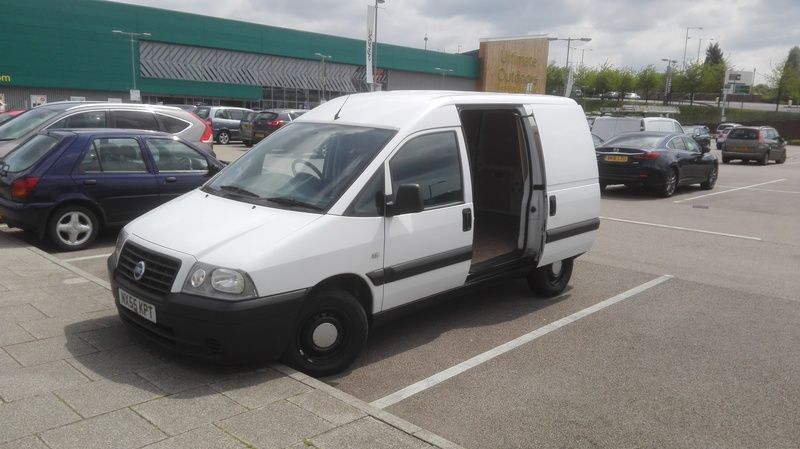
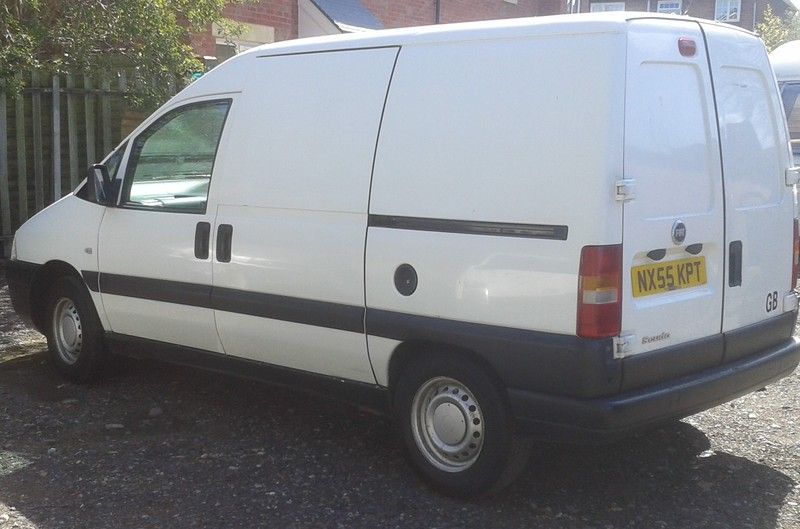
So, having bought my Van and had her delivered, I set about getting used to driving a manual vehicle again and noticing the obvious faults. As we all know there are always bits you don't see when you go see a vehicle, and in my case, I had cycled about 20 miles to get to mine, so couldn't drive it (cycle shoes with cleats)
Anyway all seemed well and the deal was struck at £1200.00
2016-04-19%2013.52.59%202_zpsb4u0lhpj.jpg
 
As you can see from the pic I took at the time she looks really tidy, and in fact that remains true for the body work.


However as detailed else where, the problems started the next day after I had ripped out all the pony lining in the back.
My new acquisition refused to start no matter what I did. My neighbour who works at a local big Commercials outlet was also at a loss, but he did suggest the starter motor... ?
As the van was bought with it being a kind of ongoing project I was not too worried but I did contact the guy from whom I had purchased the van. His last input was "I'll send my mechanic with a starter motor "
Can you see a theme emerging ? Well, that was his last effort, I don't really have to say that no mechanic ever showed up do I ? You already know the answer ? Of course you do.
I bought a starter motor and fitted it the next day.
My little Scudo roared into life on the first try, thank F%$* for that I cried.
Needless to say there was a victory dance performed on the drive and a celebratory cup of coffee.
I have now changed the following
  1. Fuel Filter
  2. Air Filter
  3. Oil
The Starter motor was not quite a straight forward job. The Clutch slave cylinder is bolted on to the same flange as the starter and someone had already had a go at moving this to get the bottom bolt out of the starter, and the Allen head was nadgered good and proper. As a result I had to back the starter off the bolt.
I wonder if the seller had tried to change the starter ?? That theme again ?? :rolleyes: LOL
Seeing as the old oil was as thick as soup I left the old oil filter on and will do another oil change in a month or so when I will also change the filter.


IMG_20160428_131907_zpsgj3hglgs.jpg


IMG_20160428_131857_zpsuffbrin2.jpg


This was the interior, below is where it ended up. :D


IMG_20160428_133516_zpsz3yrizve.jpg


I also ripped out the bottom sheet and arch covers, as they were naff too.
There was a bin liner full of crap under the board, so it was a good job I did. I should now get better fuel consumption now I'm not carrying a ton of top soil.


IMG_20160428_135521_zpsjulhmx7f.jpg


IMG_20160428_135508_zpssslada4j.jpg


IMG_20160428_170157_zps27gl1ih0.jpg


The floor was surprisingly good, I think the previous owner was a sparky as I also found loads of leccy bits and bobs, plus 7p.... Bonus :cool:

 
I have since proceeded to re-line the back of the van with shiny new ply.


IMG_20160522_165850_zpsmc6pbgxs.jpg


IMG_20160522_165901_zpsygwsk1eh.jpg


And tarted up the wheels.


Before.


IMG_20160522_165750_zpsibayupje.jpg


After.


IMG_20160522_165804_zpsokbewznn.jpg


As I was cleaning up the wheels I noticed that the drivers side rear tyre had 3 nails in it, and the passenger front had a knackered rim, so out came the spare for a refurb. I will shuffle the wheels round so that the two new tyres I have ordered will still go on the front.
I also discovered why the handbrake seemed to have too much travel, the book says 4 clicks, mine goes about 9 :eek: ,the reason being its only holding the nearside rear wheel.
A new hand brake cable will be ordered next. I checked the existing one and its not worth trying to fix, all the adjusting threads and nuts are naff.
Good news is the front discs look fine, altho the callipers could do with a tidy up.


IMG_20160522_165711_zpsymcvcrge.jpg


That's about it for now, I have got the bottom sheet in over underlay, and have carpet to go in but I will leave that for a bit cos I want to fit another single seat in the back for when we go camping.


Oh Yeah, forgot I had to replace the driver side wing mirror, fix the aux power cover, and replace the gear lever gaiter, so while I was at that I fitted this for a bit of fun.


IMG_20160515_113621_zpsep7qaltf.jpg


OK.....


Went and got two new tyres today from KwikFit near me, and good as gold they give the old bus a good going over as part of the service.
They spotted a bit of wire that was wrapped around the O/S front spring at the base.
See pic.


IMG_20160522_165711_zpsymcvcrge.jpg


I had already spotted this and wondered about it but had not given it too much attention, any way it would seem it was put there to hold the spring in place...??? Now as most of you will know the spring sits in a dip or divot in the plate on the suspension leg and should not need extra bindings !!


The numpty who had fitted the spring had obviously let it rotate and released the spring compressors without noticing and couldn't be arsed to put it right. Nice one..


The spring needs to turn thru about 90 degrees to be right, so another job to sort out.


Had a good look underneath while she was on the ramp and all looked well.


Crewie. :D
 
IMG_20160528_153212_zpsmwp2eshp.jpg

IMG_20160528_153152_zpstaadfywz.jpg


IMG_20160528_153134_zpsjdp5e1mn.jpg


IMG_20160528_153129_zpspqkv8ozr.jpg


Now I know how the seat I bought is going to fit in the rear, I decided to fit the carpet.
I got a seat off ebay for a fiver and the legs for a fiver also, both in excellent nick.


If you are going to fit a seat in the back, make sure you know the position of your fuel tank, before you drill any holes.. :eek:


I built up a frame over the bulk head behind the front seats so I could curl the carpet over it to hide all the scuff marks.
The finished floor is a layer of underlay, a 9mm board and then the carpet.


All I have to do is fit some arch covers with shelves to hold model flying gear.


Cheers


Crewie
 
Last edited:
Bought some things.


I got two female sliding door latch locators, and what a difference they made to the creaky doors whilst driving syndrome... :D
Bought a nice big tailored rubber mat for the front.
Got some Black trim wax.
Bought some 1/2 " star drives and a 3/8 " wrench and a pouring jug.


Fixed some things.


I was looking at taking out the front seats to clean up the floor in the front and one of the bolts seized up, so I got underneath to have a look and broke a clip off that holds what looks like a heater pipe loop. any way I had a think and found an old grommet and washers and a self tapper and fixed that little monkey right back on.


Fixed the back door top brake light, that was just a bulb....easy peasy


Went and saw a welder and he will sort out my new seat frame for the back.


Put a new wing mirror on the near side so that is both replaced now.


Looked at some things.


I priced up a tow bar, £89... I thought this was quite reasonable, and it just bolts up with out having to remove spare wheel carrier... Cool.. :D


Looked at a rear head lining from a taxi on ebay.


Next job is going to bee the arch covers in the back, but I want to incorporate some shelving to carry tools for flying etc. so a bit of thinking to do first.


Cheers


Crewie
 
Last edited:
Where can I get one of these rubber covers ?


IMG_20160602_210118_zps5xai6xl6.jpg


Door stop Rubbers £2.25 each, well worth it. these things get knocked out if your doors are misaligned.


IMG_20160602_210018_zpskidrqjew.jpg


IMG_20160602_210052_zpseo5q86bd.jpg


IMG_20160602_210102_zpszsxut26o.jpg


Back doors with full panelling showing. I need to paint these doors to smarten them up a bit.


IMG_20160602_210139_zpsulwhmhjr.jpg
 
Last edited:
Where can I get one of these rubber covers ?


IMG_20160602_210118_zps5xai6xl6.jpg


Should be able to get from any breaker on ebay mate, i didn't even think to keep them off the last van i broke for parts i binned them with the door cards
rolleyes.gif
. you could have had them for postage cost.


Top quality work you've done on the van mate she's looking good
thumb.gif


I like the look of that tailored rubber floor mat, how much was it?
 
Today I cleaned some things.


IMG_20160603_183732_zpsq65bhm9v.jpg


IMG_20160603_183751_zpsnp6jtr4f.jpg


And the Magic ingredient is ....................... :chin:


IMG_20160603_183920_zpscres70ko.jpg


Four quid from B & Q, and there is enough to go round the world.
Put it on, have a cup O Tea, and buff it up. :D


Cheers


Crewie
 
Oh yeah....!! forgot nearly.....


When I went to my loverly Van to go to work, I could not open the D/S Sliding door...weird, as I had fitted the female doorstop thingies last night and all was as it should be.
Any way, couldn't mess then so went to work.


At work , I investigated things, it wasn't the bungs, or the latch.... So I took off the door handle, and low and behold there it was.


The little lever that pulls the other lever attached to the rod that pulls the catch, was off.


I deduced that some scumbag from my street or local area had tried to get in my van, probably looking for loot to sell for drugs, yanked the handle really hard and separated the levers. Could this be a safety feature maybe, or just lucky for me ?
I've always had cars on the drive so now I have a van it "has" to be full of tools don't it ?? Ar$%*&! :mad:


Luckily this was a quick fix, but could have cost loads.


Cheers


Crewie
 
Last edited:
Good stuff that black trim wax, the thing that annoys me about it is when you get it on the Painted bodywork just after you have waxed it, it turns into a never ending cycle of white wax from bumper and black from bodywork
banghead.gif


I used to valet cars years ago and cleaning plastic dashboards was a 3 step process, i recently discovered accidentley a product that does all three processes in seconds when i was cleaning my custom fitted hyundai coupe leather seats
slayer.gif
and got lazy and tried it on the dash. Brilliant stuff if i only knew this then it would have saved me hours

http://www.ebay.co.uk/itm/TURTLE-WAX-LEATHER-CLEANER-AND-CONDITIONER-CLEANS-RESTORES-PROTECTS-SUN-STOP-UV-/331614736605?hash=item4d35c750dd:m:mA6oMaCUf9G2R_ZWvsr-5_w
 
Last edited:
This post contains affiliate links which may earn a commission at no additional cost to you.
Did the head rests and scrubbed the crap off the back of the seats.


Made a start on the mammoth task of blacking the floor in the front under the new mat. I swear that the wax breeds when you're not looking, everything is going black. Ahhhh Ahhhh.


How come nothing is as easy as it should be ??


I bought an identical N/S wing mirror from the same place as I bought the D/S one last time but it didn't fit on the passenger door. !!!


Reason for changing was the inner knob had broken so it was impossible to operate from the passenger seat.


It would seem that the bottom fixing lug was too long by about 5mm, so I cut 5mm off to find that the hole was not threaded all the way thru like the original. I drilled it out but had no tap to suit so had to cut the dam bolt down.


While I was at it , like the other side, I soldered the speaker wires properly and made a connection for easy removal, as the last owner had just twisted the wires around the terminals.


Anyway, after all the messin about, the wing mirror fits :slayer:


5b7c5603-ba6f-4f26-a401-3d597fb3eb8b_zpslsdhihyb.jpg


Cheers


Crewie
 
Hi , yeah, saw your thread.... I will use mine for camping ( with a tent) and for transporting my large flying models, some of which are 9' span and up to 50cc, and to get my push bikes in the back.


It's a mostly Bloke thing, but I just love Vans. :D :slayer:


Cheers


Crewie
 
Last edited:
This morning I took my seat and legs to a welder I know locally and he will shorten the legs to fit the seat rails.
I will have them back on Wednesday.
He was telling me he set up the year I was born, 1961, and he has never had to advertise...Proper craftsman.... (y)


As I walked past the bench I spotted the old N/S mirror and the actuator I had stripped out of the O/S one that I replaced cos the shroud was smashed.
I had left this alone cos I could not see how to get the mirror back in.
Turns out it was a simple push fit in the end DOH !!, held in place by a wire circlip in a groove.
So I now have a spare Wing mirror made from the bits of two.....Result... :D :D


I took this pic after I had screwed the actuator back.


IMG_20160606_105433_zps7icdarru.jpg


All back together.


IMG_20160606_110317_zpsx7qgqrcs.jpg


Cheers


Crewie
 
Back
Top