Hello,
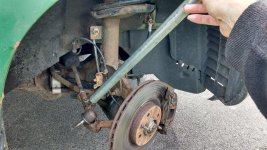
Planned to do what I thought would be a straightforward track rod end (TRE) replacement today. Didn't go to plan...
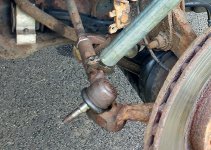
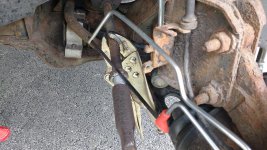
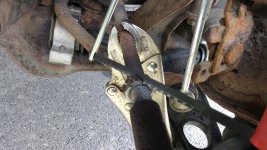
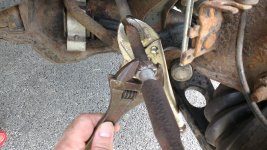
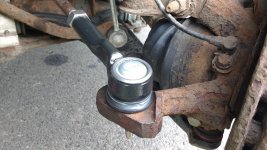
Started to undo the TRE ball joint nut, got so far, then the bolt/ball joint started to turn with the nut. Sawed a slot into the end of the tapered bolt with a junior hacksaw (good blades!) and stuck a screwdriver in the slot to stop the pin turning but couldn't get enough torque on the screwdriver. Ended up sawing off one side of the nut trying to preserve the bolt threads in case I couldn't unscrew the TRE and replace and had to reassemble. The nut did now come off and the ball joint pin then released easily from the steering arm. However, no amount of coaxing with wrenches, hammer and WD40 could loosen the TRE or the TRE locknut on the track rod. Well seized.
I have had this problem before when the locknut seized but the TRE screwed off no prob. Not this time.
Anyway, I put everything back together and retreated home (via Tesco for some consolation beverages) tail between my legs to plan Plan B.
Have measured the locknut and the flats on the TRE body and they are 20 or 21mm and 11mm respectively. Plan B is to put an 11mm spanner on the TRE flats and stick the other end of the spanner in my 4ft breaker pipe/bar with the spanner and pipe at a slight angle so I can swing the pipe o/s the wheelarch, plus an adjustable spanner holding the locknut in place. Hoping this will crack the joint between the TRE and the locknut.
Plan C, if Plan B doesn't work, is to (carefully) saw through the TRE locknut, w/o damaged the threads on the track rod, in the hope that this will allow the TRE to unscrew. I will buy another track rod first so I've got a replacement locknut.
Plan D is to replace the inner track rod too. Been watching some great videos on this procedure by pro mechanics on YT. Will need the tool to undo the inner track rod from the steering rack, but apart from this inconvenience it looks like a straightforward job.
Going to order an inner track rod tomorrow morning, hoping I can return it if not required including if there's no play in the inner track rod (didn't check today).
Will update.
Planned to do what I thought would be a straightforward track rod end (TRE) replacement today. Didn't go to plan...
Started to undo the TRE ball joint nut, got so far, then the bolt/ball joint started to turn with the nut. Sawed a slot into the end of the tapered bolt with a junior hacksaw (good blades!) and stuck a screwdriver in the slot to stop the pin turning but couldn't get enough torque on the screwdriver. Ended up sawing off one side of the nut trying to preserve the bolt threads in case I couldn't unscrew the TRE and replace and had to reassemble. The nut did now come off and the ball joint pin then released easily from the steering arm. However, no amount of coaxing with wrenches, hammer and WD40 could loosen the TRE or the TRE locknut on the track rod. Well seized.
I have had this problem before when the locknut seized but the TRE screwed off no prob. Not this time.
Anyway, I put everything back together and retreated home (via Tesco for some consolation beverages) tail between my legs to plan Plan B.
Have measured the locknut and the flats on the TRE body and they are 20 or 21mm and 11mm respectively. Plan B is to put an 11mm spanner on the TRE flats and stick the other end of the spanner in my 4ft breaker pipe/bar with the spanner and pipe at a slight angle so I can swing the pipe o/s the wheelarch, plus an adjustable spanner holding the locknut in place. Hoping this will crack the joint between the TRE and the locknut.
Plan C, if Plan B doesn't work, is to (carefully) saw through the TRE locknut, w/o damaged the threads on the track rod, in the hope that this will allow the TRE to unscrew. I will buy another track rod first so I've got a replacement locknut.
Plan D is to replace the inner track rod too. Been watching some great videos on this procedure by pro mechanics on YT. Will need the tool to undo the inner track rod from the steering rack, but apart from this inconvenience it looks like a straightforward job.
Going to order an inner track rod tomorrow morning, hoping I can return it if not required including if there's no play in the inner track rod (didn't check today).
Will update.
Last edited: