General Mitchio the 500F

Currently reading:
General Mitchio the 500F

It wouldn't be a proper day without a bit of restoration. So today I got to grips with the welding. This is going to be a very slow-burn restoration...it already has been. I just want to get to the point where I have a shell that doesnt flex so that it can be moved about.
I had removed the old "floor" some months ago and the new one was in very quickly. There are many areas where the adjoining metal I need to weld to is rusted through, but I will have to take this in stages so as to keep the shape and reference points.
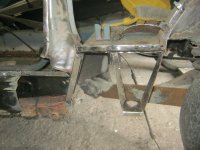
PT1_1953 by Peter Thompson, on Flickr
I am having to forgo the conventional plan of attack that I see all the time with other restorations. At some point I will turn the shell on its side to get at it all.
I left the inner sill in place and welded the floor to it where I could to provide some bracing before I removed the outer sill. This seems to line up very nicely, so a bit of preparation and this will go on tomorrow.
Then I can remove and replace the inner sill.
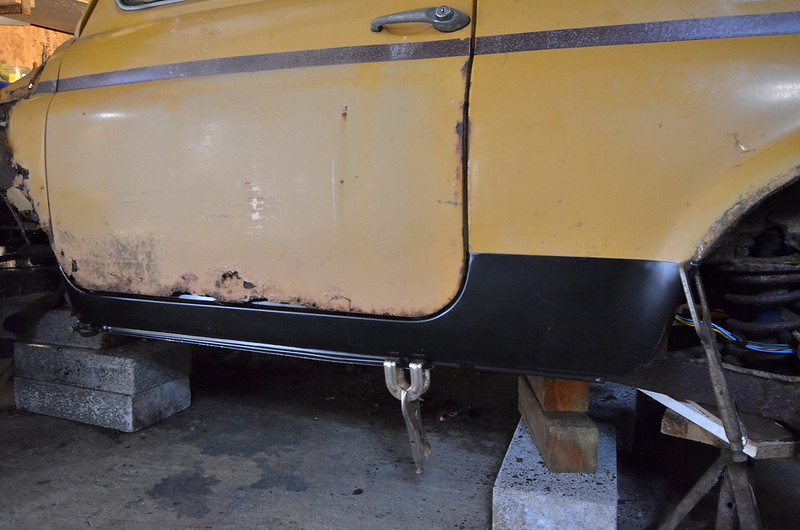
PT1_1951 by Peter Thompson, on Flickr
I am being pragmatic with this car as I was with Murphio, and I couldn't ever achieve concourse with it....even if I wanted to. So I am busy formulating a plan for a near standard, but very rugged 500, using the strongest mechanical setup possible. Shiny bits kept to a minimum, yellow and black chevrons on the rear, and made for round the world travel....it will appall you all.:D:D:D
 
It's certainly an unconventional approach by the look of it.

Is it the leave everything in place and weld around it approach? Or is it a case if you undo too many bolts it might collapse into a rusty pile of metal? Oh no wait!!!!!

Door fit looks good, I wouldn't either bother patching that door it adds that nice light touch of patina you yearn after.:chin:

You summarised the situation very well Tony. It's the approach one would take with a rickety building and actually the way I did Murphio.
I couldn't get on with it today as Murf was bedblocking in the Fiat 500 hospital.:)
 
Even the seat covers have a tinge of rusty colour to them!

if you leave the door like that then you wont have any problems shutting it. There's plenty of flex in the panel so it will bend to what ever shape it needs.

Good to see some solid metal in there Peter. Lets face it with the floor, once its all welded in place, sealed and a bit of paint, no one will see it when the carpets in!

At this rate you should have it on the road and Sheila can join you on your world tour in the number 2 500!
 
You're right Sean Franko500 about the seats...everything is rust tinged (understatement of the year!)
Also, it is nice to have some solidity, as you say. There are quite a few bits of metal now, waiting to be welded. I'm held up by not knowing what to do with the flitch plate which ties the B post, wheelarch inner and sill together,
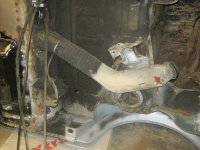
FOR_2981 by Peter Thompson, on Flickr
Confusing image unless you've been there, done that.
It comes with those tabs at the end which invite me to thing they might need to be bent at an angle or be trimmed. CAN ANYONE VERIFY WHAT TO DO PLEASE?
Also, the jacking towers which are attached to the plate are reproduced all wrong; I should have made my own. They were not originally symmetrical as the rear leg should be angled back to follow the slope of the wheelarch. It ends up as the final, lower part of the inner. So in my image I have done that.
the top left tab should also bend the other way and I don't think the long, left-hand flange should be bent at right angles at all.
FOR_2979 by Peter Thompson, on Flickr

ANY CLUES OR LINKS TO IMAGES WOULD BE VERY WELCOME.

Then I can get this bottom side a bit more secure.
 
Hi Peter,
hope these will help you.
If I remember correctly you have to fit the outer arch on first then fold those tabs over and weld.
I think I trimmed mine up as it was way too long.
The support panel I welded at the rear by the arch first and then bent it to line up with the contour of the arch. As long as the bottom tab sits on the sill edge, then you just bend the other side until it meets the rear floor filler panel. If you understand what I mean.
 

Attachments

  • IMG_2854.JPG
    IMG_2854.JPG
    65.7 KB · Views: 38
  • IMG_4664.JPG
    IMG_4664.JPG
    465.8 KB · Views: 41
  • IMG_6745.JPG
    IMG_6745.JPG
    508.1 KB · Views: 43
  • IMG_6864.JPG
    IMG_6864.JPG
    430.5 KB · Views: 34
told a lie there.
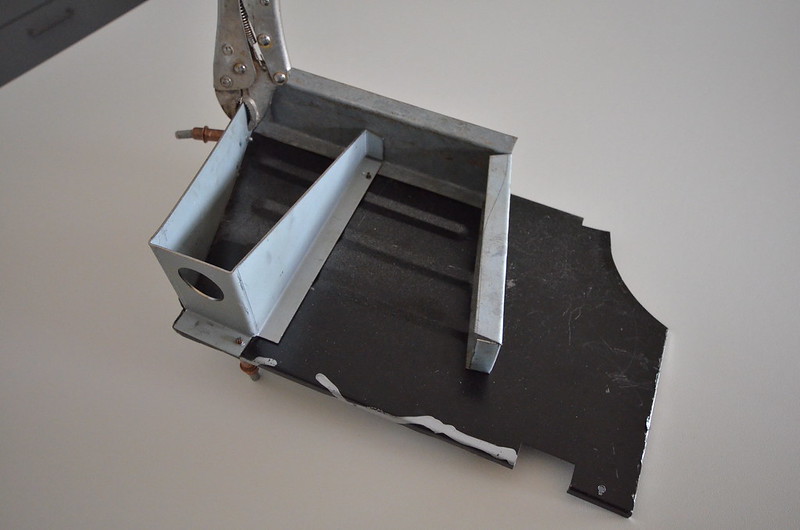
The panel with the tabs is bent round first and welded to the support panel.
then the outer arch panel has a lip that sits on top of that.

Very, very useful. Thanks for that. I'll make that L-shaped bit later that you gave me the recipe for, and put it all together on Monday.
Would you believe it was all intact on Murf?:eek:
 
Thanks to Sean's excellent dimensioned diagram I have been able to make the L-shaped joining piece. By trial-fitting the piece with the corrugations and the support tower onto the car, I have got everything lined up and I have a series of temporary rivet-holes lined up.
FOR_3246 by Peter Thompson, on Flickr
So now I just have to get the "L" bit to fit, temporary rivet that, and then I may be able to weld all of this together off the car. Only one piece of all this, about 25mm square, survived on this side of the car.
Two out of the three pieces were bought-in, but given the amount of modification needed to make them the correct shape and dimensions, if I had had a pattern to work from it would have been almost as easy to made them from scratch.:rolleyes:

PS Just realised I got a couple of flanges the wrong way round..out to correct them.
 
Last edited:
Prepping things for welding takes such along time,:mad:
So once the plug-weld holes had been drilled and the painted steel cleaned up, the actual fitting of the sill and jacking support assembly didn't take long.
FOR_3249 by Peter Thompson, on Flickr
I have also fitted the outer section of the inner wheelarch into the hole recently vacated by a few rusty tabs of steel.
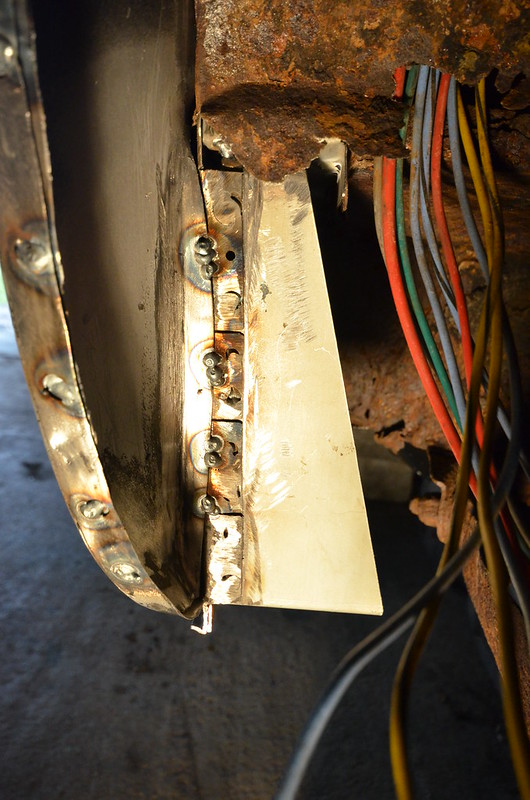
FOR_3255 by Peter Thompson, on Flickr
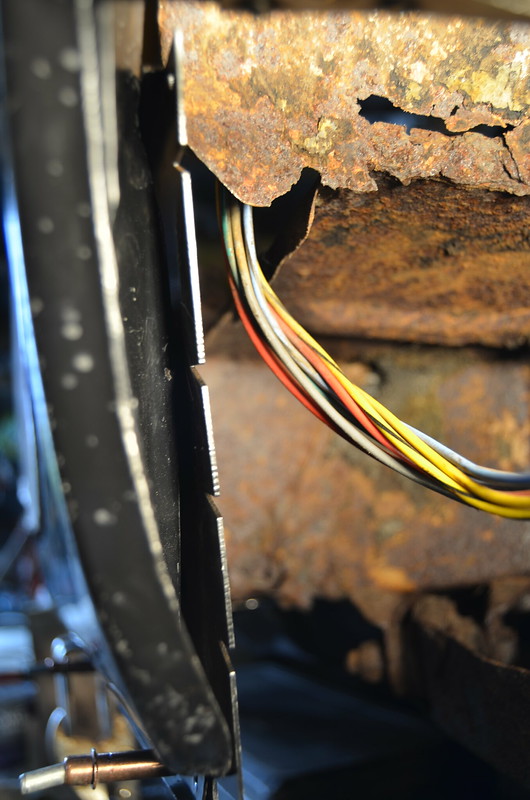
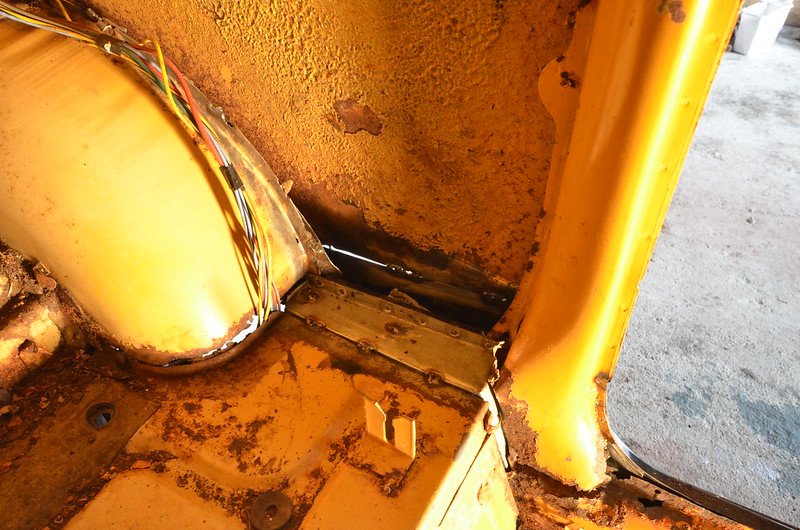
This lines up nicely with the existing outer arch and is tacked onto it in a couple of places. The same applies where the rusty floor panel will need a new end flange making, but for now it's dabbed onto the repair panel.
FOR_3258 by Peter Thompson, on Flickr
Next thing is the inner sill, but I already have a surprising amount of stability. So much so that I can now see previously masked, but anticipated flexing at the "A" pillar.
Obviously some of this work will be undone when other panels and repairs, including the outer wing, are replaced, but I'm going for maximum rigidity and integrity as a first target.
The car has to go back into hibernation in afew weeks so I hope to get the other side finished by then.(n):confused:
 
Well it's good to see you wont have to worry about rewiring Mitchio as you are keeping the loom in situ along with the rest of the interior.:D but nice welding and fabricating all the same.(y)

What concerns me though Peter is you appear to have been a little bit busier with the angle grinder than your previous posts have displayed!!! Mitchio seems to be lacking a front end? Or did it just simply fall off!!!!:eek:
 
I must shift that bunch of wires or else find a grommet about a foot wide to fit it through.:D Murphio's loom never came off the car at any stage, being wrapped in a carrier bag for the entire restoration.
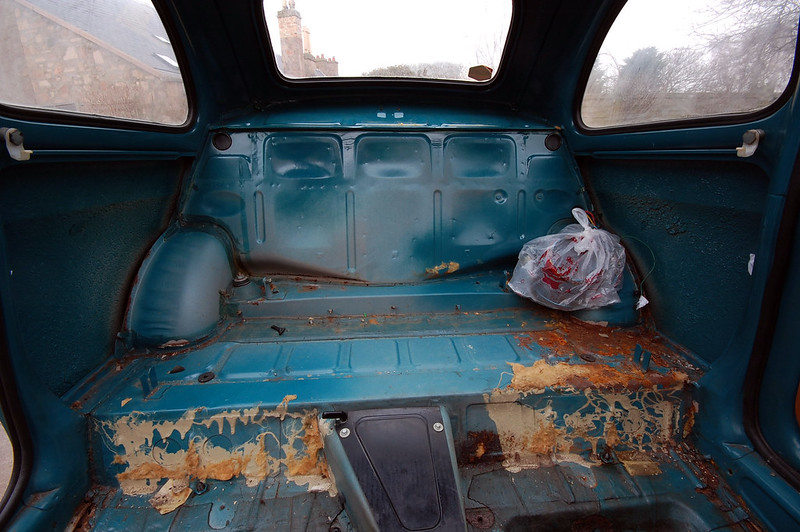
DSC_6140 by Peter Thompson, on Flickr
Don't worry about the front end; I don't think any angle-grinders were used as this is the special edition model with detachable wings...not as rare as you might think.
At the moment the driver's seat is part of the same ferric carbuncle as the floor, so when I remove the remaining couple of centimetres of "steel" I'll be able to retrieve it.
I haven't got the time or will to go for that stripped-down shell sort of look which shows you mean business. But eventually, when only about 60% of the original metal remains, it might start looking a bit more professional.
 
The ridiculous restoration contined today with the inner sill on the passenger side welded in. It was an excellent fit and gives a lot of rigidity.
FOR_3697 by Peter Thompson, on Flickr
I have tacked the new outer, internal wheelarch to the rusty inner one to give more stability. Just to extend the strength I've fitted the engine bay side panel and tacked that to the correct place on the new wheelarch panel.
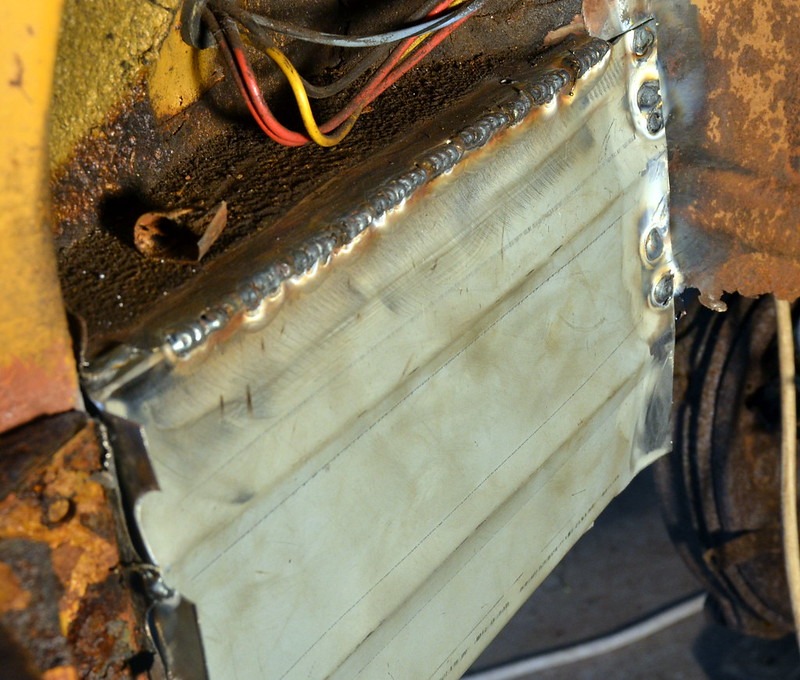
FOR_3701-001 by Peter Thompson, on Flickr
Removing the driver's floor was insane. Most of it just dropped out with the seat attached. But the bits that hadn't rusted realy resisted being dismantled. It's all lined up waiting to be drilled and ground ready for welding.
Although I obviously have acres of rusty metal and lots of major holes left and this may seem an unconventional technique, fitting in these structural panels where I can should keep alignments more accurately than would have been the case if I had hacked the outer panels back straight away to get at the inners.
 
It's coming on well Peter. It's amazing how sometimes it's easier to fit new panels & then worry about the little areas of corrosion left.
Once you see all that new steel going in, you start getting carried away and want to do more! Or maybe that's just me!
 
I managed to get the R/H floorpan and its inner sill fitted.
On this side the sills were doing nothing to stabilise the structure so I had to work a bit blind in locating everything. But luckily, more traces of the inner panels at the rear were in place and the flange of the centre tunnel and the rear strengthener for the floor was in better condition. I did find enough steel to weld to although just near the end I ran out of gas....I went back for a bigger bottle!!!
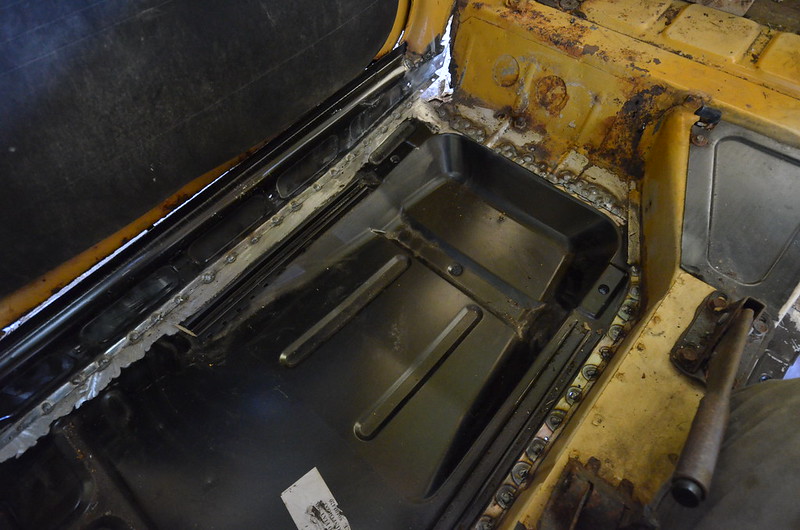
MAL_6055 by Peter Thompson, on Flickr
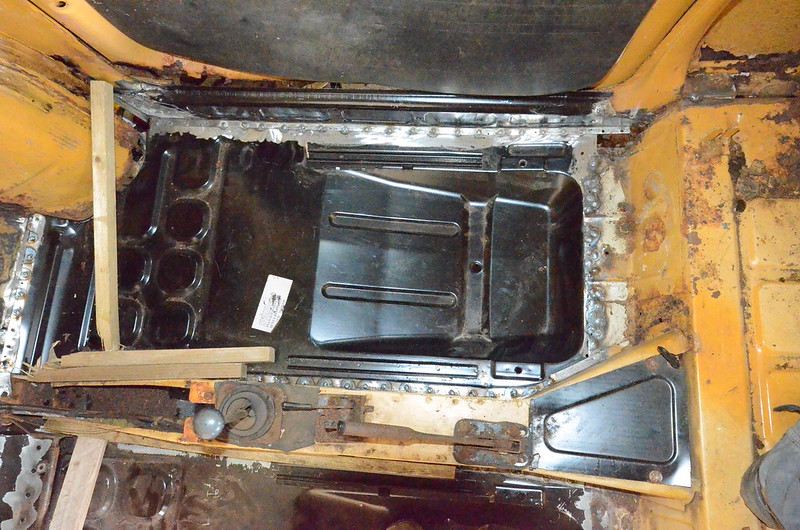
MAL_6050 by Peter Thompson, on Flickr
So I think I have a pretty accurate fit, all ready for the relatively time-consuming inner strengthener to be fitted. that will all have to wait as Michio goes back into an induced coma for a few months or perhaps longer. I will have limited access to the garage and no electricity supply.
It's now rigid enough if I have to move the shell and the wooden props are doing a great job keeping the door-pillars in the right place.
Si now it's the 900e's turn again.
 
Nice to see it getting stronger. One day it will have as much metal as my 500?
I have shown your thread to people at work who thought my 500 was a big job. That's nothing I say as I reveal the pics of your car...
 
Last edited:
Back
Top