Technical Headlight Change

Currently reading:
Technical Headlight Change

NorthernRob

Member
Joined
Jun 26, 2023
Messages
17
Points
85
Location
Devon
Hi All, MOT is looming on my 2011 (169) and yesterday I noticed by nearside headlight was full of condensation due to a small crack and moisture ingress. Looks like I will have to fit a replacement, any advice on changing one, easy access or ? Thanks All.
 
3 bolts, 1 connector, some hassle, plus possibly a couple of plasters, and a chance to practice your more colourful vocabulary.
2 bolts are easy - top one visible with bonnet up. Inner one needs grille removed (3 screws)
Lower one is a pain, though, as wheel arch liner is in the way, and either needs to be removed, or bent out of the way. In winter, the liners have been known to crack instead of bend, but usually OK. I usually remove the screws on the arch, plus the one under the bumper, and squeeze my arm through. Ratchet spanner is very helpful here, but not essential.
Lower bolt can also pull the threaded insert out of the headlight bracket, leaving another problem to solve. Also, be sure you are removing the correct bolt, as there is a wing-securing bolt right next to it... easy to get the wrong one when working blind.
Once all 3 bolts are out, and connector removed, the light CAN be removed without removing the bumper, but you may have to loosen the 3 bumper bolts that were hidden under the grille.
The "book" says that the bumper has to come off, but none of my Pandas can read, so I never bother.
Some of the aftermarket headlights are total rubbish (and some suppliers don't know the difference between LHD and RHD).
I usually use second hand ones when possible, even if I have to replace a bracket (or two).
 
Very good point.
Depending on where the crack is, how soon the MOT is due, and the weather, I would be tempted to try a quick fix now, and put it in the list to do in spring or summer. Less risk of damaging cold plastic parts.
I have found that ones that have got really wet inside once rarely seem to dry out completely on the car, but slight condensation usually dries out OK.
Even when these been a swimming pool inside

I leave the cover off

And drive them at night with the headlight main beam on its always worked for me

I have tried hair dryer and so on before, waste of time

there's a 500C plus heater built in, it good enough to cook your food (halagon oven)


Of cause if the reflectors very cloudy it will not fix this, but will normally still pass an MOT
 
This one passed MOTs for about 4 years after it got submerged in a Ford. But it never did dry out completely (I did leave the covers off throughout the whole summer a couple of years, and the owner always drove around with dipped beam on all year round), but it would always fog up eventually.
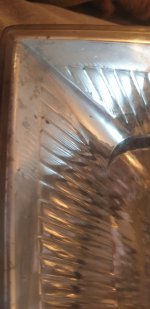
Not sure if you can make it out from the photo, but that's some sort of fungus growing at the bottom...
I eventually replaced it with a secondhand one, and put it in a dehumifying room to dry out completely. Sadly, the reflector has been attacked by whatever fungus was living in there, and has lost some silvering near the bulb as well as at the front.
It's in my pile of "last ditch emergency" parts as it's not really good enough to use except as a temporary measure. Along with various air boxes with missing lugs, rear dampers with missing top bushes, electric mirrors that don't move, etc.
Time for another clear out...
 

Attachments

  • 20231213_100443.jpg
    20231213_100443.jpg
    836.7 KB · Views: 25
That's strange it wouldn't dry out

I had a cracked at the top and when it rained it filled up,

I syphoned it out and put a hair dry on the back and headlights on, it looked done

But condensation would keep coming back

Took the back off and drove it to work for a week with the headlights on, 40 miles each way, never replaced just glued, never a problem again.

There must be a reason why one worked and one didn't, I just don't see it, also done the same on a corsa C without any problems

It's going to bug me not knowing,
 
It could well have been the biologic element - mossy fungus absorbs water and doesn't like giving it back. Still get bits of dried crud drop out if shaken.
I have had a couple of others like this, which ended up binned because they were cloudy on the reflectors, but they came from a 2004 car that got crashed in 2009 and I didn't raid it for parts until COVID lockdown, so no telling what was living on (or in) it in the meantime.
The (bent) rear beam was almost rust-free. Sadly, the interior was toxic waste, which was the bit I was looking for.
Ended up with 2 working window mechanisms, front grille with badge some random fixings and the cloudy headlights for £20.
Some you win, some you lose...
 
Thanks everyone for the great responses. Below is a pic I took lastnight, its a foggy mess. Panda is a very late 169 (61 Plate) and MOT in Jan, no minter but trying to get it back to its best (slowly) I think I might try and salvage a better one off a breaker

1702629292149.png
 
Well finally got round to fitting a new (from a breakers on Ebay) nearside headlight with my son this morning. It was actually a pleasant experience until I got to the point of removing the headlight to discover the electrical connector is completely different. The electrical connector on my headlight was purple inside yet the replacement was yellow with a completely different pin layout! Bloody annoying so plan b, hairdryer and sunshine to dry the old one out and refit in readiness for the Mot. Any idea why the connectors changed I have No idea!! Thanks
 
Well finally got round to fitting a new (from a breakers on Ebay) nearside headlight with my son this morning. It was actually a pleasant experience until I got to the point of removing the headlight to discover the electrical connector is completely different. The electrical connector on my headlight was purple inside yet the replacement was yellow with a completely different pin layout! Bloody annoying so plan b, hairdryer and sunshine to dry the old one out and refit in readiness for the Mot. Any idea why the connectors changed I have No idea!! Thanks
Connector was changed date 05.08.2009 can be converted if you have the plug aswell

Put the main beam on. The bulb is 800C

Put the hairdryer on the back aswell

Once it's gone do not stop, keep going for another few minuites otherwise it will condense back

Leave the back off and drive with the headlight on on till after the MOT

Make sure the seal seating properly on the cover
 
Last edited:
Back
Top