Technical 2013 Fiat Doblo front wishbone replacement

Currently reading:
Technical 2013 Fiat Doblo front wishbone replacement

Suggsey

Member
Joined
Dec 26, 2018
Messages
23
Points
57
Hello all, having just replaced the front springs (again, damned annoying don’t use NAPA springs they’re out of spec!) and ended up actually buying new Bilstein shocks to go with the new springs and top mounts were only two years old oh and new droplinks, two weeks on I’ve now got damned metal knocking from the front end. Bit of an odd one as it’s not constant rattle/knocking but feels and sounds horrendous. Thought initially it was grease spatter from road on inside of discs/pads so cleaned them down really well when I jacked it up to check and lock for an obvious loose part Ie hub/driveshaft/steering rack even caliper. Put crowbar on front and rear wishbone bushes area and not much movement or obvious tearing of the vertical rubber and couldn’t induce knock from ball joint but my main suspect is a debonded bushing.
Good old Fiat like on the 500 have blocked off access to the front bolt, my question is can the job be done without taking off front bumper Ie can the front carrier bolts be access just with undertray off or have I got the 500 ball ache of total strip down/front end removal?
Sod’s Law it’s going to start raining for a week too 🤦🏼‍♂️
 
Oh and under no circumstances use an impact gun on centre but of the shock as it can most likely damage the rod assembly within the shock and cause a knocking at top end of stroke/weighting/unweighting of the wheel.
Brill thank you, I installed sach springs about 3 years ago so hopefully no issues there. Do you have the torque specs for the shock nuts, top mount nuts and drop link nuts? I've used ones off of a YT video but would like to know if they are accurate.
Also how did you go about tightening shock nuts to correct torque, as it needs the allen head to stop the shaft spinning? I tried using a difficult access socket from Amazon but that socket ended up flexing at the cutout and spinning around the nut before it was tight enough. So I did the less ideal thing and snugged them up with a quick pulse of cordless impact.. 😬 that was years ago and knocking is a recent development, so I don't think shocks are the cause.
 
For the top mount shock but a drop end old fashioned spanner for the nut and the torque wrench attached to the hex head but be warned the hex’s are made of cheese (the Biksteins have torx heads)
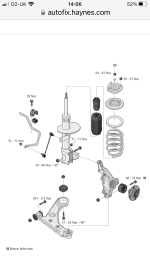
I’ve attached the page from the online Haynes manual which to be honest is shite and a waste of money. Nothing like the old fashioned books and nowhere like in depth and many generic drawings and little detail anywhere in it. So much so I’ve complained to Haynes felt proper ripped off!
 

Attachments

  • IMG_1070.png
    IMG_1070.png
    255.7 KB · Views: 32
For the top mount shock but a drop end old fashioned spanner for the nut and the torque wrench attached to the hex head but be warned the hex’s are made of cheese (the Biksteins have torx heads)
I’ve attached the page from the online Haynes manual which to be honest is shite and a waste of money. Nothing like the old fashioned books and nowhere like in depth and many generic drawings and little detail anywhere in it. So much so I’ve complained to Haynes felt proper ripped off!
Thanks that's great, if I torqued by the hex head, I'm guessing I'd have to tighten counter clockwise if I'm holding the nut still with a drop end spanner?
I purchased the same thing, only for the Vauxhall Combo version, and I don't think it even has the page you've just sent! I wasn't impressed at all with how basic it was.
 
Set the torque wrench and just hold the hex still and use the nut to apply all the torque it’ll lessen the risk of you spinning the hex head. The repeated torquing of the original shocks centre bolt is what did for them last time I did it on them I knew I wouldn’t get another opportunity to do them up as they were corroded badly and already rounding out.
On the Haynes manuals online if you open the manual and type say Front in the search bar you’ll get a drop down list and among that list will be torque specs for the various parts. Click on the one you want and it’ll open the page straight up.
Right I see, glad I asked. Ok I'll try that, see what more there might be. When it shows two different torque values, is the idea you torque to the lower spec first then tighten to the higher torque value?
 
Basically the lowers a minimum the higher a maximum unless it gives a figure and a plus 90 degrees or whatever. I always go with the higher figure. A lot of mechanics will just go impact gun to tight or f@cking tight. It’s also part of the generic specs/pictures. When you look at the top mounts they’re nothing like the real top mounts. Make sure on reassbly you align the tab of the side of the top mount with the cut out at the bottom of the shock where it mounts to hub carrier (they actually only fit through top mount body holes one way but it avoids any over rotation or the bearing faces trying to align them after the springs on and under tension.
 
Back
Top