Timing Belt Inspection/Replacement (inc.Tensioner Pulley and Alternator Drive Belt)
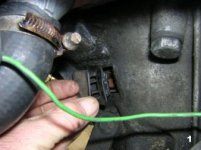
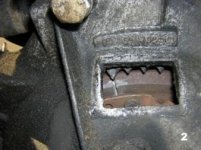
The toothed timing belt primarily transfers drive between the crankshaft and the overhead camshaft. As the camshaft is designed to operate the valves in the correct order it is essential for the mechanical timing of the engine that the sprockets turned by the belt are correctly positioned in relation to each other. Alignment marks are provided on the crankshaft and camshaft sprockets indicating Top Dead Centre (TDC) - this is where Piston no1 is at the highest point of its compression stroke. The FIRE engine also has a valuable TDC mark on the flywheel and this can be accessed by removing the plastic inspection plug located in the flywheel housing (photos 1&2). As the alignment marks on the crankshaft drive sprocket are a little ambigious it is as well to consult this also. The belt is held taught by means of an adjustable tensioning pulley that acts on the back (smooth side) of the belt. On the FIRE engine the belt is also used to drive the water pump.
Thankfully the unmodified FIRE engine is not an interference engine. See Note.
Symptoms: There are no symptoms of a worn timing belt - the best indication of belt wear being service history. However if the belt has no indication or printing on its outer flat face, looks shiny and feels hard (ie. does not yield slightly to thumbnail pressure) or shows signs of tiny cracks between the teeth or is oil contaminated, then renewal is advised. The sealed tensioner pulley bearings can moan or whine if worn or dry and attention should be given to this when checking the belt.
Recommended tools: Phillips screwdriver, 16mm ring/open ended spanner, 10mm ring or box spanner (or short or 3/8" drive socket may do), 13mm socket etc., bar for alternator drive belt tensioning (length of wood may serve also)
1) Loosen f/o/s wheel nuts.
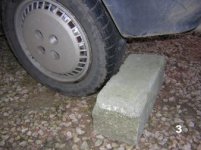
2) Chock n/s side wheels (photo3) and jack o/s of car with screw jack supplied (centre jacking point is good on Panda). As the Panda screw jack has only a small ground contact surface area support car with at least one other means other than jack and lower onto to share load.
3) Remove f/o/s wheel.
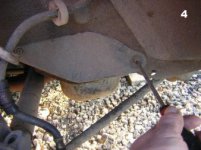
4) Undo 3 self-tapping screws holding on lower plastic guard on inner wing to gain access to cranshaft pulley. (photos 4&5)
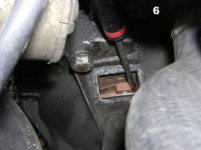
5) Shock free the 3 13mm bolts securing the pulley. If they are too tight remove the timing mark inspection cover from the flywheel housing on the rear of the engine (if not already done so) and lock with a screwdriver into the outer clutch mechanism (insert loosely - don't force it in!) (photo6) - if using a socket you may need to re-position the crank/flywheel to access the 3rd bolt.
Alternatively put car into gear and have an assistant press the brake pedal (or cut a length of timber to secure against the steering wheel to act as assistant!)
Note for Selecta Owners: If you cannot lock the engine in this way a small block of wood can be locked between the alternator drive belt and pulley. Being suggested on the FF, I tried this out of interest but didn't have any success, however if a new drive belt were fitted 1st and deliberately over tensioned (or tensioned with a tie wrap?) and a piece of wood was preshaped and taped in position I think it could be another way with the relatively small amount of torque required.
It may also be possible to hold a long bladed screwdriver between the other 3 bolt heads or make up a tool that fits over the centre bolt and one of the outer bolts.
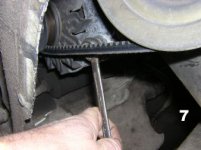
6) Loosen the 2 16mm nuts securing the alternator (photo7) and from above swivel the alternator up towards the engine and remove the drive belt. Check for wear to belt (photo8)
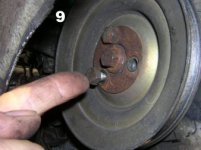
7) Remove the 3 bolts from the Crankshaft pulley and remove the pulley. (photo9)
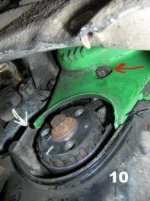
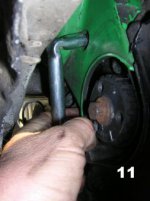
8) There is now good access to the lower Timing Belt cover securing bolt (photo10 - white arrow indicates step which is timing mark) (a 10mm box spanner is handy here but there may be enough room for a 3/8" drive socket/ratchet (photo11)
9) Remove the air intake rubber hose - simply pull out from front panel to rear of grill and squeeze clip at air filter union.
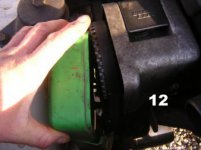
10) Working from above remove 2 10mm bolts from front and rear of head securing top of cover and lift cover from front of engine (photo12)
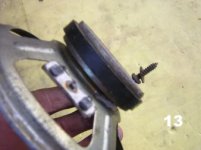
11) Now use an old loudspeaker to find those three screws that you left in the plastic guard that you've just kicked over! (photo13)
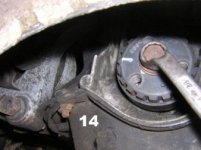
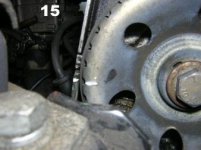
12) Using crankshaft centre bolt (13mm - 1/2" AF in photo!) turn engine to line up timing marks. You may wish to highlight them with tip-ex or a spot of paint. (photos14&15 - refer also to photo1)
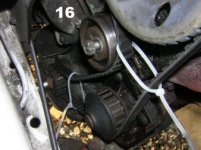
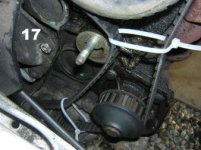
If you know your timing belt is good and wish only to remove the tension roller you can keep your belt in place with tie wraps (photos16&17)
If you intend re-using your belt, mark direction of rotation with chalk, crayon or Tip-ex
13) Loosen the tensioning roller nut and slide away from the rear of the belt or remove altogether followed by the roller (note washer and centre spacer)
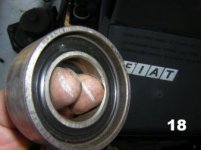
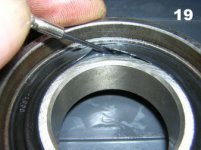
Inspect roller for wear. Also check for damage to the bearing seals. (I introduced a little oil and grease under the seal lip as mine was sounding a little dry - if you do this take care not to damage the seal) (photos18&19)
Once the tension roller is removed the belt comes away easily.
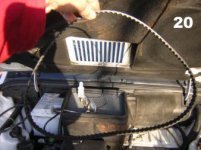
When purchasing your new belt take it out and hold it up - does it hang free and form a nice oval shape?(photo20) Don't accept a belt that stays the same shape as it was in the box! It's probably spent half its useful life on the shelf.
14) When fitting/re-fitting the timing belt keep it relatively taught between camshaft, water pump and crank. You may find that the camshaft pulley is drawn back one tooth on tightening the tension roller - if so, move the camshaft fwd one tooth and note that once the roller is pressed against the belt it pulls the camshaft back into line.
At this stage the belt only needs to be tight enough to be secure.
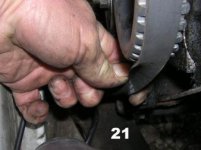
15) Rotate the engine 2 revolutions and check that the timing marks all line up, inc. TDC mark in the flywheel housing. When happy with this stage add the final tension to the roller - don't loosen the nut so much that it moves away from the belt - keep it under tension and add enough so that you can just turn the belt at right angles on the run between the camshaft and the water pump drive sprockets. (photo21)
16) Again turn the engine 2 turns and check that timing marks still line up.
If all lines up ok check that you've not left anything to interfere with a running engine (ie. screwdriver in flywheel housing - spanner on end of crank! or anything that might fall into or get caught up in the belt) and start up.
With a new, properly tensioned belt even a lightly worn tension roller might sound different - mine did!
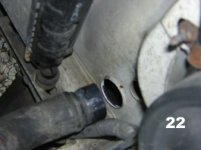
17) Replace timing belt cover, then crankshaft pulley followed by alt. drive belt. A little grease will help the air intake hose back into its retaining hole on the front grill panel (photo22) and finger pressure should be enough to help the hose back onto the air filter housing.
18) When re-tensioning alt. drive belt use a bar as a lever to add gentle pressure against the alternator. The belt is better to be a little on the slack side than too tight causing undue wear on the alternator bearing! Tighten top nut 1st followed by lower (which is behind the belt)
19) Replace lower cover to inner wing. When re-fitting self tapping screws into plastic retaining grommets, don't just screw straight in, feel the start of the original thread by turning anti clockwise until a slight 'click' is felt.
20) Replace wheel loosely (refitting wheel trim), lower car, tighten wheel nuts - chocks away.
NOTE: Many modern engines utilise the same space within the cylinder for valves and piston crowns. Neither normally occupy the same space at the same time, but if they do (ie with the engine out of time eg. if belt snaps) expensive damage ensues when the pistons and valves make all too painful contact. This may also apply to modified FIRE engines (ie. with a high lift cam)