T3wsndo.jpg

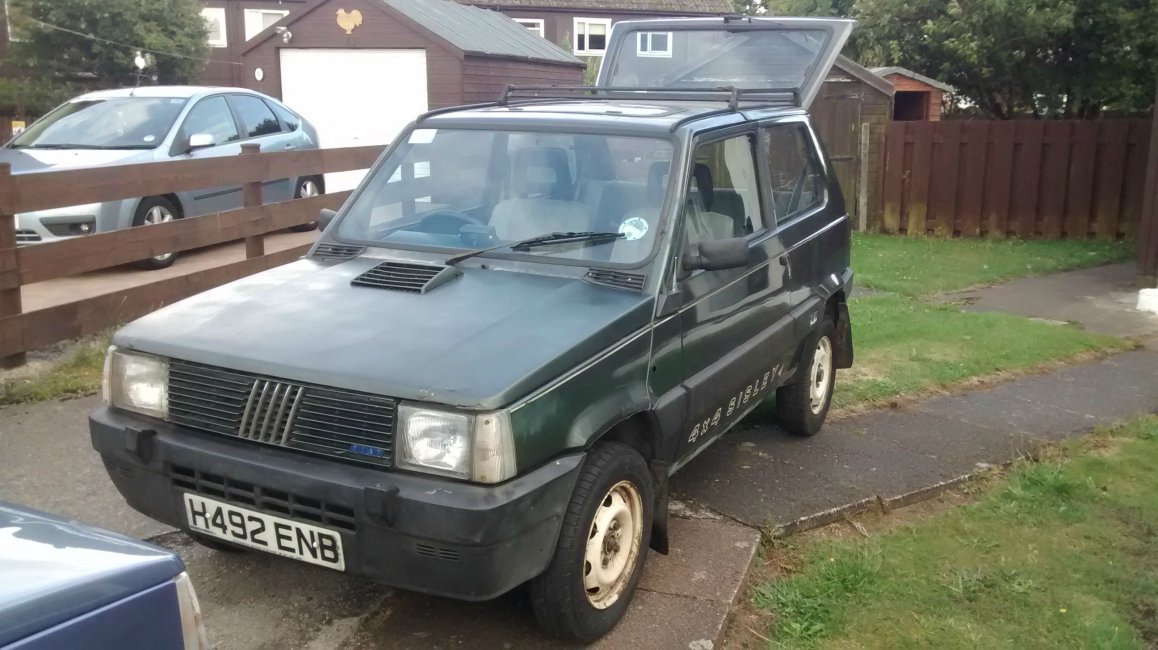
Panda (Classic) Engelbert the H reg Dark Green Sisley Progress Log

Introduction

https://www.fiatforum.com/panda-cla...ng-h-reg-sisley-needs-home-5.html#post3514984

So today I took delivery of the above mentioned Sisley, who I have decided to name Engelbert after the last 3 letters of his numberplate (I always name my cars in this way). All is explained as to how he came to be in my possession from the above thread so I wont touch on that too much here but will say the seller is a very kind lady. She was understanding about the transport frustrations I had and was very honest about the condition of the car.

This first post is going to be very pic heavy by the way!! I got it and did a quick assessment (I will do a more in depth assessment tomorrow) but I am extremely pleased with the condition generally, it obviously will need work but I am prepared for this (hence the project log). It has every sisley extra apart from the grille badge and is missing two centrecaps and the horn push (I am not counting the compass in this), though I wasnt expecting there to be as much of the sisley trim etc as there is! I am in the process of compiling a list of required items too.

Required Items/work required

Side repeater indicator
Front part of Airbox assembly (or new clips)
two sisley centrecaps
Front grille sisley badge
Instrument surround (See photo)
possibly bonnet vent (there is a small crack in this but I actually dont think it matters too much)
Possibly new bonnet or just work to the bonnet
Rubber headlamp rear cover
Rubber boot seal
Refurbish wheels and new tyres
Sisley Horn Push
New Battery
Aerial
Wiring repairs (wiring next to battery at least)
Repair front seat fabric
Under bonnet screwdriver
wirebrushing and undersealing, possible welding at points
Front bullbars
rear bullbars Palio I havent forgotten about this, but will wait till funds are more available if thats cool?
Obviously a stripdown and recommissioning generally of the engine is required as it hasnt run in 4-5 years


The general condition is pretty good indeed, though some rust curing and prevention will obviously have to be done. But I gave it a quick clean and it has come up very nicely, I am struggling for things to say about it as I have so much swimming in my head at the moment with it, im overwhelmed, need to sleep to digest it all! I will let the pictures and videos do the talking (still need to upload videos)
^ that is what i would suggest. drill em out and make them M10. i find the bolts really small to hold the sump guard AND bull bars on.. to be fair.

Fallout has a load of snapped off bolts in the mounts.. so i will just be drilling and re-tapping a nice M10 fine thread in them :D

I will need to look into that, never done that before! I take it you would press the sumpguard plate and the bracket together and then drill them in situ using a thread cutting drill bit?
 
a month or so ago was the first time i used a threading tap and die.. since then i now use them all the time.

they are the best things i have ever known for cleaning up nuts and bolts.

the way you work them is,
drill out the old stuck in bolt, using a drill of about the same size as the original thread (or bigger if you want to make a larger bolt fit) then once you have a smooth hole put a bit of (my favourite stuff!) thick copper grease in it, and some on the tap, then "screw" the tap into the hole.
turn the tap half a turn, then back off a quarter turn, then repeat till the thread is cut.

they are totally magic things!

Nice one man cheers :)
 
i wire brushed mine and painted it yellow. its covered in stone chips now a year and a bit later.

if you want my advice,and you have any of the following spare,
i would pant it and tetroseal it.. as that stuff ive found does not crack or chip.

yeah it will look a bit rough but it will be fine and rust free for years.

a shock blaster can remove it too should you want to powder coat it.

got to admit though, my sump guard has become handy a few times. im sure its saved talons sump at least once!

Frankly If I could fit a sumpguard to my parade I would, to be honest I don't think its entirely out with the realms of possibility either, but I digress, I think the sumpguard is a brilliant thing, but it does have to be relatively easy to remove should one need to, I mean the welding done can't even have been that good if a lazy hour of hacksawing is enough to free it.

Haven't heard of tetroseal but I will look into it, is it like underseal?

I don't mind removing and repainting the thing once every year or two years, its very solid and any rust appears to be cosmetic only. As I have said before I'm not intending to make it a show car but I do want it to be up to a decent standard looks wise, be useful and easy to work on and repair as I use it.


I wonder if a sump guard would work with the anti roll bar. Just from a rigidity perspective
 
I wonder if a sump guard would work with the anti roll bar. Just from a rigidity perspective
From the rigidity perspective I can tell, that the sump guard is essential while off-roading.Not only to protect the engine, gearbox exhaust etc, but also as a solid subframe. The construction of panda though much better than 127/128 body type is still prone to big deflections .ARB is not that important,it affects only driving on corners, and limits the wheel-travel{ bad idea on 4x4 panda, lancia y10 4WD was I think the only version of the y10 without the ARB}}, does not affect the car body durability, but sumpguard is a "must have". I have few months experience of driving offroad without the sumpguard, only because my laziness:D. The outcome was{ beside the dent sump and broken "oil pick up nozzle" the device that sucks oil from the pan, you know what I mean right? those missing words in my dictionary ;)}, that when I wanted to finally put on the guard I had problems with aligning the sumpguard mounting holes with bolts on the car underbody even though they are addjustable:) The body permanently flexed about 0.5cm. My trekking is a rotten bucket, so I am not suprised:D but even nice looking pandas 4x4 are plus 20 years old stressed constructions with not much care put to their assembly and good welding of the bodies at the factory , and/or can be really rotten inside the profiles.Sumpguard really helps!

PS: panda 1300Diesel also had a subframe under the engine compartment, because of the about 80kg+ hevier engine and gearbox.
 
Last edited:
Cameron, if you cant stretch to having the sump guard blasted then I would invest in a cheap angle grinder and and a wire brush attachment. You will be able to clean it up pretty well with that, much better than with a hand wire brush, the angle grinder will come in useful for alot of other things too(y) Then paint it with some decent metal paint, you can use Hammerite but there are much better paints available that will last much longer. Some black underbody wax over the paint will help aswell as John says.

For fixing it back to the car just do it the Yorkshire way, I'm sure AndyPanda4x4 will talk you through it:D
 
Cameron, if you cant stretch to having the sump guard blasted then I would invest in a cheap angle grinder and and a wire brush attachment. You will be able to clean it up pretty well with that, much better than with a hand wire brush, the angle grinder will come in useful for alot of other things too(y) Then paint it with some decent metal paint, you can use Hammerite but there are much better paints available that will last much longer. Some black underbody wax over the paint will help aswell as John says.

For fixing it back to the car just do it the Yorkshire way, I'm sure @AndyPanda4x4 will talk you through it:D

Ive been looking at getting a grinder, seems like they would come in useful a lot!
 
Back
Top