Technical inner driveshaft gaiter/seal help

Currently reading:
Technical inner driveshaft gaiter/seal help

rodders875

New member
Joined
Jul 24, 2013
Messages
14
Points
5
hi all,forgive my first post being one aasking for help,hopefully once its sorted i will be able to relax a bit and have a proper mooch around the forum :)
Ive jut bought an 86 panda fitted with a 92 5 speed box (yes,is the one off here...)

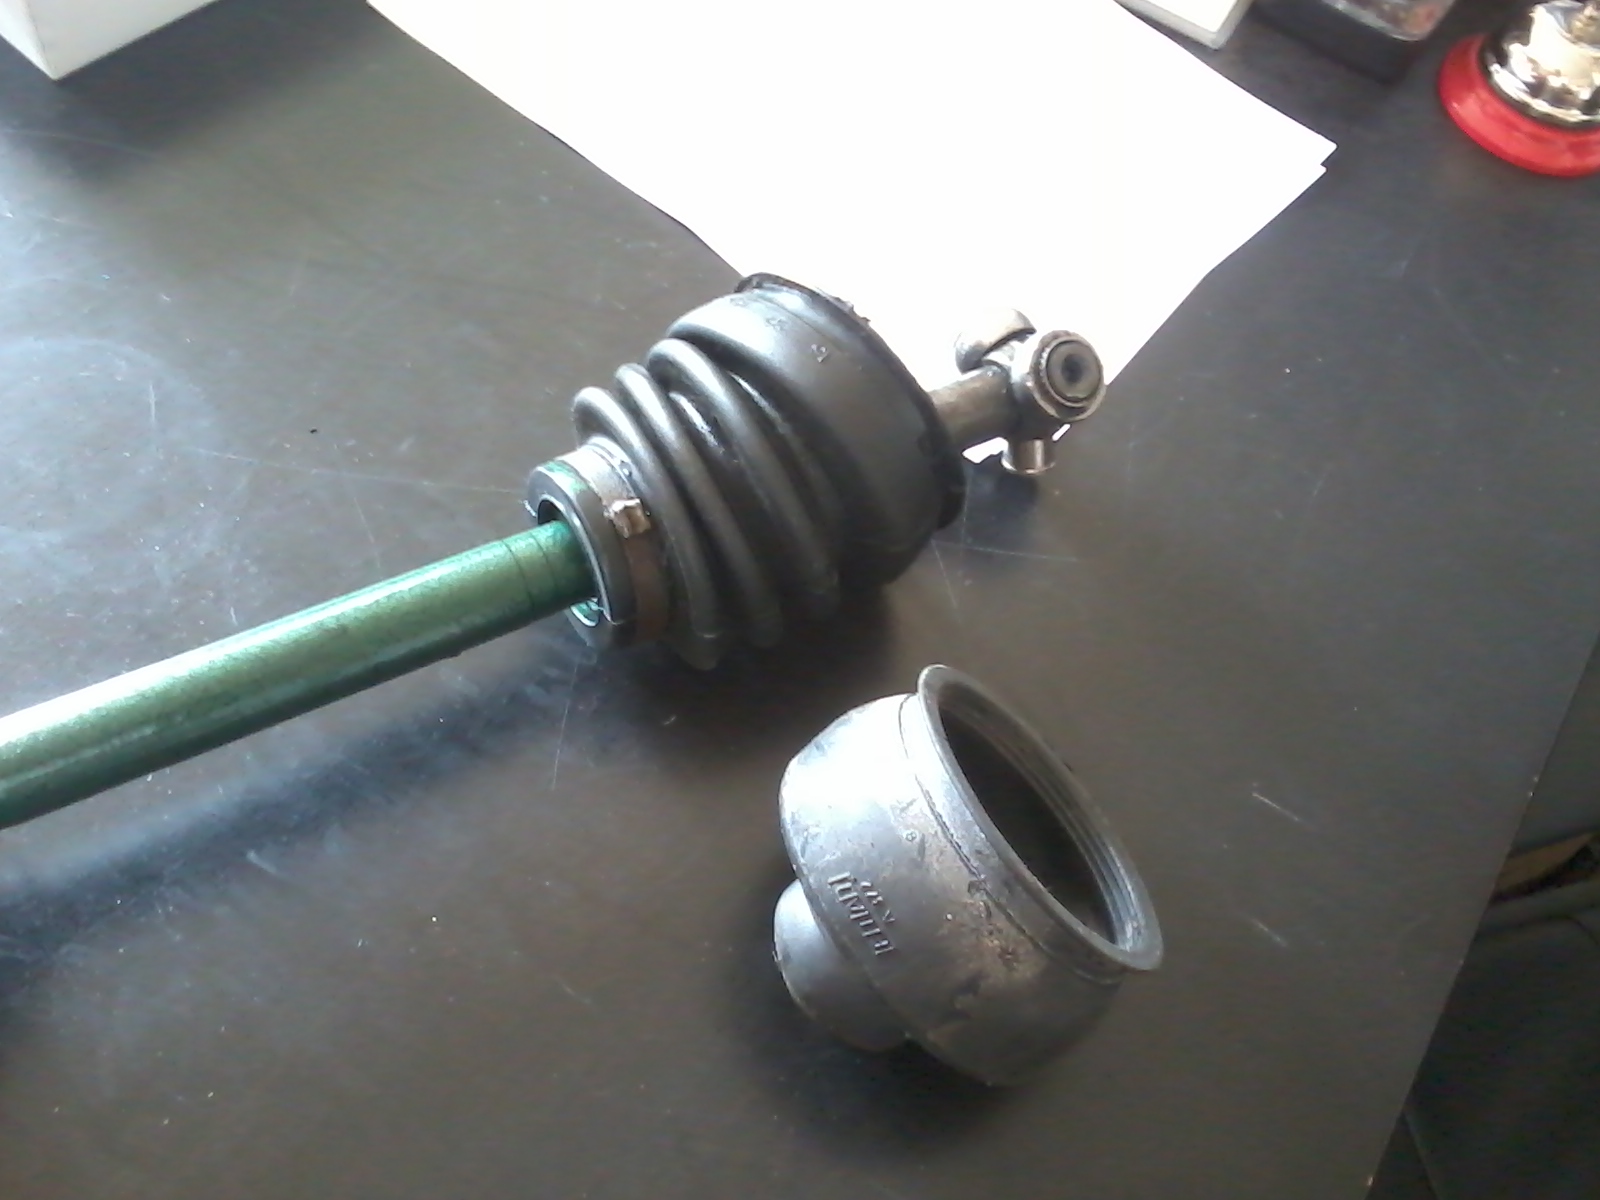
it would appear that over the years the pass side inner driveshaft gaiter has been replaced several times,but not the seal inside? forgive me i know nothing about pandas,yet!
from what i can see the boot itself is tied onto the shaft,and there looks to be something fairly loose inside which im assuming is the defective seal.
Ive seen several different types of gaiter available,and was hoping someone would be able to advise which type i need?
i got the parts ref number off the donor car of: 4181389,also engine no of 156a2000 and also 141ab53a. Im based in worcester in case theeres anyone local who has one,also any advice in whats involved in replacing it would be brilliant too,i have a friend with a workshop and lift so i can get it in the air.
all the best
Dan
 
thankyou for that, they certainly look the same as mine,would using a vernier on the large end of the boot where it is clipped to the gearbox be a close enough way to work out what size it is? how is the bearing retained on the shaft?:)
 
is there a position it sort of sits in or is it free to move up and down?sorry for the questions but i need to get it done asap (new job monday!) so if i can get the bits on a next day tomorrow i should be able to do it over the weekend,obviously i havent got a haynes manual yet either. guess im going to have to work out how i get the driveshaaft off the hub etc,im assuming i shouldnt have to remove the shaft out the box to do it?i think it was only just "replaced" in march,as in all the bolts etc have ben undone reccently so hopefully not to much grief getting it apart:)
 
You will have to take the shaft out of the gearbox. It stays in the same place on the shaft, hence it is a press fit, the haynes manual says the bearing should be 123mm from the end of the right hand shaft and 143mm from the end of the left hand shaft.

The way I would do it would be:

1. Slacken off 30mm hub nut with car on the ground.
2. Jack up and remove wheel and brake caliper.
3. Drain gearbox oil
3. Split the bottom ball joint and remove the two bolts holding the hub carrier to the the strut
4. Remove the hub nut completely then lever the suspension arm down so you can lift the ball joint out and remove the hub carrier, leaving the driveshaft in place.
5. Remove the three small bolts that hold the gaitor to the gearbox and then pull the shaft out.
6. Put the shaft in a vice, cut the old gaitor away for better access to the bearing, remove the tripod joint and drift the bearing off the shaft. If it is past it then it might just come off by hand.
7. To put the new bearing on, put the bearing inside the new gaitor before drifting it back on, then put a clip or cable tie round that end.
 
I've just done this job. The Haynes manual covers it pretty well but it is a fairly big job and you need to undo the front brake & suspension to be able to pull the leg out to get the driveshaft out. If you are taking the driveshaft out, you might as well do both sides as when I did mine, I found that the "good" gaiters on the other side all had signs of perishing so they would have leaked eventually.

First drain the gearbox oil as it's going to come out anyway.

Remove hub caps to access main driveshaft nuts on roadwheel side. They should have part of the rim of them peened into the groove in the driveshaft. You will need new nuts anyhow, so I used an 8mm drill to drill into the dented part of the nut to weaken it, but without drilling through into the driveshaft!

Using a breaker bar and 30mm socket, loosen the nuts.

Now jack the car up and remove the wheel. Unclip the brake caliper by pulling out the guides and use a tie wrap or bit of wire to hang the caliper up out of the way.

Using a ball joint splitter, undo the steering joint.

Next, ball joint splitter again, undo the bottom suspension ball joint under the hub.

Now undo the bolt holding the track control arm and separate the parts. Remove the driveshaft nut that was holding the shaft to the hub.

Undo the bolts holding the gaiter mouldings to the gearbox. The offside one is a bit of a pig to get to, you may need to undo the exhaust support bracket.

Now, a two man job. Pull the suspension arm outwards and slide the drive shaft out of the hub (you might need to tap the end of the shaft with a rubber mallet).

Once that's clear, now pull the driveshaft out of the gearbox. Prepare for some oil spillage as the gearbox oil occupies the inner gaiters.

Now you can check those bushes/bearings, clean up and regrease the CV joint (it's a Chinese puzzle to take apart and put back together, make sure the out cage goes back the right way round). Haynes manual quite helpful here.

The rest is the reverse. Oh, be careful, there is a thrust washer on the end of the shaft inside the hub, don't forget to put that back in before you reassemble the hub else you'll have to take it all apart again.

Use a clamp to push the brake piston back in whilst loosening the bleed nipple to save flipping any rubber seal inside the caliper. Then you can get the caliper back on.

If you're thinking of replacing pads or brake fluid, now is a good time.

Reassembly is the reverse as Haynes say! Recommendation here is to use tie wraps not the steel bands as they are easier to tighten properly (with correct tool) and less likely to leak.

The bush is an interference fit and a specific distance on shaft, it shouldn't move around. Haynes has the measurements but the shaft will be marked where the old one has lived for 27 years.

Good luck, it's a satisfying job albeit not one for a complete beginner.

EDIT - oops, two of us writing at the same time. Looks like we got our story straight :D
 
Last edited:
Welcome to the Forum Dan. (y)

Ricambio should be able to supply the gaiter and bearing, they will do next day if you ask.

Two comprehensive descriptions of the work from Freddy and Colin there. The only thing I would add is that the left hand inner gaiter is best separated from the gearbox by cutting off the cable tie or metal strap that holds it, there is no need to unbolt the gearbox flange it's attached to. You do have to unbolt the right hand inner gaiter when removing it, as Panda 1408 described, because it's attached to to the gearbox by a collar held on by the three bolts mentioned.
 
All very informative if you have the later type boots. On an '86 car you would normally have the earlier type that ran a plastic bush integral to the boot rather than the bearing type. The driveshafts (sez Haynes) are interchangable so there's no reason they wouldn't have been retained when the 'box was swapped but you have to use the appropriate boot with the corresponding shaft.
Have a look, older style boot on the bottom, newer attached to the shaft:
 
your a star,totally 100% have the one on the top,which is the same one that ricambio thought i had,and a quick look under the car confirmed it,one should be with me in the morning :)

just hope i can change it lol
 
the forum seen fit to provide a handy link to some crazy corvette gearbox bit

It's an "add on" in your browser rather than a function of the forum. Usually some kind of shopping app that does this. Check they are switched off or removed from your browser.
 
thanks for all your help guys, does anyone have or know where i can get a new hub nut from? had no joy yet,also if there is anyone locally with a new hub nut and a haynes manual who would be willing to bring them up to worcester and help out a panda virgin im happy to pay some beer tokens/fuel money :)
 
know where i can get a new hub nut from

From the suppliers in the sticky post "places, online shops" above. I got mine from my local motor factor, but they only had one left in stock. The other from Fiat Crawley (but they won't post).

Haynes manuals are cheap on Ebay.

You'll need a ball joint splitter and 2.4 litres of GL3 oil. Don't use modern oil in the gearbox. In the absence of GL3, I would be confident that 20W/50 classic motor oil is fine.
 
thanks for the reply,tried eurocar care and ricambio and they havent got any listed.i knew about not using ep oil in it so have been using 20/50 to move it around and back home,so hopefully it will be ok till i can get gl3.
 
thanks guys,the gaiter and seal should be with me in the morning,and my local garage who im very friendly with are squeezing me in tomorrrow lunchtime to change it:) he also told me an interesting way of freeing off the rear brake adjusters (pedal near the floor,handbrake does nothing)
 
You can reuse the existing hub nut without issues

True, my tip would be to drill into the existing peened bit almost all the way but don't go all the way through the nut into the stub. The peened part will then shear off as soon as you undo the nut. It will most likely tighten up to a different part of the nut so can easily be re-peened in a new place to secure it.

The suspension and steering nuts are nylocs however, so well worth putting new ones on if you can.
 
Last edited:
Thanks for all your input people,the part finally came at 3.30pm (morning delivery my arse!:p) and i just managed to get over to my friends workshop for 4,after a lot of mickey taking along the lines of "4 oclock,on a friday?!!" he then started the job and it was finished in an hour:) while it was up in the air saw some rot behind the rear subframe mounts? (behind the doors,between door and wheel arch,a bit on one sill,and rear seatbelt mounts. will these be a big job to do?
Just thinking that if i can i would much rather try and keep the old girl on the road rather than let it become another victim to the bangernomics theory of use till the mot runs out then throw it away and get another:)

Only other things i need to sort out is i think the front left caliper is sticking on a bit,as the wheel was getting hot,think ive freed up the rear self adjusters following my garages tip of reversing up to 10-15 mph then stamping the brakes on a few times. Sump will need changing soon but ive patched it up again for now.

Hoping if i can get the brakes ok then i can actually just use the thing,get to know it,hopefully get to love it,then steadily improve it :)
 
Back
Top